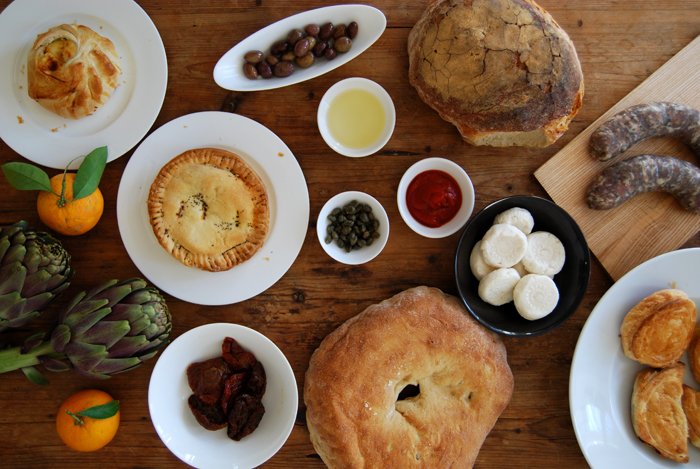
Hobz biz-Zejt u Tadam and more delicious Goods from the Maltese Rock
Today I will share some special food with you! I got a wonderful gift from Emma, my boyfriend's sister who lives in Malta and came to visit us for a few days. She put a big smile on my face when she opened her bag and I saw all the nice food she brought for me (well, not just for me actually). Emma knows which food I love and miss so much from her home island in the Mediterranean, especially now that it's been a few months since I was last there. Her gift reminded me of the taste and smell of this island which I got to know so well over the past years, during so many holiday trips and summers we spent there. Our family and friends, the food, the sea, so many memories connect me to this rock in the Mediterranean (this is what many Maltese affectionately call their home island).
This is a very personal introduction to Maltese food through my eyes and taste buds.
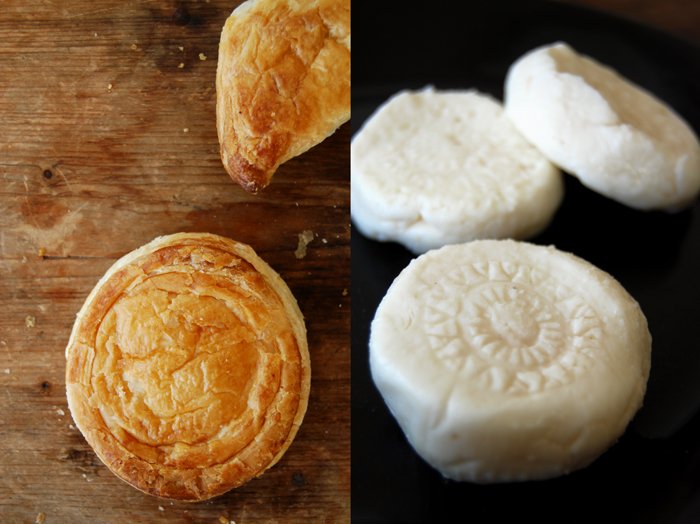
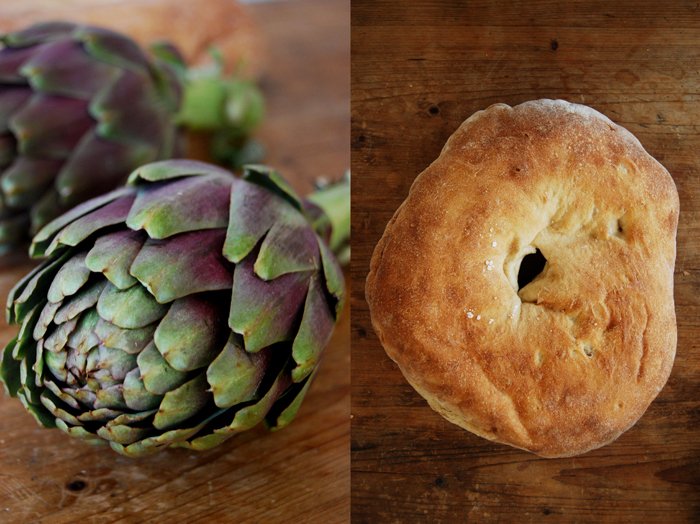
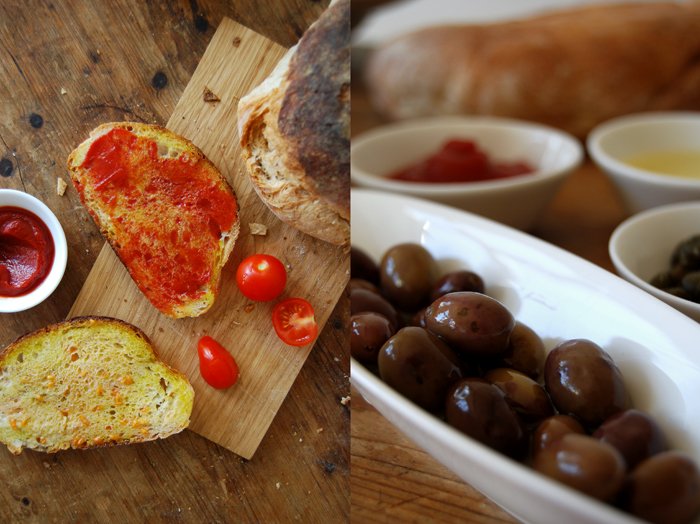
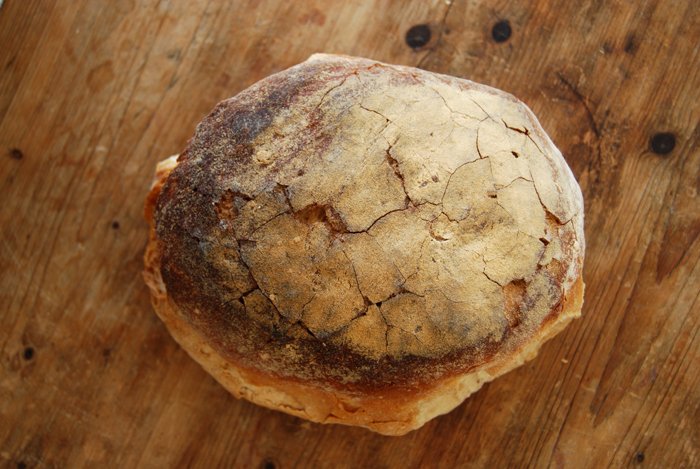
Whenever I'm in Malta, first thing in the morning I go to a wonderful traditional bakery, St. Josephs Bakery in Msida, to buy the most amazing white bread with the perfect crust. Every Maltese is proud of this bread and it's famous for good reason. There are two different types of bread, the big loaf called Hobz Malti (Maltese Bread) and the round Ftira with a hole in the middle. Usually, I cut thick slices off the loaf, dip them in olive oil and spread the sweetest tomatoes and some crushed pepper on top which makes the Hobz biz-Zejt u Tadam (Maltese bread with oil and tomato). There is also a famous (and quick) beach version which is made with Kunserva, a concentrated tomato paste full of ripe Maltese tomatoes and some mint or basil in between two slices of this amazing bread. There's nothing better than sitting on the beach after a long swim, this sandwich in your hands and your fingers staining with juicy tomatoes and olive oil - I love it!
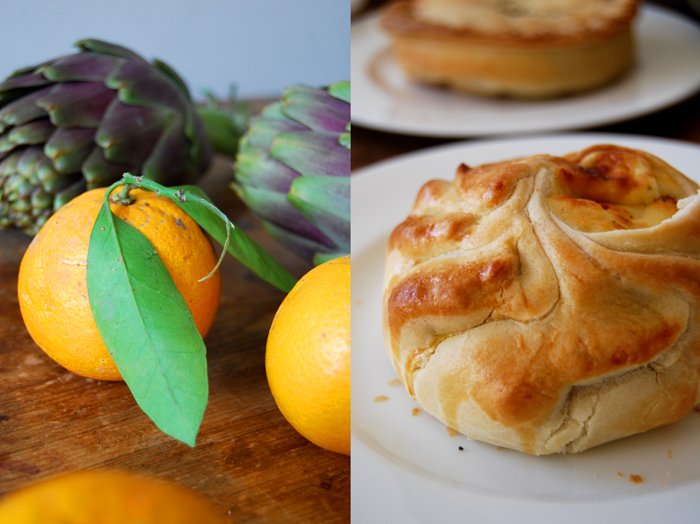
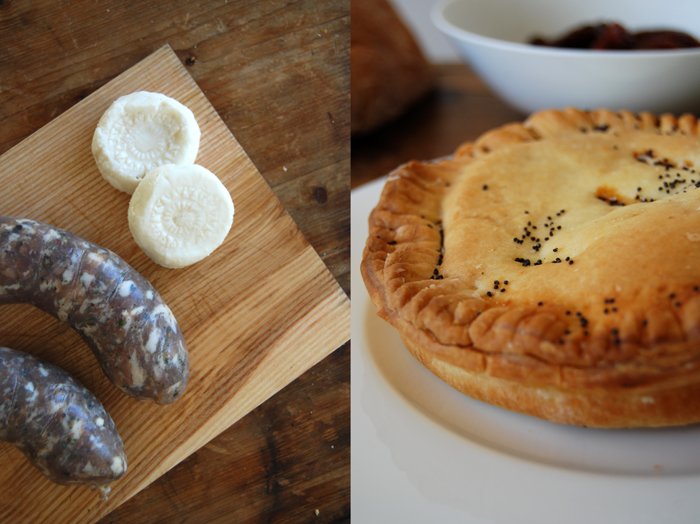
Fruits and vegetables are heavenly in this sun kissed place, strong and honest in taste, ripe, with the flavours of a soil rich in clay. There's not much water, but the sun and the ground make up for it. My taste buds are always disappointed when I'm back home and have to get used to the store bought quality again. Maltese sausage is another speciality I'm very fond of as it's full of spices, the meat is coarse, its taste so strong that you can season a meal with it. Dairy products are limited, this rock isn't really made for cows, but the Maltese make a strong cheese from goat milk which is called Gbejna, delicious tiny round cheeselets. There are two kinds, the hard one which is a bit salty, great for salad and pizza, and the soft one, milky and mild. On the photos you see the hard ones from Gozo, Malta's sister island.
One of my favourite places is Busy Bee Confectionery where I get my daily dose of delicious cakes and pies. I love their sweet Mediterranean specialities like Cannoli, Cassata Siciliana and Ottijet (figure of 8 shaped tea time cookies with sesame seads). Unfortunately the Cannoli didn't survive the flight very well so I can't show them to you. On the savory side there is Qassata tal-Irkotta (a round short crust pie filled with ricotta), Pastizzi tal-Irkotta or tal-pizelli (puff pastry filled with ricotta or peas) and a huge Torta tal-Laham (Beef Pie), filled with tasty beef stew.
The colourful sweets are Perlini, filled with almonds, a traditional Maltese carnival treat.
Go visit and enjoy!


A warming Soup with Chestnuts, Cinnamon and Thyme

For this soup I appreciate the convenience of vacuum packed peeled chestnuts - even though I love the romantic, wintery atmosphere when you bake them in the oven and they fill the air with the smell of their burned peel. I need quite a few nuts for my recipe and with so many to peel, the thought of burnt fingers puts me off. I want a soup without major frustration and injury, so I bought them pre-cooked and peeled. This is a quick soup, relaxed cooking and I didn't want to change that.
I had a velvety soup in mind, smooth and a bit sweet, enhanced with some cinnamon and thyme. I wasn't sure if the chestnuts would be too overpowering so I added a few cooked potatoes. When you have a nice broth on hand, the preparation only takes a few minutes. All you need to do is fry an onion in a little oil, add the chestnuts, potatoes, cinnamon and thyme and heat everything together with the broth, some cream, salt and pepper. When you have everything together, mix it in a blender.
As a main for 2, I used 250g / 9 ounces chestnuts, 3 medium sized cooked potatoes (cut into cubes), 1 large onion (chopped and fried in olive oil), 600ml of broth, 1 tablespoon of heavy cream, seasoned with 1/2 a teaspoon of cinnamon plus salt and black pepper to taste. Fill into bowls and if you like sprinkle with chestnut crumbles, cinnamon and thyme.


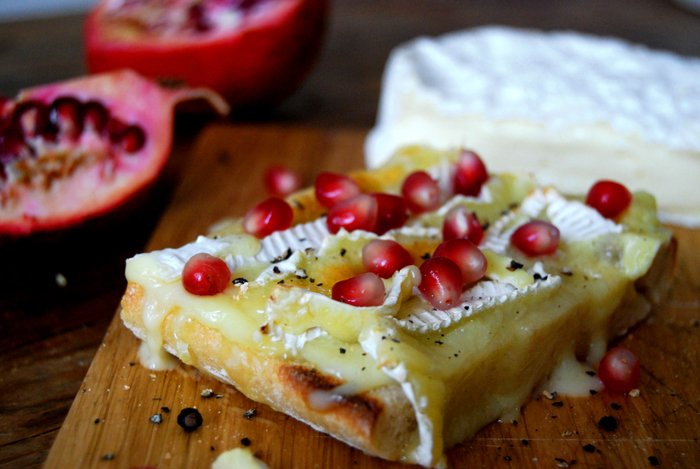
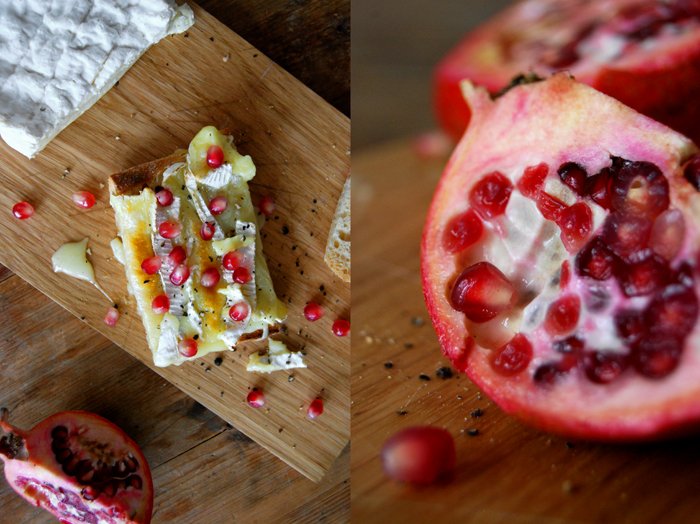
Sandwich Wednesday with Camembert and Juicy Pomegranate
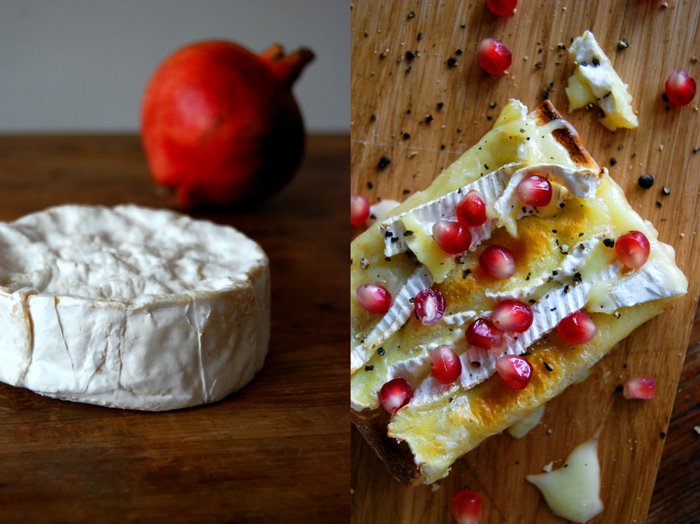
It felt like a lot of people enjoyed my Stilton and Pear Sandwich a couple weeks ago as much as I did. I received quite a few messages from people who tried it and loved it which made me think about further possible cheese and fruit combinations. There are a million variations but I particularly love a mix of sweet and aromatic flavours. When it comes to cheese, I'm the kind of person who eats what others might consider to be beyond the expiry date, to me a cheese can't be too ripe. There is a wonderful cheese section in my favourite department store which has - as you can imagine - a very distinct smell in the air. So when I go there with friends you can be sure that when the others are already on the run, I'm still standing there fascinated by the variety. When it comes to cheese, I feel no pain!
At the moment I buy a lot of pomegranate, they are sweet and juicy (and full of antioxidants which isn't bad either). So the fruit is set. My cheese of choice is an an aged Camembert, so stinky that I have to wrap it twice and put into a box to keep the rest of my fridge safe, but it tastes delicious! I bought a loaf of Ciabatta, my current favourite for sandwiches when I don't bake my own bread, which I cut in half and cover with thick slices of my creamy Camembert (for 2 people I needed around 90g of this cheese). I baked it in the oven under the grill for just 20 seconds, any longer and there wouldn't be any cheese left. This one melts really quick! I kept a baking dish under it to collect the cheese running down the sides of the bread. When it was golden brown, I took it out and sprinkled my sandwiches with the seeds of 1/3 of a pomegranate and crushed black pepper.


Ginger Honey Glazed Duck with Spices and Polenta
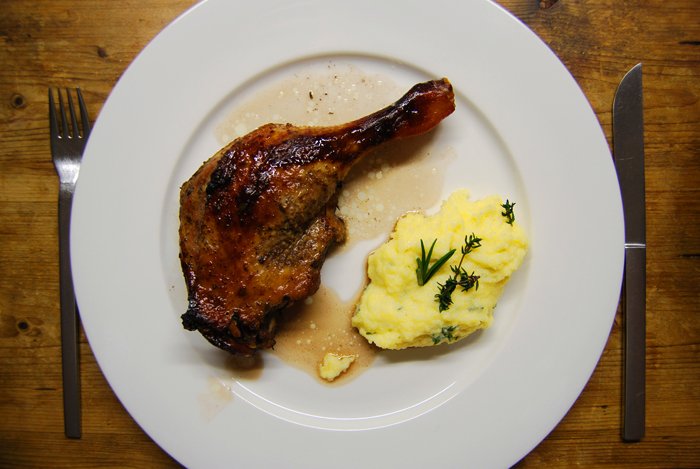
Sometimes I don't have the time or patience to slow cook a whole duck for hours like I do with my Christmas Duck. Although this really makes for the most tender and juicy meat, I need a quicker alternative. Here's what I came up with, honey glazed duck legs, juicy as well, with crisp skin, rubbed with spices and - most importantly - you can enjoy all of this after about an hour. If I find the time I marinade the meat in the morning so that the flavours can spread and soak into the skin during the day but it's great either way.
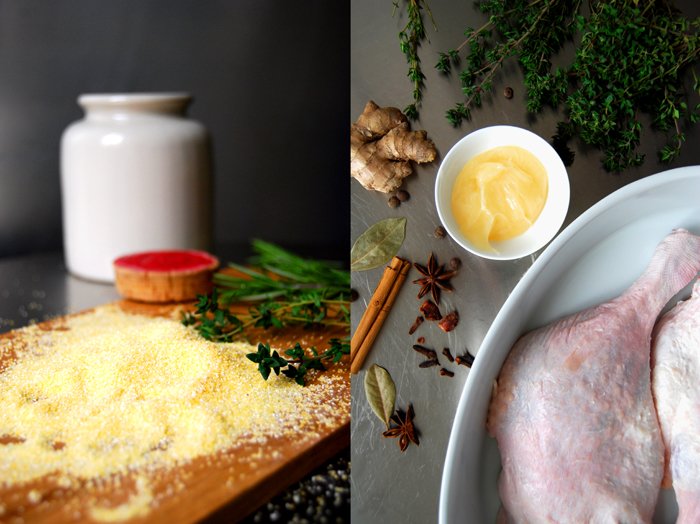
I prefer the darker, deeper meat of wildfowl like duck, goose and pheasant, especially in the cold season. They allow you to rub strong spices and herbs into their skin without loosing their own qualities. For my duck legs, I went for an aromatic mixture of clove, bay leaf, ginger, star-anis, thyme, allspice and a good amount of honey for a crispy caramelized skin. The juices made an amazing sauce, a concentrate of all the spices, I just added some red wine. Perfect to dip the polenta in which I seasoned with thyme and rosemary.
GingerHoney Glazed Duck with Spices and Polenta with Thyme and Rosemary
I prepare the polenta around 4o minutes after I put the duck legs into the oven.
For 2 people you need
duck legs 2
red wine 250ml (or 100ml red wine and 150ml broth)
salt and black pepper
olive oil
For the marinade
aromatic honey 2 tablespoons
ginger, thumbnail sized, grated
thyme, leaves of 5 sprigs
allspice berries, ground, 3
cloves, ground, 5
bay leaf, ground, 1
star-anis, ground, 1
cinnamon, ground, 1/4 teaspoon
Warm up the honey in a small sauce pan until it becomes liquid, spread on the duck legs together with the spices and rub everything into their skin marinating them for 1 hour (if possible). You can also prepare them in the morning (like I do) and keep them in the fridge all day before you cook them in the evening.
For the duck legs
Set the oven to 260°C / 500°F. My oven has a Rotitherm roasting setting which works perfectly for poultry.
Put the duck legs into an oiled baking dish, skin side up, and season with salt and pepper. Pour the remaining honey and spices of the marinade over the duck and place the dish in the hot oven. When the skin starts to get brown after a few minutes turn the temperature down to 130°C / 265°F and pour the red wine into the baking dish (a little over the duck as well) and bake for 60 minutes. Check with a skewer, if only clear juices come out the duck is done. Keep the duck legs in a warm place, pour the juices into a sauce pan and season with salt and pepper to taste. I didn't even need to cook the sauce down. It was perfect, very intense, it didn't need anything else. If you like you can add some more honey, Balsamico or a little orange juice.
For the polenta
polenta 120g / 4 ounces
water 250ml plus 150ml for cooking
milk 250ml
thyme, leaves of 4 sprigs
rosemary, chopped, 1/2 - 1 teaspoon
salt 1 teaspoon
olive oil 2 tablespoons
In a sauce pan, mix 250ml of water with the milk and salt and bring to the boil. Take the pan off the heat, add the olive oil, polenta and herbs and mix with a whisk. Turn down the heat to the lowest temperature and put the pan back on. Cook the polenta for 10 minutes mixing and adding the rest of the water once in a while.


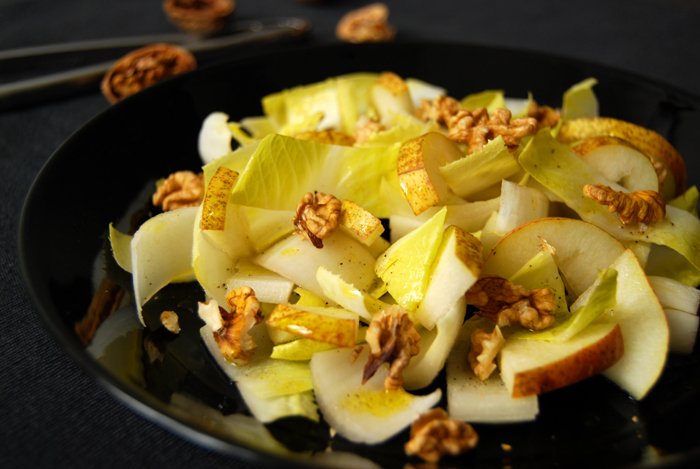
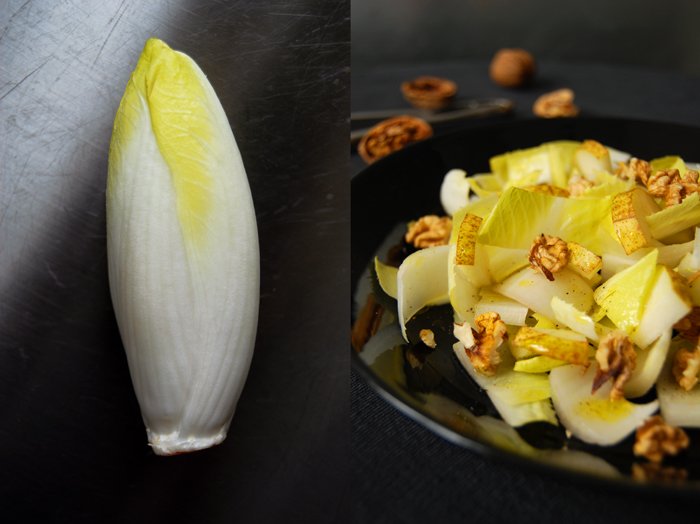
Sweet Pear and Bitter Chicory Salad
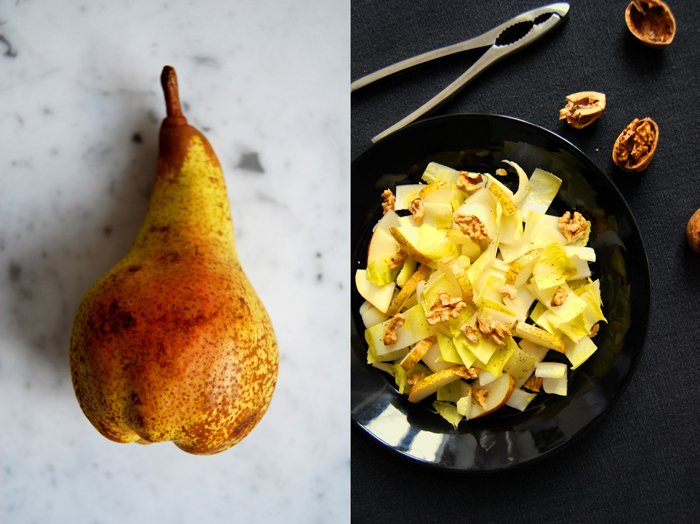
This was my favourite salad during my university years! When I was too busy to cook or my fridge didn't have much to offer, this was always an option (besides spaghetti with tomato sauce). A crunchy sweet and bitter combination which I always love but here especially together with the walnuts. In winter I make sure I have these three in stock, pear and walnuts as a quick snack and chicory is one of my quick emergency dinners. If I'm running out of time, I cut 2 chicories in half, fry them in butter, golden brown on each side and season them with salt and pepper - done.
For my salad I need 2 chicories and 1 pear, both sliced in strips, enough to feed 2-4 people. At lunch time people have different eating habits so it's hard to estimate the exact amounts. At a dinner party this is definitely enough for a a side dish for 4. I make a light dressing with 3 tablespoons of olive oil mixed with 2 tablespoons of white Balsamico (I can't live without this vinegar in winter!), seasoned with salt and pepper. You could also add some fresh lemon juice. Some walnuts on top and I'm back in my student years!


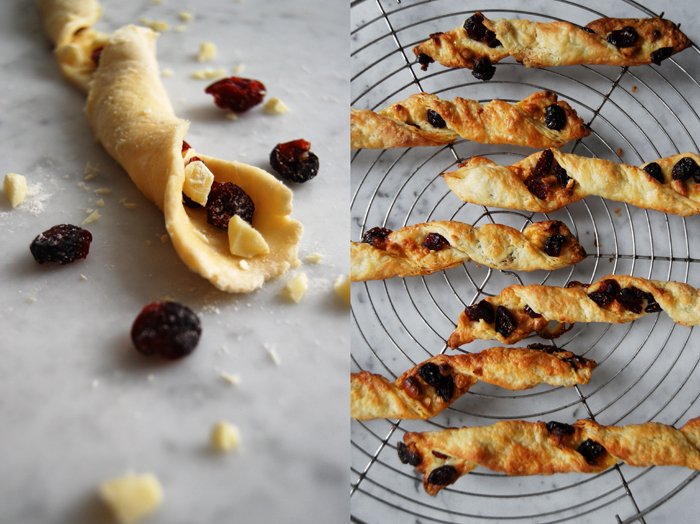
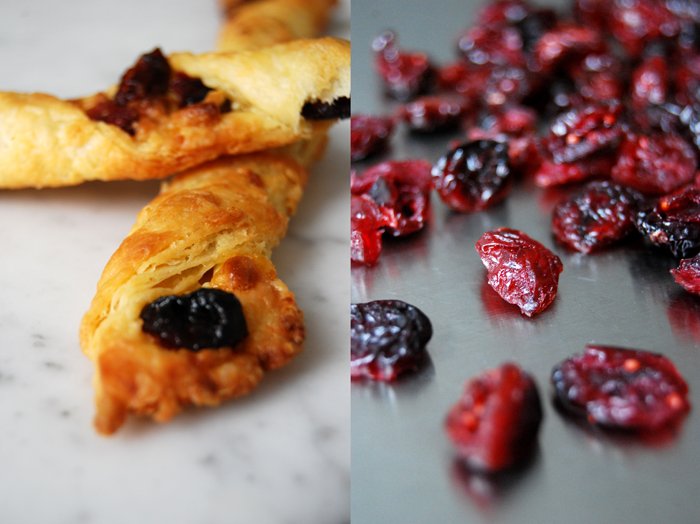
Flaky White Chocolate and Cranberry Twists
I've been wanting to bake something with white chocolate and cranberries since December but this idea never reached my oven - too much to bake, too little time. I was drawn to this combination last winter when I mixed them into my crunchy cookie recipe. The chocolate and the berries gave them a nice sweetness, milky and fruity. I enjoyed them so much that I decided to share them with our family and friends in Malta, so I sent them a big parcel stuffed with these cookies at Christmas time. The box was emptied within moments as we witnessed on Skype.
This weekend I felt like this duo again but didn't want to bake cookies. Croissants are more what I had in mind, just without the hassle of making two different doughs for the perfect puff pastry. I thought of my buttery flaky Rugelach, this dough is made to be wrapped around a sweet filling but I wanted something bigger, not just a mouthful - a handful! This is a Sunday morning pastry which you hold in your buttery fingers while you sip your coffee. I went for a long and twisted shape, quick to prepare, easy to eat, no hassle on a Sunday - Good morning everybody!
White Chocolate and Cranberry Twists
For 16 twists you need
plain flour 150g / 5 ounces
icing sugar, 1 heaped tablespoon
butter, cold, 125g / 4.5 ounces
cream cheese, at room temperature, 120g / 4.5 ounces
a pinch of salt
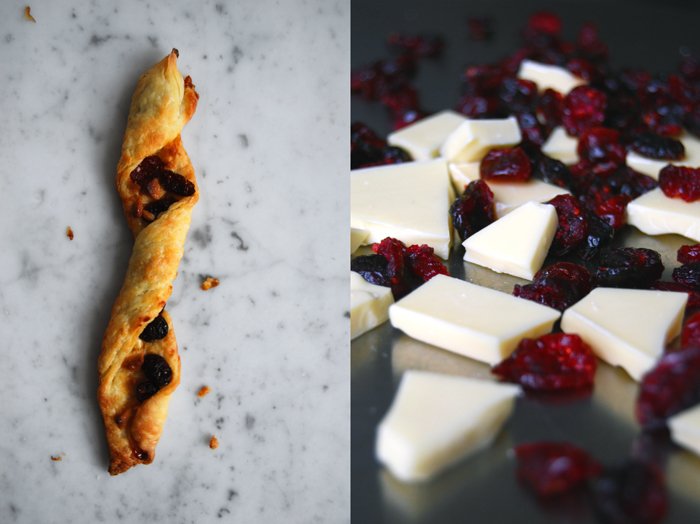
white chocolate, chopped, 70g / 2.5 ounces for the filling
dried cranberries 70g / 2.5 ounces for the filling
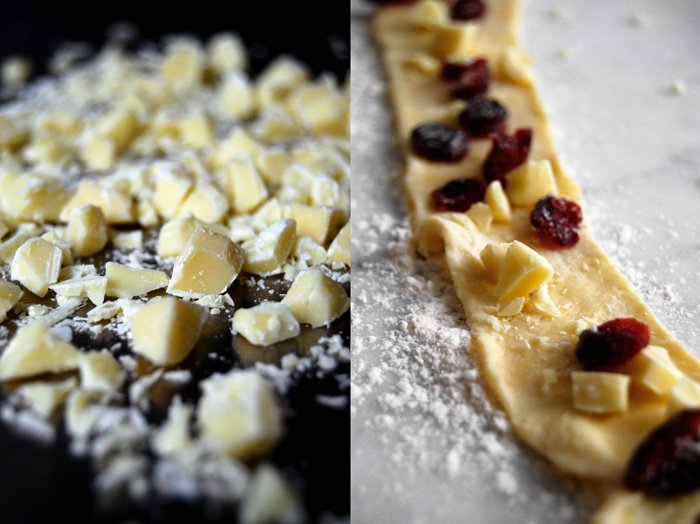
For the filling, mix the chocolate and cranberries.
Combine the dry ingredients. Cut the butter with a knife into the flour mixture until there are just little pieces of butter left. Mix with your dough hooks for a few seconds. Add the cream cheese and work it into the mixture with a spoon or the mixer until you have a crumbly mixture. Form 2 discs and put them in the freezer for 30 minutes. The dough should be very cold but not too hard, still rollable.
Preheat the oven to 185°C / 365°F and prepare a baking sheet with parchment paper.
Take out one disc, leave the second one in the fridge while you're preparing the first batch. Roll out the disc between floured cling film as the dough becomes very sticky at room temperature. Give it a rectangular shape, the width will be the length of your twists. Cut off a 4.5cm / 2" strip and pull it off the foil (don't worry if it's sticky, it's an elastic dough, you can also use a knife to lift it). Lay the pastry strip flat on your working surface, sprinkle with the filling, pushing it a little into the dough. Carefully, twist the pastry, starting on one side twisting it up to the middle and then continue from the other side. This way you don't loose too much of the filling. Place the twist on the baking sheet and continue with the rest of the dough. Bake the pastry for 12 minutes or until puffy and golden brown. It’s best to check them after 10 minutes to be sure that they don’t get too dark. Let them cool on a wire rack for a few minutes.

A Sweet Berliner - Our Family Feast

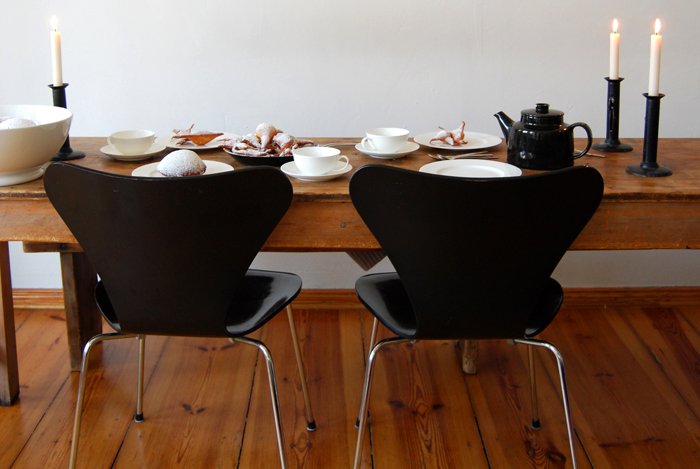
A long time ago, my family started a beautiful tradition. All my sisters, their children and friends of the family meet at my mother's house in the countryside to celebrate carnival. We listen to silly carnival music, the children dress up in funny costumes and we make huge amounts of a special traditional carnival pastry - the famous "Berliner". When the sweets are done, we fill them in my mother's large white bowls from Tuscany, place them on her long table and enjoy the fruits of our work, which usually goes on for hours. In general, I can't say that I'm too fond of the 5th season (the name given to carnival time in Germany) but the mood and the food at my mother's home makes me love it!
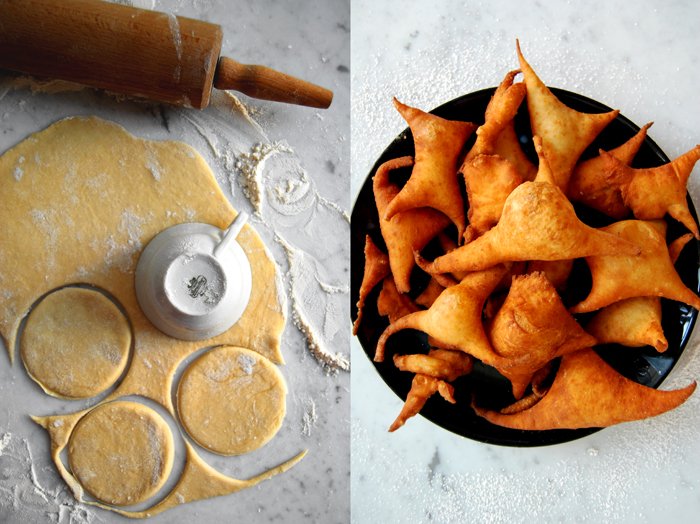
The sweet speciality we make looks a bit like a doughnut without a hole, it's made of yeast dough, filled with jam and deep fried in vegetable shortening. It has different names in different regions but where I come from, which is the center of carnival in West Germany, they are called "Berliners". Funnily enough, they are called "Pfannkuchen" in Berlin, which means pancakes. In the Swabian area in the South of Germany where my step father comes from, people call them "Fastnachtskuechle". I could continue endlessly with even more names "Krapfen", "Kreppel", seemingly every region wanted to give them a name of their own.
So we all gather in my mother's kitchen and each of us has a specific job to do in the making of our "Berliners" - which never changes. For years now, my job is to watch the sweets together with my step father while we fry them in a large cast iron pot. We have to turn them and dust them with sugar when they are done. My mother and sisters, on the other side of the kitchen, take care of the dough and filling the "Berliners". On my photos you can also see some free shaped sweets which are the bits and pieces of dough that are left after cutting out circles.
Carnival is still a month away (and I'm also not at my mother's house at the moment) but there is a reason I made my own "Berliners" at my home now. I was asked to participate in a blog tour with 13 other blogs from America and Australia and write about "Hearts At Home". My heart is always where good food is and that's at my home most of the time but also at carnival at my mother's together with my family. Our tradition, to meet at this time and to make this special food means a lot to me. I look forward to seeing my loved ones and spend a few wonderful, silly days together with them. That's where my heart is and that's home to me. Making "Berliners" without my family was still a fun experience. I was a bit worried that I wouldn't manage on my own but I did, and even more so it was surprisingly easy which makes me think about having this adventure more than just once a year!

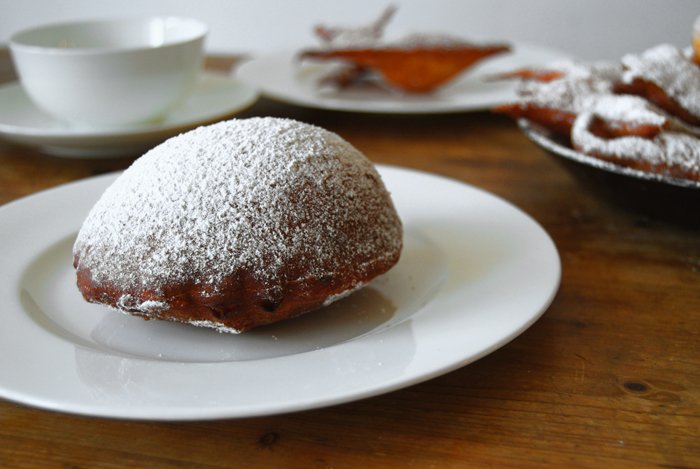
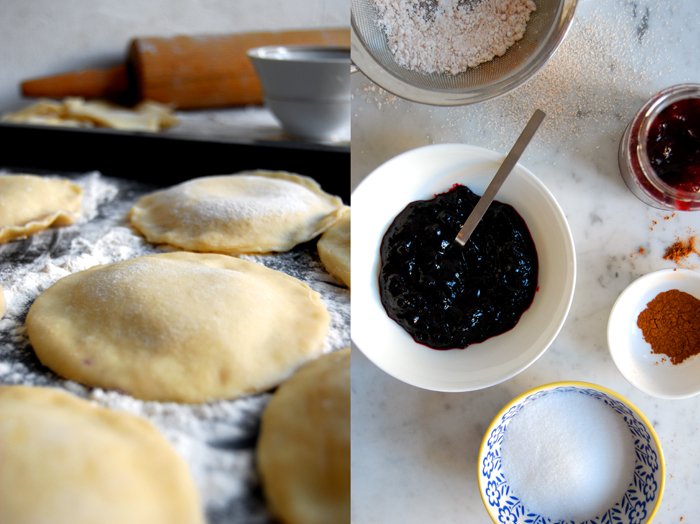
Blueberry Jam Filled Berliner
I made 12 jam filled "Berliners" plus several free shaped sweets (without filling), all in all of 500g / 1 pound of flour. I melted 1kg / 2 pounds of vegetable shortening for deep frying in a large pot, enough to allow the sweets to float freely. My mother uses a much bigger pot and 3kg / 6 pounds of shortening but she starts off with 3kg / 6 pounds of flour as she has to feed more hungry people than I did.
plain flour 500g / 1 pound
dry yeast 1 package (for 500g / 1 pound of flour)
granulated sugar 3 tablespoons
vanilla sugar 1 package
salt scant 1 teaspoon
milk, lukewarm, 250ml
butter, melted and cooled down, 80g / 3 ounces
blueberry jam, around 200g / 7 ounces for the filling
egg white, mixed with a fork, 1-2 (to stick the discs of dough together)
vegetable shortening 1kg / 2 pounds for frying
For dusting
50g / 2 ounces of icing sugar sieved together with 3/4 teaspoon of cinnamon
Combine the dry ingredients, add the milk and butter and mix with your dough hooks for 5 minutes. Continue kneading and punching with your hands until you have an elastic dough ball. Put the dough back into the bowl, cover with a tea towel and let it rise in a 35°C / 95°F warm oven (top / bottom heat) for about an hour.
When the dough has doubled in size, take it out, punch it down and knead with your hands for 2 minutes. On a floured working surface, roll the dough out in batches and cut out 10cm / 4" circles (I used an old tea cup from my grandmother). Put the bits and pieces of dough which are between the circles aside as you will fry them as well (without filling).
Heat the shortening in a large pot on highest temperature.
Take one disc of dough, drop a teaspoon of jam in the middle and brush the edge with egg white. Put a second disc on top, sealing well by pushing with your fingers along the outline twice to make sure that they won't open in the hot fat.
To check the temperature of the fat, put a piece of dough inside, carefully as it's very hot! Turn it with wooden spatulas or spoons, it should be done within a few seconds. The "Berliners" might take a few seconds longer. They will become a bit dark, that's normal, but they shouldn't burn, so adjust the temperature if necessary. Keep in mind that if it's too low the inside won't cook through. I always cut the first "Berliner" in half when I think it's done to see if I have to change the setting.When you take them out, let them cool for a few seconds before you dust them with your cinnamon icing sugar.


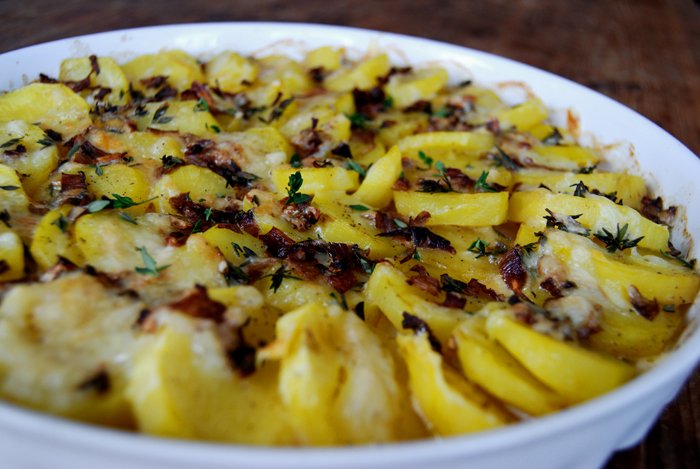
Potato Porcini Gratin with Raclette and Thyme
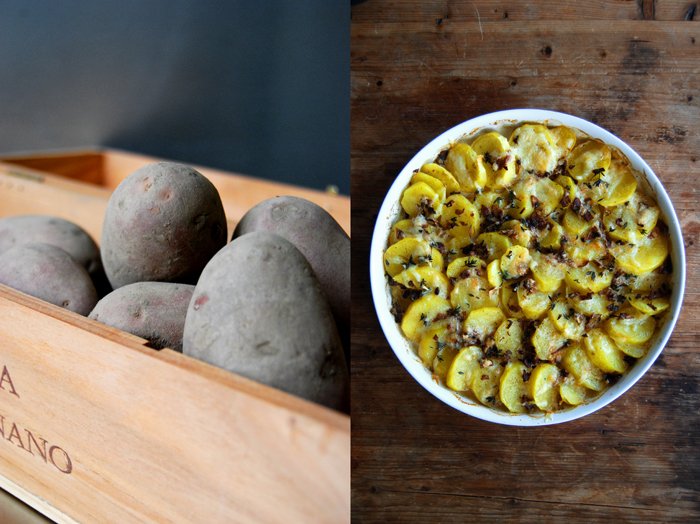
Imagine bubbling Raclette cheese, golden potatoes, earthy Porcini and aromatic thyme and you have all the strong but well balanced flavours of my hearty gratin. Add some cream, salt, pepper and nutmeg and you're pretty much done. It's a quick one, the potatoes are boiled already and I used dried Porcini which only had to soak for a couple minutes. Normally I make my gratin with raw potatoes, sliced very thinly, several layers stacked on top of each other with cheese in between. It takes longer to prepare and to cook, I didn't have the time so I went for a quicker one.
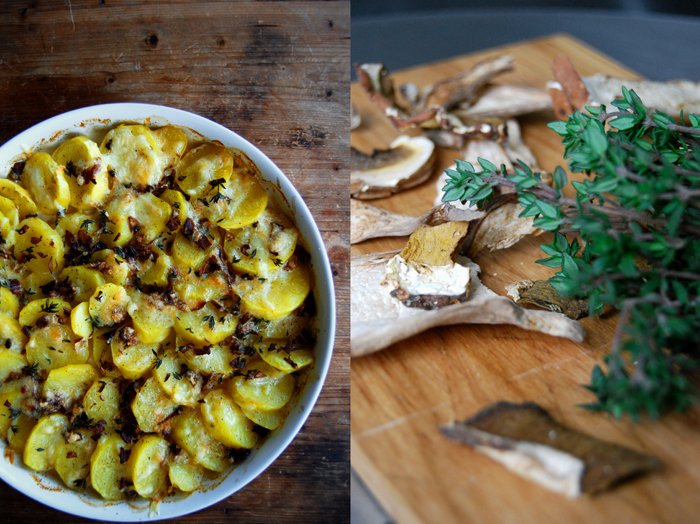
I like to cook with dried Porcini. It's convenient as you can use them all year round and they are really tasty, even more intense than the fresh ones. I always use the liquid after I soak them in water as it absorbs lots of the mushroom's taste. It's great for risotto or, in my case, to mix with the cream. It makes a lighter sauce than my usual gratin milk and cream mixture. I add some thyme which is the perfect herb for Porcini (parsley also fits well but the thick thyme leaves give it this nice wintery touch). I cut the potato slices quite thick, I don't want them to become mushy when they soak a bit of the sauce. To finish it off it just needs some strong meltable cheese sprinkled on top. Swiss Raclette became one of my my favourites over the past years as it tastes really strong. I don't like to drown my poor food under piles of cheese for a bit of taste, I rather use less of a good and aromatic one.
Potato Porcini Gratin
For 4 people as a side dish, or for 2 as a main, you need
boiled potatoes, cut into thick slices, 800g / 1 1/2 pound
dried Porcini, soaked in 120ml of warm water, chopped, 20g / 1 ounce (keep the water, you will need 100ml for the sauce)
heavy cream 100ml
Raclette cheese, grated, 50g / 2 ounces
thyme leaves of 2-3 sprigs
salt and black pepper
nutmeg, ground
olive oil to brush the baking dish
Set the oven to 200°C / 390°F.
Arrange the potato slices in the oiled baking dish. Mix the cream, Porcini water, chopped Porcini, cheese and thyme leaves. Season with salt, pepper and nutmeg and pour over the potatoes. Bake for 30 minutes or until bubbly and golden. At that point you can also put the gratin under the grill for a couple minutes so that the cheese becomes a bit crisp.

Thai Soup and Beef

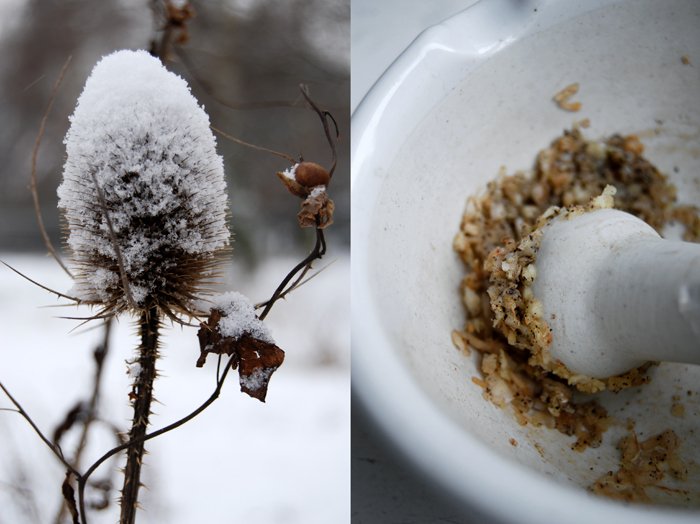
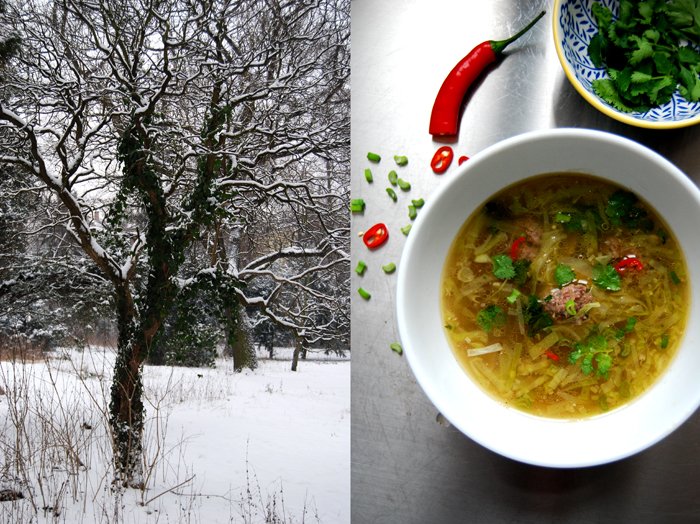
The past couple of days have brought a lot of snow, turning the world outside into a winter wonderland. Everything is covered by a soft white blanket, which is true magic to me! It looks different, sounds different and it even smells different. Two days ago I had time for a short walk so I went down the road to a tiny park that looks a bit like a secret garden. It's my city hideaway as it seems to leave the noise and bustle outside as soon as you enter the iron gates. The trees and bushes were covered in snow and I had my camera with me, luckily, so I could take some of these wonderful impressions home with me and share them with you.
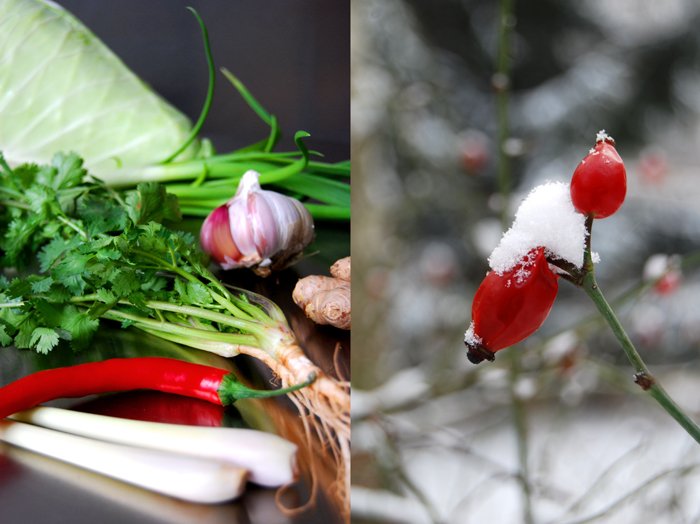
After walking for a while I started to feel cold and I got in the mood for a warm, spicy broth, a Thai soup. I have all sorts of broth in my freezer. Every few weeks I cook a few litres of vegetable broth to use for soups and risottos, but I also have duck and pheasant broth in stock at the moment. When you have a strong broth you are already well on your way to a good soup. I warmed up the duck broth and added some lemongrass, ginger, fresh chili and coriander. I was really hungry, so I decided to throw in some pointed cabbage and some tiny meatballs mixed with the spices. The meatballs weren't bigger than walnuts, after cooking in the soup for 5 minutes they were done, the cabbage needed even less. If you prefer the vegetarian version just leave out the meat, which is what I often do. Either way, this soup is a perfect treat for this cold season, you can be sure you will feel warm, strong and refreshed afterwards!
Thai Soup with Meatballs
For 2 people as a main or for 4 people as a starter you need
broth 1500ml
pointed cabbage, sliced thinly, 250g / 9 ounces
ground beef 400g / 14 ounces
fresh ginger, thumb sized piece, 1/3 sliced thinly, 2/3 grated
garlic, crushed, 2 cloves
coriander roots, ground in a mortar, 2-3
coriander leaves, a handful
fresh chili, sliced thinly, 1
lemongrass, peeled and cut into thin slices, 1
salt and black pepper
Mix the coriander roots, the grated ginger, the garlic and a generous amount of ground black pepper in a mortar and grind to a smooth paste. Mix the paste together with the beef, half of the coriander leaves (chopped) and a teaspoon of salt. Form little walnut sized balls with a teaspoon.
Season the broth with salt and pepper to taste, add the slices of ginger and lemongrass and bring to the boil. Cook the meatballs in the broth on medium heat for 4 minutes. Keep the lid closed. After 4 minutes, add the cabbage and cook for another 2 minutes. Serve in deep bowls topped with the chili slices and the rest of the coriander leaves.


Sabih - A Sandwich with Hummus, Egg and Grilled Aubergine

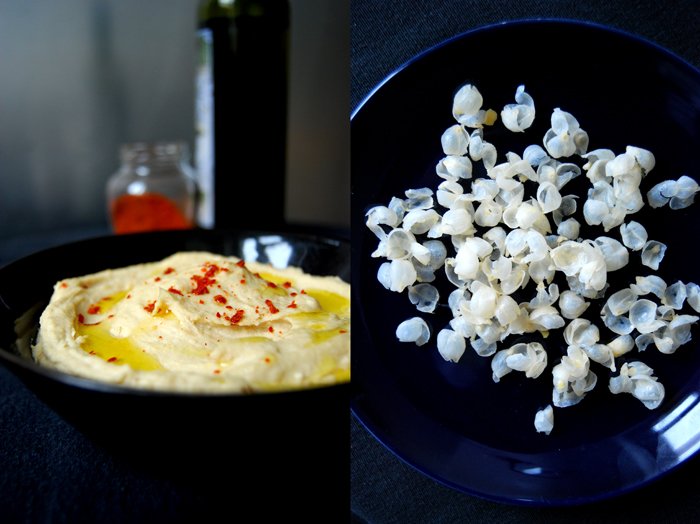
The last time I ate Hummus at a restaurant I decided that the time has come to make my own. It's one of my favourites from the Middle Eastern cuisine and you can be sure that I always order my own little bowl of this delicious spread when we go to a restaurant to make sure that I definitely have enough for myself.
I'm an expert when it comes to eating it but not preparing it and I didn't want to make a fool of myself so I decided to ask two experts, both very good friends of mine from Israel. They recommended using really good quality Tahini from Lebanon because this sesame paste has a big influence on the Hummus' taste. It's one of the main ingredients together with cooked chickpeas and this is actually where Hummus gets its name from, meaning chickpeas in Arabic. It's very easy to prepare if you use tinned chickpeas - that's what I did and the expert opinions didn't object - you just have to peel them which only takes 5 minutes. It's more like popping them out of their peel between two fingers, it's fun! Then you add the Tahini, fresh lemon juice, garlic, salt, water, mix everything in a blender and your Hummus is done.
My friends also told me about a sandwich which is very popular in Israel - Sabih (meaning the handsome one!). You spread Hummus on some good white bread (I use my olive bread which fits really well with its juicy texture and flavours of green and black olives), then you put slices of grilled aubergine and boiled egg on the Hummus and sprinkle some Harissa on top. This is too good! I'm not normally the first one to put an egg on a sandwich, but here I make an exception. The creamy Hummus, the juicy bread, the aubergine, the egg, the whole combination is just divine, I'm not surprised this sandwich is so popular!

Sabih with Hummus, Grilled Aubergine and Boiled Egg
I made enough Hummus to fill a large bowl as you can keep it in the fridge for a few days. For the sandwich you can also use white flatbread but I must say that I really enjoyed it with my thick and juicy olive bread.
For the Hummus
canned chickpeas, cooked and peeled, 475g / 17 ounces
tahini 300g / 10.5 ounces
garlic, crushed, 2 big cloves
salt 1 1/4 teaspoon
freshly squeezed lemon juice 5 tablespoons
water 100-125ml
olive oil, for the topping
harissa, for the topping
Purée all the ingredients in a blender until you have a smooth paste, you can add a little more water and lemon juice if you want the Hummus less thick. Fill in a bowl and sprinkle with olive oil and Harissa.
For the grilled aubergine (eggplant)
one aubergine, cut into 7mm / 1/4" slices
olive oil to brush the aubergine slices (around 50ml)
salt and pepper
Brush the aubergine slices with olive oil, season with salt and pepper and grill in the oven until golden brown and soft.
For the sandwich
white bread, 4-6 thick slices
boiled organic eggs, cut into slices, 2
Spread the Hummus on a slice of bread, put 1-2 slices of the grilled aubergine and some of the egg on top and sprinkle with a little Harissa to add more spiciness. Close with a second slice of bread to finish your sandwich.

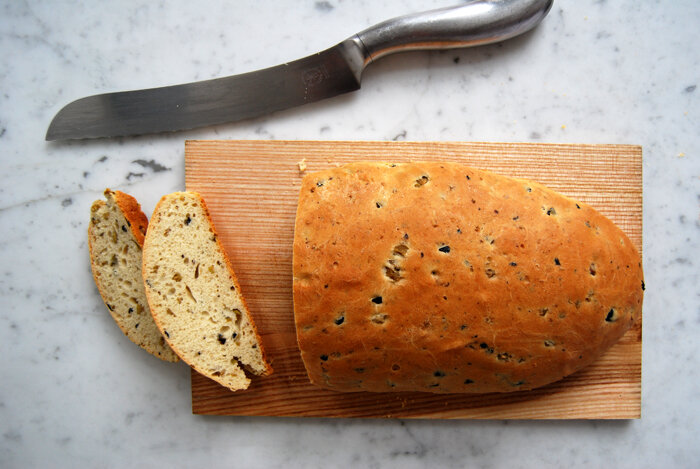
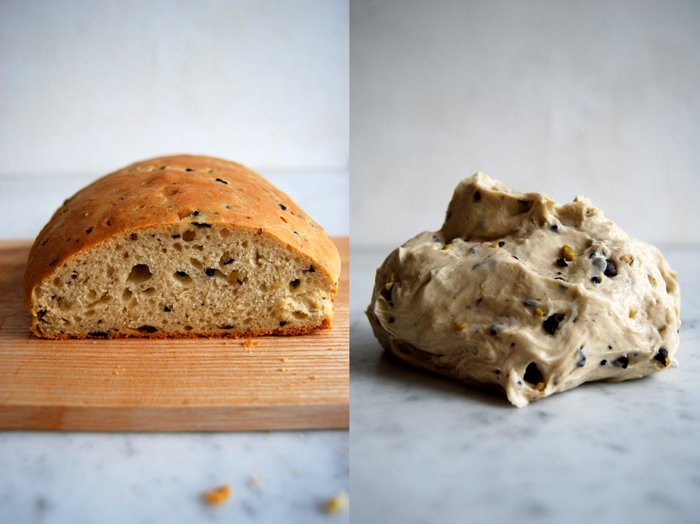
Luscious Bread with Black and Green Olives

Baking bread is a very relaxing and satisfying ritual. You mix the dough and watch it rise slowly, then you shape it and bake it in the hot oven where it doubles in size again. It's such a simple yet wonderful food, one of my favourites! Nothing beats a slice of fresh warm bread spread with butter or sprinkled with olive oil. So many people from different cultures celebrate this ritual, with similar recipes even though they live on opposite sides of the world. It's one of our traditions that connects us and shows how much we have in common.
I have a good friend who lives in Sydney and whenever he comes to Berlin we all meet at our's together with a few of our friends. Sometimes it's a big dinner, sometimes we just have some wine and snacks. The only problem is that he never tells me in advance, it's a very spontaneous thing, he's just here at one point. Followed by another 10 - 15 people. This calls for some improvisation tricks in the kitchen, we just have to eat what my fridge offers!
Around two years ago he called to announce his arrival and I was lucky to have a few pumpkins in my kitchen, so a soup for 10 was quickly thrown together. For whatever reason I had lots of black olives as well. I like to have more than enough good bread on my table when it's a long night so I decided to bake 2 loaves of olive bread with lots of olives and olive oil, juicy enough to nibble on after finishing the soup. The texture is light but you taste and feel the olives and the olive oil, it makes the bread really smooth. Everybody loved it and couldn't stop eating it. This was a feast to me, it always is, sitting together with friends at my long wooden table, talking, laughing and enjoying some red wine and nice bread.
Tomorrow it's my Sandwich Wednesday again and I will make a special sandwich with this bread which is very popular in the Middle East!
A Juicy Bread with Black and Green Olives
For 1 loaf of bread you need
plain flour 250g / 9 ounces (I use spelt flour type 630 but you can use any other plain flour)
dry yeast 1 tablespoon
salt 1/2 teaspoon
a pinch of sugar
water, lukewarm, 70ml
milk, lukewarm, 70ml
butter 1 tablespoon
olive oil 2 tablespoons
black and green olives, chopped, 60g / 2 ounces
Combine the dry ingredients and add the water, milk, butter and olive oil. Mix with your dough hooks till everything is combined. Add the olives and continue mixing for a few minutes. Continue kneading and punching with your hands until you have an elastic dough ball, it will be a little sticky but that's fine. Put the dough back into the bowl and cover with a tea towel.
Option1:When I prepare the dough the day before I bake it, I put the bowl with the dough in the fridge (covered with cling film) and let it rise overnight. You will have to take it out of the fridge 30-60 minutes before you can continue with the next steps.
Option 2:In case I want to bake my bread the same day, I let the dough rise in a 35°C / 95°F warm oven for 45 minutes. This works really well but make sure that your oven is set to top / bottom heat and not to fan.
When the dough has doubled in size, take it out, punch it down and knead with your hands for 2 minutes. Form the dough in a long loaf shape and put it on an oiled baking sheet. Cover with a tea towel and let it rise for another 25 - 35 minutes in a warm place.
Set your oven to 200°C / 390°F top / bottom heat.
Bake the bread for 30 minutes or until cooked through. If you're not sure if it's done turn the bread around and knock on its underside, it should sound hollow. Let it cool for 5 - 10 minutes, cut a thick slice off it and drizzle some olive oil on top, just a bit, and sprinkle with salt.

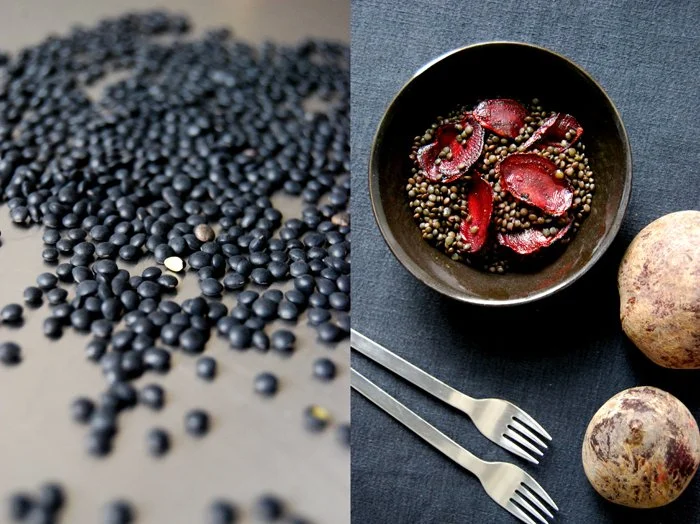
A Salad with Beluga Lentils and Beetroot

I went a bit overboard on the weekend, two pies (sweet and savory) in two days, time for a change in my kitchen! Something lighter (that doesn't involve butter) is on my mind, a salad with black Beluga lentils and fried beetroot slices. Beluga lentils are perfect for salads. They are tiny little legumes, with a strong and nutty taste and they just have to cook for 30 minutes without having to soak in water. The beetroot becomes a bit sweet when you fry the raw slices, even sweeter than when boiled in water. When it comes to salads, I prefer fewer ingredients with strong flavours and quick preparation. I'm not too fond of salads which mix up lots of different vegetables and fruit as the single tastes tend to get blurred.
Today's salad is a dark beauty, the lentils are dark grey, nearly black with shades of blue and green and the beetroot slices deepen to a dark red when you fry them. All you need for a salad for 4 is 1 cup / 200g of Beluga lentils, rinsed and cooked in 3 cups of water (without salt!) for 20-30 minutes. While they are simmering, I slice 2 large uncooked beetroots with a slicer very thinly. I heat some oil in a large pan, sprinkle the beetroot slices with a pinch of sugar and fry them in batches for a few seconds on each side before I season them with salt and pepper. They burn quickly which gives them a bitter taste so you have to watch them.
My dressing is very simple and light, 3 generous tablespoons of olive oil mixed with 1 tablespoon of freshly squeezed lemon juice and 1 tablespoon of white Balsamico vinegar, seasoned with salt and black pepper. When the lentils are done I rinse them with cold water, drain them and pour the dressing on top. You may have to add more salt and pepper at this point to taste. I lay the beetroot slices on top and the salad is ready to be served!


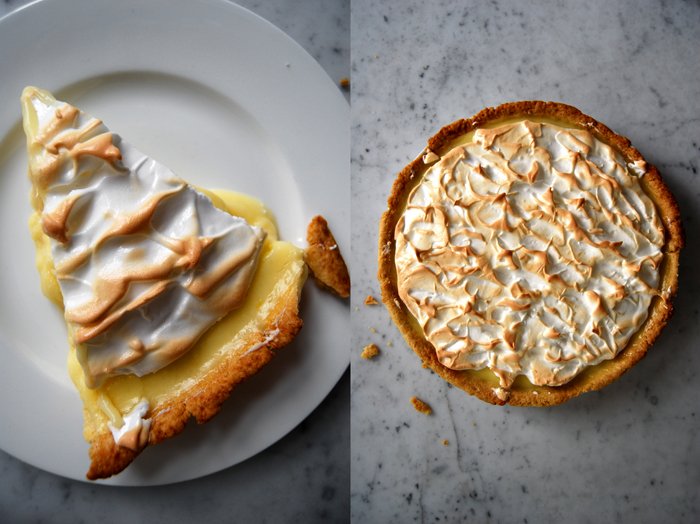
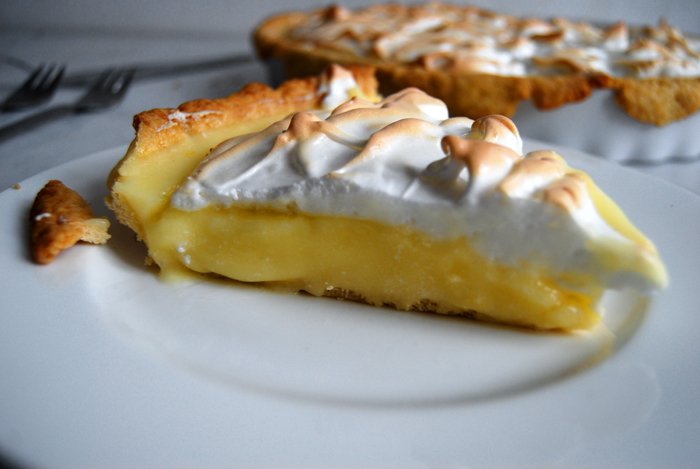
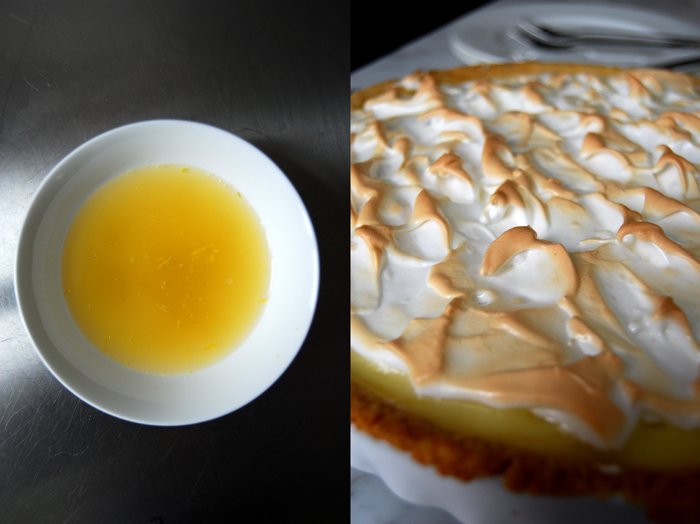
Jenny's Awesome Lemon Meringue Pie
I had the first lemon meringue pie of my life in Malta, just a few years ago. It was one of those things I always wanted to try but always took second place. Whenever I went to a Patisserie and spotted a pretty meringue, my mood still took me somewhere else and chose something different. Now I know that was a mistake!I
t was summer and we stayed at Jenny's house in Malta. It was hot (as always) and everybody met in the kitchen, also as always. My Maltese Mama made a lemon meringue pie for a party and I followed her baking curiously but not overly excited. I must admit that its delicate beauty appealed to me and the fact that she had squeezed the juice of countless lemons - from her own lemon tree! - into the curd caught my attention. Maltese lemons taste amazing, they are spoiled with sunlight, juicy and strong. And Jenny's are simply the best! So, I tried the pie and it it was awesome. A crunchy base, buttery and crisp as I love it, the lemon curd perfectly balanced between sweet and sour, and the meringue was fluffy and slightly sweet. I had to get her recipe!
She gave it to me, and since then I made it, with little changes numerous times, mostly eating more of it than I want. It's the perfect dessert for a dinner party. It looks beautiful and you can prepare it in advance, it should actually sit for a few hours so that the curd can become firm. I skipped this point as you can see in the photos, the curd is still a bit soft. The smell of butter and lemon in my kitchen was too much of a teaser, I had to try it. I gave the pie 10 minutes to cool on my balcony (in arctic temperatures), impatiently, waiting for my first bite of Jenny's awesome Lemon Meringue Pie!
Lemon Meringue Pie
For one pie you need a round 27cm / 10.5″ baking dish or tart pan.
For the crust
plain flour 210g / 7.5 ounces
butter 120g / 4.5 ounces
granulated sugar 1 tablespoon
salt 1/2 teaspoon
water (cold) 4 tablespoons
Combine the flour with the sugar and salt. Cut the butter with a knife into the flour until there are just little pieces of butter left. Continue with your fingers and work the butter into the flour until combined (there shouldn’t be any lumps of butter left). Add the water and continue mixing with the hooks of your mixer until you have a crumbly mixture. Form a disc, wrap in cling film and put in the freezer for 15 minutes.
Set your oven to 210°C / 410°F top/ bottom heat. Roll out the dough between cling film and line your baking dish with the flat pastry. Prick it with a fork and blind-bake in the hot oven for 18 minutes or until golden. Let it cool completely.
For the curd
granulated sugar 150g / 5 ounces
cornstarch 50g / 2 ounces
pinch of salt
water 450ml
egg yolks, beaten 2
butter 90g / 3 ounces
freshly squeezed lemon juice 150ml
zest of 1 lemon
Combine the sugar, cornstarch and salt and mix together with the water in a small sauce pan. Bring to the boil on medium heat, stirring constantly. When the mixture starts to bubble, turn down the heat, and cook for another 3 minutes, again, stirring constantly, it will become thick. Take the pan off the heat. Mix 1 tablespoon of this mixture into the egg yolks, stir and pour everything back into the remaining mixture in the sauce pan. Bring to the boil, stirring, let it bubble for a few seconds and take it off the heat. Stir in the lemon juice and zest and the butter and let it cool.
For the meringue
egg whites 3
granulated sugar 80g
a pinch of salt
Beat the egg whites together with the salt, adding the sugar gradually while beating, until the white is stiff.
The Pie
Set the oven to 210°C / 410°F top/ bottom heat.
Pour the lemon curd over the short crust and spread the stiff egg whites on top. Bake for 6 minutes or until the top is golden and crisp. Let it sit for 2-3 hours in a cool place.


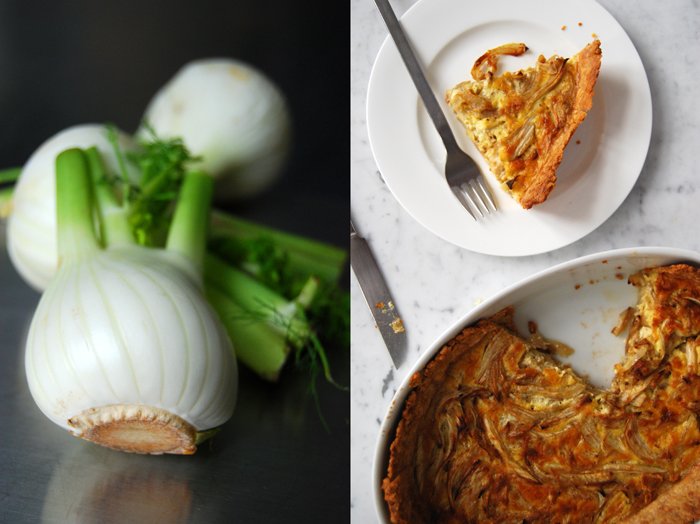
Buttery Crisp Fennel Tart
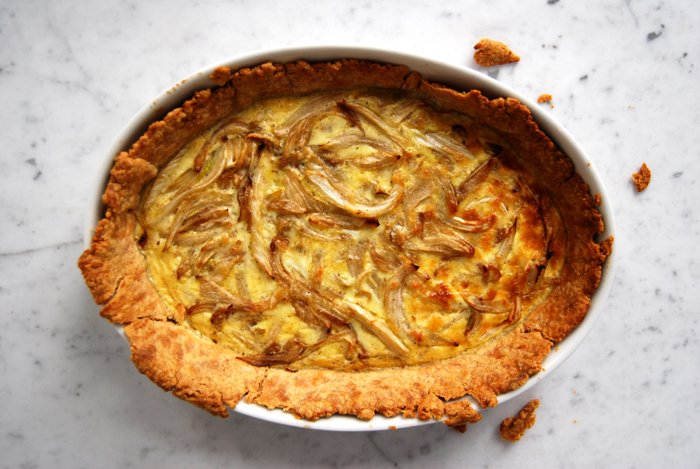
A tart, a quiche, a pie, call it whatever you like, anything that involves buttery short crust is heavenly food to me. I'm the happiest person in the world when I have one of these in my oven, filling the air with that buttery smell, teasing me as I can't wait to have the first bite in my mouth. Most of the time I use my all time favourite quiche crust recipe for any kind of savory tart or quiche. I wrote about that recipe in December. It has been with me for nearly twenty years and I never found a better one. It's crisp, it's buttery, yet still light. Just perfect!
If you follow eat in my kitchen you'll find that I tend to buy too much of this and that (I'm talking about food). This time it's fennel, three bulbs! I never throw any food away, I use everything I buy, but I become too excited when I see all the nice food at the market and a million things come into my mind that I'd like to cook with them. So I buy whatever arouses my appetite. Sometimes, my fridge just reaches its limits.
I haven't made a tart in a while so I will use the fennel for the filling, mixed with Parmesan, a few eggs, milk and cream, and the buttery smell can take over my flat!
Fennel Tart
For one tart you need a round (27cm / 10.5″) or oval baking dish or tart pan.
For the short crust base
flour 250g / 8.5 ounces (I use spelt flour type 630 but you can use any other plain flour)
butter, cold 125g / 4.5 ounces
organic egg 1
salt 1 teaspoon
Combine the flour with the salt. Cut the butter with a knife into the flour until there are just little pieces of butter left. Continue with your fingers and work the butter into the flour until combined (there shouldn’t be any lumps of butter left). Add the egg and continue mixing with the hooks of your mixer until you have a crumbly mixture. Form a disc, wrap in cling film and put in the freezer for 10 minutes.
For the filling
fennel, cut in half and sliced thinly, 400g / 14 ounces
organic eggs 2
milk 100 ml
heavy cream 100 ml
Parmesan, grated, 2 heaped tablespoons
salt 1 teaspoon
black pepper
nutmeg, freshly grated
The tart
Set your oven to 210°C / 410°F.
Sauté the fennel in a big pan in a little oil for 5 minutes until golden.
Mix the eggs with the milk, heavy cream, Parmesan, salt, pepper and nutmeg.
Roll out the dough between cling film and line your baking dish with the flat pastry. Prick it with a fork and blind-bake in the hot oven for 10 minutes. Take your baking dish out of the oven and set the temperature down to 180°C / 355°F.
Spread the fried fennel on top of the pre-baked pastry base and pour the liquid mixture over. Put the tart carefully on a baking sheet in the oven and bake for about 30 minutes or until golden, the top should be firm. Let it cool for 10 minutes.


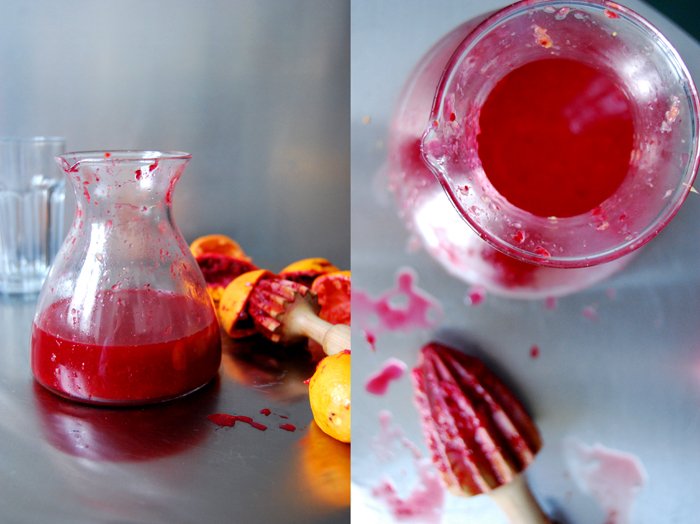
A juicy treat with orange, turmeric and ginger

Today's post is dedicated to all my friends who have a cold - unfortunately, quite a few at the moment. I would love to have them all over to nurse them, so I decided to come up with a tasty and healthy juice, full of vitamins and powerful roots to give them a recipe that will strengthen them again!
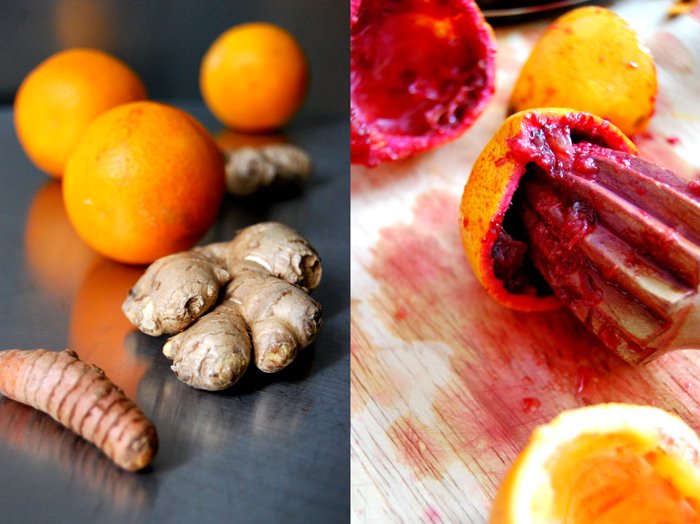
My current favourite, the blood orange, is as important to this juice as freshly grated turmeric and ginger roots. Turmeric is a great helper when your body suffers from inflammations, be it in the throat, the ears or your tummy. This root has an important role in the Ayurveda philosophy and is assumed to have a big effect on our cells like ginger which is an antiseptic boost to the immune system.
If you feel well and strong - which I hope you all are - then you can just enjoy this wonderful juice and its spicy, fruity taste. And anyways, prevention is better than cure.
For 1 big glass of this powerful drink, you will need around 350ml of freshly squeezed orange juice (I used 6 of my blood oranges), 1/8 teaspoon of freshly grated turmeric root and 1/4 teaspoon of freshly grated ginger. I bought the turmeric in a small organic shop around the corner but you can find it in lots of Asian shops as well.
Drink it, enjoy, and get well soon!

Gravad Lax with Dill and Spices
Yesterday Saveur Magazine added eat in my kitchen to their "Sites We Love" and I'm so happy and excited to be a part of this special list! It's only been two months since I started sharing my personal kitchen moments here on my blog and I have been overwhelmed by the response and support, thank you!
Here is the link to the interview I did for Saveur Magazine: http://www.saveur.com/article/sites-we-love/sites-we-love-eat-in-my-kitchen
So, back to food, a special day deserves a special meal! Coincidentally, today I'm writing about a very special, luxurious if not festive recipe, Gravad Lax!
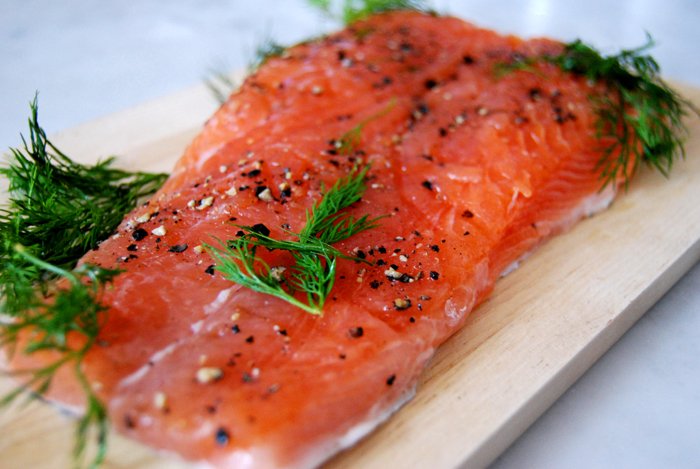
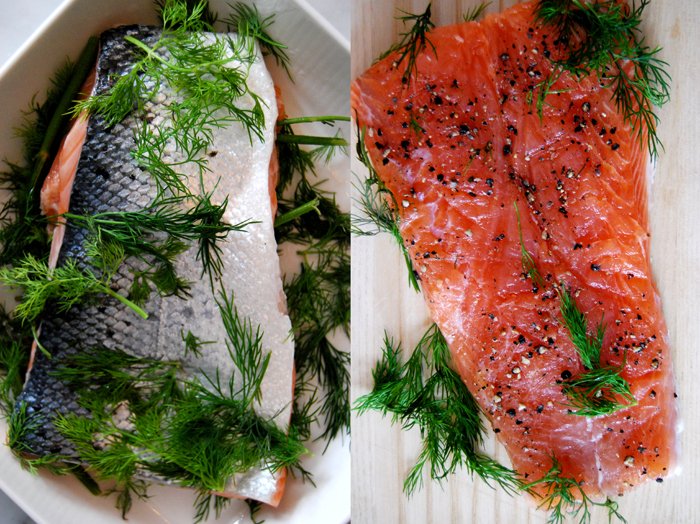
Gravad Lax is very literally slow food as the cured salmon needs a few days in the fridge, pressed down with weights, looked after and turned once a day. It can take between 2 - 4 days to reach the right consistency, so you must be patient, but you can be sure you will be rewarded.
I cure mine with a marinade of dill, juniper and black pepper and the obligatory salt/sugar mixture. This, to me, is the best way to savor salmon by far. It's an old family recipe made by many of my relatives, it's always one of the starters when my family comes together at table. I have tried different recipes, with more spices and orange zest for example, but I always come back to this one. The dill, black pepper and the juniper just bring out the best in the salmon.
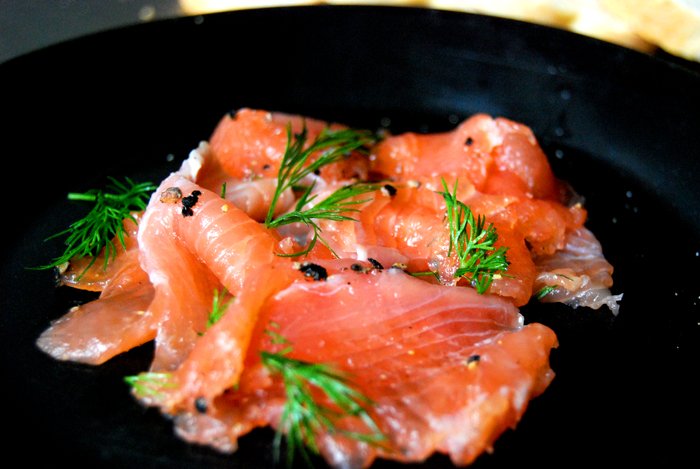
After a few days, when the salmon is done, I cut very thin slices off the fillet. I serve mine pure, with no dressing, just some white bread. That's it, it doesn't need anything else. Apart from a glass of white wine maybe, or Champagne even. It's a luxurious meal so you might as well go all the way!
Gravad Lax
salmon, end or centre-cut, bones removed, skin on, cut into 2 pieces that fit on top of each other, around 700g / 24.5 ounces
granulated sugar 100g / 3.5 ounces
coarse sea salt 80g / 3 ounces
black pepper, crushed roughly, 1 tablespoon (measured before crushing)
juniper, crushed, 6 berries
fresh dill, chopped roughly, 2 small bunches
Combine the sugar, salt and spices.
Spread 1/4 of the dill on a flat dish big enough for the salmon. Place one half of the salmon on top (flesh-side up), rub the spice mixture gently into the flesh and cover with half of the dill. Place the other half of the fish on top (flesh-side down), press it down and cover with the rest of the dill. Cover with cling film, put a wooden board on top and place 2-3 (filled) tins on top, or anything else that is heavy enough to put some weight on the salmon. Place in the fridge and turn once a day. You might have to drain some liquid once in a while. Check after 2 days to see if the texture is already more firm. The salmon will start to look a big glassy. If so, slice it thinly (you must hold a large, sharp knife at a flat angle) - if not, be patient and check again tomorrow!

A Ladin Sandwich with Spices and Tyrolean Prosciutto
I used to eat this sandwich whenever I arrived in Corvara, I went straight to the bakery to get some local flatbread and then to the butcher for prosciutto. Outside the shop, I prepared my sandwich, sat on a bench in the snow and enjoyed the start of my holiday.
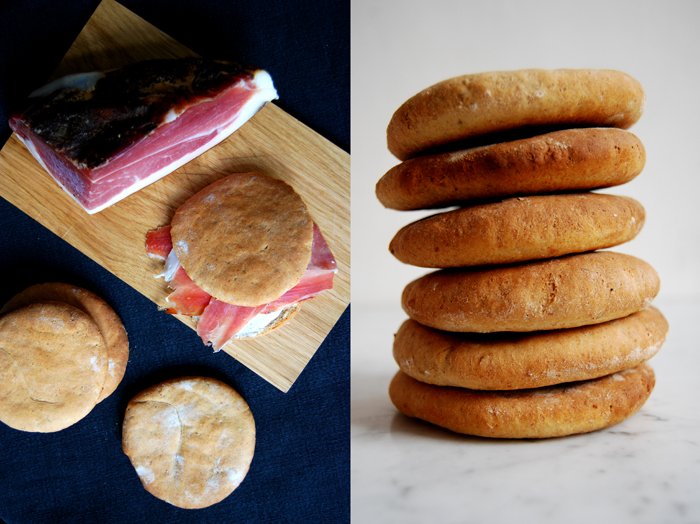
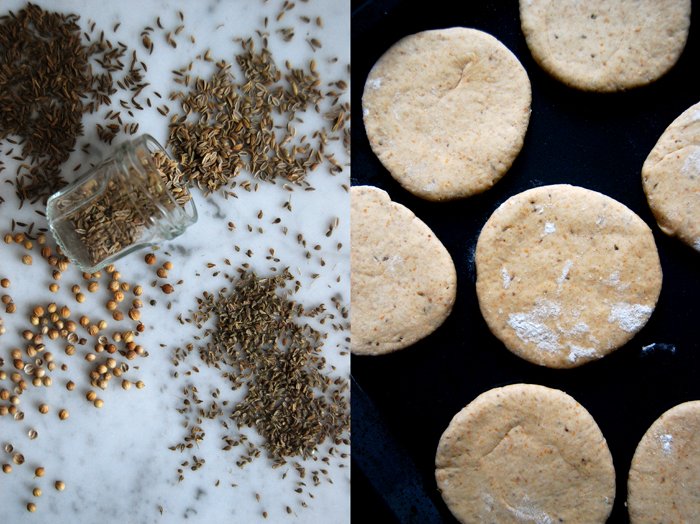
Last week I read about this bread, the bread of my mountain village of choice. It is a flatbread made with rye flour mixed with coriander, fennel and aniseed. It's a speciality in the Ladinia region around the Sella mountains in the Italian Dolomite Alps. In Italian this area is called Val Badia and the Ladin name (which is an autonomous language) is Alta Badia.
There are two ways to prepare this bread, one is more flat, it becomes dry, hard and brittle after baking. It's very thin and you "shake" the dough to loosen it up which gives it its name, "Schuettelbrot" (shaken bread). This method was used to preserve the bread for the long and lonely time in the mountain huts where the supply of fresh bread and food was an unfrequent and laborious task. It keeps for months, the texture is hard but it retains its strong taste of spices.
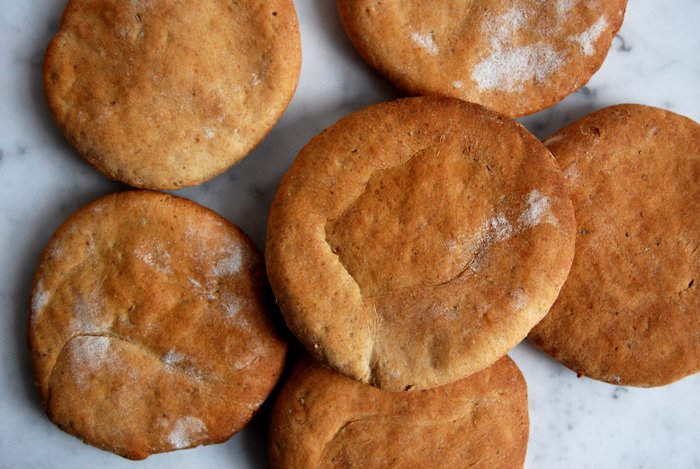
The second one is thicker and this is the one I choose to make, at it's best when fresh and warm. Although it's not as light and fluffy as a flatbread made with wheat flour, it's denser and more complex in taste. Traditionally you eat this bread together with Tyrolean Prosciutto at Vesper time, in the afternoon or evening when you feel like a little snack. My mother sent me a nice piece of prosciutto from San Cassiano, so I use this special occasion for this week's Sandwich Wednesday.
A Ladin Sandwich with Spice Flatbread and Tyrolean Prosciutto
I spread some cream cheese on the flatbread, traditionally it's made without, but I was in the mood for it.
For 8 little flatbreads you need
rye flour 180g / 6.5 ounces
spelt flour 180g / 6.5 ounces
dry yeast 1 package (for 500g / 1 pound of flour)
water, lukewarm, 125ml
milk, lukewarm, 50ml
coriander seeds, ground, 1 teaspoon
fennel seeds, ground, 1/2 teaspoon
aniseed, ground, 1/2 teaspoon
caraway seeds, ground, 1/4 teaspoon
salt 1/2 teaspoon
olive oil to grease the baking sheet
For the sandwich
Tyrolean Prosciutto 3 slices for each flatbread
cream cheese (optional)
crushed black pepper
Combine the flour with the spices, yeast and salt, add the lukewarm water and the milk, slowly, not all at once (you might not need all of it). Mix with your dough hooks for a few minutes. The dough should be more on the dry side. Continue kneading and punching with your hands until you have an elastic dough ball, not sticky at all. Put the dough back into the bowl, cover with a tea towel and let it rise in the warm oven (35°C / 95°F) for 45 minutes. This works really well but make sure that your oven is set to top/ bottom heat and not to fan.
Take the dough out and punch it down. Divide it into 8 pieces and roll them out into discs (on a floured working surface, between 1 - 1 1/2 cm / around 1/2" thick). Cover with a tea towel and let them rise for another 25 minutes.
Set your oven to 250°C / 480°F. My oven has a special pizza setting which I use for this recipe but you can use top / bottom heat as well. Grease your baking sheet with some olive oil.
Put your flatbreads on the baking sheet and bake them on the lowest level for 10 minutes or until golden brown. Take them out and let them cool for 2 minutes. Cut a bread in half, spread with cream cheese and cover with a few slices of the prosciutto. You can sprinkle some crushed black pepper over it too.


Cipollata with Raclette Crostini, the perfect Soup for a January Day
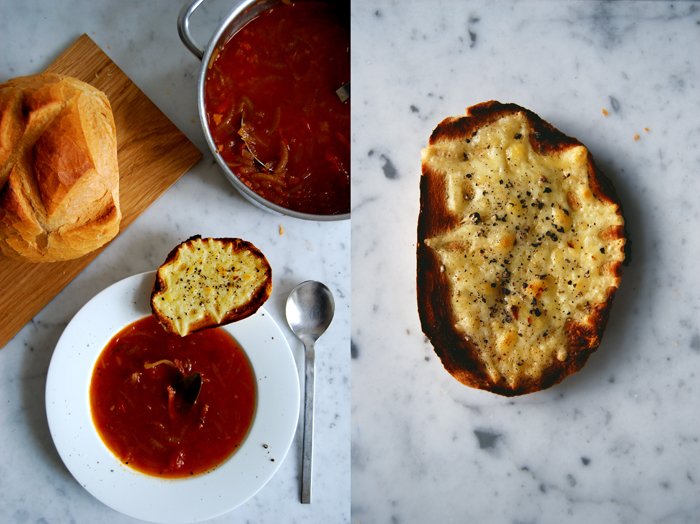
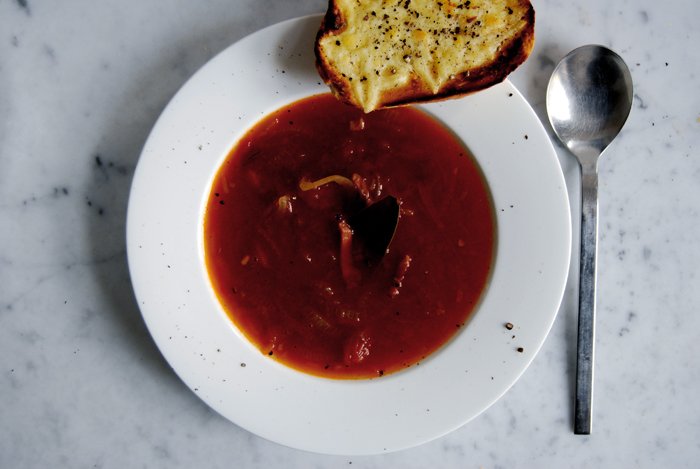
I remember when I was a child people used to make onion soup with a slice of white bread and grilled cheese on top. I liked the soup, I liked the melted cheese but I would have prefered the bread if it hadn't been soaking in the soup getting soft and soggy. That was never my thing, I also don't dip my cookie in tea or croissant in my cappuccino. I don't like pastry pieces swimming about soaking up liquid, neither sweet nor savory. Each to their own but this is not for me.
However, the combination of onion soup, bread and cheese is great, especially in winter. It's warming, a treat to the body, and it's rich and feels like a real meal. I found peace with my bread very easily by just keeping it out of the soup, it stays crisp and crusty and I can still enjoy this hearty combination. My soup is bright red as I add tomatoes to the broth, a nice change to the snowy grey outside my window, and a little spicy because I cook dried chili with it. I mix the onions with thick strips of Tyrolean Prosciutto from Mr. Pizzinini in San Cassiano. The spices of the prosciutto fit perfectly to the soup as I also use clove, bay leaf and rosemary.
While the soup is bubbling in the pot for half an hour I put thick slices of white bread covered with Raclette cheese under the grill. This alone would have already put me in a very happy mood but together with the soup I must say I'm at peace with the world!
Cipollata - A Winter Soup with Onion, Tomatoes and Tyrolean Prosciutto and Raclette Crostini
For 4 people you need
For the crostini, cut a loaf of white bread into thick slices, cover with grated Raclette cheese (100g / 3.5 ounces of cheese should be enough for 4 people) and put under the grill until golden brown. Sprinkle with crushed pepper.
For the Soup
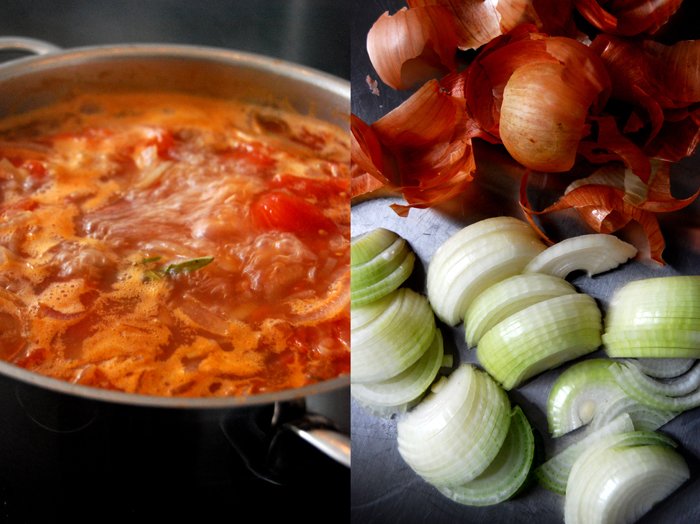
onions, cut in half and then into thin slices, 500g / 18 ounces
a piece of Tyrolean Prosciutto, cut into thick strips, 120g / 4 ounces
tinned tomatoes, chopped, 400g / 14 ounces
broth 1000ml
cloves 3
clove of garlic 1
bay leaf 1
rosemary, 1 sprig
sugar 1 tablespoon
salt and pepper
olive oil for frying
Heat a little oil in a large pot and fry the prosciutto until crisp. Take it out, add some more oil and fry the onions with the sugar for around 10 minutes until soft. Add the tomatoes, broth, spices and cook for 30 minutes on medium heat. Season with salt and pepper to taste and serve together with the grilled Raclette crostini.

White Pizza with Spinach and Ricotta
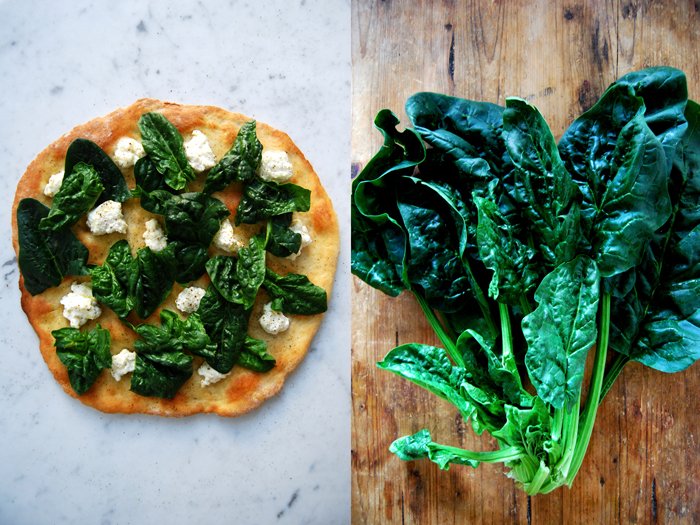
A few years ago curiosity got the better of me and I tried a "white pizza" at one of my favourite pizza restaurants. White pizza is made without tomatoes and I didn't quite know what to expect. I had my virgin white pizza moment with a spinach and ricotta topping and all my reservations melted away after the first bite. Lighter and with more space for the single ingredients, the absence of tomato sauce didn't lessen that feel good pizza pleasure.
I wrote about my Sunday pizza tradition a few weeks ago and yesterday was no exception. It has been ages since my last white pizza and, as it's been on my mind for a while, I bought some crisp winter spinach and ricotta. To finish it off I added some olive oil infused with garlic and some crushed black pepper. The dough was light and crisp, it soaked some oil, but not too much, a bit like a Focaccia. The spinach was crisp and had some bite as in winter it's a bit thicker while the ricotta brought a touch of velvety smoothness.
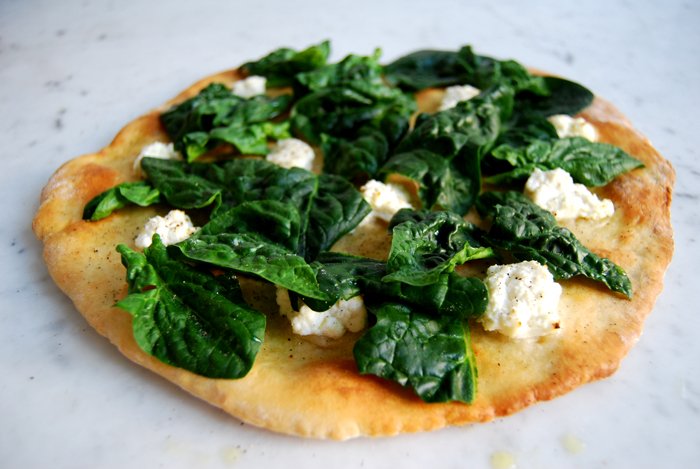
White Pizza with Winter Spinach, Ricotta and Olive Oil
I start to prepare the dough 2 hours before I bake it to give it enough time to rise.
For 1 big pizza (size of 1 baking sheet) you need
For the topping
fresh spinach, rinsed, 250g / 9 ounces
fresh ricotta 250g / 9 ounces
olive oil 4-6 tablespoons
garlic, cut in half, 1 clove
salt and crushed black pepper
Warm up the olive oil together with the garlic for 2-3 minutes.
For the dough
plain flour 350g / 12.5 ounces plus more for mixing
dry yeast 1 package (for 500g / 1 pound of flour)
water, lukewarm, 190ml
olive oil 3 tablespoons
salt 1 teaspoon
Combine the flour with the yeast and salt, add the olive oil and the lukewarm water, slowly, not all at once (you might not need all of it). Mix with your dough hooks for a few minutes. The dough shouldn’t be moist and sticky at all, more on the dry side. Continue kneading and punching with your hands until you have an elastic dough ball, not too hard, not sticky. Put the dough back in the bowl, cover it with a tea towel and let it rise in the warm oven (35°C / 95°F) for 40 minutes. This works really well but make sure that your oven is set to top/ bottom heat and not to fan.
When the dough is well risen, roll it out on a very well floured (this is very important!) working surface. It should be a bit smaller than the size of your baking sheet. Cover with a tea towel and let it rise for another 10-15 minutes.
The pizza
Set your oven to 260°C / 500°F. My oven has a special pizza setting but you can use top / bottom heat as well. Put the baking sheet on the bottom of your oven to heat it.
Take the hot baking sheet out of the oven, flip it over and place it carefully on two stable wooden boards or mats as it will be very hot. Place your risen dough carefully but quickly (best done by two people) on the baking sheet, push it gently into place if necessary. Sprinkle the olive oil and the ricotta in lumps on top. Put the baking sheet back into the oven, on the bottom again, and bake for a few minutes until the pizza is golden. Take it out and spread the spinach on top immediately. Season with salt and pepper, sprinkle some more olive oil on top if you like and enjoy!

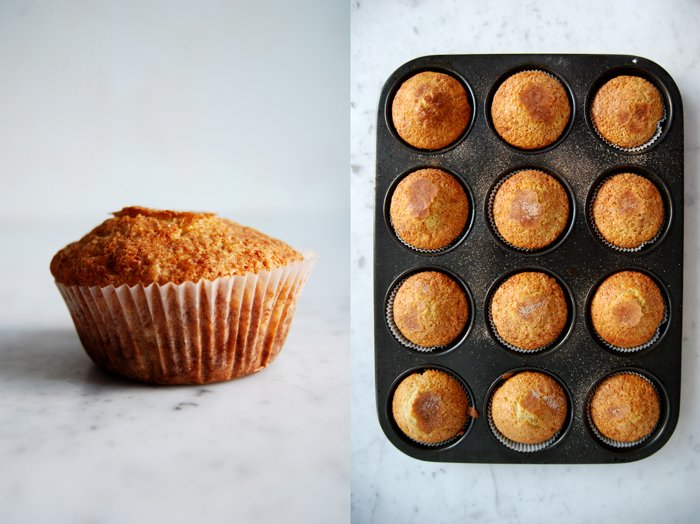
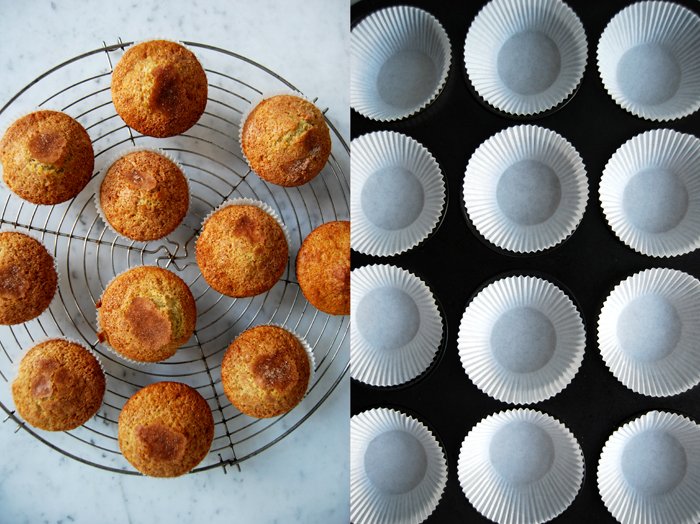
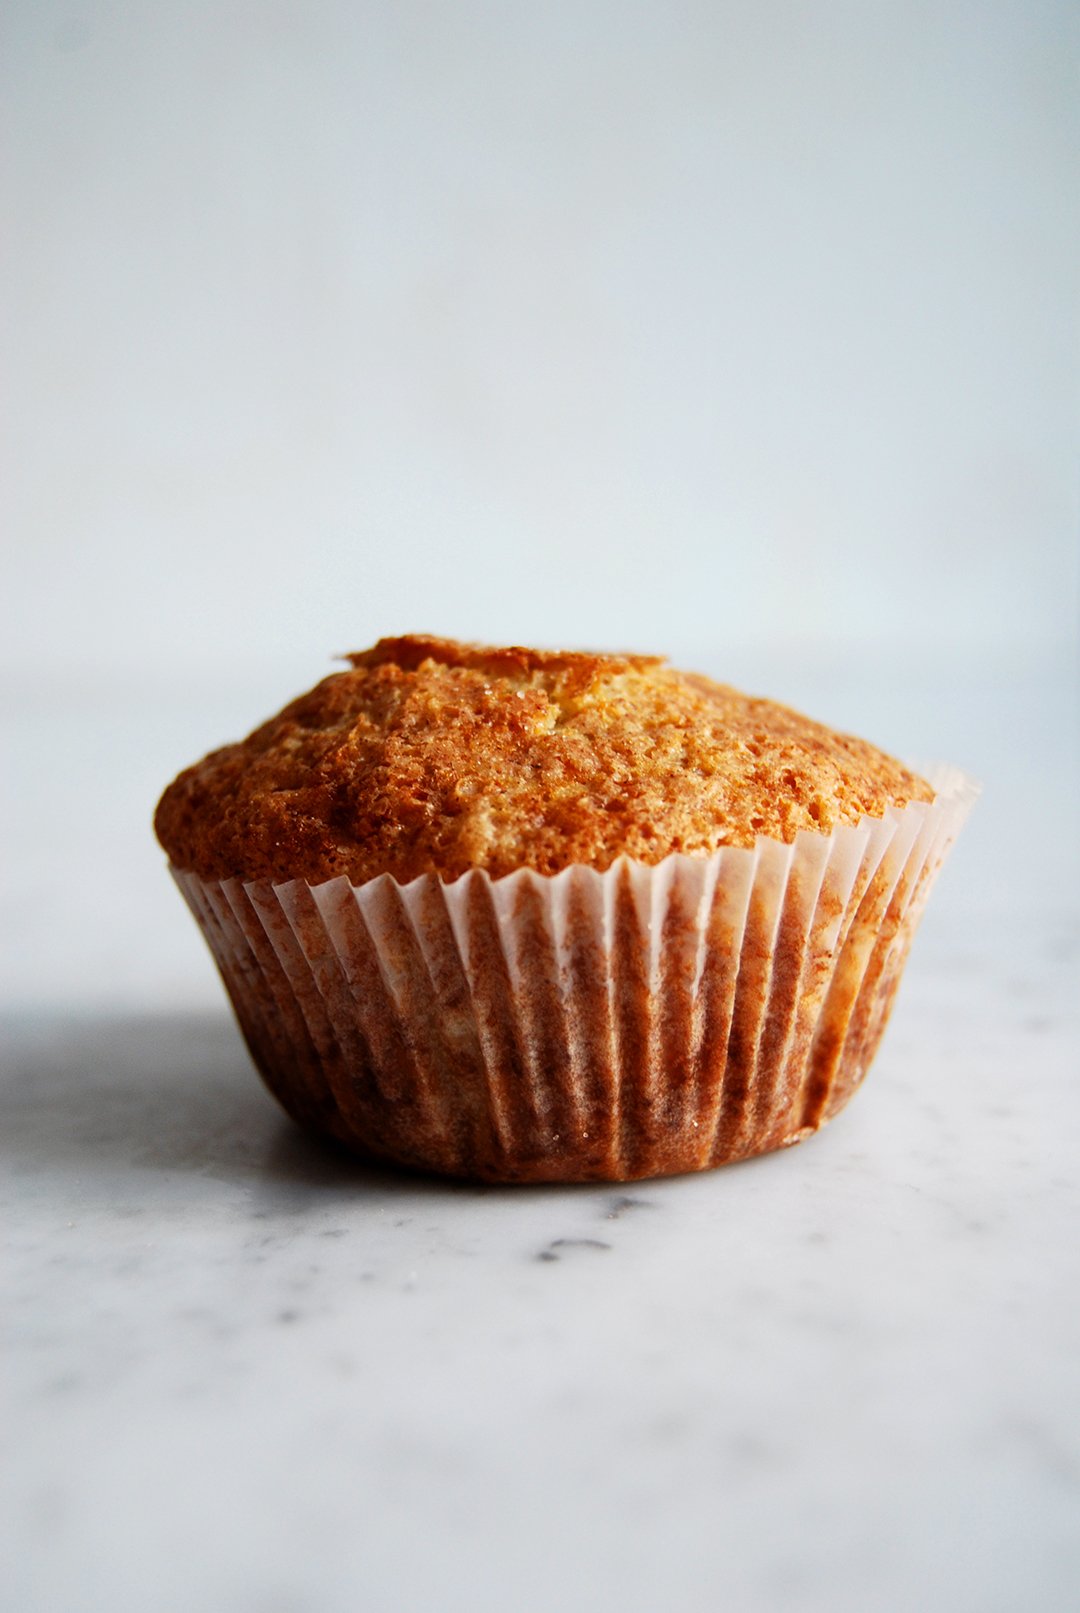
Wintery Sunday Morning Muffins with Blood Orange Marmalade

Sunday morning is made for muffins! They combine the spongy feeling of a cake with the handiness of a cookie and they don't take much longer to make than pancakes. You don't even need an electric mixer. You combine everything with a spoon, fill the lumpy batter into your muffin tray and within 12 minutes you'll have warm little muffins on your breakfast table. It can't get any better on a Sunday morning!
This recipe doesn't need many ingredients, you might already have them at home if you’re into baking. I mix some of my blood orange marmalade into the batter, which you can also replace with bitter orange marmalade (that's what I normally do) or with plum jam or any other jam that fits to cinnamon and nutmeg (as I add these two spices as well). These muffins are light and fluffy, I love them warm, tear them in half and let their wintery aroma fill the air - heaven!

Sunday Morning Muffins with Marmalade and Cinnamon
You need a muffin tray with 12 molds, lined with paper baking cups.
200g / 1 1/2 cups all purpose flour
70g / 1/3 cup granulated sugar, plus 1 teaspoon for the topping
2 1/2 teaspoons baking powder
1/2 teaspoon baking soda
1/2 teaspoon ground cinnamon, plus 1/2 teaspoon for the topping
a pinch of nutmeg
a pinch of salt
160ml / 2/3 cup whole milk
50g / 1/4 cup unsalted butter, melted
1 large egg
1 1/2 - 2 tablespoons blood orange marmalade (or bitter orange marmalade or plum jam)
Preheat the oven to 200°C / 400°F.
Combine the dry ingredients in a large bowl.
In a medium bowl, whisk together the milk, melted butter, egg and marmalade. Pour the liquid mixture into the dry mixture and quickly stir with a wooden spoon until you have a lumpy batter. The more you mix it the more it will lose its light texture so don't mix it too long.
Fill the batter into the lined muffin tray. Combine the sugar and cinnamon for the topping, sprinkle on top of the batter and bake for about 12 minutes or until golden and spongy. Let the muffins cool for a few minutes and enjoy warm!