
Ricotta stuffed Zucchini in White Wine Sauce
When we have friends over for dinner, my mood always decides what treats I bring to the table. There are two options, I either feel like a sumptuous meal with several courses which might mean cooking for one or two days and which definitely requires good organisation before and on the night and most importantly enough time to enjoy all the preparations. The other approach is to take it easy and choose recipes which don't need a rigid plan. I just fill the table with plates full of food before or as our friends arrive and we all enjoy the night together. Eating, talking and laughing, drinking some wine of course, savoring and emptying the plates for hours. This was my choice when I had a dinner for 10 ahead of me a few days ago!
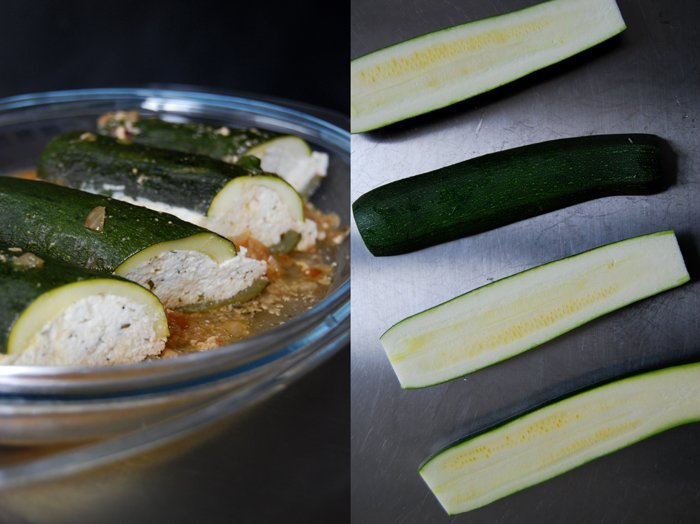
Some of our friends from Malta just moved to Berlin a few months ago. I know how much Maltese love and miss their home and food when they live abroad so I decided to make a traditional Maltese recipe, zucchini stuffed with lemon ricotta. I would have loved to get the small round courgette (Qarabaghliin Maltese) which would have been perfect for this recipe as you can close the stuffed fruit from the top. I worried that the ricotta would run down the sides of my long zucchini when I closed them but it worked fine. I cooked them for an hour in white wine together with the fried pulp of the fruits and some onions. Just a little of the creamy cheese went into the sauce and added some nice creaminess.
In the late afternoon, I cooked the zucchinis and left them al dente. I didn't want them to turn soggy as I had to warm them up again before our guests arrived. I filled my dining table with three different kinds of quiche which are very easy to prepare in advance and I can't really say if I prefer them warm or cold. Two loaves of homemade bread and a big batch of my raspberry chocolate brownies were on my list as well, both are great nibbles for a long night. When we all gathered around the table and I brought the dish with the steaming zucchini I didn't know that the night would go on for so long - our last guests left at 5 in the morning or so I was told, I fell asleep on the sofa at 4!
Zucchini stuffed with Lemon Basil Ricotta in White Wine Sauce
For 2 hungry people or for 4 when you have starters, you need
zucchini / courgette, cut in half (lengthwise) 2 (around 500g / 1 pound)
ricotta 200g / 7 ounces
Parmesan, grated, 20g / 1 ounce
organic eggs 2
basil, chopped roughly, 10 large leaves
lemon zest 1 teaspoon
salt 1/2 teaspoon
crushed black peppercorns
medium sized onion, chopped finely, 1
garlic, cut in half, 2 cloves
fresh parsley 3 sprigs
white wine 1 glass
tomato paste 1 tablespoon
olive oil for frying
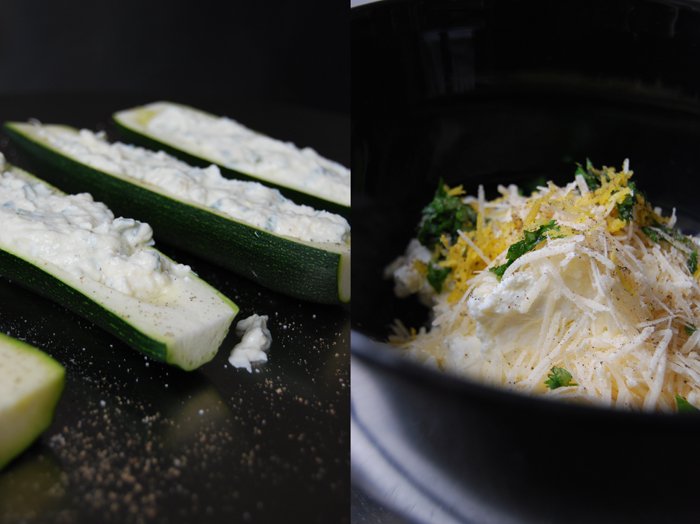
Whisk the ricotta together with the parmesan, eggs, basil, lemon zest, salt and pepper.
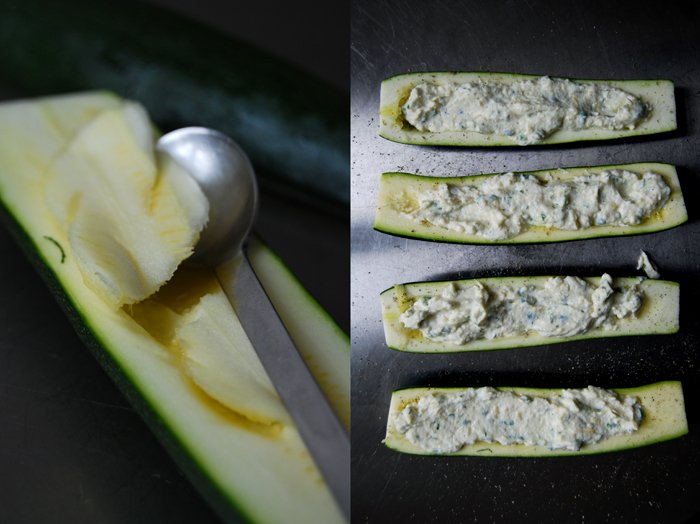
Scrape the pulp out of the zucchini with a small spoon and set aside. Season the inside of the zucchini with a little salt and pepper and fill both sides with the ricotta mixture. Close them just before you put them into the casserole.
In a large pot or casserole with a lid (big enough for the zucchinis), fry the onions in a little oil till golden and soft on medium heat. Add the garlic and the pulp and fry for 2-3 minutes, deglaze with some white wine and add the sprigs of parsley. Put the stuffed zucchini on top of the onions, add some more wine (1-2cm / 1/2-1" of the bottom should be covered), close with a lid and cook for 1 hour on low - medium heat. Check after 2o minutes, you may have to add some more wine, the bottom should remain covered.
When the zucchinis are soft at the bottom and al dente at the top, take them out with 2 spatulas, carefully, and set them aside. Take out the parsley, add the tomato paste to the sauce and season with salt and pepper to taste. Serve the zucchini together with the sauce.

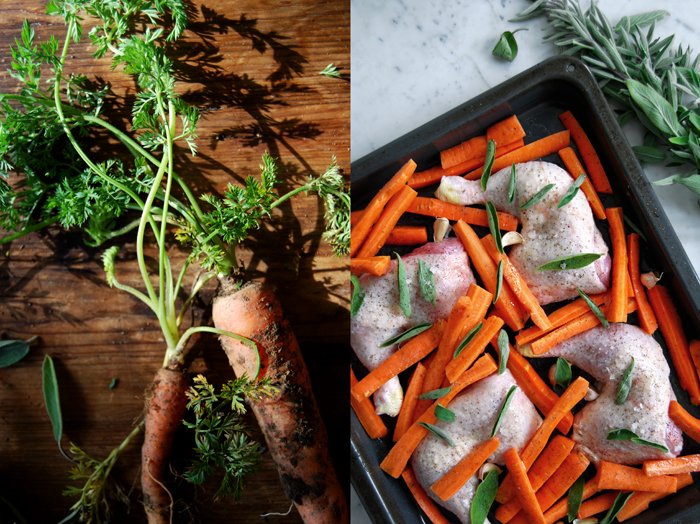
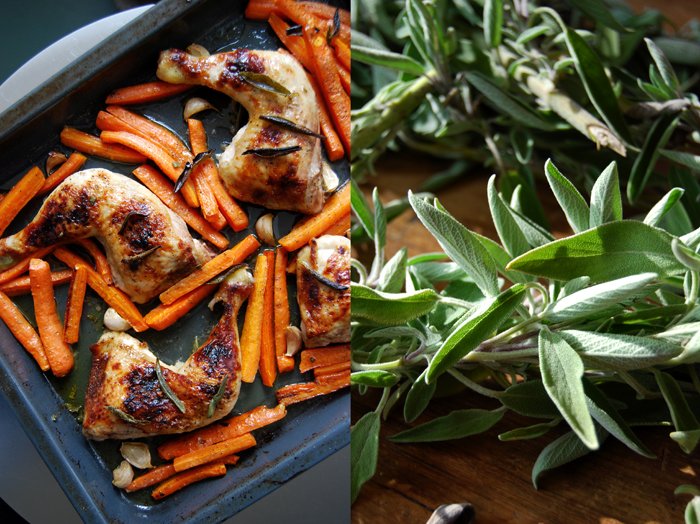
Honey glazed Chicken and Carrots roasted with Sage
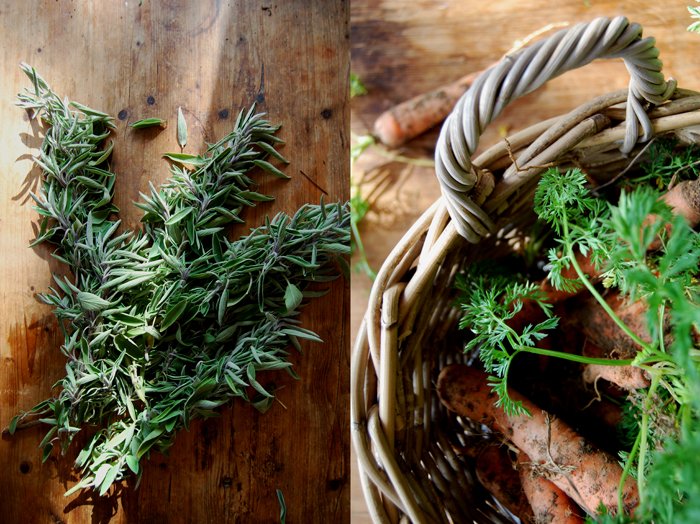
A package filled to the brim with carrots and sage arrived at my door a couple days ago. I opened the box impatiently and when I lifted the cover a cloud of soil and sage aromas filled the room. I removed the top layer of sage leaves, closed my eyes and dug my hands into the greens of 6 pounds of carrots. It felt like standing on a field in the middle of a farm!
The box came from my mother's vegetable garden where she bas been busy with the annual spring chores. I envy her for the fertile patch of earth where she grows all kinds of vegetables in unbelievable quantities, potatoes, beans, carrots, peas, tomatoes, zucchini, leek, celery, lettuce and, of course lots of herbs. Whenever I ask her about her harvest, she tells me about so many different vegetables that I'm sure I forgot to list one or two. The area she chose for her gardening isn't large, it has a slight decline, perfectly aligned facing the South so it's in the the sun all day and the soil is very rich. A couple days ago she called me up to ask if I would like to have some of last year's carrots which had been in the soil all winter but had to make room for the new seeds. She dug pound after pound out of the soil (she was a bit impressed by the amount herself) and now she was looking for thankful recipients. I was glad to be one of them, I didn't even know that one can eat carrots which have been in the ground all winter. To keep them safe and moist on their travel she wrapped them in branches of sage which apparently grow like weeds in her garden. If there is one person who has a green thumb it's definitely my mother!
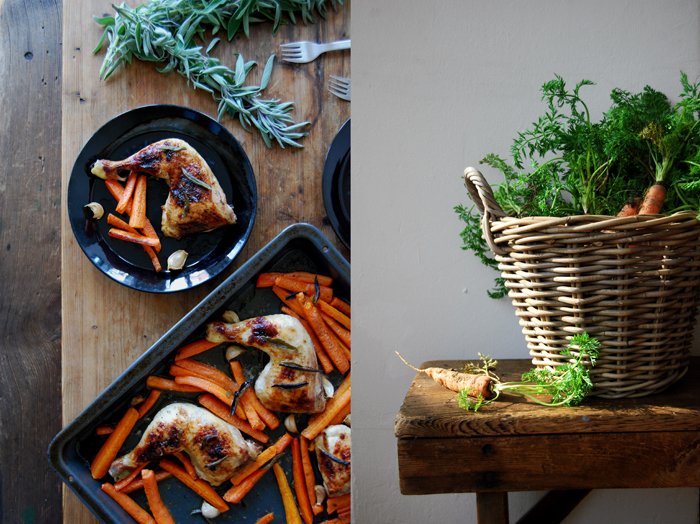
So the carrots arrived and I had to come up with an idea to use them, a recipe which demands lots of carrots. I didn't make roast chicken legs in a while so a quick decision was made, honey glazed chicken legs and carrots roasted with sage!
Honey glazed Chicken Legs and Carrots roasted with Sage
If you like you can marinate the chicken legs in the honey glaze for an hour (or longer) but season with salt and pepper just before you put them in the oven.
For 4 people you need
chicken legs 4
honey 2 tablespoons
olive oil 5 tablespoons plus a couple tablespoon for the carrots
large carrots, quartered lengthwise, 10
garlic, in their skin, 10 cloves
fresh sage leaves 30 (10 chopped)
salt and pepper
Set the oven to 200°C / 390°F. My oven has a Rotitherm roasting setting which works perfectly for poultry.
Warm the honey in a sauce pan on medium heat until liquid, take off the heat and add the olive oil, whisk till combined. Glaze the chicken legs on all sides with the honey and season with salt and pepper. Place on a baking sheet, add the carrots and garlic and spread the remaining honey over the chicken and vegetables. Pour some more olive oil over the carrots and season them with salt and pepper. Sprinkle with the sage (chopped and leaves) and put 2 of the leaves under each leg. Roast in the oven for 20 minutes or until golden brown. Check with a skewer, only clear juices should come out. Turn the grill on for a couple minutes until the skin starts sizzling and turns dark and crisp.
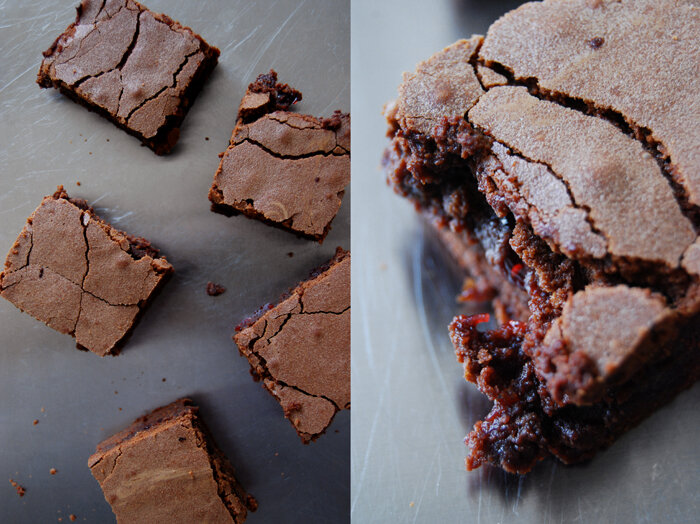
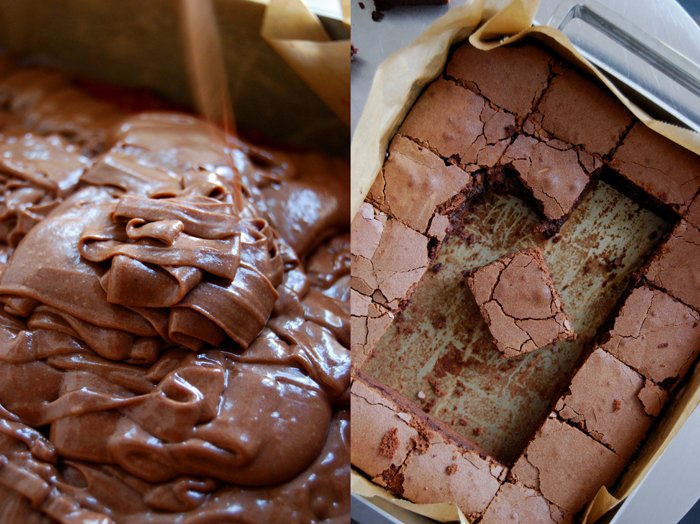
Fudgy Raspberry Chocolate Brownies

The first bite of these chocolate brownies changed my opinion about this cakey treat completely. After a few rather dry, too heavy or painfully sweet experiences with brownies I already felt like giving up on them. I never felt inspired and motivated to give them a try in my own kitchen but this recipe changed everything! They are fudgy, dense, chocolaty and juicy and a thin layer of sweet raspberry jam even adds a hint of fruitiness. You can't really ask for more when you pull a chocolate cake out of your oven!
It's important to use good quality chocolate, bittersweet, the kind you like to eat without putting it in a cake. Mine is 50% cocoa, I tried stronger ones but this works best for me. Sometimes I make the recipe without the jam layer which doesn't effect the brownie's fudginess, they just have to bake shorter as the fruit keeps the dough soggy for a bit longer. When I want chocolate, pure and intense than that's my choice! I like both, so much that I always make a big tray right away, even if there's just the two of us. I also like to make them for easy dinner parties, a sweet finger food dessert, no plates, just napkins and everybody gets a big brownie in their hands.
This recipe comes from my boyfriend by the way. One day he went into the kitchen, came up with this recipe and baked these wonderful brownies. I don't remember why or how, I don't ask questions, I just enjoy them!
Raspberry Chocolate Brownies
For a 28,5 x 23,5 cm / 11 x 9 " baking dish making 24 brownies you need
butter 350g / 12.5 ounces
bittersweet chocolate 350g / 12.5 ounces
a pinch of fresh vanilla
organic eggs 6
granulated sugar 320g /11.5 ounces
plain flour 250g / 9 ounces
salt 1 teaspoon
raspberry jam, whisked with a fork, 100ml
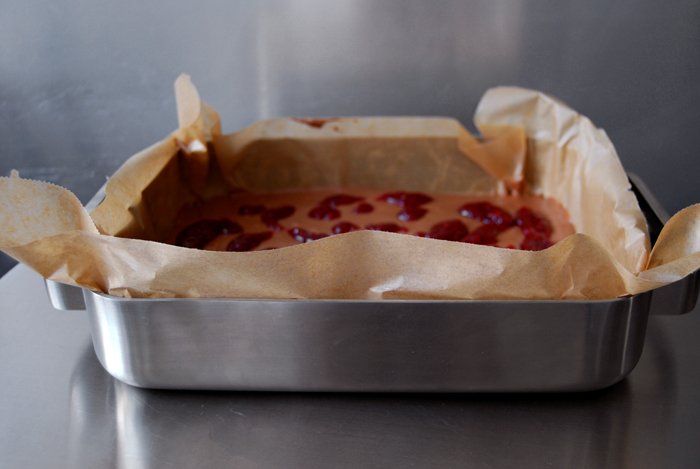
Set the oven to 175°C / 350°F (fan-assisted oven) and line a 28,5 x 23,5 cm / 11 x 9" baking dish with parchment paper. (It must be roughly this size).
Melt the butter together with the chocolate and vanilla in a sauce pan. Set aside and let cool for a couple minutes. Beat the eggs together with the sugar till fluffy and add to the chocolate mixture. In a large bowl, combine the flour and salt, add the liquid mixture and mix with your mixer until everything is combined. Pour half of the dough into the baking dish, even it out and spread the jam on top, carefully so that the layers stay separate. Add the rest of the dough and spread evenly.
Bake in the oven for 55 minutes. The top will be a pale brown and speckled. When you push in the middle you should feel a soft but spongy resistance. Let it cool for 10 minutes before you cut it into small squares.
If you make the brownies without the jam layer, check them after 30 minutes. It should look and feel as described above.


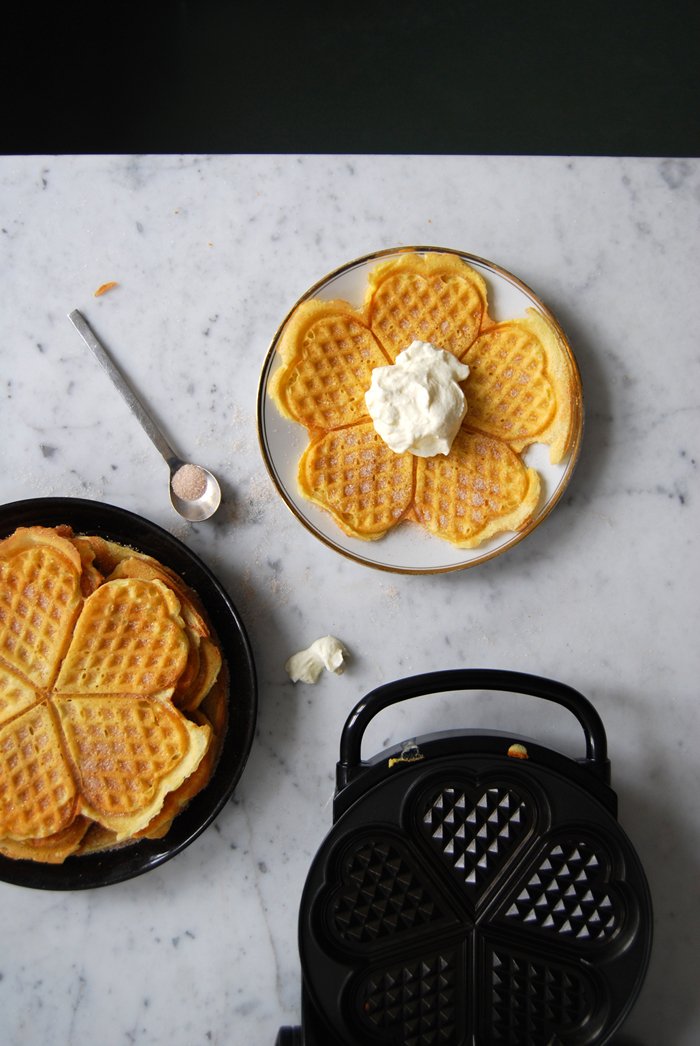
The Family Waffles and Prokofiev's Peter and the Wolf
I used to have cosy tea time ceremonies with my mother and my sister on the weekends, just the three of us. We lit candles, got comfy in between piles of cushions and listened to music. I always wanted to play either Prokofiev's Peter and the Wolf or Ravel's Bolero, both dramatic and mesmerising. It fascinated me as a child, especially Prokofiev's musical fairy tale, just a narrator telling the exciting story and an orchestra interpreting the characters and scenes. It made me feel like I was right in the story, I could see Peter following the cat through the grass and then, the scene when the duck escapes through the garden gate which little Peter had left open! He shouldn't have because of the wolf (his grandfather had told him a million times) and as one can imagine, it doesn't look so good for the duck. I don't want to reveal the end of the story, I still love listening to it!
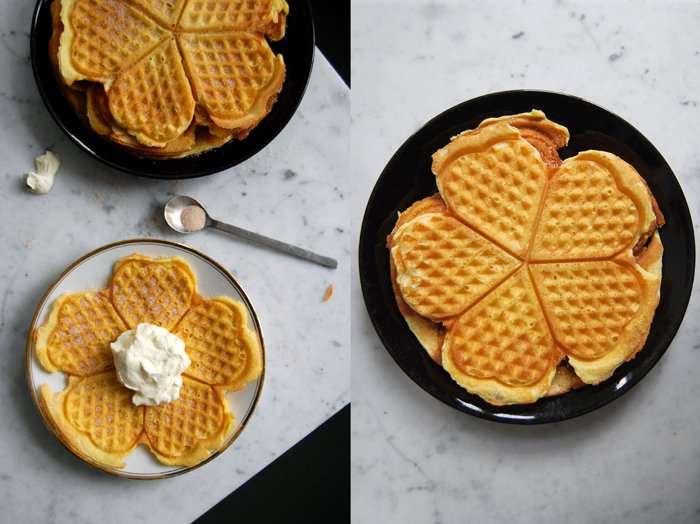
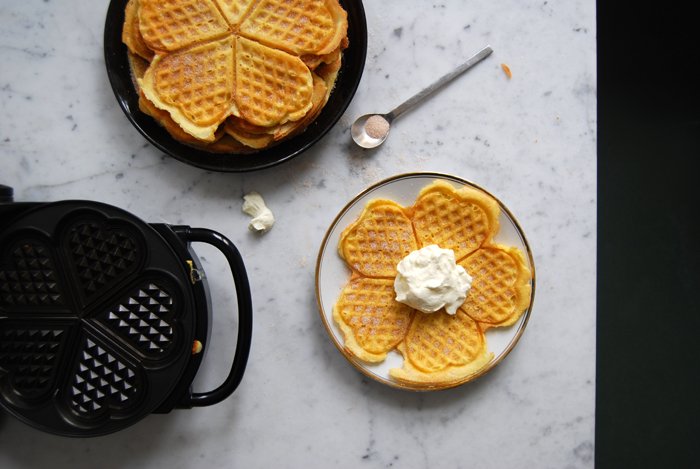
When we had our girly afternoons, we either baked a cake or made waffles, my grandmother's waffles who passed her much-loved recipe on to my mother and her siblings before the grandchildren started baking them as well. I'm one of them, still enjoying them as much as my family does. I never made any other waffle recipe myself but I've obviously had others. I'm biased, I know, never as good as my granny's! Hers are light and fluffy, not too sweet as the dough is made with only a pinch of sugar. She used to sprinkle the sugar on top of the waffles after they were baked, still warm out of the waffle maker, which is how I make them too, sometimes with some cinnamon mixed in.
When I thought of my grandmother, I remembered her gold rimmed plates which I don't use very often. I ate my waffles like I always do, sandwiched with whipped cream in between and I played Peter and the Wolf, all the sweet memories came back and with them a happy and thankful feeling!
This recipe has been featured by Food52!
Waffles with Cinnamon Sugar and Whipped Cream
For the 8 waffles you need
butter 50g / 2 ounces
milk 175ml (if you use a Belgium style waffle maker you need only 150ml of milk)
organic eggs 3
a pinch of salt
granulated sugar 1 teaspoon
plain flour 100g / 3.5 ounces
baking powder 1/2 teaspoon
a pinch of fresh vanilla
For the topping
granulated sugar 70g / 2.5 ounces plus 1 tablespoon for the whipped cream
ground cinnamon 1/2 teaspoon
whipping cream 200ml
Warm up your waffle maker.
Combine the sugar and cinnamon to sprinkle on the waffles and whip the cream together with a tablespoon of sugar.
Melt the butter and mix with the milk. Combine the flour and baking powder. Beat the egg whites with a pinch of salt till stiff. Mix the egg yolks with the sugar and vanilla till fluffy and add the milk and flour, mix well. With a spoon, fold the stiff egg whites gently into the dough until well combined.
Pour a ladle of the dough onto the waffle maker and bake until golden brown. Sprinkle with the cinnamon sugar while the waffles are still warm and served with whipped cream.


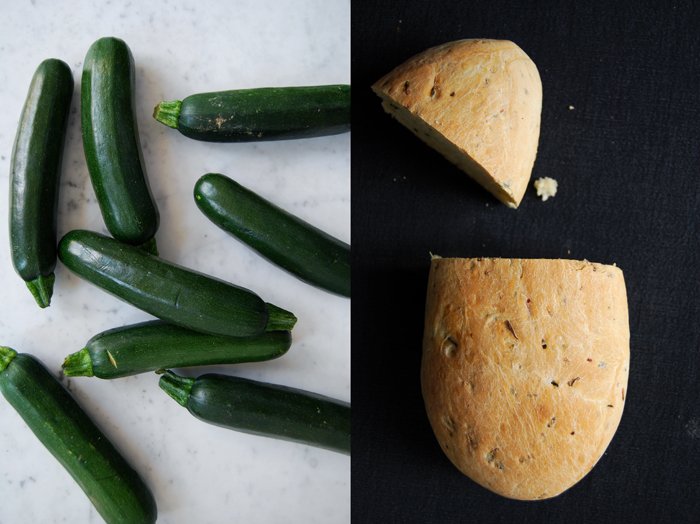
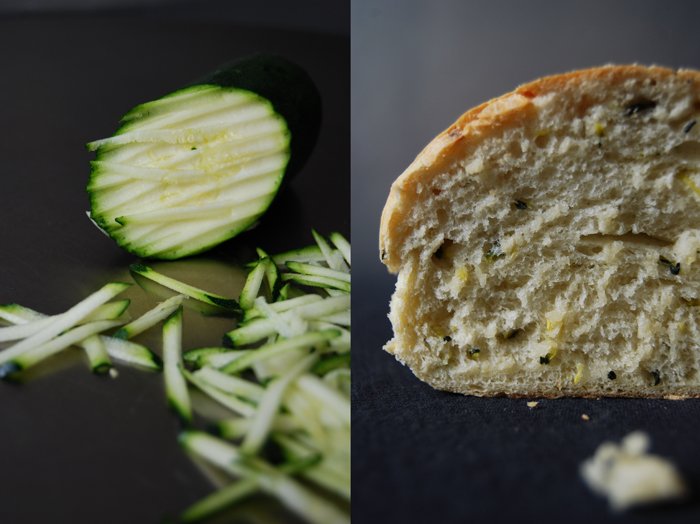
Savory Zucchini Bread
I've wanted to learn how to bake sourdough bread for years, the only problem is that I bake and love so many of my yeast bread recipes that, so far I've never approached this adventure. Dry or fresh yeast allows me to make a fresh and warm bread within a couple hours where as sourdough demands days of preparation. Most of the time, my baking isn't really planned far ahead, my mood decides what I will put in the oven. With the right ingredients a yeast bread is wonderfully juicy and spongy but I have to admit that it never creates a crust comparable to the more time-consuming alternative which also has the advantage that you can keep it for days. This is impossible with yeast bread, but to be honest that has never been an issue as all the fresh bread coming out of my kitchen doesn't survive for more than a day or two!
I know that one day sooner or later I will give the sourdough a try, but till then there is still a lot of bread to bake. One option, which is as juicy as my olive bread, is a loaf made with grated zucchini (courgette) which makes the texture so soft and spongy that it doesn't need more than some olive oil or butter spread on top. I served it with ramp (yes, again) butter when we had some friends over and I liked that a lot as well, it made it a bit garlicky.
It's really quick to bake, it only needs 20 minutes in the oven!
Savory Zuchini Bread
For 2 loaves of bread you need
plain flour 500g / 1 pound
dry yeast 1 package (for 500g / 1 pound of flour)
salt 1 heaping teaspoon plus 1/2 teaspoon for the zucchini
zucchini, grated 200g / 7 ounces
water, lukewarm, 225ml
olive oil for brushing
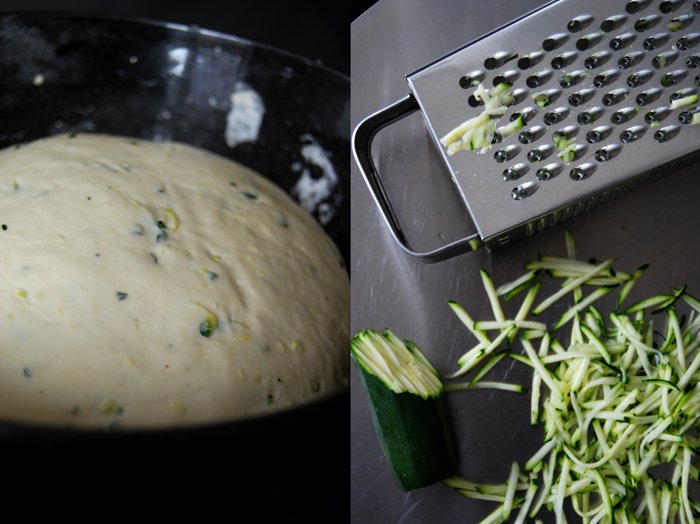
Put the grated zucchini in a sieve over a bowl, add 1/2 teaspoon of salt and mix with your fingers. Set aside for 15 minutes, rinse under cold water for a few seconds and squeeze the water out with your hands. Spread the zucchini on a tea towel and push another towel on top to dry. Scrape off the towel and set aside.
Combine the dry ingredients, add the zucchini and water and mix with your dough hooks for 5 minutes until well combined. Continue kneading with your hands for a few minutes until you have an elastic dough ball. Put the dough back into the bowl and cover with a tea towel. Let the dough rise in a 35°C / 95°F warm oven for 45 minutes. This works really well but make sure that your oven is set to top/ bottom heat and not to fan.
Take the dough out, punch it down and knead for 1 minute. Form 2 long loaves and put on a baking sheet lined with parchment paper. Cover with a tea towel and let them rise for 30 minutes in the warm oven.
Set your oven to 220°C / 430°F.
Brush the loaves with a thin layer of olive oil and bake for 18 minutes or until cooked through. If you’re not sure if it’s done turn the bread around and knock on its underside, it should sound hollow. Let it cool for a couple minutes before you enjoy the first slice of your freshly baked bread.


Radicchio with Caramelised Red Onions and Lemon Thyme

In the past few days I've had caramelised onions on my mind, sweet and syrupy, preferably the red ones or shallots which taste softer and reveal an intense natural sweetness when they are cooked. There is a big bowl in my kitchen which is always filled with onions. I like to have the whole range at hand, red, yellow, white, big and small, but most of the time I use the spicy yellow bulbs, mine are medium sized and organic, they bring tears to my eyes as soon as the knife touches the peel. They are great too cook with but painful to prepare! A few shallots are in the bowl as well and red onions of course which I love to use for pies or in salads, which rarely happens as I'm not too fond of raw onions.
I have a beautiful head of radicchio in my fridge just waiting to be used, the big leaves falling over its sides like a ball gown, almost too perfect to destroy! But I must, I want to combine its bitterness with the sweetness of caramelised red onions and some lemon thyme. The radicchio is uncooked but the onions caramelise in sugary butter, softening over less than 15 minutes before I deglaze their juices with dark Balsamico vinegar. The result is delicious, a salad of bitter sweet flavours glazed in a thick sweet and sour dressing!

A Salad of Radicchio, Caramelised Red Onions and Lemon Thyme
For a side dish for 2 you need
radicchio, torn into bite sized pieces, 4 big leaves
medium sized red onions, each cut into 8 pieces (lengthwise), 2
butter 3 tablespoons
sugar 2 tablespoons
balsamic vinegar 2 tablespoons
olive oil 4 tablespoons
lemon thyme, 10 young and soft sprigs chopped roughly or just the leaves
salt and black pepper
In a large pan, heat up 1 tablespoon of oil together with the butter and sugar on medium temperature. As soon as the butter starts to sizzle add the onions, stir once in a while. Let the onions soften over 10 minutes, they can become a bit dark but shouldn't burn as that would make them bitter. When the onions are soft, caramelised and have turned a dark red, season with salt and pepper and take them out keeping their caramel juices in the pan. Deglaze the bits and pieces left in the pan with the Balsamico, put on medium heat for a few seconds and mix it so that just a little of the vinegar evaporates. Take it off the heat, pour the liquid into a bowl, whisk with 3 tablespoons of olive oil and season with salt and pepper to taste.
On large plates, arrange the radicchio with the caramelised onions on top, carefully as they are very soft, sprinkle with some salt and pepper and add the thyme. Drizzle the thick dressing over the leaves, it's so strong that a few drops are enough to spread the sweet flavours.

A juicy Lamb Burger with Ramp Pesto
Yesterday I mentioned that nothing can escape my appetite for ramp, not even a burger! At first, my plan was to add just a few spices and leave the focus on the strong lamb meat. A juicy hamburger with tomato and lettuce, simple and pure, that was my idea, but when I saw the bowl with yesterday's ramp pesto on my kitchen top I remembered a beef burger I had made two weeks ago with pesto mixed into the burger mixture and it was so good that I couldn't resist! I had to make it again and added it to the lamb meat. The pesto doesn't only add its flavours but it also effects the texture and makes the burger very, very juicy.
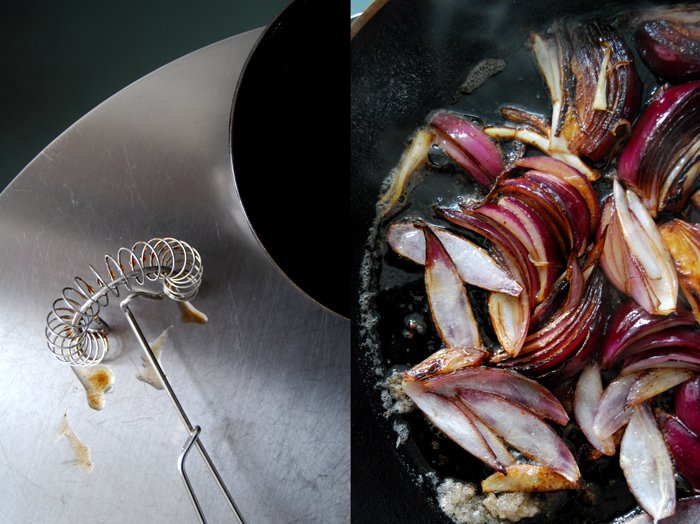
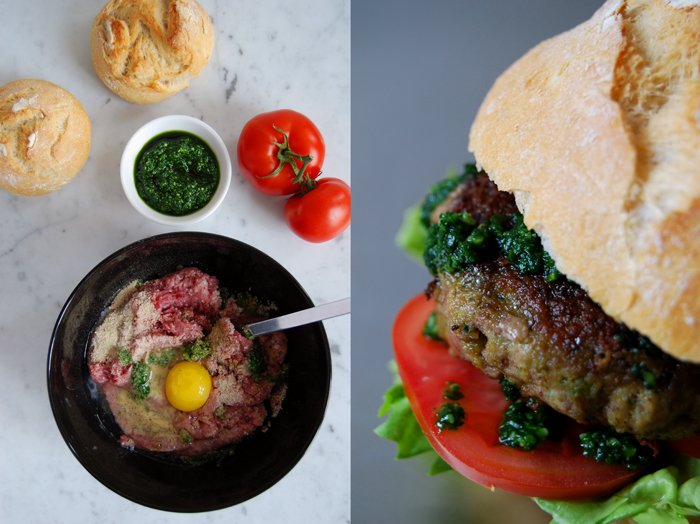
Usually, for my sandwiches on Wednesdays I measure the amounts for a quick lunch for 2, but I knew that this would have to be a proper dinner. It's so good that you can't stop after one burger! So I got 600g / 21 ounces of minced lamb meat and mixed it with 1 egg, 40g / 1.5 ounces of bread crumbs, 2 teaspoons of salt and ground black pepper. I stirred in 3 tablespoons of my ramp pesto (you can find the recipe here), but you could use any other pesto which matches the taste of the meat. When I made the beef burger I only added 2 tablespoons of the pesto as the meat isn't as strong as lamb so I put in an extra one. To keep the meat juicy while its frying I form thick burgers. We had 6 which I fried in 2 tablespoons of butter and some olive oil, on high temperature which I turned down to medium immediately after I put the burgers in the pan. After a couple minutes on each side they turned a crisp brown, but still juicy inside.
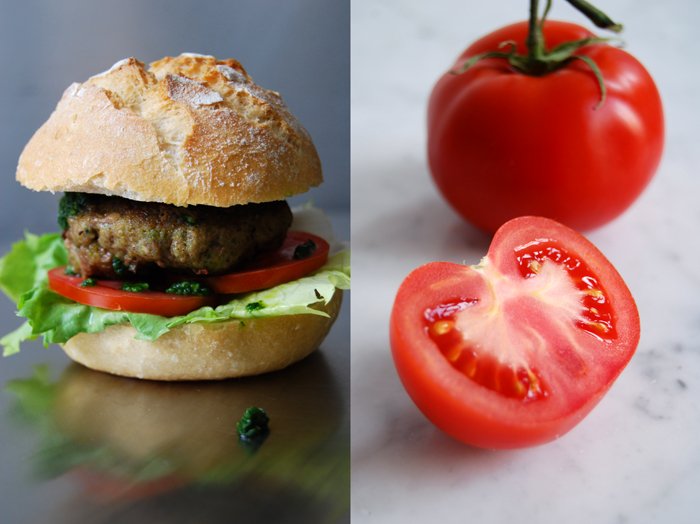
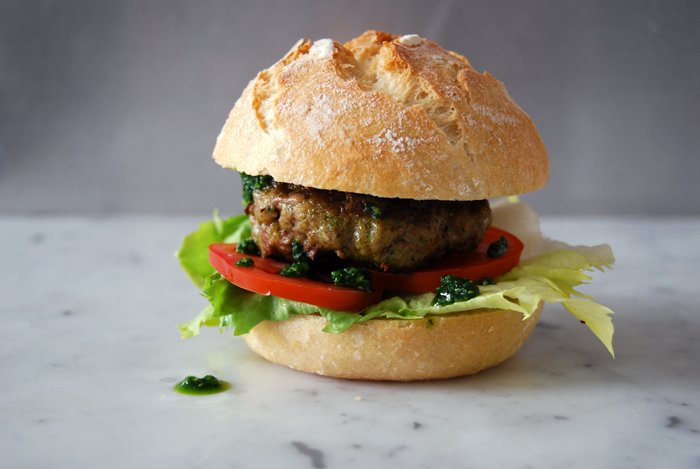
We put the burgers in some crunchy buns together with thin slices of tomato, a leaf of green lettuce and sprinkled them with some more pesto - and then we ate them all!


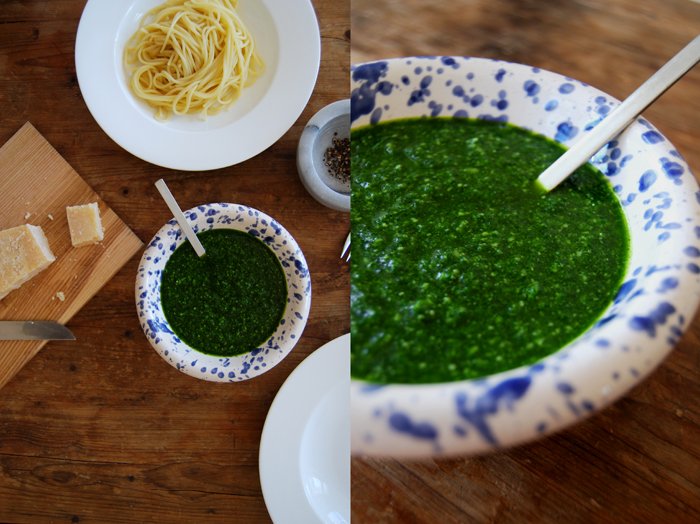
Spicy Ramp Pesto with Spaghetti
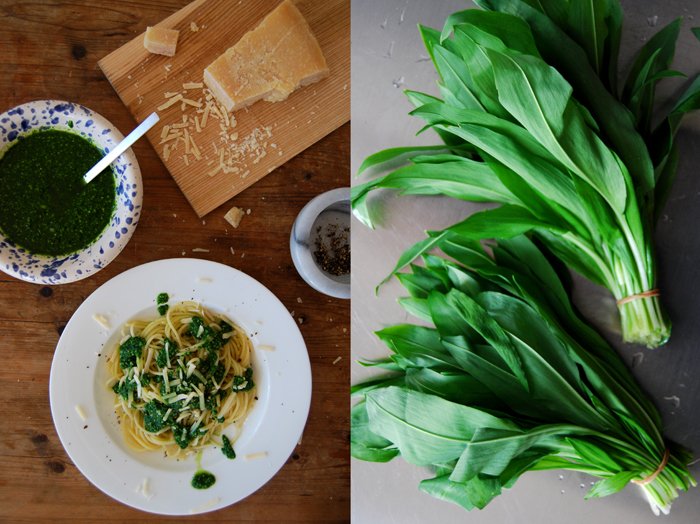
When I wrote about my wild garlic soup two weeks ago, a couple of the more attentive followers of eat in my kitchen told me that "ramp" is the more common name for my beloved "wild garlic". I'm happy they let me know and to avoid confusion I will change its name in my recipes to "ramp". "Wild garlic" has a bit of an adventurous touch, I like that, it fits to its distinct taste but if only a few know it as such then I have to compromise.
At the moment, this plant is at its seasonal peak. The long leaves cover the moist ground in the forests, filling the air with their beautiful smell of fresh green onions. When I go to the market, I buy ramp in bulk as I'm a bit obsessed with it. I even start my shopping earlier in the morning just to make sure that I get enough of the little bunches for all the recipes I have in mind. The recipe I make the most (at least once a week) is a pesto, spicy and very strong in taste, great with pasta or spread on toasted dark bread which is an absolutely delicious snack! In the fridge, it stays fresh for a few days so I always prepare a big bowl.
For my pesto, I use the leaves of 2 bunches of ramp (around 90g / 3 ounces), rinsed and dried well, and mix them in a blender with 110ml of olive oil, 50g / 2 ounces of parmesan and 1/2 teaspoon of salt. You could add some pine nuts but I find them too weak to come through, I prefer to concentrate on the ramp and the cheese. When we eat the pesto with spaghetti or linguine I add some crushed pepper and more grated parmesan on the warm pasta.
Tomorrow I will write about a burger which didn't manage to escape my ramp obsession!


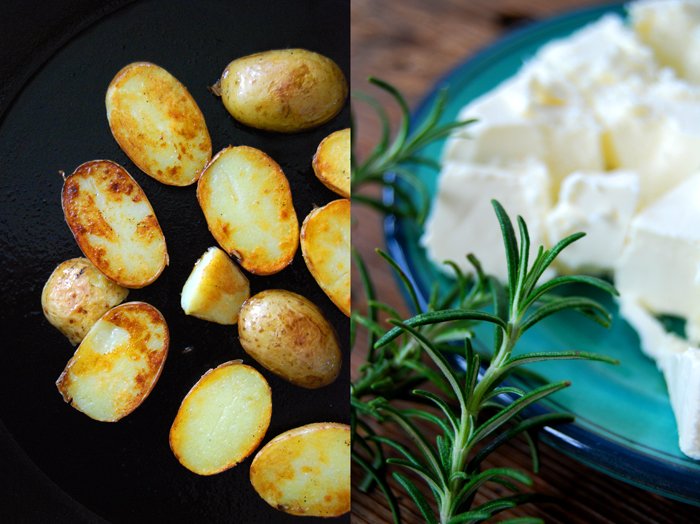
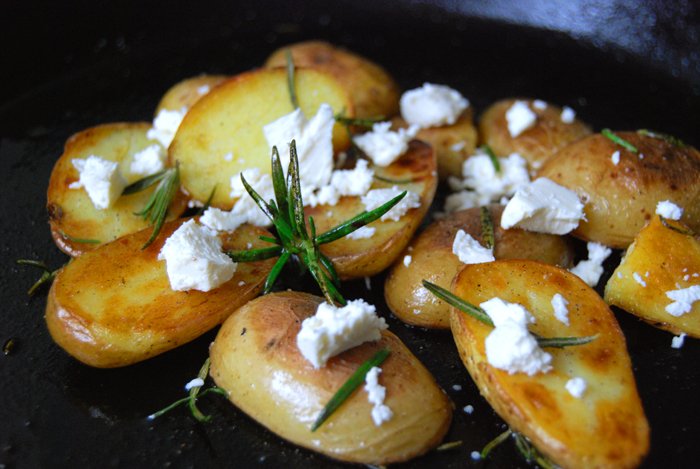
Crisp Golden Rosemary Potatoes with Feta Cheese
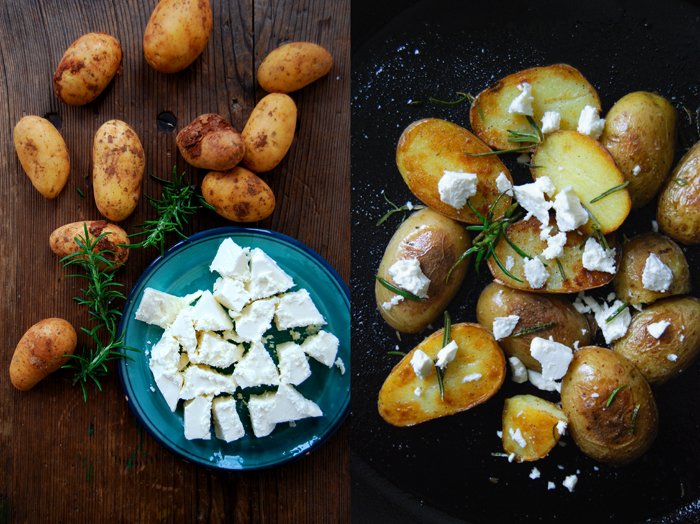
Some days call for a quick lunch or dinner and potatoes are often my solution - apart from pasta, of course. Mashed, fried, baked or in salads, preparations never take too long to create a satisfying meal which won't leave me hungry. Sometimes when I know that stressful days are ahead, I put a big pot of potatoes on the cooker, enough to be turned into a few delicious meals in the following days. This is perfect when there are fried potatoes on my cooking plan as they should always cool and dry after cooking before you throw them into the hot pan, that way they turn nice and crisp and won't become mushy. My favourites are the classic version with bacon and onions or a bit lighter and Mediterranean, golden fried potatoes with rosemary. I could leave it at that, good potatoes fried in olive oil with some herbs, sea salt and pepper don't really ask for more but I'm in the mood for cheese at the moment. I could throw it into anything, like last week's rocket salad with goat cheese, my Bavarian Obatzda sandwich with camembert or the gnocchi with blue cheese sauce.
So my potatoes get a cheesy add-on as well, in the form of Greek Feta cheese. I cut 500g / 1 pound of small cooked and cold potatoes in half and fry them in olive oil on medium heat until golden on all sides. For the last 2-3 minutes I add the needles of 3 small sprigs of rosemary, they become bitter when fried too long. When the potatoes are nice and crisp I season them with crushed black pepper and coarse sea salt and crumble 150g / 5.5 ounces of Feta cheese on top. A ripe goat cheese would work as well, or an aromatic French cheese like Comté grated and melted on the hot potatoes, so many options!
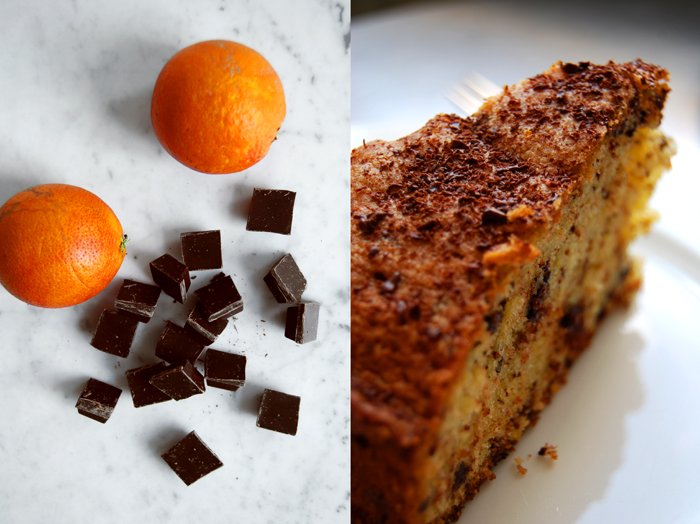
Bittersweet Chocolate and Orange Sponge Cake

Last week I wrote about one of my numerous phone calls with my Maltese granny who is actually my boyfriend's granny but over the years, after so many stays on her home island and through our shared passion for food she "adopted" me. That's how it feels, she became my granny. In our last conversation she gave me a wonderful recipe for the Maltese tea time cookies with vermouth and she also mentioned a cake made with bittersweet chocolate and orange (juice and zest). I love this combination but my boyfriend isn't so fond of it and I didn't want to end up eating a whole cake on my own. But she insisted on giving it a try, she knows her grandson after all, and she was right!
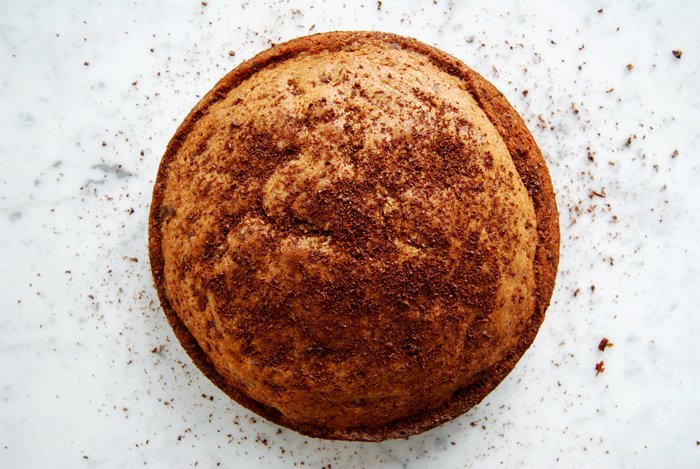
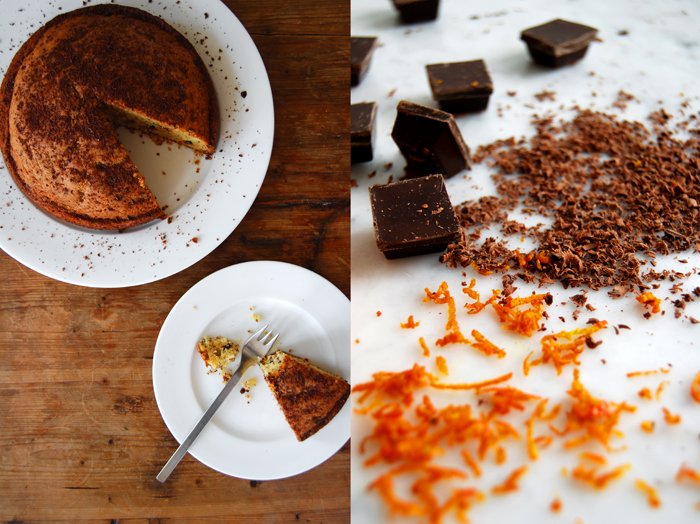
We both agreed that this cake is amazing, simple but so aromatic. The texture is very spongy and on top it has a fine sugary crust, a bit flaky. I sprinkled it with some more chocolate when the top was still a bit warm and it melted into the crust. Granny Edith was right, I didn't have to eat the cake on my own and it didn't even last for 2 days!
Bittersweet Chocolate and Orange Sponge Cake
For a 20cm / 8″ cake pan you need
butter 180g / 6.5 ounces
granulated sugar 210g / 7.5 ounces
plain flour 180g / 6.5 ounces
baking powder 2 teaspoons
a pinch of salt
organic eggs 3
orange juice 2 tablespoons
orange zest 1 1/2 tablespoons
bittersweet chocolate, chopped coarsely, 100g / 3.5 ounces plus 1 tablespoon finely grated for the topping
Set the oven to 175°C / 350°F (fan-assisted oven) and butter the cake pan.
Mix the butter with the sugar and orange zest till fluffy. Add the eggs, one at a time and mix well for a couple minutes. Add the flour, baking powder, salt and orange juice and mix quickly until everything is combined. Stir in the chopped chocolate and scrape the dough into the prepared pan. Bake for 40 minutes or until golden brown. Check with a skewer, it should come out clean. Let the cake cool for 5 minutes and sprinkle with finely grated chocolate.


Challah - Sweet and Fluffy Braided Yeast Bread
As passionate as I am about my dinner, I feel the same about breakfast which is quite late in my case. I always start the day with a cup of green tea with freshly squeezed lemon as I don't like to eat early in the morning but then after a couple hours my body needs some energy which I gladly deliver. Bread, fresh vegetables and fruit, my coffee of course, and some cheese. To me, it's all about bread, dark or white, buns, croissant, during the week it's a dense spelt loaf from my bakery most of the time but then on the weekend I love to bake my own bread. It's the most relaxing and delicious way to end the week!
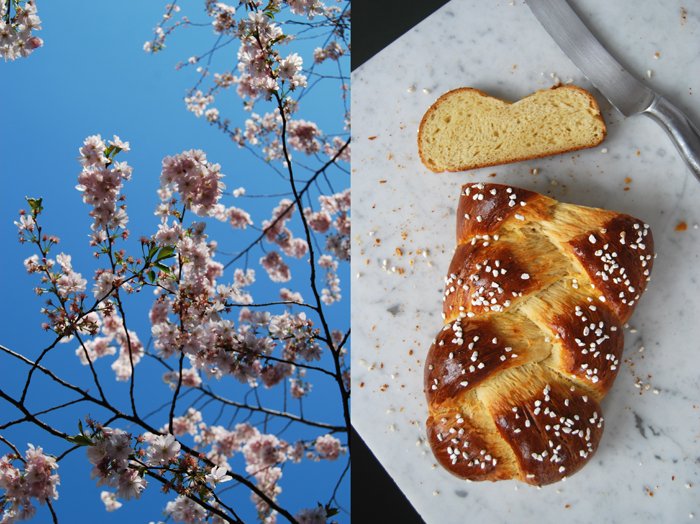
Where I grew up, I used to buy a brioche like loaf of bread, fluffy and sweet, a bit dark on the outside, sometimes made with raisons, it's called Stuten or Blatz. It's baked square shaped and best when cut into thick slices, spread with butter or, one of my favourites, with liver pâté. I never managed to bake a Stuten as good as the one I bought from my hometown's bakery which unfortunately doesn't even exist anymore. I'm still working on it!
For now, I enjoy a similar bread, in a different shape and made with a slightly different dough. The wonderful Challah! The braided yeast bread is just as sweet and fluffy, I eat it either with butter or liver pâté, or with one of my homemade jams, like the blood orange or tangerine marmalade.
The trees and flowers around have been bursting in the past days, I had to catch these moments and share it as I enjoy this beauty as much as a fresh and warm loaf out of my oven!
Sweet and Braided Yeast Bread
For one braided loaf of bread you need
plain flour 500g / 1 pound
dry yeast 1 sachet (7g / 1/4 ounce)
granulated sugar 60g / 2 ounces
salt 1/2 teaspoon
butter, melted, 100g / 3.5 ounces
milk, lukewarm, 150ml
organic eggs 2
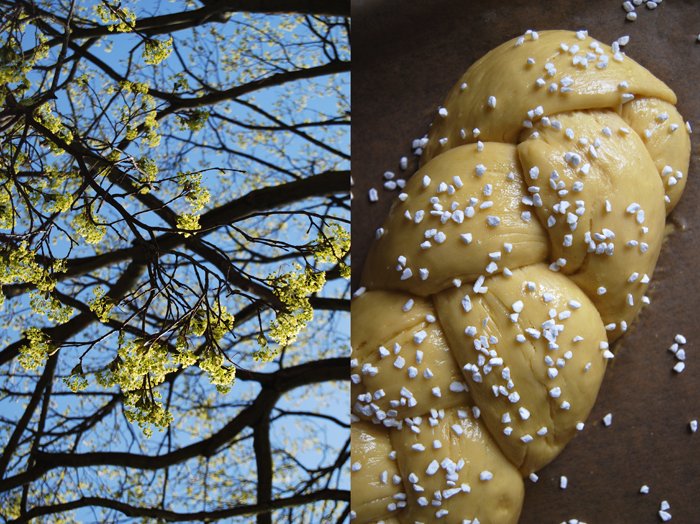
pearl sugar, for sprinkling
organic egg yolk 1, for the glaze
milk 1 tablespoon, for the glaze
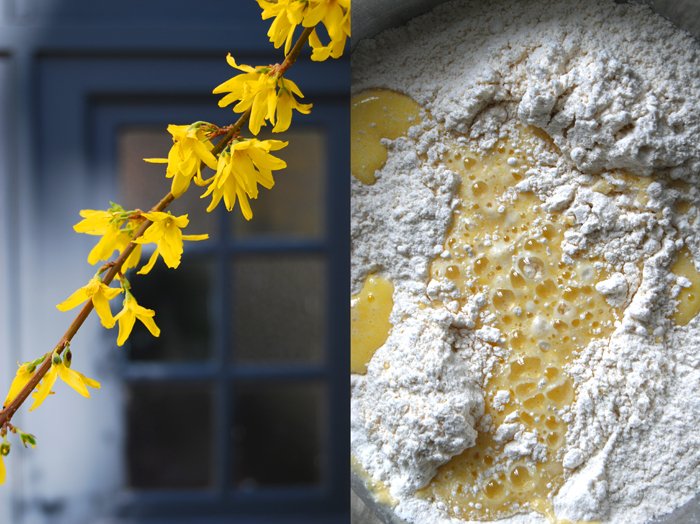
Combine the dry ingredients. Mix the hot melted butter with the cold milk and the 2 eggs, this way the liquid mixture will have the right lukewarm temperature (check with your finger). Mix the dry and the liquid mixture with your dough hooks for 5 minutes until well combined. Continue kneading with your hands for a few minutes until you have an elastic dough ball. Put the dough back into the bowl and cover with a tea towel. Let the dough rise in a 35°C / 95°F warm oven for 70 minutes (I tried it for 60 minutes but the last 10 minutes make a big change). This works really well but make sure that your oven is set to top/ bottom heat and not to fan.
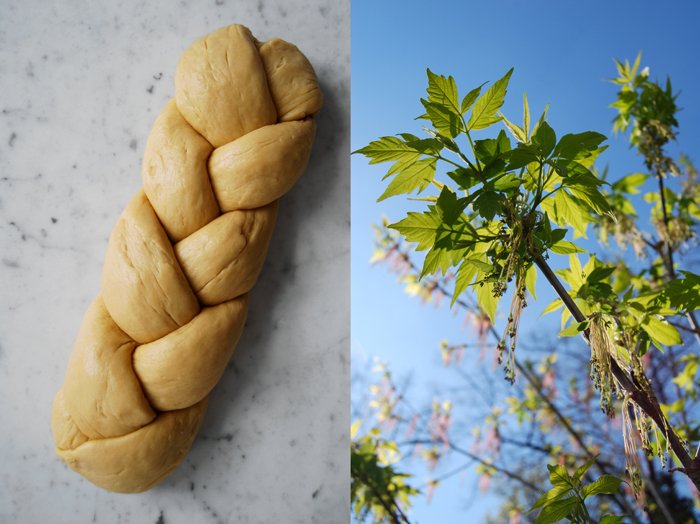
Take the dough out, punch it down and knead for 1 minute. Divide it into 3 pieces and roll them into long sausage shapes. Lay the ends of the rolls on top of each and start to braid them tightly. Bend both ends under the loaf and put on a baking sheet lined with parchment paper. Let it rise for 30 minutes, covered with a tea towel, in the warm oven.
Set your oven to 200°C / 390°F (top / bottom heat).
Whisk the egg yolk and milk for the glaze, brush the bread, sprinkle with pearl sugar and bake in the oven for 10 minutes before you turn it down to 180°C / 355°F and bake for another 15 minutes until golden brown.


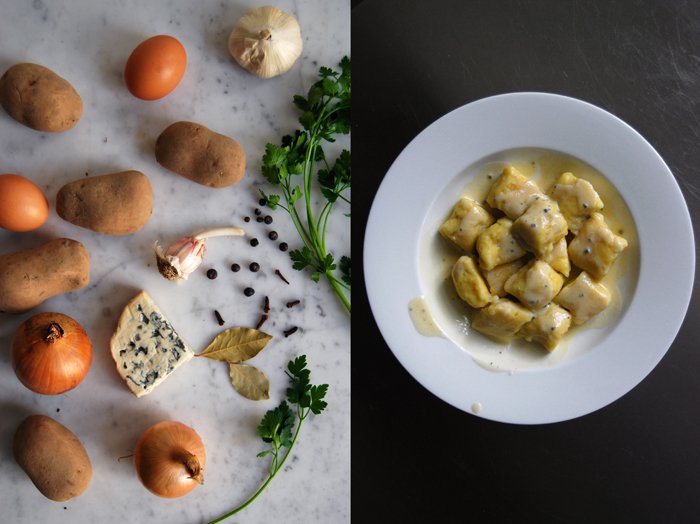
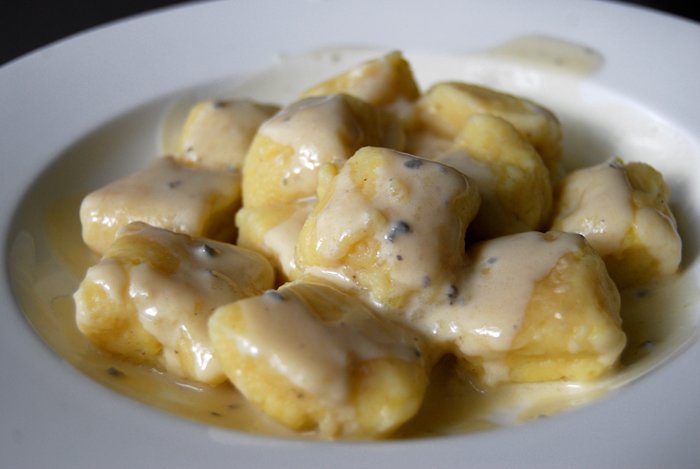
Gnocchi with Blue Cheese Sauce
As soon as the temperatures start to rise the Mediterranean influence on my cooking begins to increase accordingly. I feel like olives, fresh herbs, capers and garlic, lemons and seafood, and all the fresh vegetables which finally start to grow. The tomatoes and cucumbers start to taste strong again and yesterday I bought my first bottle of rosé wine of the year, another sign of the official start of the new season!
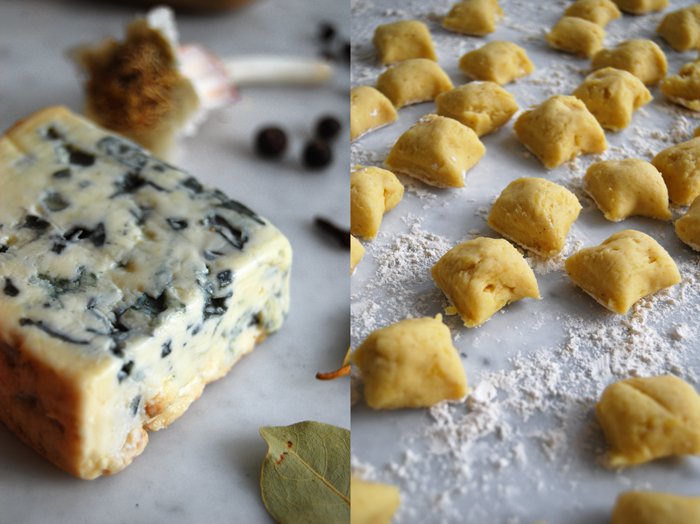
From now on, I could just live of pasta, vegetables, simple dishes which sparkle through the ripe flavours of their ingredients, basically Italian cooking which refines minimal dishes to perfection and celebrates each single element of a dish. A great example are gnocchi. After I ate my own, homemade gnocchi for the first time I couldn't enjoy the store bought ones anymore. The dough is so easy to make, potato and nutmeg as the dominant flavours, flour, eggs, butter, salt and pepper mixed together and shaped into little gnocchi. Far less complicated than homemade pasta as long as one rule is obeyed, the potatoes must have cooled off before mixed with the flour. Apart from that it's an unbelievably easy dinner and so delicious that some sage leaves fried in olive oil and some grated parmesan would be enough to make me happy. If only there wasn't this amazing blue cheese sauce that I fell in love with a couple years ago. It's smooth but aromatic, cooked with garlic, onions, parsley, juniper berries, cloves and bay leaf which are taken out before the blue cheese is mixed in. I use Fourme d'Ambert cheese from the Auvergne region in France which is creamy but very strong in taste, the gnocchi just need to be glazed with the sauce, enough to enjoy all the intense aromas.
In January I made my wintery gnocchi with pumpkin and potatoes and a walnut pesto. Sometimes I mix spinach into my gnocchi dough which I have to make again, soon, as there is nice and crunchy spinach at the moment!
Gnocchi with a Fourme d'Ambert Blue Cheese Sauce
It's best to use floury potatoes with a fluffy and dry texture for the gnocchi dough. Keep in mind that you don't mix the flour with the cooked potatoes unless they are absolutely cold.
For 2-3 people you need
For the Blue Cheese Sauce
small onion, chopped, 1
garlic, cut in half, 1
butter 30g / 1 ounce
milk 125ml
heavy cream 125ml
white wine 150ml
fresh parsley 3 sprigs
cloves 2
juniper berries 2
bay leaf 1
black peppercorns 4
blue cheese such as Fourme d'Ambert 45g / 2 ounces
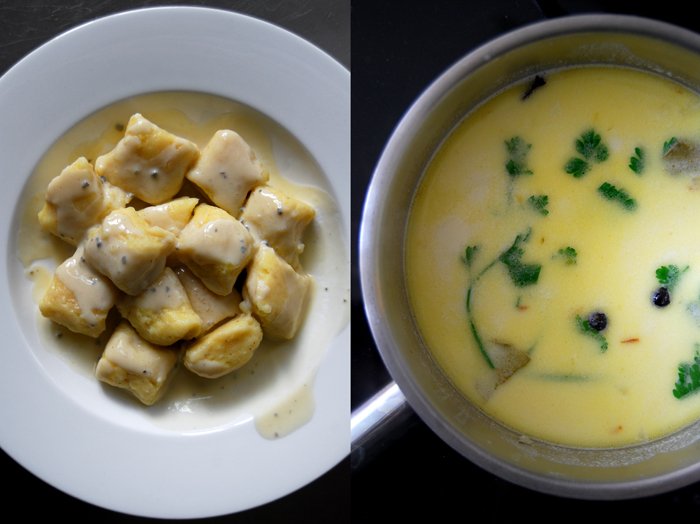
In a sauce pan, fry the onions and garlic in butter until golden and soft, add the other ingredients except the blue cheese and bring to the boil. Let it simmer for 10 minutes on medium heat, pour through a sieve and add the cheese. When the cheese has melted, let the sauce simmer for 5-8 minutes on low heat until it starts to thicken slightly. Season with salt and pepper.
For the Gnocchi
potatoes, cut into cubes, 450g / 16 ounces
butter 30g / 1 ounce
organic egg yolks 2
plain flour 125g / 4.5 ounces
nutmeg, grated
salt 1 1/2 teaspoons
black pepper
Cook the the potatoes in salted water until soft (around 15 minutes). Drain them when they are done. Press the drained potatoes through a potato ricer and mix immediately with the butter and egg yolks. Put in a cool place (in the fridge) until the mixture is completely cool.
In a large pot, bring plenty of salted water to the boil. Set the oven to 100°C / 210°F and put an ovenproof dish inside. You will need it to keep the gnocchi warm while you cook them in batches.
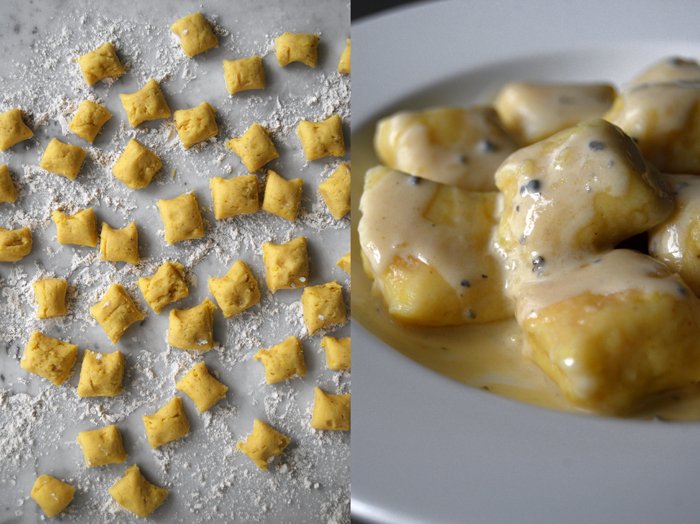
With a spoon (or your hands), mix the cold potato mixture with the flour, salt, nutmeg and pepper until combined. Dust your hands with flour and roll the dough – in batches – into sausage shapes on a well floured working surface and cut off 3x3cm / 1x1″gnocchi. If you like you can roll them on a fork for the typical gnocchi pattern. Put them onto a floured baking sheet.
Cook your gnocchi in batches in the boiling water so that they can float. After 3 minutes, when they start to come up and float on the surface take them out with a slotted ladle and drain them. Keep them in the warm dish in the oven until you are done with the last batch.
Arrange the gnocchi on plates and pour some of the blue cheese sauce over them.

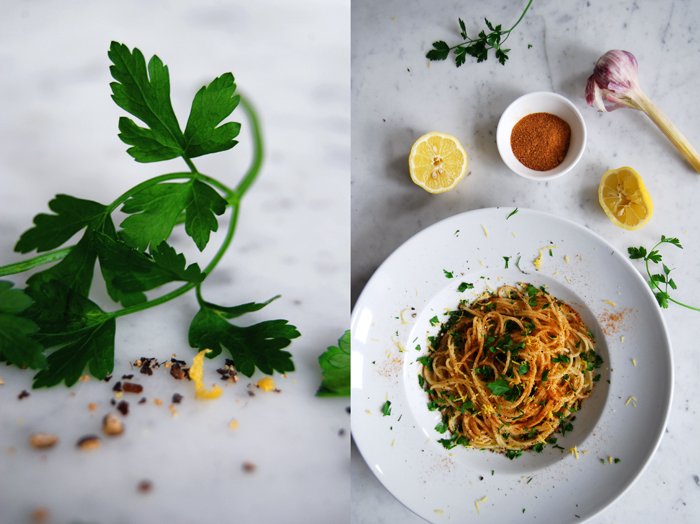
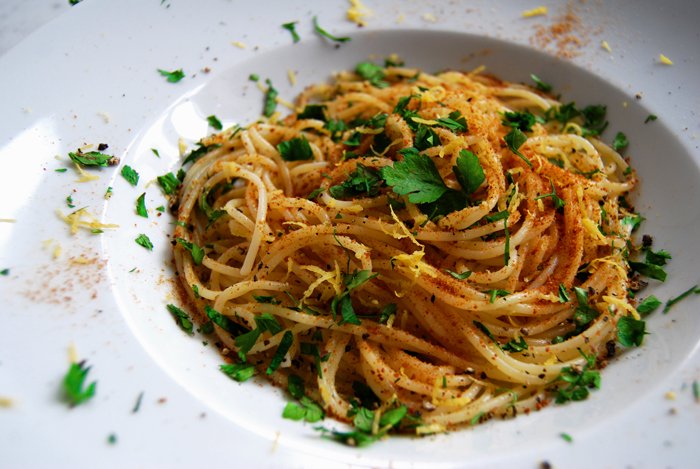
Sicilian Spaghetti with Bottarga di Tonno
Marzamemi! This is the name of a picturesque fishing village in southern Sicily in the Syracuse region. It's right by the sea, with two churches - an old and a new one - both dedicated to the village's patron San Franceso built around the historic piazza which is, as in every Mediterranean village, the lively centre especially at night.
Two years ago we spent an evening in Marzamemi, strolled through the narrow alleys, between the old limestone houses where fishermen used to live. We passed a beautiful artisan market which was still open at night and enjoyed the sight of all the restaurants which had placed their long tables outside in the piazza where families already filled the air with laughter and the delicious smell of seafood. We couldn't wait any longer to join them and went straight to the restaurant at the sea where our table was waiting for us, but as we wanted to sit down we spotted an old storehouse with a big, open gate and people walking in and out. Curiosity was still stronger than our appetite, so we took a look.
We went inside a huge hall piled high with fish products, mainly made of bluefin tuna but also anchovies, sardines, mackerel, and swordfish. I discovered food I had never seen before, tuna salami for example, I had to buy it! It tasted interesting, salty, something I would have to eat a few times and try out a few combinations to get used to it. They also sold the famous Bottarga di Tonno, the dried roe pouch of bluefin tuna. If it's in one piece, you slice it thinly over spaghetti, grated you sprinkle it over a quick pasta dish. Its taste is distinct and salty, it comes from a fish with a strong flavour and you can taste it!
I haven't eaten it since my last visit to Sicily so I was happy to finally open a jar of grated Bottarga di Tonno again and mix it with my pasta. I like to add some lemon (juice and zest), garlic, parsley and coarsely crushed black pepper.
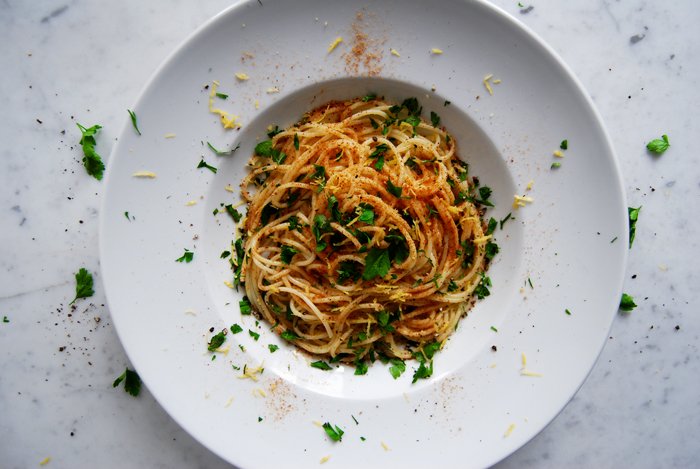
Spaghetti with Bottarga di Tonno, Lemon and Parsley
For this meal I suggest you warm up the plates in the oven.
For 2 people you need
spaghetti 200g / 7 ounces
olive oil 6 tablespoons
garlic, cut in half, 2 cloves
grated Bottarga di Tonno 4-6 heaping teaspoons
freshly squeezed lemon juice 1 tablespoon
lemon zest 2 teaspoon
fresh parsley, chopped, 4 heaped tablespoons
salt and coarsely crushed black peppercorns
Cook the pasta in lots of salted water till al dente.
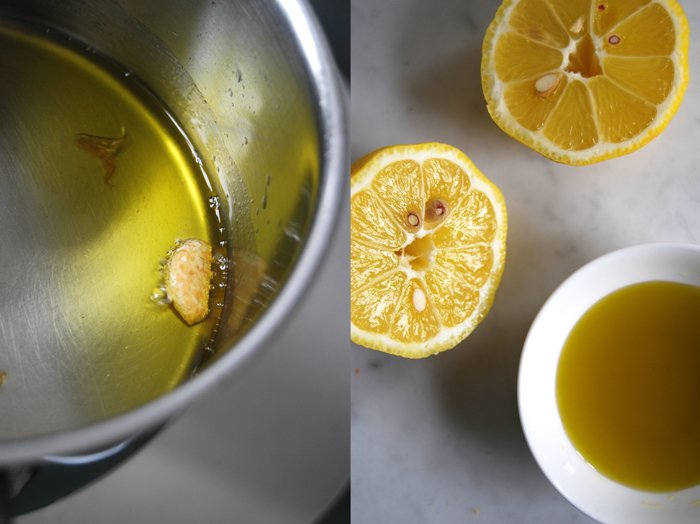
Heat up the oil in a sauce pan, add the garlic and take the pan off the heat, let it infuse the oil for a couple minutes and add the lemon juice.
After the pasta is mixed with the warm oil and divided between the plates, sprinkle with parsley, lemon zest, pepper and salt and add the bottarga di tonno to taste.


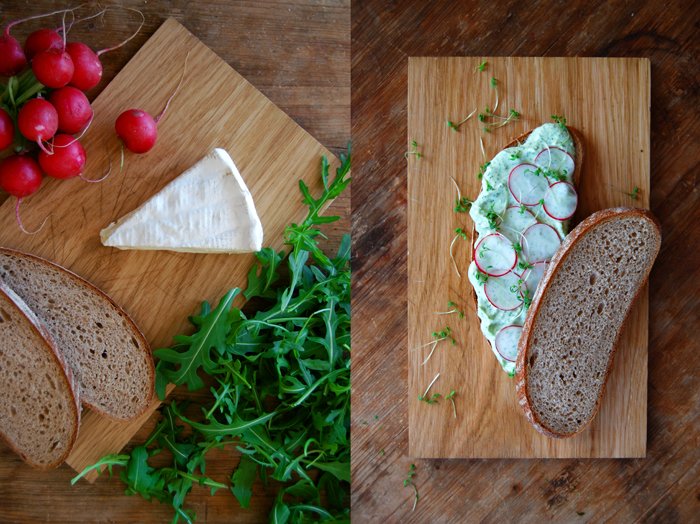
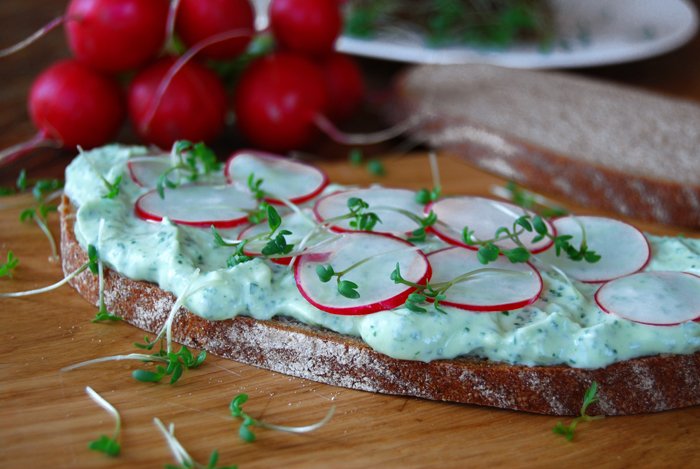
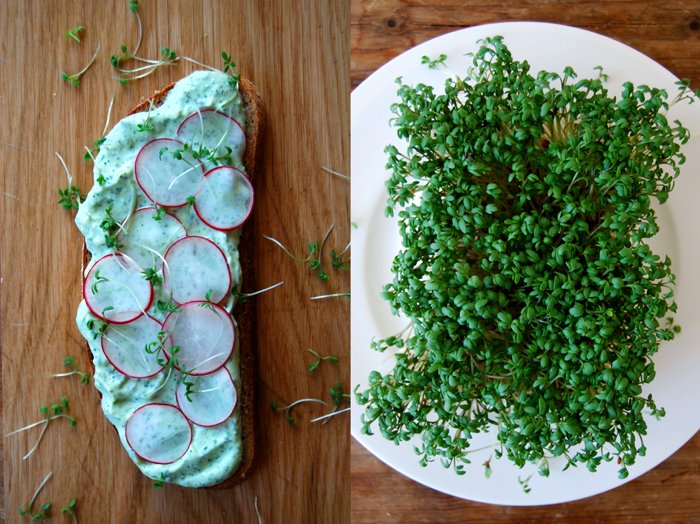
A Bavarian Sandwich with Obatzda and spicy Radish
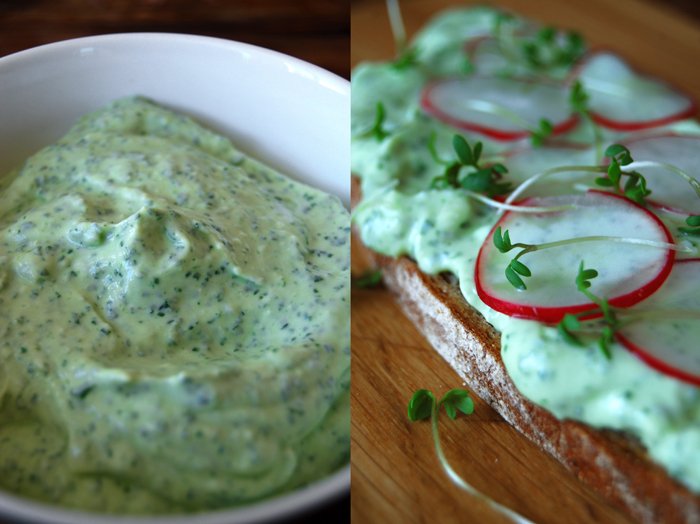
In a Bavarian beer garden, you can be sure you will find plenty of beer, sausages and at vesper time a traditional delicacy which is served with bread, I'm talking about Obatzda also known as Obatzter meaning mashed. Drinking beer in Bavaria demands strong physical condition as it's served in a 1 liter mug, the "mass". You may imagine that it's quite helpful to have some rich food on the side when drinking such quantities (obviously people don't stop after their first "mass" of beer). Obatzda is one of them and it's offered in huge varieties. It's basically a cream made of aged cheese leftovers often mixed with either herbs or spices like hot paprika powder or caraway seeds, onion, garlic, a shot of beer, horseradish, butter, cream cheese, I could continue endlessly. It is, again one of those dishes that evolved in each region with each personal preference and local tradition.
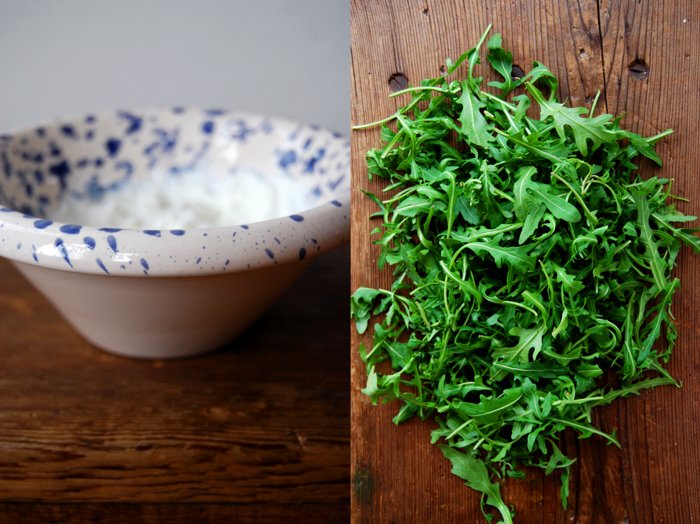
My Obatzda is green, it's based on rucola and a middle-aged camembert and cream cheese. I added some radish and watercress to bring out the rucola's mild spiciness next to the rich and tangy cheese. White bread wouldn't have managed to keep up with these strong flavours, I used dark spelt bread. This sandwich needs a dense and juicy texture, strong bread with a nice crust. What is great about this dip is that you can really play around with the leftovers of your fridge. Spring onions, dried tomatoes, olives, all the ingredients mentioned above, you can create your own Obatzda after your own preferences. After your selection is made, mix everything in a blender or mash with a fork and spread on a slice of bread, a thick layer, this is a luscious Bavarian sandwich after all!
For a little bowl of Obatzda, I mixed 30g / 1 ounce of rucola with 50g / 2 ounces of aged camembert, 150g / 5.5 ounces of cream cheese and 1 tablespoon of heavy cream, seasoned with salt and pepper to taste. Depending on the camembert's age and tanginess you might need more or less cream cheese, the same with salt. When the dip is spread on a slice of bread, sprinkle with thin slices of radish and some watercress.

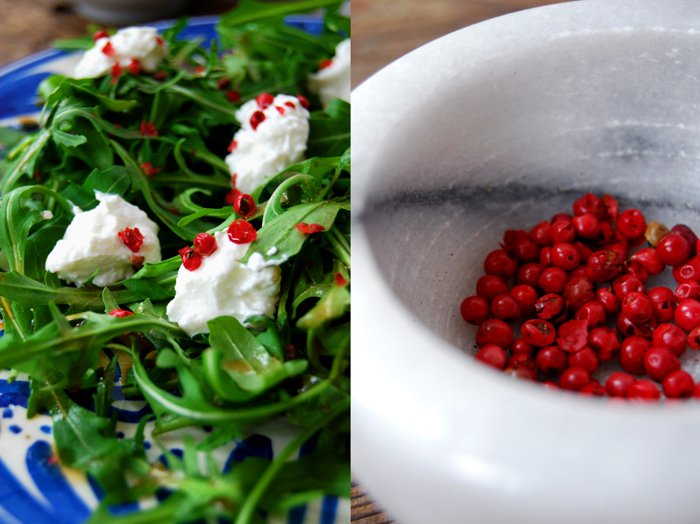
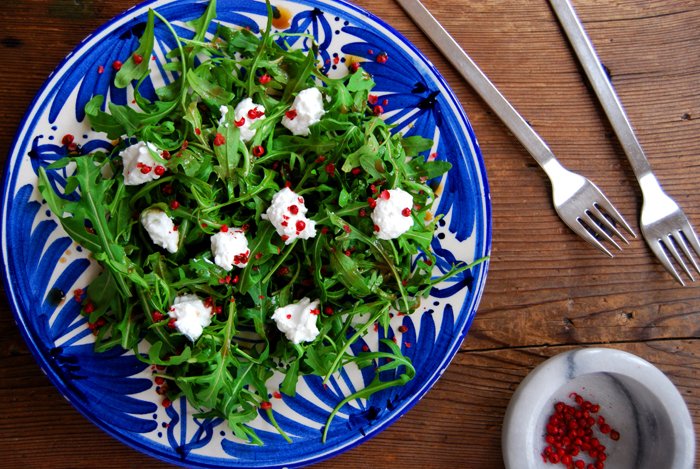
Rucola Salad with Goat Cheese, Honey Dressing and Pink Peppercorns
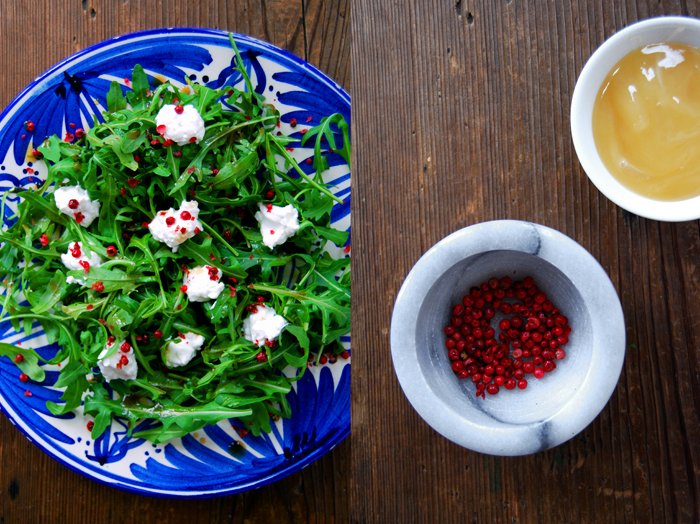
Here's the salad which accompanied yesterday's salmon with spice crust, rucola with goat cream cheese, crushed pink peppercorns and a sweet honey Balsamico vinegar dressing! I wanted to use both the pink and the green peppercorns which I had just bought at the market, not in the same dish but in the same meal. The spiciness of the green pepper fit perfectly with the crust I chose for the fish but my salad, sweet and milky, needed a mild and less spicy aroma, pink peppercorns. The berries matched the sourness of the creamy cheese very well which was so young that there was only a hint of goat milk. I could have used mozzarella instead but I wanted this special, slightly sharp aroma which balanced out the sweetness of my vinaigrette on the other side.
Usually, I make a quick dressing for my salads, 3 tablespoons of olive and 2 tablespoons of balsamic vinegar plus salt and pepper, but this salad asked for more. I kept the ratio of vinegar and oil but I mixed my dark balsamic vinegar with the white one and added 1 small teaspoon of honey (depending on the sweetness you want to achieve you might need more or less honey). It turned out thick, sticky and syrupy, exactly what I wanted! For 2 I spread 2 handfuls of rucola leaves on plates and sprinkled 125g / 4.5 ounces of fresh goat cream cheese in big lumps on top. I drizzled the dressing over the leaves and garnished my salad with 1 tablespoon of crushed pink peppercorns. It would have made us just as happy as a light and easy lunch on its own. I have to remember that, it will be perfect on a hot summer evening!

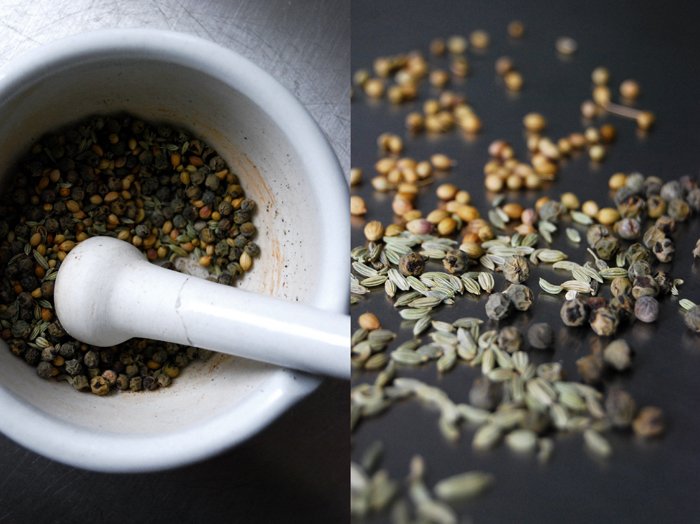
Salmon with a Green Pepper, Coriander and Fennel Crust

Last week's visit to Reims and the delicious seafood I enjoyed during my short stay in France inspired me to cook fish again. I went to the market and spotted a nice fillet of salmon and my decision was made! It looked firm, nice in colour and it smelled fresh like the sea. I like salmon in combination with aromatic flavours, in January I wrote about my salmon with wintery spices baked in the oven, with bay leaf, juniper and cloves. I just restocked the jars of my spice box, my fennel and coriander empty within weeks, I'm often surprised how quickly! When I go to the market to buy spices I always take an extra few minutes to look around at what's on offer. All the little bags and boxes filled with precious powders, berries, herbs from far away countries, so many different smells and colours, it's a sensual journey to another world! I always buy more than there is on my list, this time a package of green peppercorns came home with me unexpectedly. Green pepper berries are picked before they are ripe, they have a strong spiciness like black pepper but very aromatic, a bit flowery.
My pick was a good choice as I wanted to pack a thick crust of coarse spices on my salmon again, this time it's green pepper, coriander and fennel. Not a hint of spices, more of an attack, but the fish can handle that. Even more so, it was delicious. First, I thought I went a bit overboard with the spicy pepper but after the first bite I was happy I did. To prevent the crust from falling off I glazed the fish with an egg on the fleshy side, it didn't effect the taste but kept the spices where they should be.
For 2 I had a 300g / 10.5 ounces fillet of salmon, brushed with 1 mixed egg (just on the fleshy side) and covered with a mixture of green peppercorns, fennel seeds and coriander (1 tablespoon of each), crushed coarsely in a mortar, and some salt. I fried the fish in a large pan in olive oil, 5 minutes on each side on medium heat, the skin side first before I flipped it around and added some more oil, carefully so that the crust wouldn't fall off. We just had some slices of baguette and a salad on the side, my favourites with fish, apart from a glass of white wine.


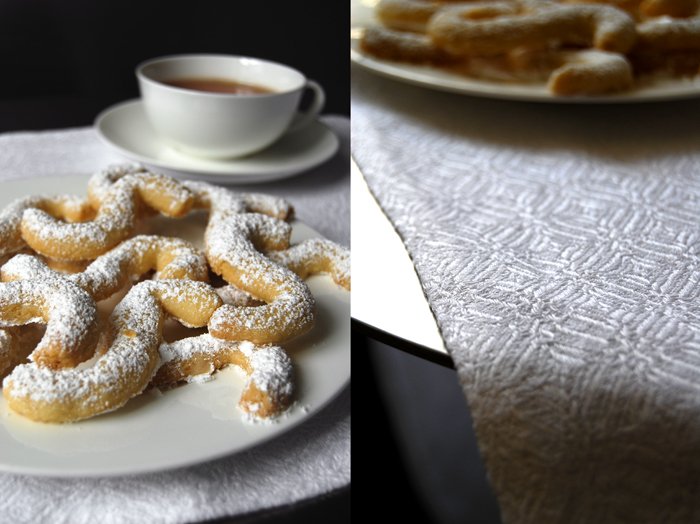
Essijiet - Maltese Tea Time Cookies with a shot of Vermouth
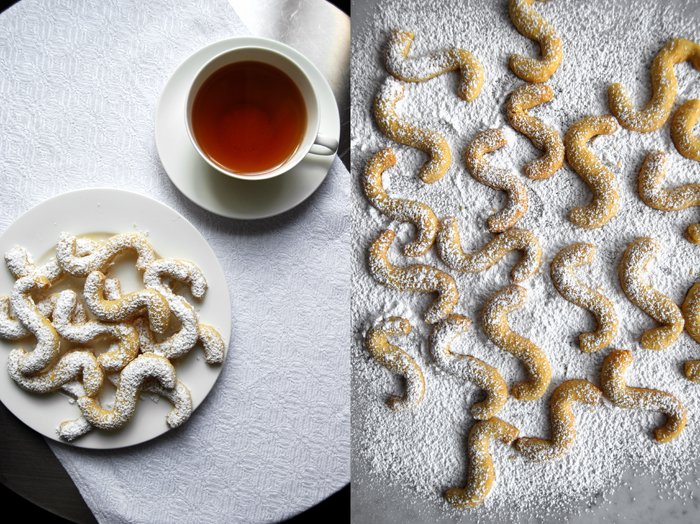
When I'm on the phone or video chat with our family in Malta, you can be sure it will go on for hours, it will involve many people, coming and going, lots of laughing and very often the exchange of recipes. Especially when I talk to Granny Edith who has been cooking and baking all her life, so you can imagine her large recipe collection, influenced by her mother, grandmother and all the close relatives and friends which are quite numerous in a Maltese family. I found so many traditional dishes in her collection, true treasures! Like everybody else in the family, I love to sit with Edith at her kitchen table in her beautiful old villa in Msida at the sea, talking about life, cooking, men, fashion, the offers at the vegetable man and the butcher, normal daily life, it feels so easy on this island! We enjoy a cup of tea, some sweets from our local confectionary (which is the best in Malta in our opinion) and appreciate every second!
Recently I've been talking to her about baking and she handed some recipes over to me which caught my attention. One is a traditional tea time cookie recipe from her mother-in-law Maria, she used to make them for the family, Edith continued the tradition and now she passes it on to the next generations. It's a very easy cookie recipe, made with so little ingredients that I thought I had left some out when I started preparing the dough. It's just butter, flour, baking powder, salt, sugar and a shot of vermouth making a delicious cookie, fine in taste, buttery and crumbly. I couldn't have asked for more for tea time! The cookies don't really have a proper name apart from the family given one, referring to their shape they are called Essijiet, meaning many "S" in Maltese.
Essijiet - Maltese Tea Time Cookies
For around 60 cookies you need
plain flour 300g / 10.5 ounces
baking powder 1/2 teaspoon
granulated sugar 1 tablespoon
a pinch of salt
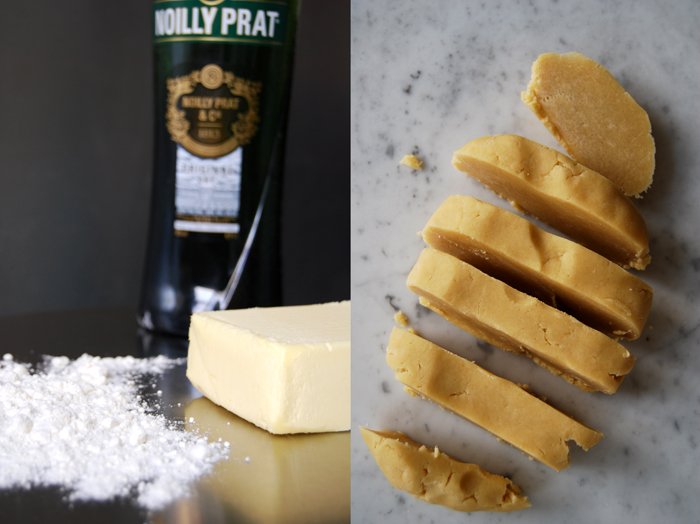
butter 200g / 7 ounces
vermouth 2 tablespoons
icing sugar for dusting
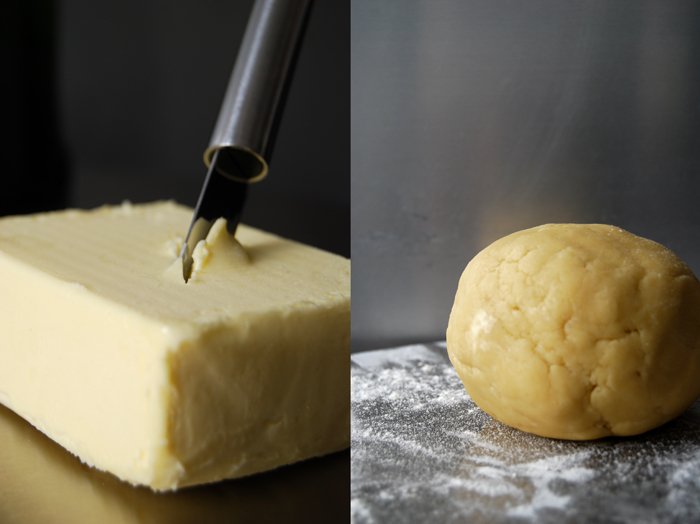
Combine the flour with the baking powder, sugar and salt. Cut the butter with a knife into the flour until there are just little pieces of butter left. Continue with your fingers and work the butter into the flour until combined (there shouldn’t be any lumps of butter left). Add the vermouth and continue mixing with the hooks of your mixer until you have a crumbly mixture. Form a ball, wrap in cling film and put in the fridge for an hour or in the freezer for 15 minutes.
Set the oven to 175°C / 350°F and prepare a baking sheet with parchment paper.
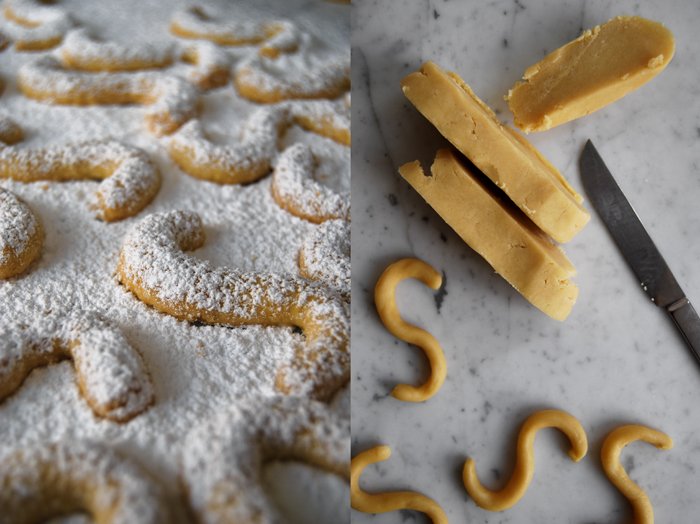
Cut thick slices off the dough, make thin rolls and cut into 12cm / 5" pieces. Form the cookies into an S-shape and bake for 9 minutes or until lightly golden (they stay light in colour). Let them cool for a couple minutes and dust with icing sugar.

Wild Garlic Soup to start off the Spring
Walking through the forest is one thing I miss the most living in the city. Its earthy smell, the musty air captured by the trees changing with the seasons makes me feel at home. Especially in spring, when the green comes out again and everything smells light and fresh with the first flowers starting to blossom. I want to walk on soft soil watching nature unraveling around me!
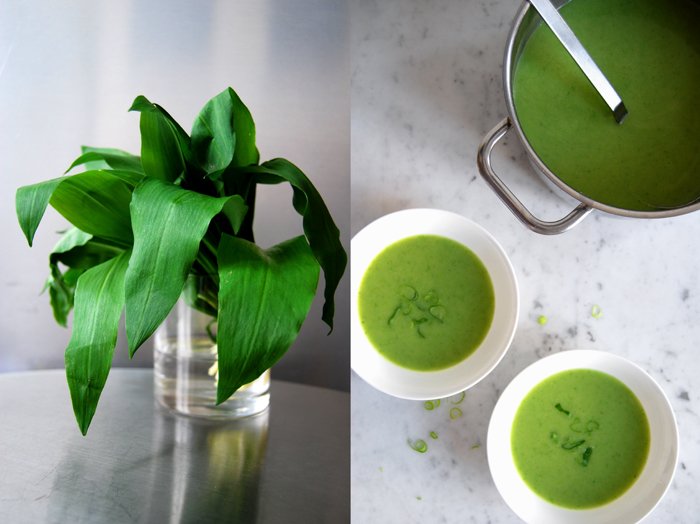
One of the most distinct smells you can find at the moment when walking though a European forest close to a river or lake is the smell of garlic, wild garlic. Coming from a little plant which covers the ground in large areas and looks similar to lilies of the valley. It's a wild relative of chives also known as ramps, ramsons, buckrams, wood garlic or bear's garlic as they must be quite taken by it. In taste it's similar to chives but with a unique touch to it, spicy, a bit like garlic but fresher, more "green". The leaves are best when young and fresh, great in pesto, soups or to spice up other vegetables and meat.
I'm totally with the bears, I love cooking with it and when I spotted it at the market I got excited and had lots of recipes on my mind. Inspiration for the weeks to come! I will start with a tangy but smooth soup, the leaves of two bunches of wild garlic, potatoes, onion and a few spring onions on top. It doesn't take much to make this springy soup of the forest!

Wild Garlic Soup
For 4 people you need
wild garlic (ramps), rinsed and stems cut off, the leaves of 2 bunches (around 100g / 3.5 ounces)
potatoes, cut into cubes, 750g / 1.5 pounds
onions, chopped 2water 1500ml
heavy cream 180ml
salt and pepper
olive oil for frying
spring onion, cut into thin slices, 1, for the topping
In a large pot, bring the water to the boil and cook the wild garlic for 2 minutes. Take it out with a slotted ladle, rinse under cold water for a few seconds but keep the boiled water! Fry the onions in some oil until golden, add the potatoes, some salt and the water used to cook the wild garlic and cook for 12 minutes or until the potatoes are soft. Add the wild garlic and cream and mix in a blender till smooth. Season with salt and pepper and sprinkle with spring onions when served on plates.

Blood Orange Rosemary Sorbet
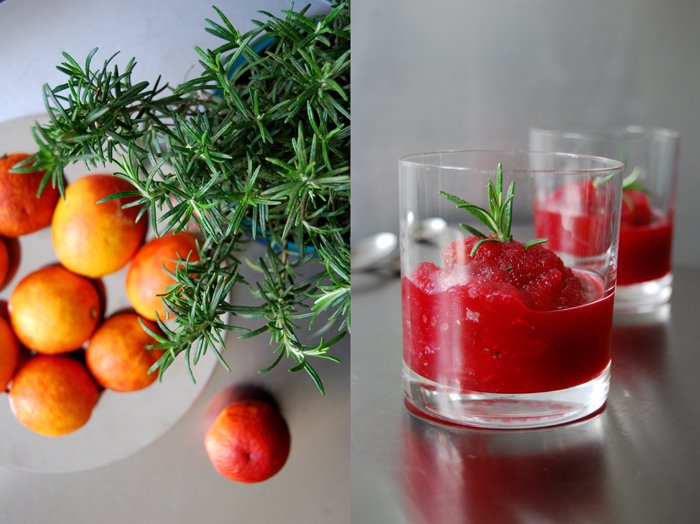
When I bought our ice cream maker a couple years ago, I didn't use it at first. I'm not crazy about ice cream although I have a sweet tooth and I can eat sweets all the time - if it's frozen I have to be in the mood. Things changed after I made my own first ice cream, I think it was strawberry, very creamy and far better, fruitier and less sweet than most I had tried before.
I always start my ice cream production in spring as I prefer to make it with fresh fruit, strawberry, blueberry, later in the year I use plums as well, everything sweet and aromatic finds its way into my ice cream maker. It's still quite early in the year and the temperature is far from summery but spring officially starts today, the perfect day to begin the production! Local berries aren't ripe yet so I have to think of something else. I find my inspiration in a frozen delicacy I love to eat in summer when we're in Malta, a fruity granita or sorbet! I love to walk along the promenade at the sea in the late afternoon when the sun is more forgiving, a cup of sour lemon granita in my hand, melting as soon as I dip the spoon into the crunchy bits of ice!
Today, it's not lemon but blood orange. I want to use them as long as they are still juicy and sweet. I'm in the mood for a sorbet with more complex flavours so I add a few chopped needles of rosemary. The result is delicious and the recipe a keeper, I will definitely make another batch soon!

Blood Orange Rosemary Sorbet
For 4 big portions of sorbet you need
freshly squeezed blood orange juice 500ml
juice of 1 lemon
icing sugar 50g / 2 ounces
fresh rosemary, finely chopped, 2 teaspoons
Mix the ingredients well and put into an ice cream maker for around 25 minutes until almost frozen. Serve immediately or keep in the freezer.


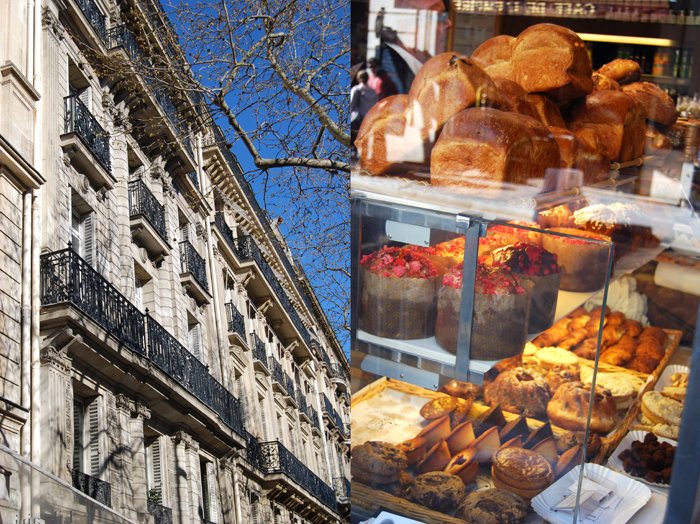
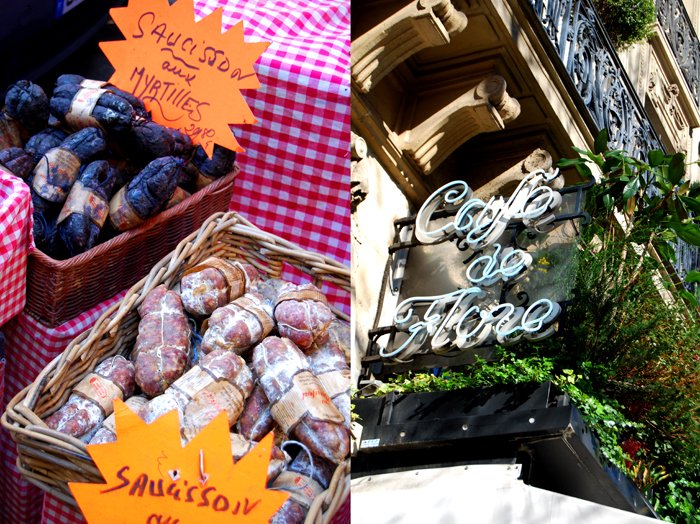
A visit to Reims and the Mystique of Champagne

Paris, Reims and Champagne, I had an exciting start to the week! I was invited by Champagne Jacquart to join a Vins Clair tasting in Reims, the pure, still wines which form the foundation of every Champagne and I was happy to get a little insight into the mystique and the making of this wonderful sparkling drink from the northeast of France.

I was lucky, my trip started with a bright Sunday in Paris. Warm and sunny, it couldn't have been better, I walked down the boulevards, along the Seine passing the beautiful Musée d'Orsay. The charm of this city is contagious, it just puts a smile on my face! I took a rest at a romantic bistro on Rue du Bac in the VIIe arrondissement and enjoyed an amazing Terrine de Canard accompanied by a glass of Sancerre. Life at its best, wonderful! A visit to a boulangerie and patisserie reminded me of my love for the French baking tradition. I left with bags full of bread, a delicious dark loaf and a fine Pain Platine and, of course, some sweets. I'm obsessed with Éclairs au Café, so as soon as I stepped out of the boulangerie, I opened the bag and had a big bite of my favourite éclair. It was delicious, as expected! In the evening, I joined a few other bloggers and journalists at dinner who were also invited to learn more about Champagne. We were all excited about what the next day would bring!

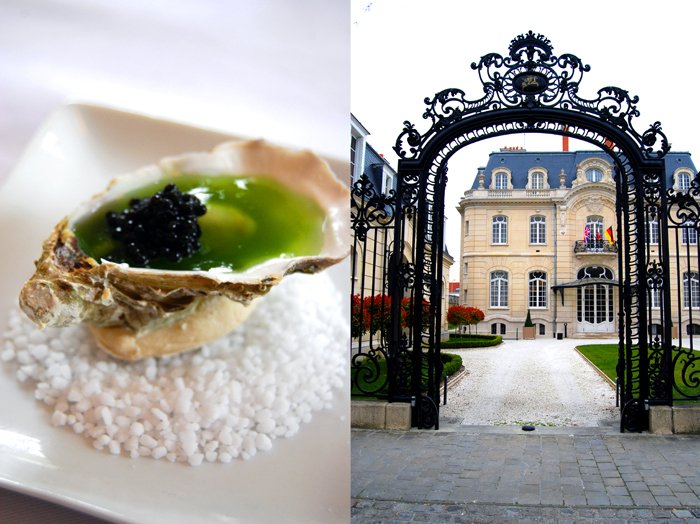
Diane from Jacquart welcomed us to their headquarters in Reims. Her sweet and lively way and her love for Champagne made me curious to find out more about this legendary place. Reims is located in the Champagne-Ardenne region, 130km / 81 miles northeast of Paris. We took the TGV high-speed train and arrived just 40 minutes later! After a short drive we turned into the Boulevard Lundy in the center of historic Reims. We stopped in front of a beautiful villa, with a curved pebble stone driveway surrounded by boxwood bushes. I walked through the iron gates and entered another world! The house, called "Hotel de Brimont", was simply stunning. It was built in 1896 and is surrounded by all the other prominent Champagne houses. In this prestigious neighborhood, a few houses form the center of the Champagne world!

Jacquart's history is different to other big Champagne houses, it was written by a few visionary growers who decided to form a cooperative to launch their own Champagne instead of supplying their grapes to other Champagne houses in 1964. In the late 90's, 3 regional cooperatives of growers united to form the Groupe Alliance Champagne and bought the established Jacquart brand. Today, 1800 growers make up this alliance, all together owning more than 7% of the surface area of the Appelation Champagne, 60 crus (villages) in the Côte des Blancs, Montagne de Reims, Vallée de la Marne and Côte des Bar. 10 of them are classified as Grand Crus and 22 as Premiers Crus assuring grapes from the finest terroirs in the Champagne! It started as a vision and led to great success, the growers holding shares in the brand guide its direction and development!
The grapes used for Champagne are Pinot Noir, Pinot Meunier and Chardonnay, they ripen on the slight hills, rich in chalk, and make the cuvée, the blend for the Champagne. The secret of each cuvée lies in the composition which is where Jacquart's oenologist Floriane Eznack comes in, she's young but very experienced, open minded and absolutely passionate about her product. Together with her team she finds the right composition for the different cuvées every year, mixing them in graduated tubes, trusting their fine senses to feel the wines' temper and style, to let them express themselves within the blend carefully, without letting a single one becoming too overpowering. It's a science but above all, an art!

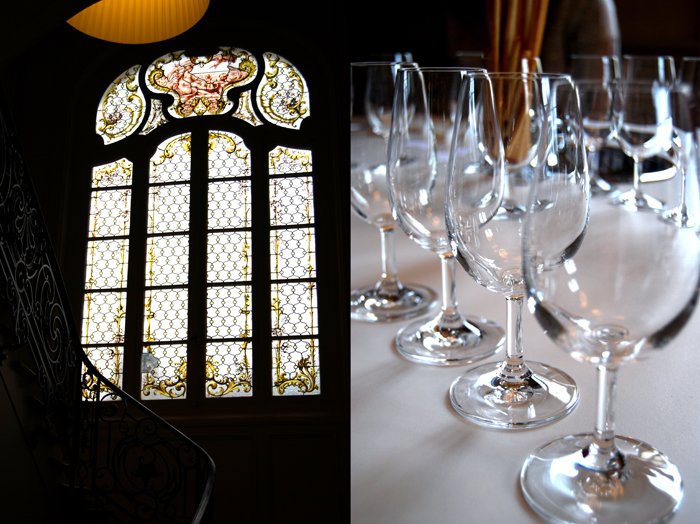
Directly after the harvest which is made by 100.000 pickers every autumn, the grapes are pressed separately for each cru and filled in stainless steel tanks. The first fermentation creates the Vins Clairs (clear or still wines) after a filtering process. Around 4 months later, the oenologist assembles the different Vins Clairs to create the cuvée. For example the Cuvée Brut Mosaïque, is made of 50 different wines. I tasted 7 different Vins Clairs at Jacquart and it's hard to imagine how one can develop a memory for so many different tastes! When the right composition is found, the wine is filled in bottles together with a small amount of yeast and sugar. In the following 8 weeks, gas starts to develop in the bottles turning the still wine into sparkling wine. After more than 15 months (or 3 years for the Brut Mosaïque and 5-6 years for vintage wines) in a horizontal position, the bottles are repeatedly shaken for 21 days (the remuage or riddling), gradually tilting the bottle neck down and drawing the sediments into the neck. These sediments are eventually removed by freezing the bottle neck through a quick cooling process. This forms a plug of ice which shoots out when the bottle is opened leaving behind a bottle of sediment free wine. Sealed with a cork the Champagne is ready to be sent into the world!
I learnt so much about Champagne, the grapes, Vins Clairs, I could write about so much more but Champagne is best when experienced personally, the region, its history and of course, the drink as well. So I can only recommend a visit to Reims!
As we enjoyed a wonderful lunch together, Floriane declared that Champagne is the celebration of the moment. I agree!
Here's the wonderful menu we enjoyed for lunch, created by Maison Schosseler in Taissy, and the accompanied selection of Champagne
Oysters in cucumber jelly with Aquitaine Caviar - Champagne Jacquart Blanc de Blancs 2006
Butterflied roasted langoustines, with a citrus and coriander infused olive oil - Champagne Jacquart Rosé Mosaïque
Braised sea bass with shellfish sauce and French garden vegetables - Champagne Jacquart Cuvée Alpha 2005
Finely sliced Comté with rocket - Cuvée Champagne Jacquart Nominée 2002
Apple pear and lemon éclair - Cuvée Champagne Jacquart Demi-Sec


