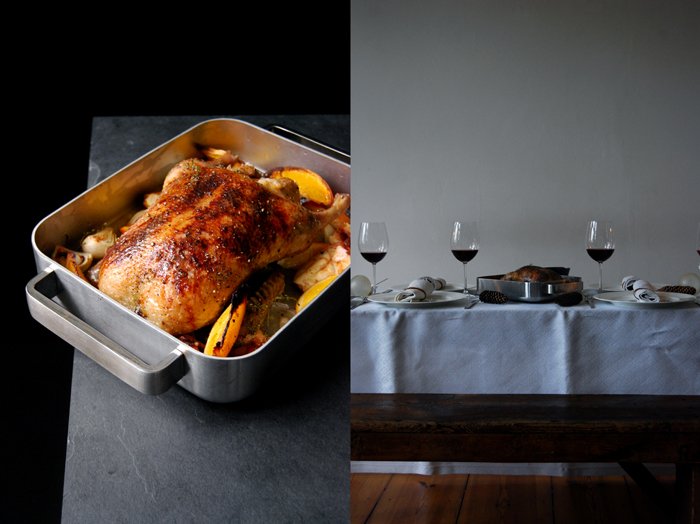
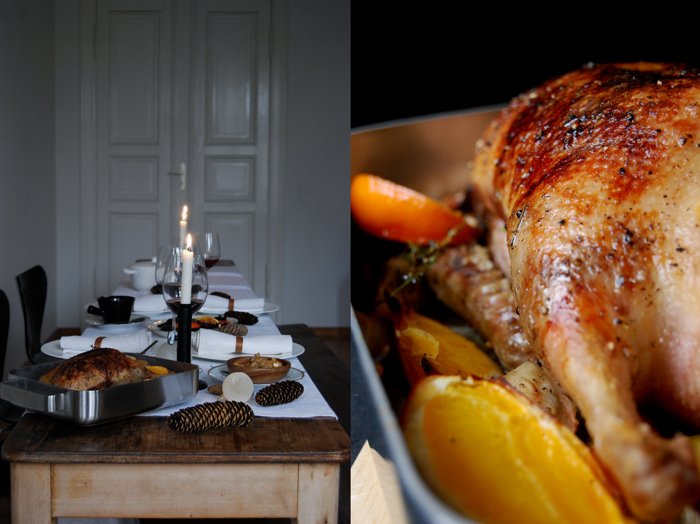
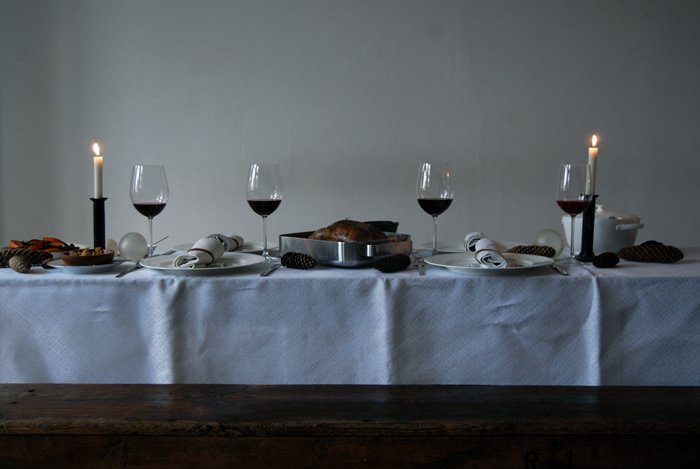
Slow-Roasted Duck a l'Orange with Lingonberry-Port Gravy & Chestnuts
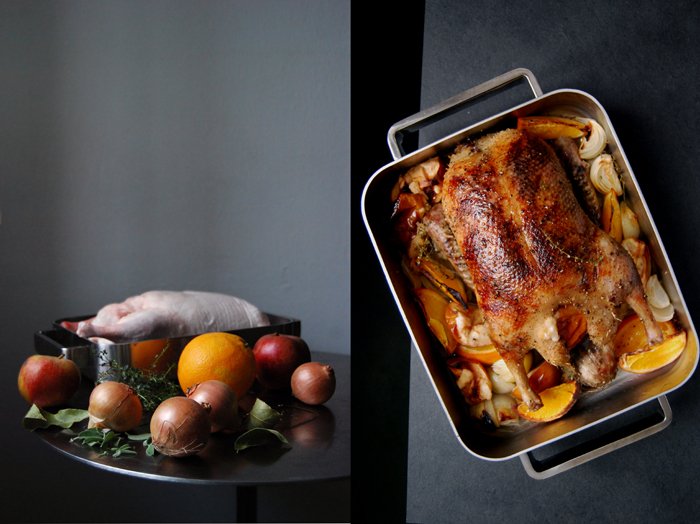
So many options for the Christmas table and so many choices to be made! In the past few weeks I've been coming up with various menus in my head, circling around roasts, stews and poultry, and so far, just one thing is set: there will be one (or rather two) slow roasted ducks on the table.
This is my little tradition, which I'm not willing to compromise on. The recipe I use guarantees the most tender meat, it tastes fantastic with red cabbage and spaetzle on the side, and gravy, of course. Lots of gravy, I love it. I often used to fill the duck with a rich meat-and-liver-stuffing similar to paté, a recipe by my Mama, but it's time to try something new.
For my pre-Christmas test dinner, I stuffed the bird with oranges, apples, chestnuts, onions and herbs. The focus is on the citrus' fruitiness, and letting that merge with the meat's juices - it makes such a fabulous sauce. I mixed in some lingonberry jam and port wine, a quick sauce that makes you hear the angles sing. I didn't change the method of cooking though, I worked with the same time and temperature as every year (3.5 to 4 hours at 85°C / 175°F, with the broiler switched on in the last few minutes). The result is so reliable that I wouldn't ever dare to mess with it. This is how my mother cooks her duck and I trust her blindly when it comes to poultry (with a few other things too).
She only failed once - and that wasn't her fault - and it was funny. Years ago, she made a huge turkey for the whole family that had to be roasted in the oven for hours. At one point, we covered it with foil, following the recipe, which seemed to work fine. When my mother took the turkey out of the oven we all gathered around a little table. I remember the pride on her face, the pride of a cook who's waited impatiently to show the fruit of hours of work. She lifted the foil but the bird was pitch black - it almost looked mummified. And to make it even worse, a leg fell off with a dull thud. In a dry tone, all my mother could say was "I think it's done." We looked at each other and couldn't stop laughing! The thermostat in her oven had broken and changed the temperature setting…
Although things didn't turn out as we had planned, what I love about this night is that, even years later, we still talk about it and it makes me laugh till I cry whenever I think about it and picture the scene of my family gathering around the burned turkey. We tried to make the best out of it and cut off a few (edible) pieces and enjoyed it with lots of gravy on sandwiches.
No matter how many lemons life gives you, turn them into something edible, always!

Slow roasted Duck a l'Orange with Lingonberry Port Gravy and Chestnuts
This recipe is also in my 2nd cookbook
365: A Year of Everyday Cooking & Baking
Serves 3-4
Olive oil
1 (5 ½-pound / 2.5-kg) duck, with neck and giblets reserved
2 tsp flaky sea salt
1 tsp black peppercorns, crushed with a mortar and pestle
3 medium onions, cut into thin wedges
2 medium, tart baking apples, peeled, cored, and cut into wedges
1 large orange, cut into thin wedges
1 handful vacuum-packed whole cooked chestnuts
1 small bunch fresh thyme
10 fresh sage leaves
1 bay leaf
¼ cup (60 ml) port (or brandy)
¼ cup (60 ml) full-bodied red wine
2 tbsp freshly squeezed orange juice
1 tbsp lingonberry jelly (or another berry jelly), plus more to taste
Fine sea salt
Finely ground pepper
Ovenproof cotton string
Preheat the oven to 175°F (85°C).
In a large, heavy pan, heat a splash of olive oil over high heat and sear the duck, turning, for a few minutes or until golden brown on all sides. Transfer the duck to a medium baking dish and carefully pour the fat from the pan into a small bowl. Season the duck, inside and out, with the flaky sea salt and crushed black peppercorns and rub into the skin. Stuff the duck with some of the onion, apple, and orange wedges, 1/3 of the chestnuts, 1 /2 of the thyme, 1 /2 of the sage, and the bayleaf and tie the legs together with ovenproof cotton string. Arrange the remain-ing onion, apple, and orange wedges, the chestnuts, thyme, and sage around the duck and roast, spooning a little of the reserved duck fat and the juices from the baking dish over the duck every hour, for 4 hours. After 4 hours, check to see if the duck is done by pricking the thickest part of a thigh with a skewer—the juices should run clear. Turn on the broiler for the last 1 to 2 minutes or until the skin is golden brown and partially crispy, but mind that it doesn’t burn.
Let the duck rest for a few minutes while you make the gravy: Heat 2 teaspoons of the reserved duck fat in a large, heavy pan over medium-high heat and sear the neck and giblets, turning, for 2 minutes. Add the port, stir, and then add the red wine and orange juice and bring to a boil. Remove the neck and giblets, whisk in the lingonberry jam, and season to taste with additional lingonberry jam, fine sea salt, and finely ground pepper.
Carve the duck and serve the meat with the gravy, onions, apples, oranges, and chestnuts.
For the sides, you can also make red cabbage and spaetzle (just she spaetzle, without the cheese and onions).


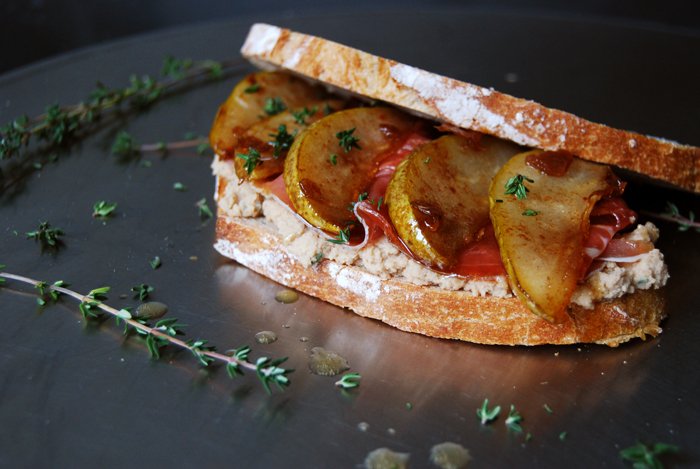
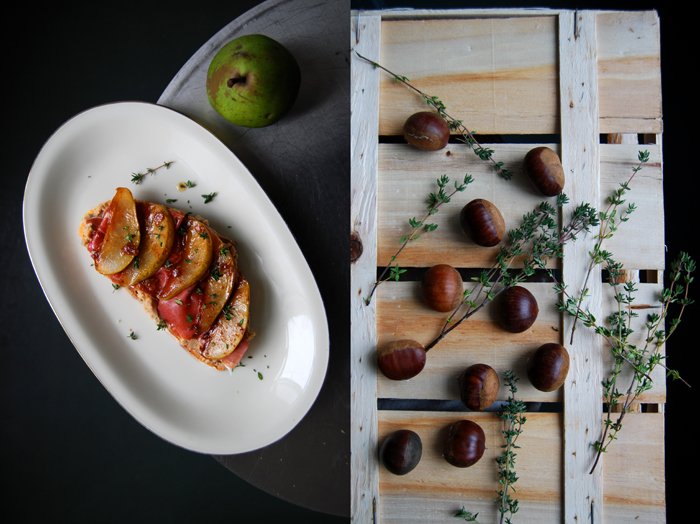
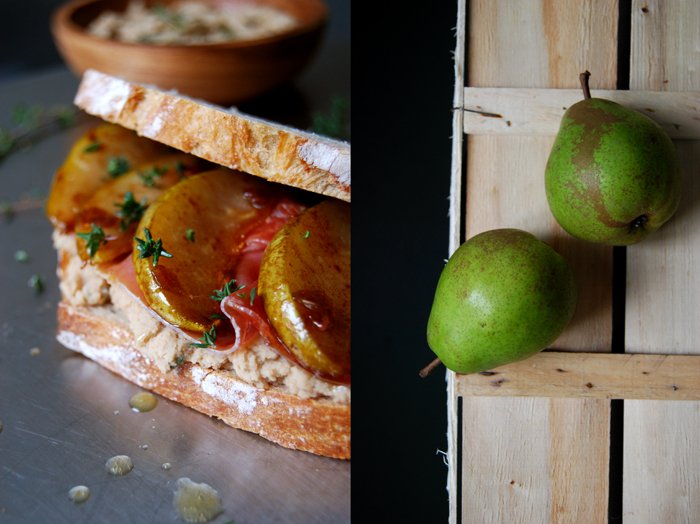
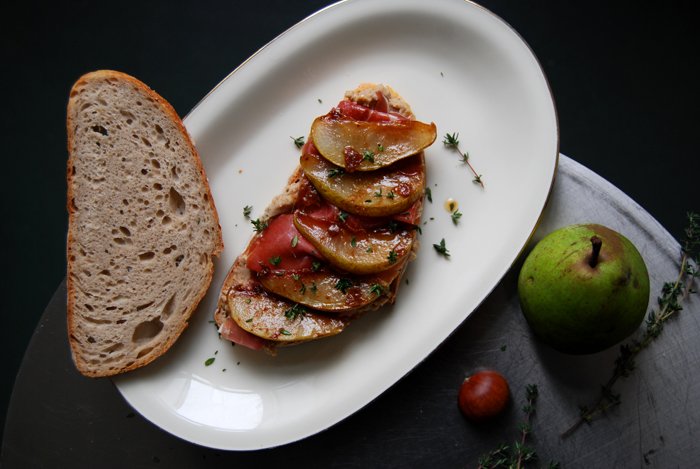
Chestnut Mousse, Prosciutto di Parma and Caramel Pear Sandwich
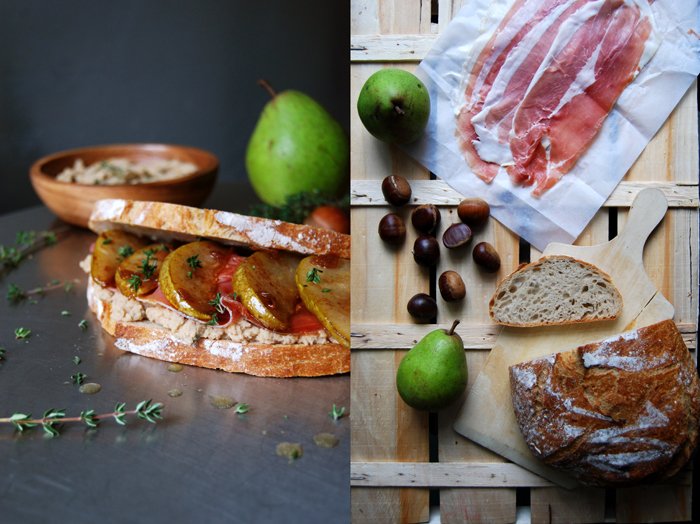
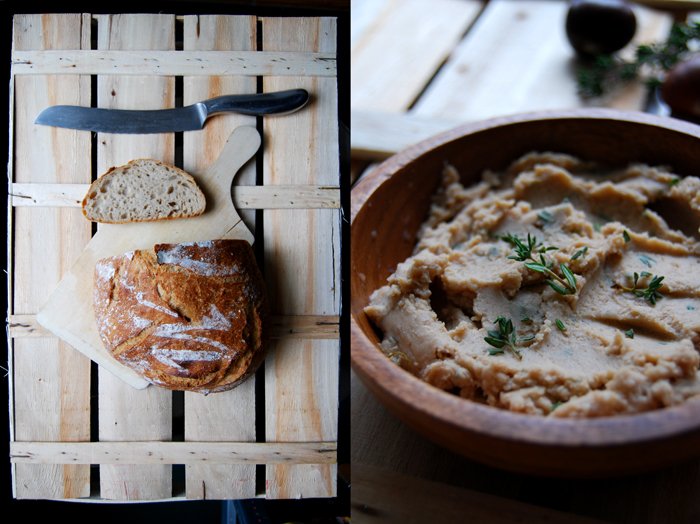
I wanted to create a Christmas sandwich that combines all I love about the four lavish weeks that end the year. Chestnuts, caramel, pear and cinnamon, this sweet aroma that welcomes me as soon as I open my spice box, and the heavy odor of my golden quince brandy shouldn't be missing. And there's more on the list, paper thin Prosciutto di Parma and fleshy thyme leaves which I use for all my wintery stews, gratins and legumes have to feature as well. This herb is the perfect match for both the chestnuts and the fruit, so there's plenty to work with between two slices of sourdough bread!
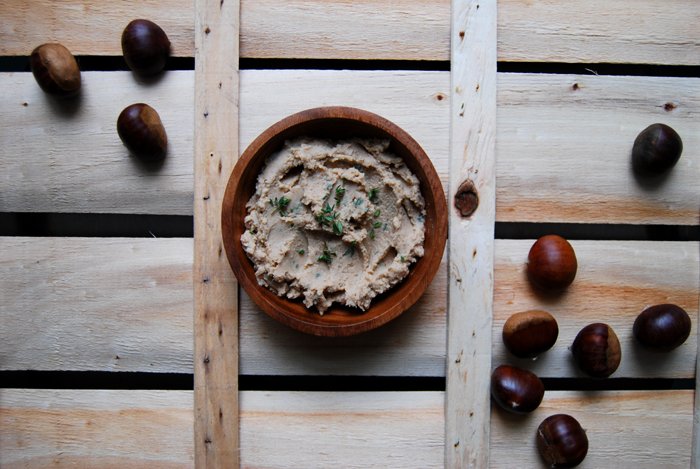
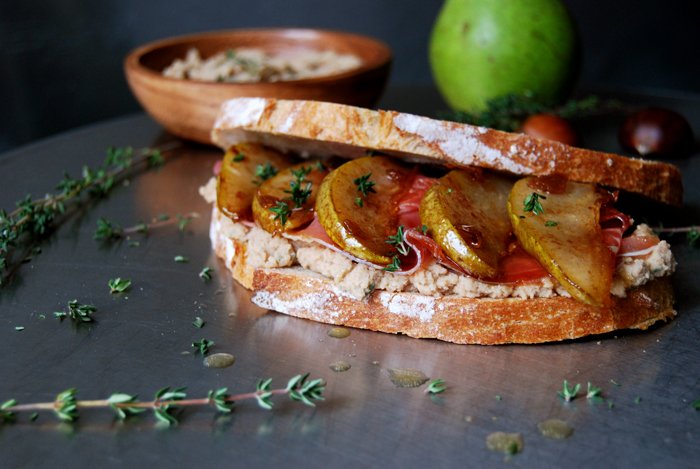
This sandwich is a bit baroque, it's luscious and sweet but with a certain finesse. The chestnut mousse (I bought the nuts pre-cooked for reasons of convenience) is velvety and smooth, refined with cinnamon, brandy, orange and cream. The pears are glazed with buttery caramel and stick to Parma's wonderful prosciutto. It's a lot to taste and enjoy, but this season demands a touch of opulence!
Chestnut Mousse, Prosciutto di Parma and Caramel Pear Sandwich
For 3 sandwiches you need
white sourdough bread 6 slices
Prosciutto di Parma 6 slices
crisp pear, cut into slim wedges, 1
butter 2 tablespoons
granulated sugar 2 tablespoons
chestnuts, pre-cooked and peeled, 200g / 7 ounces
heavy cream 75ml / 1/3 cup
brandy or port 1 tablespoon
freshly squeezed orange juice 2 tablespoons
ground cinnamon 1/4 teaspoon
a pinch of salt
fresh thyme leaves 2 tablespoons
Purée the chestnuts, heavy cream, brandy, orange juice and 1 1/2 tablespoons of the thyme in a food processor until smooth and season with a pinch of salt and cinnamon to taste.
Melt the butter and sugar in a pan. Caramelize the pear wedges in the hot brown butter for about 1 minute on each side.
Spread the chestnut mousse on a slice of bread, lay the prosciutto and pear on top and sprinkle with thyme.
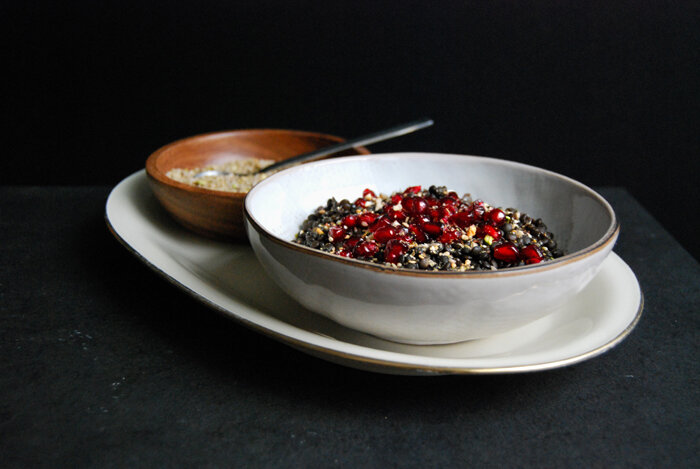
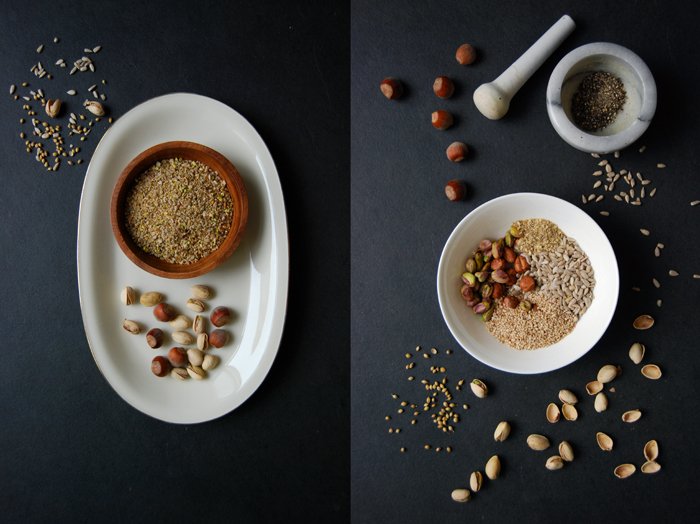
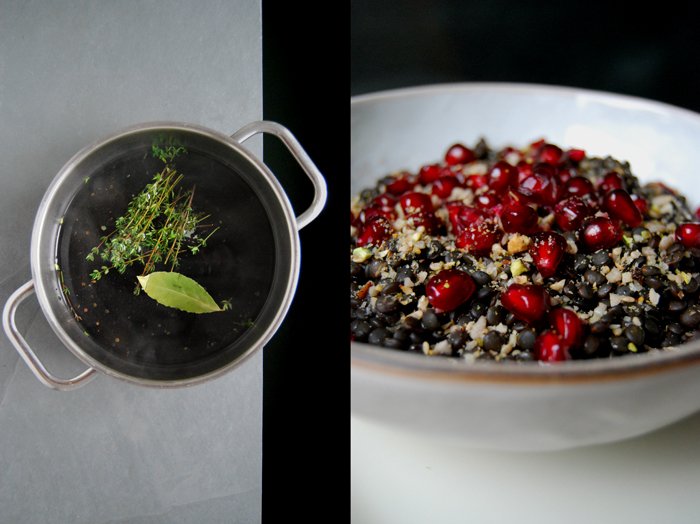
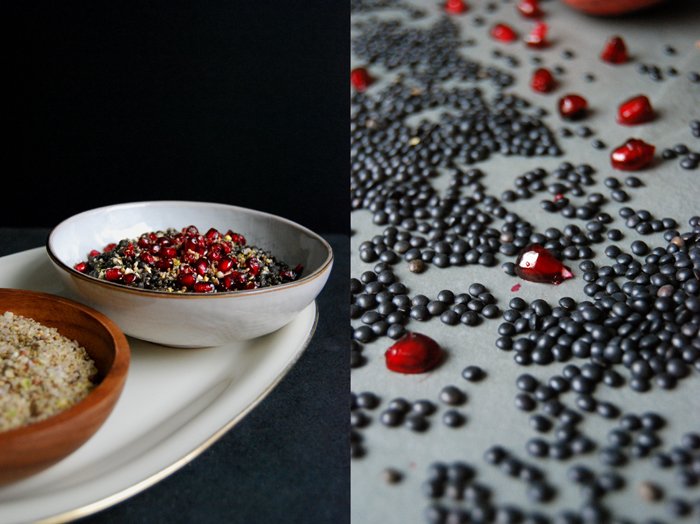
Lentils with Pomegranate and Dukkah
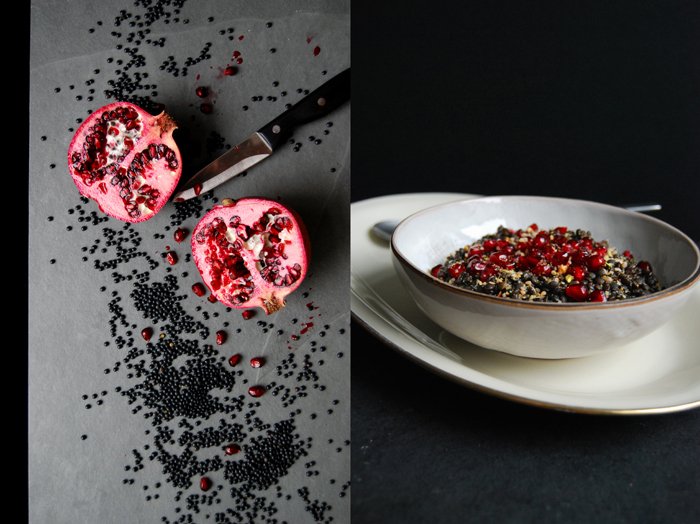
This dish caused one of those exciting kitchen moments that leave you speechless. I had a rough idea of what I wanted to throw together but when it was finally on my plate, it blew my mind. I have wanted to mix black Beluga lentils with the glowing red of pomegranate seeds for quite a while as I couldn't resist this colour combination. I felt sure that something that looks so beautiful together must also match on a culinary level!
A couple weeks ago I read about dukkah which reminded me of this great mixture of seeds, nuts and spices so popular in Egyptian cooking. So I decided to add this as well. I prepared a selection of hazelnuts, pistachios, sesame and sunflower seeds and took some black peppercorns, coriander and fennel seeds and cumin from my spice box to make the mixture complete. The lentils cooked with a bunch of fresh thyme and a bay leaf before I stirred in a splash of olive oil. I arranged the legumes on the plates with the crunchy pomegranate seeds and my dukkah and was mesmerized by its beauty and simplicity. The first bite made me speechless, it was fantastic! The nuttiness of the lentils combined with the dukkah and the sweet and sour pomegranate is one of the best things my dark Belugas have ever seen (apart from my Lentil Salad with Blue Cheese and Pear).

Lentils, Pomegranate and spicy Dukkah
You can keep the remaining dukkah in a jar and use it for salads and soups.
For 3-4 people you need
lentils (preferably Beluga) 250g / 9 ounces
bay leaf 1fresh thyme, a small bunch
olive oil
pomegranate 1
For the dukkah
hazelnuts 30g / 1 ounce
sunflower seeds 20g / 3/4 ounce
pistachios 20g / 3/4 ounce
sesame seeds 20g / 3/4 ounce
fennel seeds, crushed in a mortar, 1 teaspoon
black peppercorns, crushed in a mortar, 1/2 teaspoon
coriander seeds, crushed in a mortar, 1 teaspoon
ground cumin 1/4 teaspoon
coarse sea salt 1/2 teaspoon
Mix the ingredients for the dukkah in a food processor.
Peel the seeds out of the pomegranate.
Cook the lentils according to the instructions on the package with the bay leaf and thyme but without salt. Mine needed 20 minutes in 750ml / 1.5 pints of water. Stir in a splash of olive oil and season with a little salt.
Arrange the lentils on the plates sprinkled with pomegranate seeds and a tablespoon of dukkah.


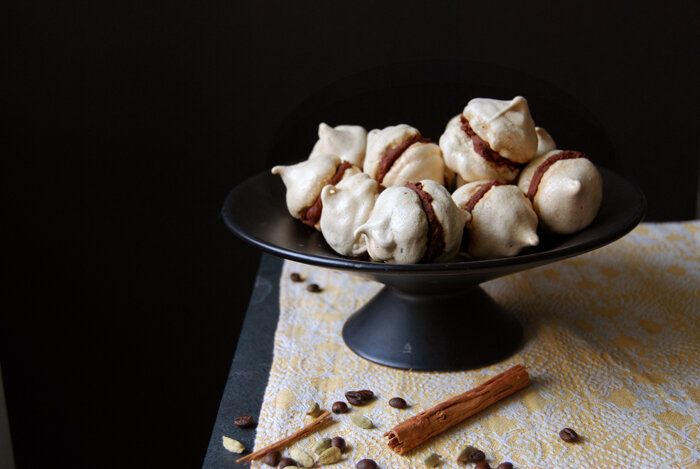
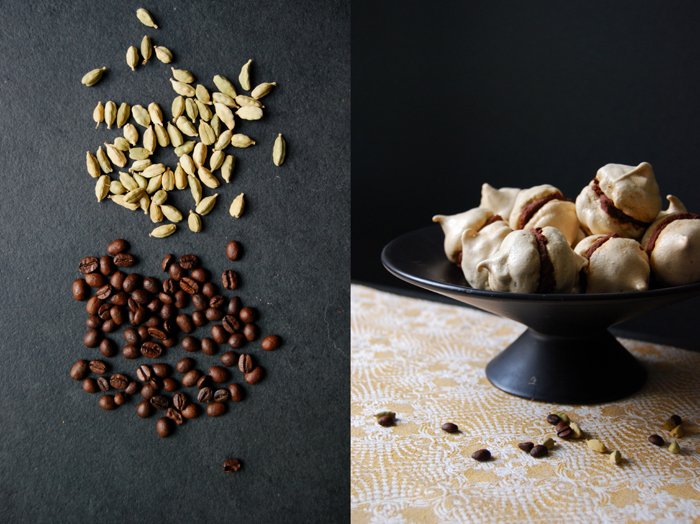
Espresso Meringue Cookies with Spiced Chocolate Ganache
The peace and silence of a Sunday morning is just perfect for an Advent baking session. I take my time to choose a recipe that fits my mood, lay out the ingredients and I'm filled with a kind of excitement that isn't too far away of what I felt as a child when I used to prepare this same ritual with my mother. Years have past and now it's my own kitchen filled with the most beautiful smell of cookies and Christmas cakes but the magic of this moment touches me just as much.
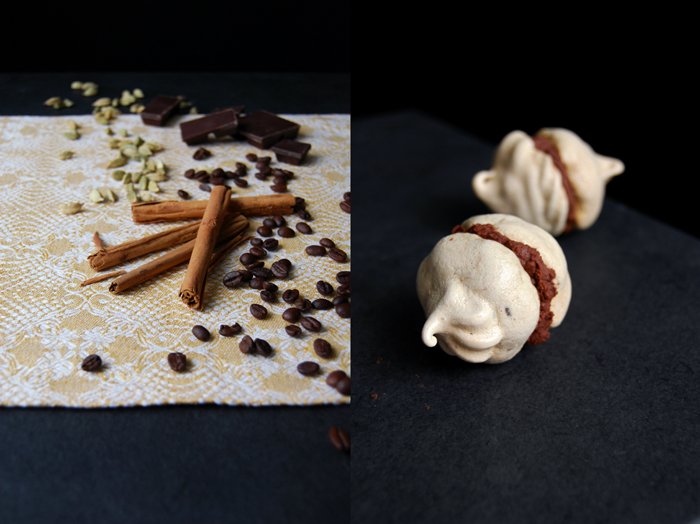
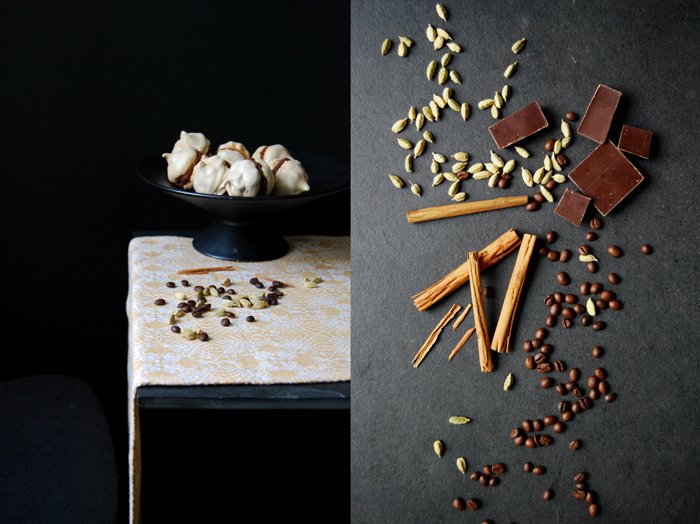
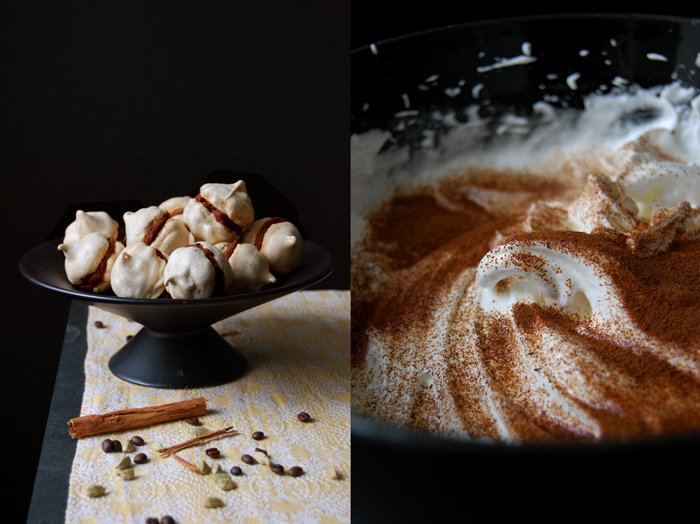
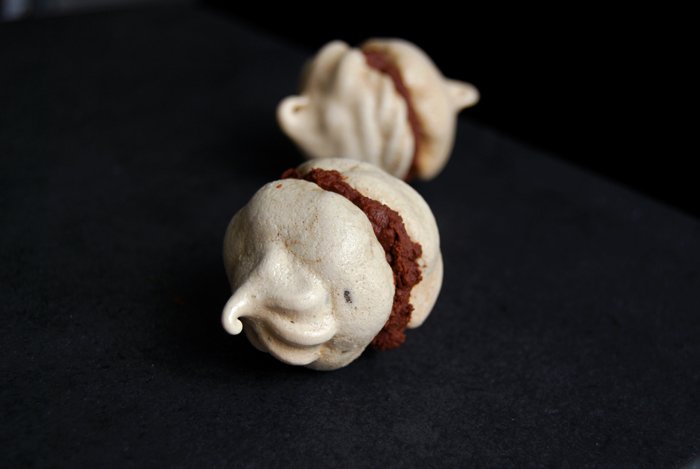
Although my oven doesn't see meringue too often, I have to make my luscious meringue sandwich beauties at least once during the Christmas season. Two delicate drops of espresso meringue cookies stuck together with the most aromatic bittersweet chocolate ganache refined with cardamom and cinnamon are such a sumptuous treat! The whipped egg whites turn into crisp bites which are a perfect contrast to the creamy lusciousness of the dense filling.
This is an adult cookie, it needs a bit of care and gentle handling but it's worth it. There are so many festive treats which don't ask for much, a quick short crust dough, some fancy or nostalgic cookie cutters and the kitchen turns into a christmassy bakery. My meringue cookie is a little diva, it demands special treatment, care and attention, but the result is so amazing that the attitude is forgiven. The great thing about the Advent season is that there are four weeks of festive baking, four weekends to choose from traditional family recipes, experimental new discoveries and delicious finds from various culture's culinary cookie collections. Every week, there are new spices to use, new pastries to work with to bring the sweet classics from our childhoods back to the table. Nuts and seeds, flour, chocolate, spices and icing sugar spread all over the kitchen tops, this is a picture full of memories which makes this time of the year so special to me.
I had an unexpected little visitor this weekend who joined my baking. Our godchild visited me to take a look at our Christmas tree and also helped me prepare a batch of Gianduja cookies. The two of us listened to some music, rolled out the dark Kipferl between our hands and had a chat. Now I'm the one who can pass on my cookie knowledge to the next generation and maybe he will remember this moment when he's in his own kitchen one day, as a man, rolling Kipferl. We were both really sad when his father came to pick him up but we already have a date for another baking session!
Have a wonderful 2nd Advent!
And here's some inspiration for more christmassy cookie recipes:

Espresso Meringue Cookies with Spiced Chocolate Ganache
The ganache has to cool in the fridge for a few hours or in the freezer, or you can let it harden overnight, like I did.
For about 20 sandwich cookies you need
For the ganache
good quality bittersweet chocolate 150g / 5.5 ounces
heavy cream 150 ml / 5 ounces
instant espresso powder 1/2 teaspoon
ground cardamom 1/8 teaspoon
ground cinnamon 1/4 teaspoon
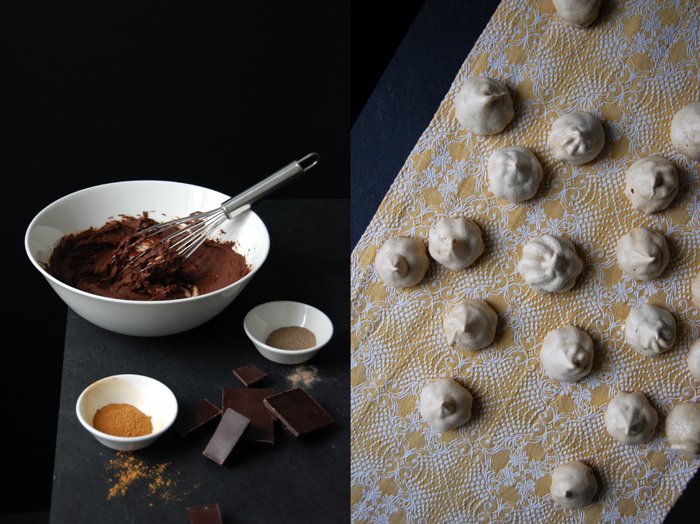
In a sauce pan, heat the cream and add the chocolate, espresso and spices. When the chocolate is melted whisk the mixture until well combined, let it cool and keep in the fridge for a few hours until stiff.
For the meringue cookies
organic egg whites 4
granulated sugar 180g / 6.5 ounces
a pinch of salt
white wine vinegar 1/2 teaspoon
instant espresso powder 2 teaspoons
Set the oven to 140°C / 275°F (top / bottom heat) and line a baking sheet with parchment paper.
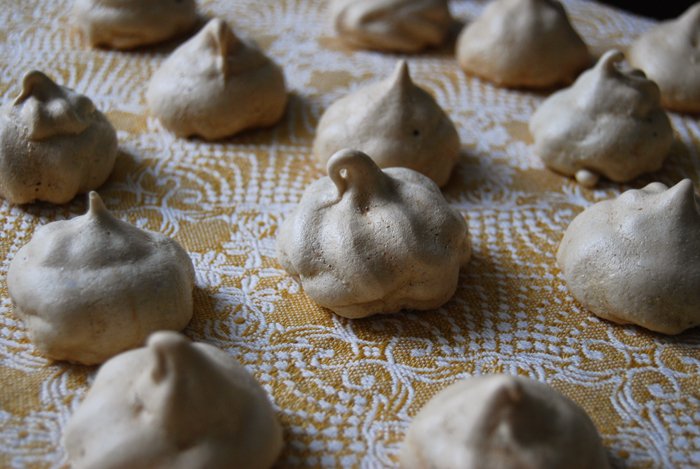
Whisk the egg whites and salt until stiff. Slowly add the sugar and vinegar and continue mixing until stiff and glossy. Mix in the espresso powder and fill the meringue mixture in a piping bag (with a wide opening). Pipe walnut sized mounds on the lined baking sheet, leaving some space in between them. Bake for 50-55 minutes or until they are golden and firm on top, place a wooden spoon in the door to keep it open a bit while the meringues are baking. They should easily peel off the parchment paper when they are done. Let them cool completely on a wire rack before you stick them together with the ganache.
Assembling the cookies
Whisk the hard ganache until light and creamy (like a frosting). Spread the ganache on one cookie and gently (!) stick another one on top.


Potato, Apple and Black Pudding Gratin

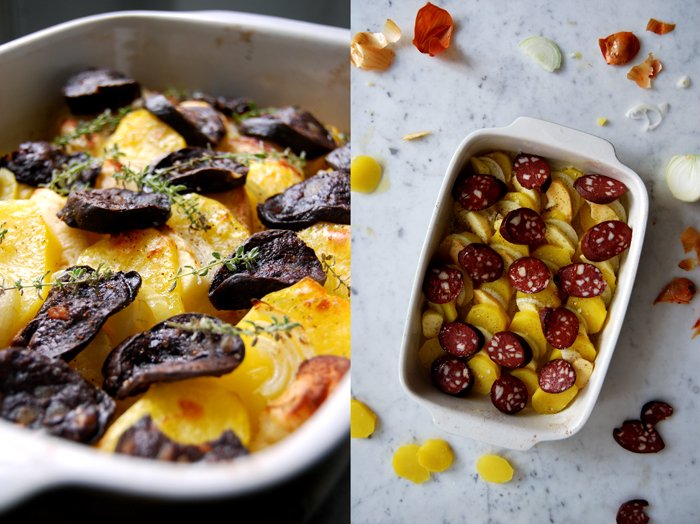
Golden potatoes, apples and onions roasted together make a wonderfully sweet and fruity gratin but you can top that by spreading a few slices of black pudding (or German Blutwurst) over the fruit and vegetables. Sprinkle this oven beauty with fresh thyme and you'll be rewarded with the most aromatic winter gratin!
Black pudding has a difficult image - unfortunately! Although the taste is often enjoyed, I know quite a few who have a problem with the fact that the sausage gets its dark red colour from blood. It's one of the oldest sausages which was highly appreciated by the Romans and it also got mentioned in Homer's Odyssey: "As when a man beside a great fire has filled a sausage with fat and blood and turns it this way and that and is very eager to get it quickly roasted ." I love its sweet and aromatic taste and soft texture. I often fry slices of Blutwurst in butter for just a few minutes and eat them with mashed potatoes, fried onions and apples. This is the German classic called Himmel und Ääd, meaning Heaven and Earth, it's very popular in the Rhineland area where I come from. I mentioned this great combination of fruits from the soil and the trees when I wrote about my parsnip and pear soup.
For my gratin, I layered slices of boiled potatoes, apples and onions and put the sausage on top. You could also tuck them in between the vegetables but then you would miss out on their almost caramelized texture. After 30 minutes in the oven, the blood pudding turned into crunchy bites which were still soft inside, it was so good!

Potato, Apple and Black Pudding Gratin
For 2 as a main or 4 as a side dish you need
potatoes, peeled, boiled and sliced, 650g / 1.5 pounds
large onion, cut in half and sliced thinly, 1
large sour apple, peeled, cored, quartered and sliced, 1
black pudding, peeled and cut into 0.5cm / 1/4" slices, 200g / 7 ounces
olive oil
sea salt and pepper
fresh thyme, a small handful
Set the oven to 200°C / 390°F (I used the Rotitherm roasting setting) and brush the bottom of a baking dish (around 28 x 20cm / 11 x 8") with olive oil.
Layer the potatoes, apples and onions in the dish. Sprinkle with a splash of olive oil, salt and pepper and put the sausage and thyme on top. Cook in the oven for about 30 minutes or until golden brown. Check after 20 minutes, if the sausage gets too dark, put it under the potatoes.


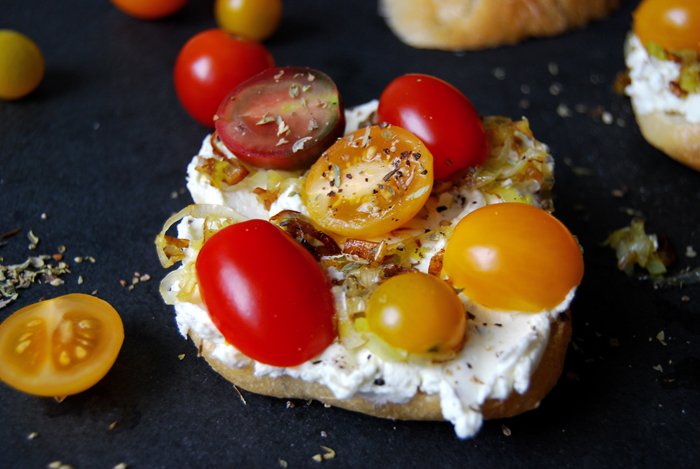
Tomato, Leek and Oregano Cream Cheese Sandwich
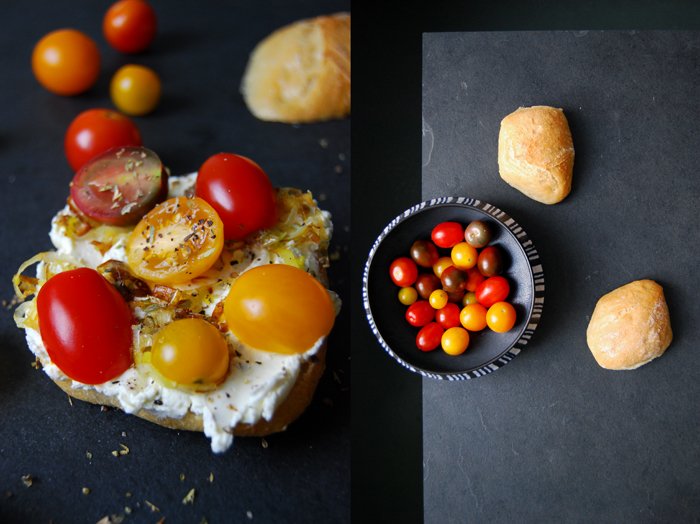
Today's sandwich reminds me a bit of pizza although there's no melted cheese in the recipe, but if you combine the milky taste of cream cheese with dried oregano and put this on a yeasty bun with tomatoes, you're already half way there. It's a lighter and quicker version, easy to prepare as a little snack for lunch.
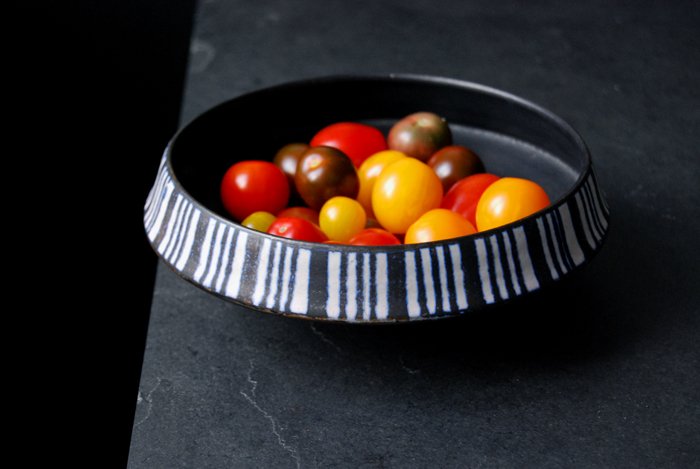
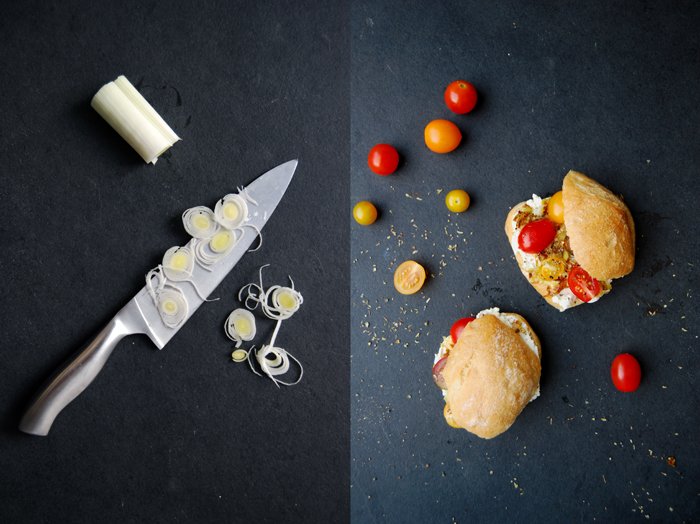
The dried oregano should be organic if possible as it tastes remarkably better, as so do the cherry tomatoes. Heirloom fruits are the best, especially in winter, as they offer a variety of flavours from honey sweet to fruity and tart. They also look really pretty with their different shapes and shades of yellow, green, red and brown. Some are almost black, quite dramatic! For my sandwich, I just cut them in half and left them uncooked to keep their crunchiness and freshness. I brought in some leek cut into very thin slices which I sautéed in a little olive oil, they were smooth with a soft hint of onion and merged well with the creaminess of the cheese. This is an easy sandwich, exactly what I need sometimes in a month full of culinary opulence and lusciousness!
As much as I try to stick to the seasons when it comes to vegetables, in winter I can't live without tomatoes. I accept that the skin is a little bit thicker at this time of the year, and you can taste that they aren't spoiled with sun anymore. But if you choose well, you can find some colourful little treasures that please your taste buds.

Tomato, Leek and Oregano Cream Cheese Sandwich
For 2 sandwiches you need
white buns, cut in half, 2
mixed heirloom cherry tomatoes, cut in half, a handful
leek, just the white part, cut into thin slices, 1/4
cream cheese 200g / 7 ounces
dried oregano 1/4 teaspoon, to taste
salt
black peppercorns, crushed in a mortar, for the topping
olive oil
Sauté the leek in a little olive oil for a few minutes until soft and golden. Whip the cream cheese with oregano and salt. Season to taste.
Spread a thick layer of the whipped cream cheese on the bottom of the buns and sprinkle them with the sautéed leek. Garnish each bun with tomatoes, some more oregano and crushed pepper before you close it.


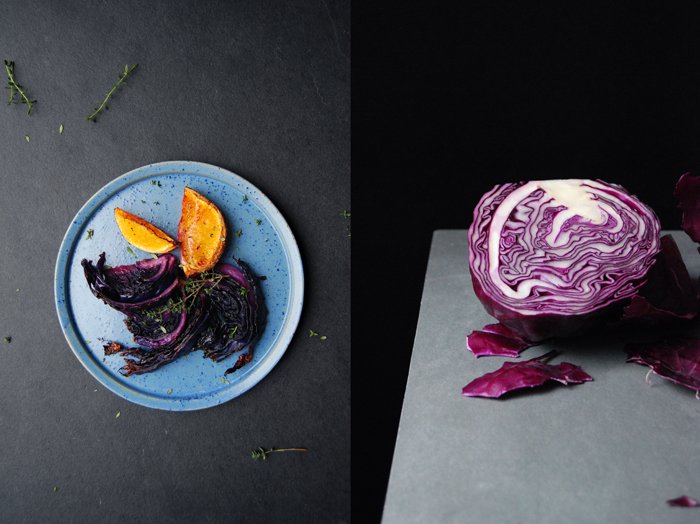
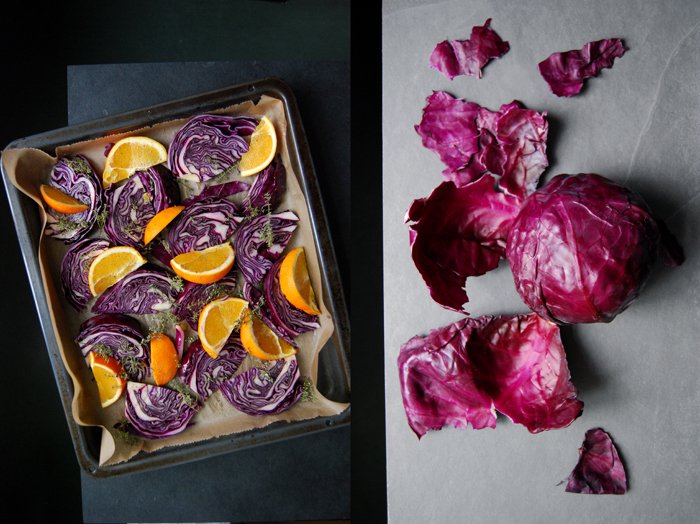
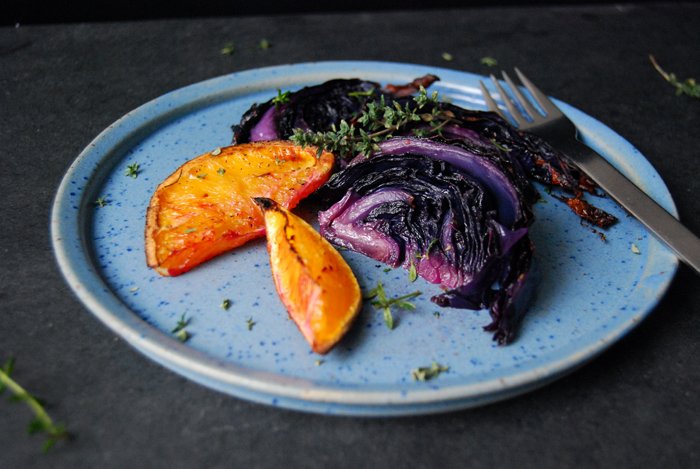
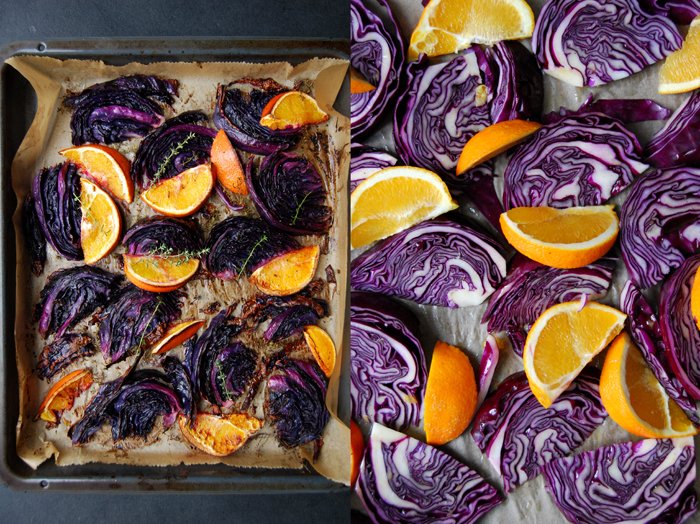
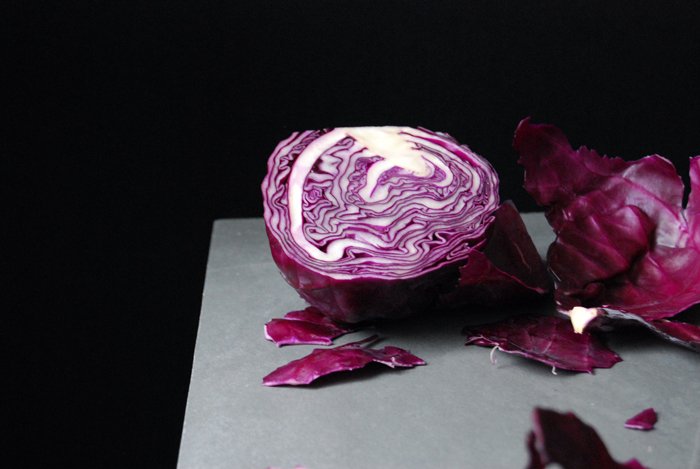
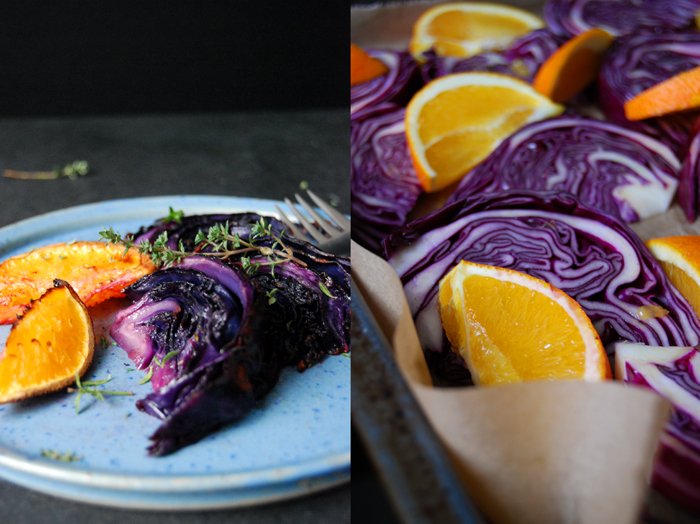
Roasted Red Cabbage and Orange Wedges with Maple Syrup
Every year, in late October or early November, our family and friends ask where and how we're going to celebrate Christmas this year. I often have problems thinking myself into the festive situation so early on. The tree, the food, baking cookies, visiting Christmas markets in the snow, it all feels so far away at that point. But now, a month later, I'm ready to jump into it and enjoy it to the fullest. Our Christmas tree is set up in all its glory, the living room is lit up in candle light and my oven is on practically constantly. Fruit cakes, cookies, pies and roasts have the wonderful side effect that they fill the whole flat with the most beautiful smells and aromas!
The big decision for Christmas is already made, we'll celebrate at home together with my sister in law Emma from Malta and her partner. I know that there will definitely be a duck on the table at one point, my flambéed Christmas pudding and paté, cheese and champagne while we cook. My beloved red cabbage will be on the menu as well, but after so many years of cooking this vegetable traditionally with the obligatory spices, apples and chestnuts, it's time for a change. In the next few weeks, I will try out some new recipes and variations on my festive classics. So let the test cooking begin!
When I looked at the red cabbage, this crunchy ball of purple prettiness, I decided that, this year, I'll roast it with some sweet orange and a little thyme. For my test cooking session, I cut the cabbage and citrus fruit into thin wedges and coated them with a syrupy olive oil mixed with orange juice and maple syrup. The added sweetness combined with the fruitiness of the orange and the roasting flavour was great, the cabbage was al dente in the middle and soft at the ends of the leaves. It was just right and looked surprisingly pretty on the plates!

Roasted Red Cabbage and Orange Wedges with Maple Syrup
As a side dish for 4 you need
red cabbage, quartered, cut into slim wedges, 800g / 1 3/4 pounds
organic orange, rinsed and scrubbed, cut into slim wedges, 1
olive oil 50ml / 2 ounces
freshly squeezed orange juice 1 tablespoon
maple syrup 1 tablespoon
salt and pepper
fresh thyme, a small bunch
balsamic vinegar for the topping, to taste
Set the oven to 200°C / 390°F.
Whisk the olive oil, maple syrup and orange juice.
Spread the cabbage and oranges on a baking sheet and coat with the oil (use your fingers). Season with salt and pepper and sprinkle with thyme (leave 1-2 tablespoons of the leaves for the topping). Roast in the oven for 15 minutes, turn the cabbage and oranges and cook for another 15 minutes or until the cabbage is al dente. Turn on the grill for 1-2 minutes until golden brown. Sprinkle with fresh thyme leaves and a little Balsamico vinegar. Season with salt and pepper to taste.

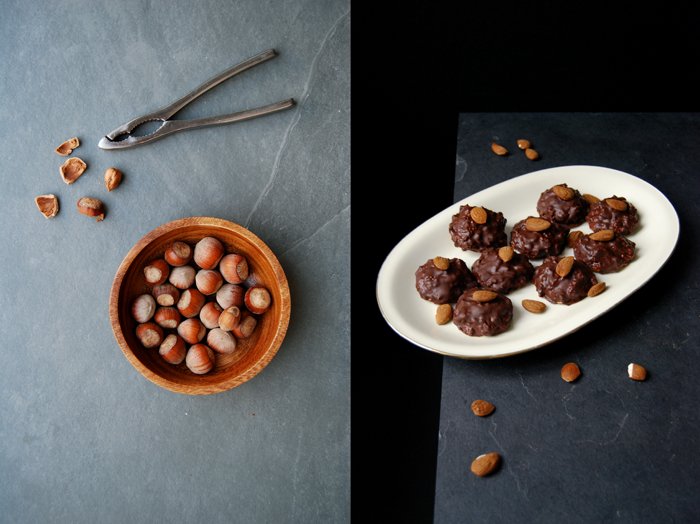
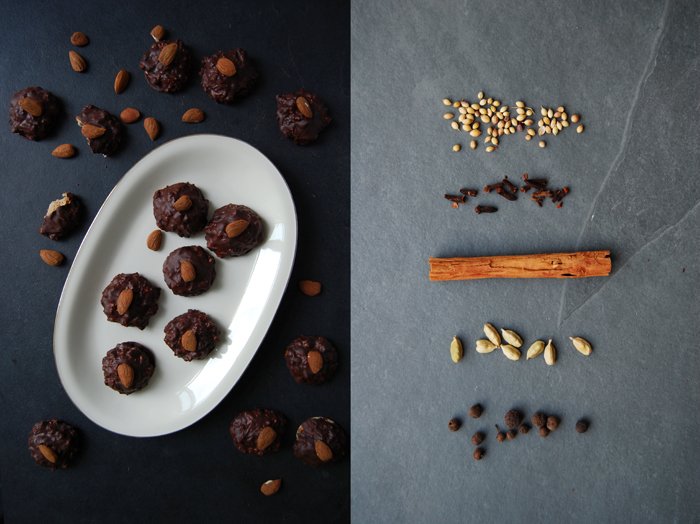
Elisenlebkuchen - Juicy Spice Cookies with Bittersweet Chocolate
Elisenlebkuchen are essential German Christmas treats! A bite of these juicy spice and chocolate cookies, a sip of my mulled wine and some John Fahey tunes in the background and I'm right in the mood for the 1st Advent!
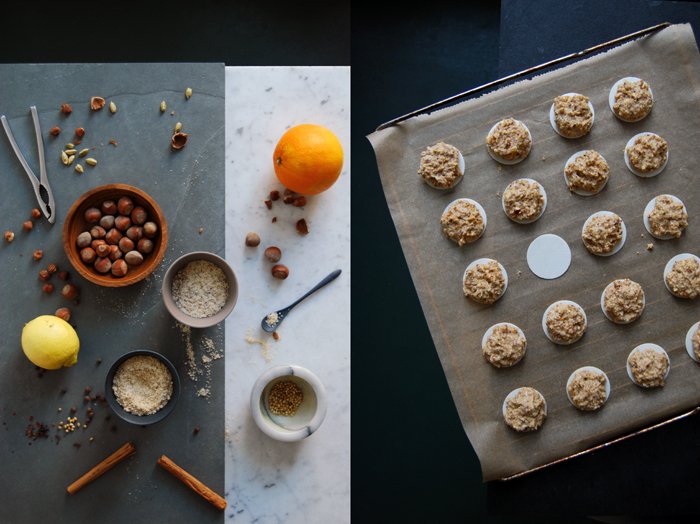
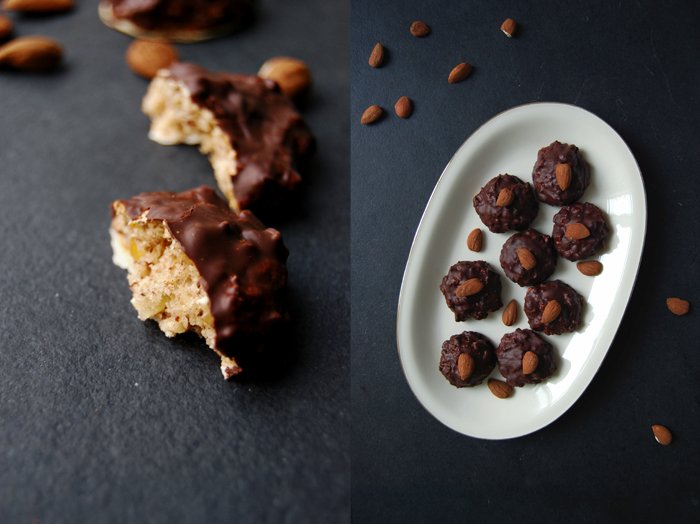
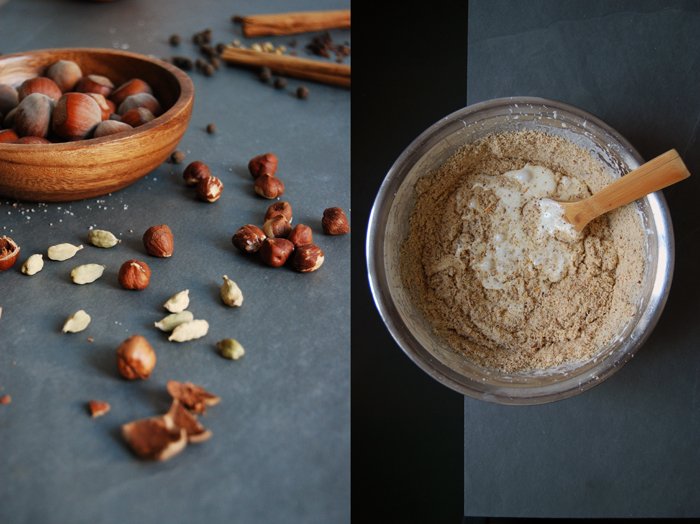
These dark sweets are a special kind of Lebkuchen, made without any flour or butter but lots of ground hazelnuts, almonds, spices and citrus fruits. They are often compared to gingerbread (which I find difficult as there's no ginger involved in the recipe), with a similar aromatic juiciness which is no surprise as they combine all the wonderful flavours associated with festive baking, like cinnamon, cardamom, cloves, all spice and citrus. A simple Lebkuchen officially becomes the queen of all Lebkuchen, the fine Elisenlebkuchen, when the dough contains more than 25% of nuts and less than 10% flour. It's kind of a royal upgrade to keep the quality and protect its tradition. Originally from Nuremberg (Nürnberg in German), the city gained fame all over the world for this sweet delicacy. I remember emptying one package of them after the other as a child at Christmas, preferably the ones covered in bittersweet chocolate. The Nuremberg Lebkuchen are either 'naked' or glazed with sugar or chocolate, which were the most popular ones in my family so I had to eat them quick.
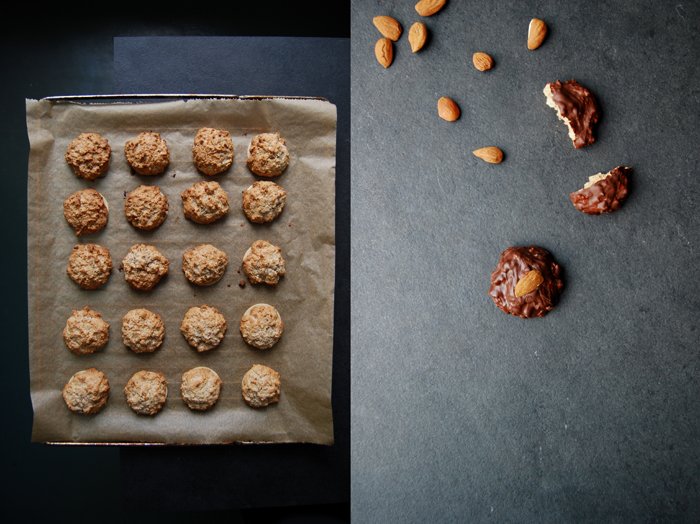
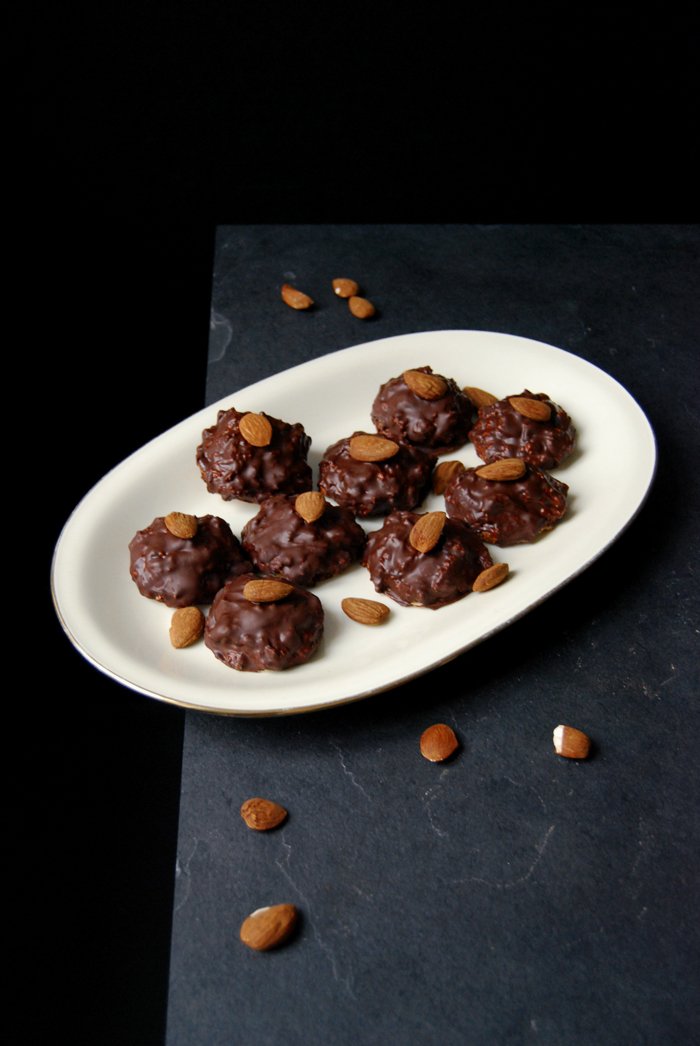
After years of stuffing my belly with them under the Christmas tree, the time has come to start the Lebkuchen production at my home. Elisenlebkuchen are often quite big but I wanted a smaller size, just a small bite to enjoy them more often. The preparation is surprisingly easy. The dough can be used as soon as it's mixed although some bakers recommend keeping it in the fridge overnight. It's a bit sticky but manageable. You just have to drop a dollop of it on a thin edible wafer paper for cookies (also known asoblate) and put them in the oven until they are golden but still soft inside. The result is almost spongy and so fragrant that it wasn't easy for me to watch them cool before I could brush them with bittersweet chocolate. When you have a treat like this in front of you, the last thing you want to do is wait!
In the past, certain bakeries were specialised in the production of Lebkuchen all over the country to create their own christmassy signature sweet for their region. The textures and shapes vary, some are cut into squares like in Aachen in the west of Germany, or baked in the shape of hearts like in Bavaria. Elisenlebkuchen are still my favourite, with chocolate of course and preferably in large amounts!
Have a jolly 1st Advent!
Elisenlebkuchen
For 40 cookies you need
organic eggs (at room temperature) 3
granulated sugar 210g / 7.5 ounces
hazelnuts, roughly chopped, 40g / 1.5 ounces
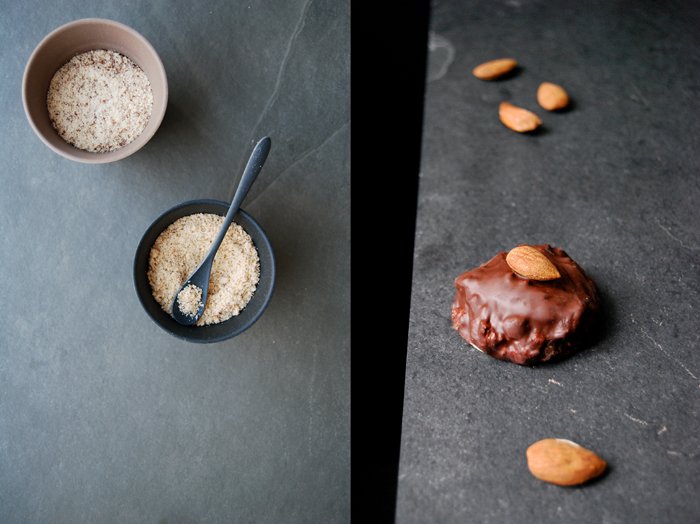
ground hazelnuts 200g / 7 ounces
ground almonds 80g / 3 ounces
candied lemon peel 50g / 2 ounces
candied orange peel 50g / 2 ounces
lemon zest 2 teaspoons
orange zest 2 teaspoons
ground cinnamon 1 1/2 teaspoons
ground cardamom 1/4 teaspoon
ground cloves 1/2 teaspoon
ground coriander 1/2 teaspoon
ground allspice 1/4 teaspoon
ground mace 1/4 teaspoon
a pinch of salt
edible round wafer papers for cookies (50mm / 1/4" diameter), 40 (if you use a bigger size, add a little more dough on each of them and bake the cookies a bit longer)
bittersweet chocolate 300g / 10.5 ounces, for the topping
butter 1 1/2 tablespoons, for the topping
almonds 40, for the topping
Set the oven to 180°C / 355°F and prepare a baking sheet with parchment paper.
In a saucepan, melt the chocolate and butter for the topping.
Mix the eggs and sugar with an electric mixer for about 7 minutes until light and creamy, there shouldn't be any sugar crystals left.
Combine the ground nuts, almonds, candied peel, zest, spices and salt and gently stir into the egg sugar mixture with a wooden spoon until combined. Stir in the chopped nuts and put a heaped teaspoon of the dough on each round wafer paper. Put the cookies on the baking sheet and bake in the oven for about 13 minutes or until golden, they should stay soft inside.
Let them cool on a rack before you brush them with the melted chocolate and garnish each of them with an almond.


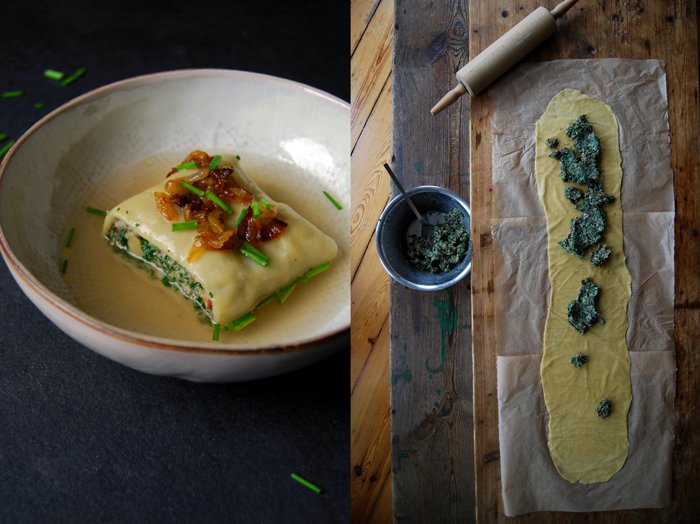
Maultaschen - Swabian Ravioli filled with Spinach, Beef and Parsley
If it weren't for the preparation of the pastry I could eat this Swabian treat every week, I love it! Unfortunately, I don't have a pasta machine and, as Maultaschen are the southern German variation of large open ravioli, I have to roll out lots of dough by hand, as thinly as possible. This takes a while (about 45 minutes to be precise) but this shouldn't put you off as the work is absolutely worth it! And if you're the lucky owner of a pasta machine it's even easier.
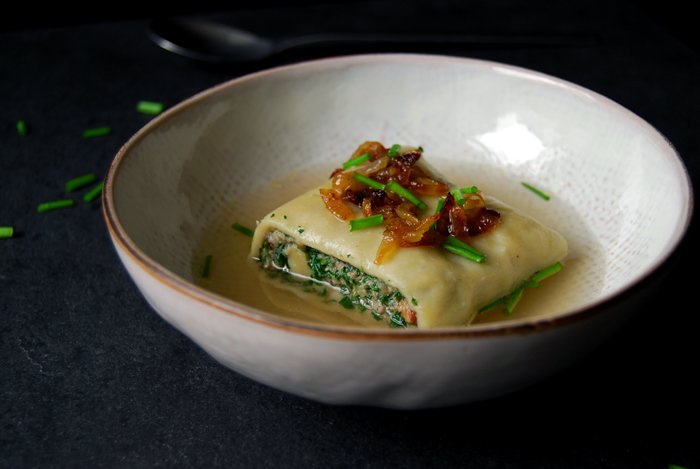
Maultaschen are a culinary classic from Swabia, they are the region's most famous speciality, apart from spaetzle maybe. They are popular all over Germany and the European Union recognized the dish as part of the culinary heritage of the province of Badem-Württemberg. So officially, a Maultasche is only a Maultasche when it's produced in Swabia. I can't claim that, mine are made in Berlin but at least I had a great master to learn from, my Swabian step father Uli. We often eat them for lunch in my mother's kitchen either in a bowl of steaming broth or fried in butter with onions, the two typical ways to serve them. Due to their size, Maultaschen have more filling to enjoy than the Italian version. I make mine with lots of spinach and parsley, and although there's minced meat, bacon and sausage mixed in as well, they taste very light and fresh. Whenever I roll out the dough for this southern treat I make lots of it, lined along our wooden dining table (which is very long, luckily). They just taste too good!
Traditionally, you serve Maultaschen in broth on the first day and fry the leftovers in butter with eggs the second day, but this is up to you. I felt like a warming broth and some golden sautéed onions, so I started with that. I always keep a few of them in the freezer as well. This is such a luxurious treat, on one of those cold nights when there isn't much time left to cook, I just have to pull out my Swabian ravioli and throw them in the pan.
This dish has a long history, with a variation of stories about its origin. One says that the Cistercian monks of the Maulbronn Monastery invented Maultaschen as a sneaky way to eat meat during Lent. The meat in this dish is hidden under the pasta dough so it cannot be seen by God, this also led to the dish's nickname Herrgottsbescheißerle, meaning God cheater in German.

Maultaschen
For 18 large Maultaschen you need
For serving
strong broth (chicken, beef or vegetable), seasoned, to serve the Maultaschen in
onions, cut in half, sliced thinly, sautéed in butter until golden and soft, for the topping
chives, snipped, for the topping
For the pasta dough
plain flour 300g / 10.5 ounces
organic eggs 3
salt 1 1/2 teaspoons
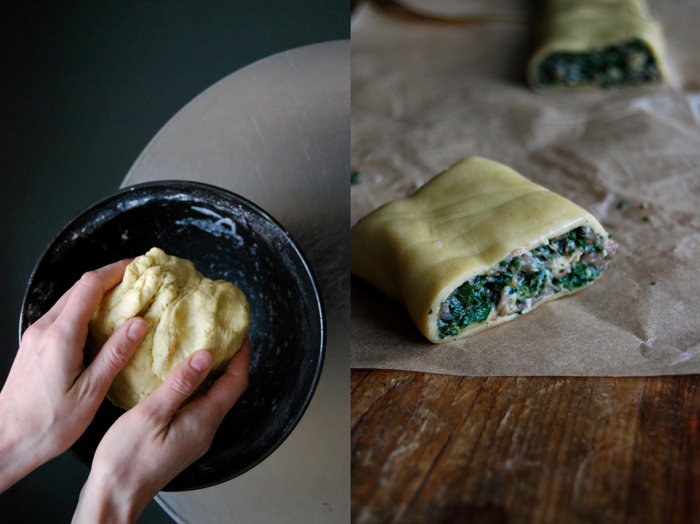
Mix the ingredients with an electric mixer for a few minutes. Continue kneading with your hands for 2 minutes or until smooth. Form a ball, wrap in cling film and put in the fridge for at least 1 1/2 hours.
For the filling
fresh spinach leaves, rinsed, 300g / 10.5 ounces
parsley, finely chopped, 50g / 2 ounces
bacon, cut into small cubes, 50g / 2 ounces
medium onion, finely chopped, 1
minced meat (beef or mixed) 250g / 9 ounces
coarse sausages, skin removed, 150g / 5.5 ounces
white bun 1
sour cream 2 heaping tablespoons
salt 1 teaspoon
freshly grated nutmeg
pepper
olive oil
Blanche the spinach in salted water for 1 1/2 minutes, drain and rinse with cold water. Let it cool for a few minutes, squeeze the water out with your hands and chop it with a knife or in a food processor.
Soak the bun in warm water for 15 minutes, squeeze it well and tear into pieces.
In a pan, fry the bacon in a little olive oil for a few minutes on medium heat until golden brown and crisp. Add the onions and cook for 2 minutes or until soft.
In a large bowl, mix the spinach, bacon, onion, parsley, minced meat, sausage filling, sour cream, salt, pepper, nutmeg and the bun with an electric mixer or your hands until well combined. Cover the bowl and keep it in the fridge while you roll out the pasta dough.
The Maultaschen
On a large work surface or table, roll out the dough between cling film. It should be thin and about 19 x 90cm / 7.5 x 35.5". If it's wider than 19cm / 7.5", roll it up a little from the sides and continue rolling until it's the right size.
In a large pot, bring salted water to the boil.
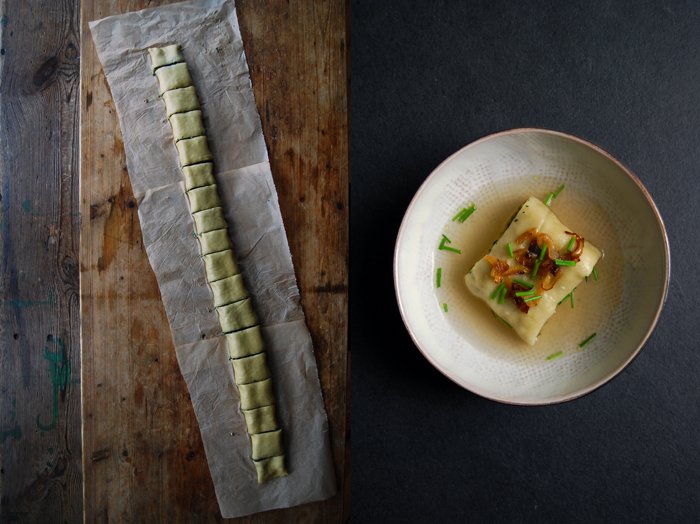
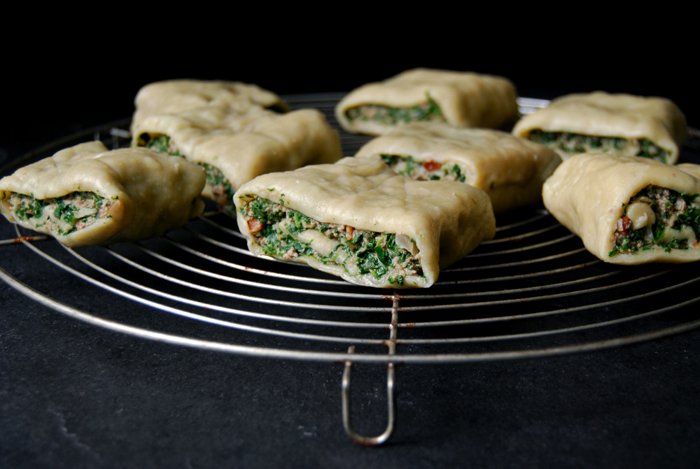
Take the top layer of cling film off the dough and cover it with parchment paper. Gently turn it around and pull off the other layer of cling film. Spread the filling evenly on top of the dough, leaving a small rim around it. Fold the dough up from the long side until it's slightly over the middle (with the parchment paper) and pull off the parchment paper. Fold up the other side, this time almost to the end of the roll, close it and push the fold together gently. Turn the roll over, so that the fold is on the bottom. With a sharp knife, gently cut the pasta wrap into 18 pieces, don't close them, they stay open.
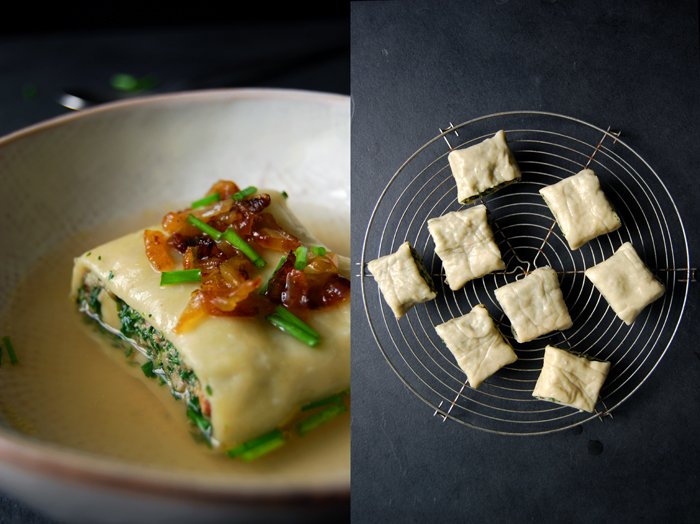
Slip the Maultaschen into the boiling water (in batches of about 6 depending on the size of the pot), cover with a lid and take the pot off the heat immediately. After 12 minutes they are done. Take them out with a slotted ladle and put them on a grid for a few minutes.
Serve them in a bowl with a little hot broth, garnished with the sautéed onions and some chives.


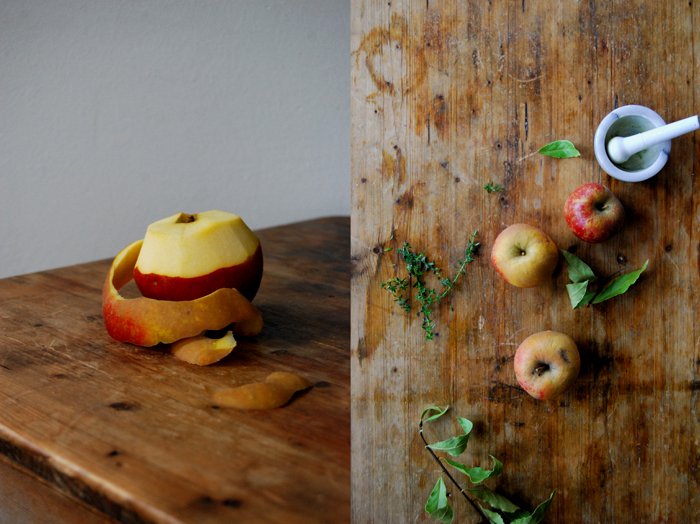
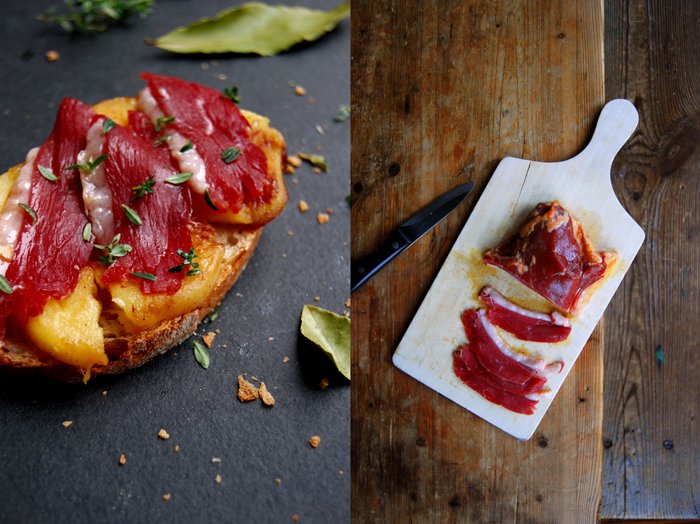
Goose Prosciutto and Bay Leaf Apple Sandwich
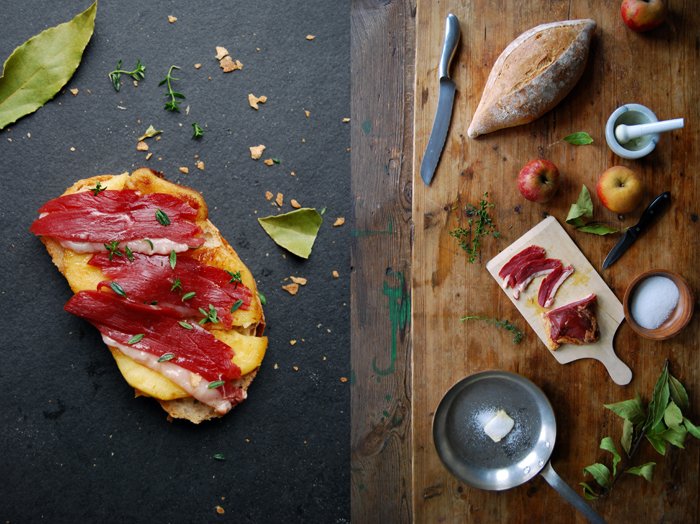
With almost childish excitement I spotted a nice piece of goose prosciutto, a typical winter treat which couldn't have found its way into my shopping basket at a better time. This Sunday will be the first Advent, the official start of all of my little christmassy traditions which I follow obsessively. Setting up the tree, baking lots of cookies and consuming more warm alcoholic beverages than I normally would are just some of them. Duck, goose and venison are to be found in my kitchen more often as well, another one of my seasonal habits.
Although it's not December yet (or Advent), with today's sandwich I welcome the time of joy and festive savouring. I start with a sandwich that combines the caramelized fruitiness from sour apples cooked in sugary butter with thyme and bay leaf with the smokey aroma of goose prosciutto. The meat is dark red with a strong smokey flavour, a bit too strong for my taste but still good. Its tenderness is topped with a thick layer of goose fat, you have to cut the slices really thin to enjoy it. It's the same with duck prosciutto (which would also be fabulous on this sandwich) or smoked salmon, they should always be sliced as thinly as possible. At first, I wasn't sure if this wintery composition between two slices of a French country loaf needed a further addition, but after the first bite I came to the conclusion that it's all good!

Goose Prosciutto and Bay Leaf Apple Sandwich
For 2 sandwiches you need
white bread 2-4 slices (if you want a closed sandwich)
goose or duck prosciutto, very thinly sliced, 80g / 3 ounces
large sour apple, peeled, cored and thickly sliced, 1
butter 2 tablespoons
granulated sugar 2 tablespoons
small bay leaf (hard stalk removed), chopped finely into tiny crumbs, 1
fresh thyme leaves 2 tablespoons
Melt the butter and sugar in a pan on high temperature, when it's golden brown, add the apples, bay leaf and 1 tablespoon of thyme. Cook the fruit quickly for 1-2 minutes on both sides until golden and caramelized. Spread the apples and their juices on 2 slices of bread and put a few slices of the meat on top. Sprinkle with thyme.


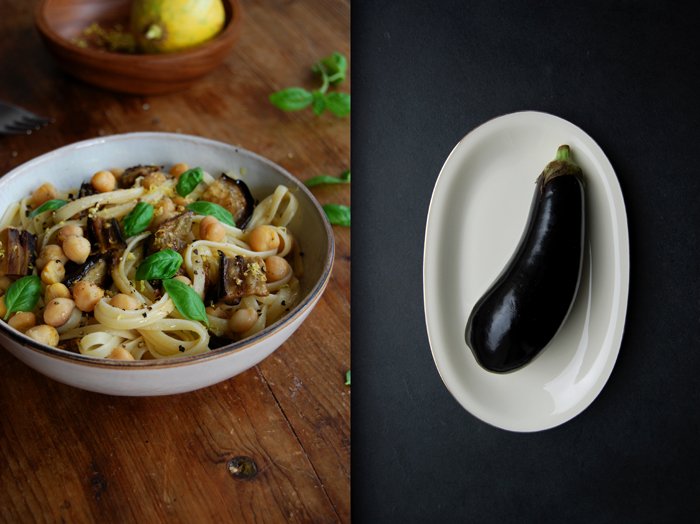
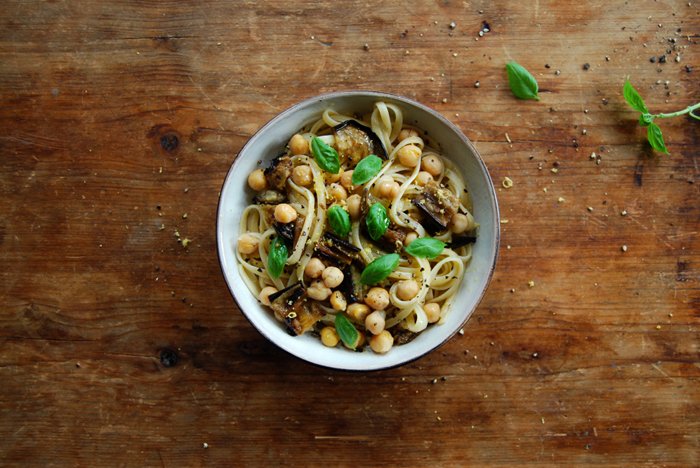
Linguine with Chickpeas, Grilled Aubergine and Lemon
What an amazing anniversary! Thank you so much for your sweet wishes and support of eat in my kitchen. It's been a perfect celebration of an extraordinary year and the beginning of a new chapter, the second year of the blog!
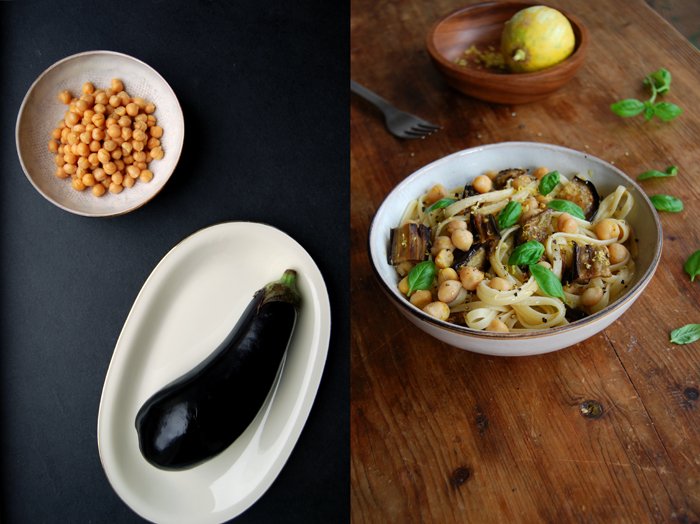
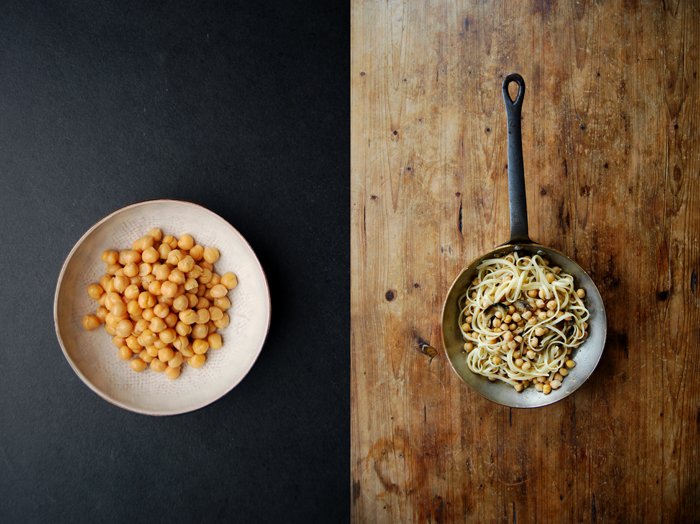
Let's start the new week with an easy pasta dish, chickpeas (canned, so there's no soaking and cooking involved), grilled aubergine slices, lemon and basil! I got the inspiration for this composition from a sandwich which is very popular in Israel, it made it onto the blog last January, the fantastic Sabih. Velvety hummus, grilled aubergines and a boiled egg on juicy homemade olive bread, it tastes divine! Our godchild's father told me about this sandwich classic from his home country, he praised it with such passion that I had to try it. It became a new standard, with great potential to inspire various recipes. For my linguine, I left out the egg, although I think it would have fit but instead I added lemon and basil for an aromatic southern Mediterranean feeling. The aubergine and chickpeas were so smooth, almost sweet, that it needed a bit of a contrast, a task that my beloved lemon zest always manages with ease.
When I grill aubergines, I always prepare two or three of them right away. You can use them for your pizza or roll them up with ricotta. Although they need (and soak up) quite a bit of olive oil, I found that you can minimize it by stacking them on top of each other as soon as you take them out of the oven. I brush them with a thin layer of oil on both sides before they cook. Don't worry, they tend to look a bit dry at first when they are done but they will turn into perfect juicy and oily bites after a couple minutes of soaking and softening each other.
Linguine with Chickpeas, Grilled Aubergine and Lemon
For 4 people you need
linguine pasta 400g / 14 ounces
chickpeas, canned, rinsed and drained, 300g / 10.5 ounces
large aubergine, cut into 1/2cm / 1/4″ slices, 1
garlic, crushed, 1 clove
olive oil
salt
black peppercorns, crushed in a mortar, for the topping, to taste
lemon zest, for the topping, to taste
basil leaves, a small handful
Cook the pasta in salted water al dente and keep some of the cooking water.
Brush the aubergines with olive oil on both sides, season them with salt and pepper and grill them in the oven until golden brown on both sides, they will darken partly but that’s fine. Mine needed 7 minutes on one side and 5 minutes on the other but that depends on the oven. Set the aubergines aside and stack them, that will keep them moist and soft. Cut them into thick slices.
In a pan, heat a splash of olive oil, add the garlic and cook it for 1 minute on medium heat. Add the chickpeas, season with salt and pepper, close with a lid and cook for 4 minutes on medium-low heat. Add the pasta and a little of the water they cooked in and season with salt. Stir in the aubergine and sprinkle with the crushed black peppercorns, lemon zest and basil.
Enjoy warm or with short pasta as a salad.


Reflections on 1 Year of eat in my kitchen, 365 Recipes and an Apple Strudel
When I decided to start a food blog in October last year, at the breakfast table on a cold and misty morning in Berlin, I had no idea what I was getting myself into. I felt recklessly excited, so much so that I made a big decision which changed my life drastically in the past twelve months. My goal was to share a recipe a day, for at least 1 year. I was so inspired by this idea, my head was full of recipes and stories that I wanted to write down on the as yet empty pages of eat in my kitchen. I knew I would have enough of a repertoire to cook, to bake and to talk about for a few years so I thought I might as well share all this with the world once a day.
It has been intense if not tense at times, I completely underestimated how much time it would take to capture a dish in mouthwatering photos, to describe what I do in my kitchen, what your taste buds can expect, but also to inspire you to go to your own kitchen, to pull out the pots and pans and trust me. When I shared the first recipes, I didn't think about the fact that you would have to believe me that my recipes would work out for you as much as they do for me. You would have to buy the ingredients, take some time out and cook with the same excitement that I felt. At one point, after I had been writing for a few days, it clicked, I understood what it meant and it overwhelmed me. Until today, every time I get an email from someone who felt enticed by one of my posts and cooked or baked my recipes and tells me about the result, I'm as happy as a child at Christmas. It's a wonderful experience and there are no words to describe how thankful I am for this journey which put so many amazing moments into my life, and a written collection of more than 365 recipes!
In the past few months, I've written a lot about enjoyment, culinary pleasures and the fun of cooking in your own kitchen and treating the ones you love with the fruit of your work, that's not a cliché, this fills me with true happiness. No matter if the final result on the table is mind-blowing or if a recipe still needs some work, the time spent creating this meal is precious. No one forces us to put our money into good quality and natural ingredients, no one tells us to turn them into a delicious meal, it's our decision, one that we make every day to treat our body well but also to let our minds rest. Beyond all the satisfaction which my taste buds get from a great home cooked meal, I call my daily dinner a feast because I feel complete bliss as soon as I go into my kitchen to get out the vegetables and knifes, to chop and stir, to taste and experiment. I take this time out for myself, sometimes I get the record player started, open a bottle of wine, and I slow down my pace, always. There are a million other things I could do instead but I decided that this would be a part of my life, this is what I would do every evening for a couple hours. This choice has always been a gift and it still is, as it has given me some of my best memories, all saved in food.
For about three days, I thought about a recipe which I would like to share with you today. I was looking for something which tastes exceptionally good to celebrate this special day, but I also wanted to write about an experience which I felt quite a few times in the past year, to struggle, to doubt, to feel like giving up but in the end, to trust and follow your inner voice which guides you into the right direction.
One of the earlier dishes I made for eat in my kitchen, was a rabbit stew. It tasted fantastic but it didn't look pretty and I had no experience whatsoever capturing every kind of food deliciously in a picture. I was used to taking photos of our dinners or lunches once in a while to freeze the moment but not to make it look good and appealing on a plate. So I sat on the floor of our kitchen, crying, it was late in the evening, my boyfriend was my light man standing on a chair and holding a fluorescent tube from the hardware store, trying to make it work. The scene was ridiculous and so funny at the same time, at least now when I look back! It didn't work out, the rabbit never made it onto the blog and that night I thought I would give up, but instead I made a few changes and moved on. No more artificial light and no more stews until I felt experienced enough to capture their rustic beauty in a photo.
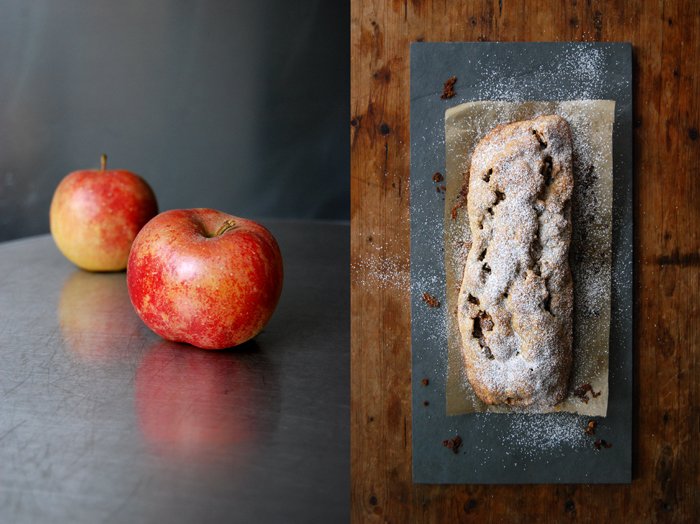
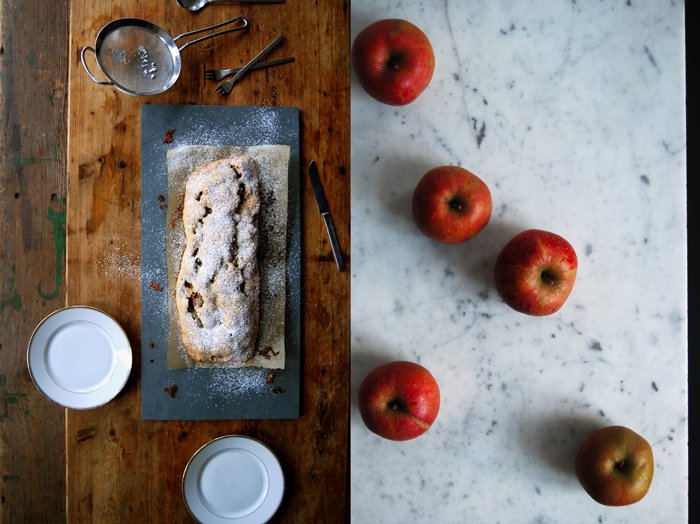
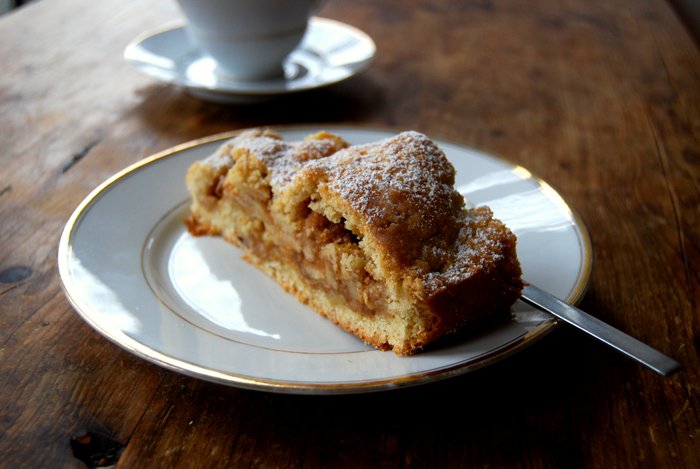
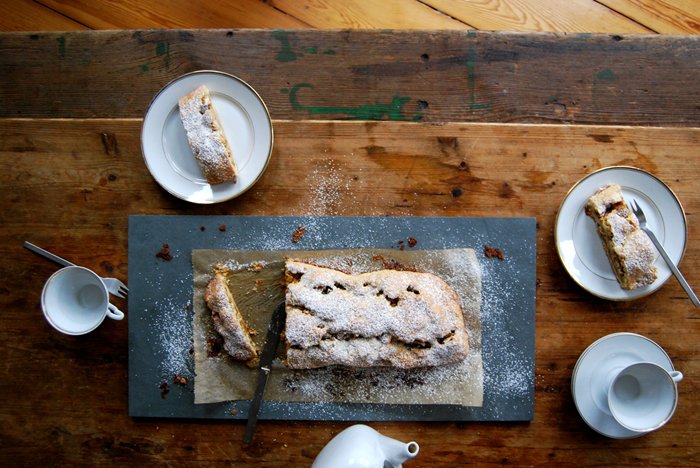
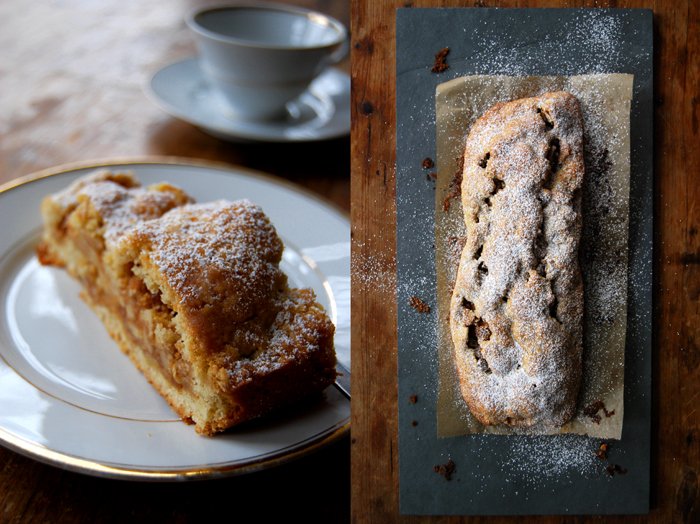
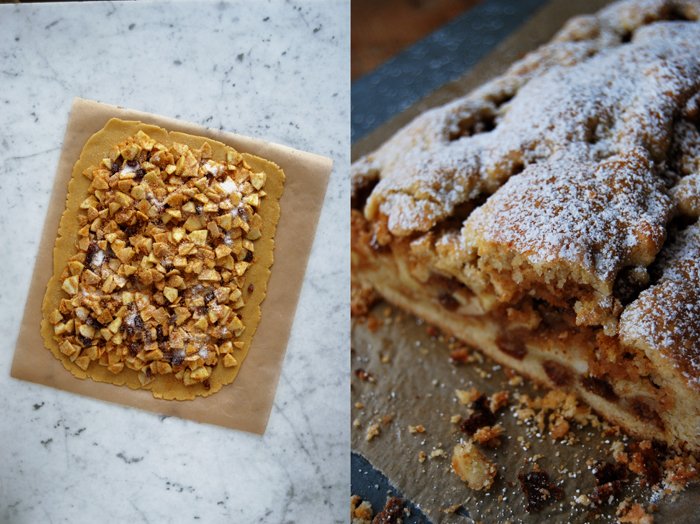
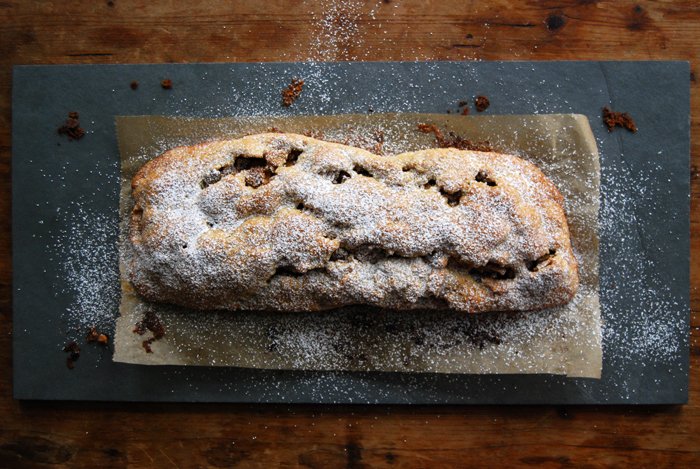
I'm not going to share a rabbit recipe with you today but another advanced kitchen task, Tyrolean apple strudel. This isn't a quick and easy cake but it teaches you to trust. It's a bit of a challenge but it will reward you with one of the greatest enjoyments of the sweet world, pure buttery fruitiness. The strudel is filled with lots of apples, raisins and spices all wrapped in a cinnamony short crust. The pastry isn't crisp like a pie, it's a bit soft, almost juicy which makes it quite delicate to handle. There is another strudel variation made with a very thin and flaky dough called Ziehteig in German but I prefer my strudel with short crust. It's my favorite of all strudels, buttery, soft and slightly crisp on the outside.
The final result is fantastic but you will have to work for it and trust yourself and maybe improvise at times. There may be moments you want to give up, when you feel that you can't get it right and for a second, you believe that it's over, you're done with it (although it's just a cake, it can feel quite dramatic). But then, out of the deepest corner of the mind comes a spark, a pull, like a defiant little child that doesn't want to accept a "no", and this feeling that seems like a mood at first, doesn't want to fade, it grows instead until it becomes a force. It fills you up with energy again, confidence, the exact power you need to overcome this low, because that's what it is in the end, nothing more and nothing less than a low that will pass. Maybe these words fit more to my last year than to a strudel but anyhow, it can feel similar in the kitchen at times. So back to my strudel, the first 10 minutes in the oven are the critical phase, it can be tricky. The dough can crack, it happens sometimes but it's not a problem, you just have to close it again. And here's when the trust comes in. I've been making this recipe for almost 15 years but today's strudel opened more than any other before as I took my time taking pictures so the pastry got warm. I was used to a few cracks on the top which you can easily close with two spoons, but this time, one side opened completely. So I had to react quickly, I pulled the pastry up again with the help of the parchment paper and stabilized it with small baking dishes on each side. I got a bit nervous but it worked, as always.
And maybe that's one of the biggest lessons I've learned in the past year, not for the first time in my life, but with a kind of intensity I never felt before. As long as you don't give up and trust everything will work out. The peace discovered through this experience is a treasure.
I want to thank you so much for joining me while I fill these pages of eat in my kitchen. I hope you enjoy the time in the kitchen and at the table with these recipes as much as I do. There will be many more to come, not every day but about four times a week. I need a little break once in a while to feed my inspiration.
Thank you to my mother and my whole family in Germany, Malta and in the US for being such an amazing inspiration to my kitchen and a big thank you to my boyfriend for his patience!
Lots of love from Berlin,
Meike xx
Tyrolean Apple Strudel
For 1 large apple strudel you need
For the dough
plain flour 300g / 10.5 ounces
granulated sugar 150g / 5.5 ounces
ground cinnamon 1 teaspoon
baking powder 2 leveled teaspoons
a pinch of salt
butter, cold, 150g / 5.5 ounces
organic egg, beaten, 1
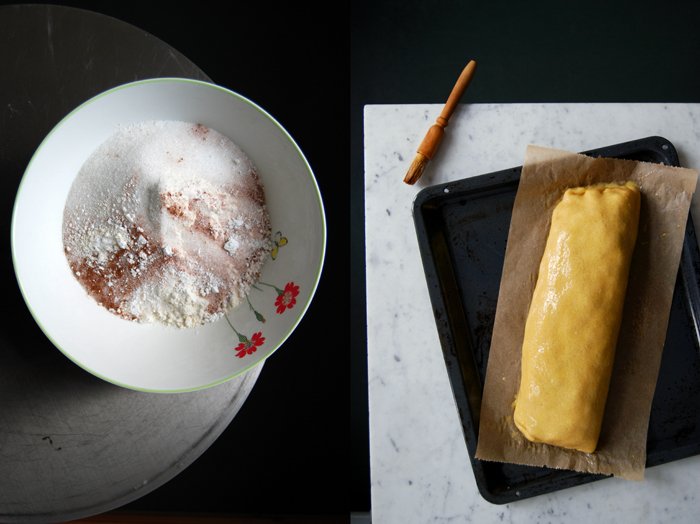
Combine the flour with the sugar, salt, baking powder and cinnamon. Cut the butter with a knife into the flour until there are just little pieces of butter left. Continue with your fingers and rub the butter into the flour until combined. Add the egg and continue mixing with the hooks of your mixer until you have a crumbly mixture. Form a thick disc, wrap in cling film and put in the fridge for 1 hour.
For the filling
sour apples (like boskoop), peeled, cored, cut into 8 pieces each and sliced thinly, 800g / 1 3/4 pounds (weight of the apples before peeling and coring)
raisins 100g / 3.5 ounces
dry breadcrumbs 60g / 2 ounces
butter 1 teaspoon
vanilla, the seeds of 1/2 pod
ground cinnamon 2 1/2 teaspoons
zest of 1/2 lemon
zest of 1 orange
freshly squeezed lemon juice 1 tablespoon
freshly squeezed orange juice 1 tablespoon
Kirsch schnaps 2 tablespoons
granulated sugar 80g / 3 ounces
Roast the breadcrumbs in the butter, stirring constantly until golden brown. Let them cool.
In a large bowl, mix all the ingredients for the filling apart from the sugar; you add the sugar when the filling is spread out on the pastry.
The strudel
organic egg, beaten, 1 for the egg wash
icing sugar for the topping
Set the oven to 180°C / 355°F (fan assisted oven).
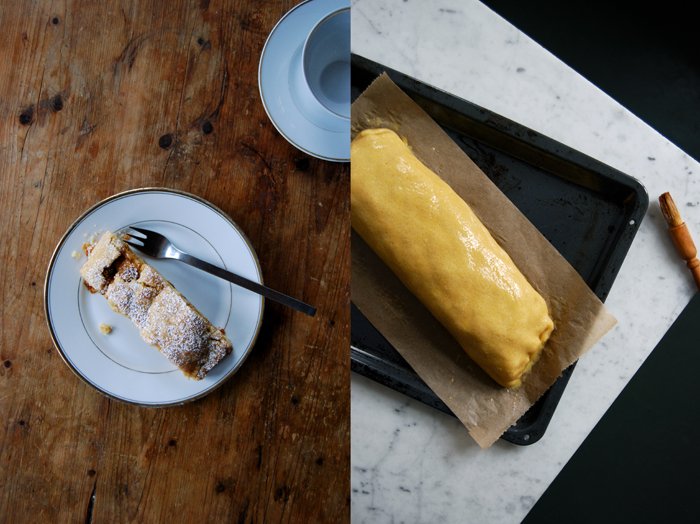
Roll out the dough between cling film, about 35 x 30 cm / 14 x 12". Take the top layer of cling film off the pastry and put a large piece of parchment paper on instead. Flip the dough around so that the parchment paper is at the bottom and take off the cling film on top. Gently spread the filling evenly on the pastry but leave a 2cm / 1" rim around it, sprinkle the filling with the sugar. Carefully roll up the dough from the long side, it should be quite tight, if possible, push the apples back in that fall out. When the strudel is rolled up put the fold at the bottom and close the sides by pushing the dough together. Quickly move the strudel on the parchment paper onto the baking sheet, brush with the egg wash and bake for 40 minutes or until golden brown. Watch the strudel in the first 10 minutes, if it opens, quickly close it with the back of a spoon. If it opens on the side, pull up the parchment paper to put the pastry back into place and hold it in place with a small ovenproof dish put right next to the strudel. When it's done, take it out of the oven and let it cool on the baking sheet for a few minutes before you sprinkle it with icing sugar.
Enjoy pure, with whipped cream or custard sauce.
For the custard sauce
organic egg yolks 4
cornstarch 3 tablespoons
granulated sugar 100g / 3.5 ounces
milk 700ml / 3 cups
a pinch of salt
vanilla pod, slit slightly, 1
Whisk the egg yolks with the cornstarch, sugar, salt and 50ml / 2 ounces of the milk until well combined.
In a sauce pan, bring the remaining milk with the vanilla pod to the boil. Take the vanilla pod out and scrape the seeds out of the bean into the milk. Add the egg mixture to the hot milk, whisking well. Take the sauce pan off the heat after 1 minute and continue whisking for 2 minutes, serve hot.

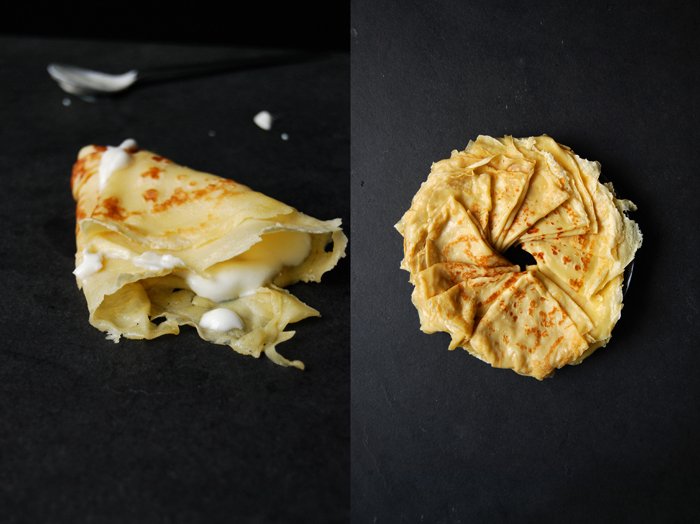
Breakfast Crêpes with sweet Sour Cream
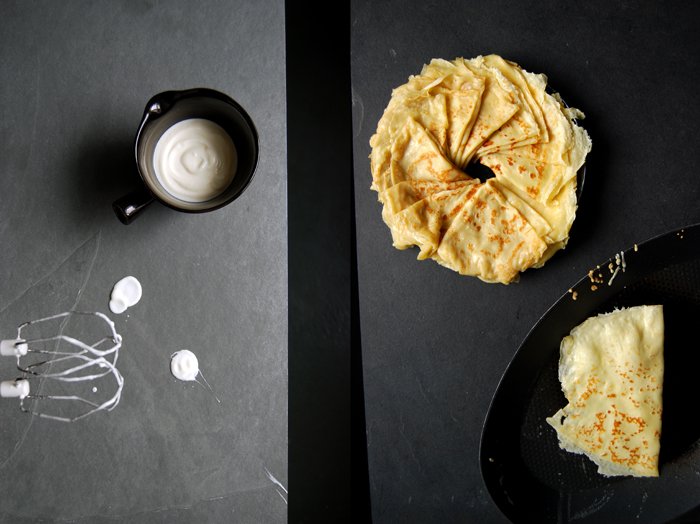
This is one of the best things you can do with a golden crêpes, fill it with sweet whipped sour cream! The cream is so simple that whenever I make it for my friends, no one manages to guess what's in it. It's definitely not much, just sour cream whipped with icing sugar but for whatever reason, it creates a unique taste between sweet and sour which is far more fine than you would imagine.
I learned about this recipe from my stepfather who lived in Paris for a few years. Uli adores this country, the food and lifestyle and he praises its cuisine almost as much as the one he grew up with, the traditional Swabian cooking. He's a true gourmet, one of the most joyful and critical I know who loves his food and wine with such passion that he celebrates every meal. A dinner with him is a feast and even the smallest nibble for lunch turns into a special treat. It's the way he talks about it, how he appreciates every bite, that it becomes more than just food, it's a celebration of life. Uli brought a huge French influence into my family's cooking, yesterday's Coq au Vin, my Daube de Boef Provençale, the creamy Vichyssoise or my mother's Tarte Tatin, I'm sure I would have cooked these recipes at one point in my life anyway, but his notes and comments to the recipes, his authentic knowledge and the stories about his life in France which he has told us since we were children turn these dishes into something very special (and delicious!). I still call him when my cooking turns French for some tips and advice.
I remember that we often used to make these crêpes as a spontaneous dessert after a long dinner when we all didn't feel like finishing our gathering at table but rather listening to more stories while eating these wonderfully luscious crêpe rolls. Uli always used to remind us in the kitchen that we have to make them thinner, like in France! Today, I love to make them for a late breakfast on the weekend, with a Café au Lait at hand and some Jacques Brel in the background. Although he was Belgian he's still one of my favourite singers when it comes to French chansons! He makes me feel like I'm in Paris!
Crêpes with sweet Sour Cream
For about 20 crêpes (for 4-6 people) you need
plain flour, sieved, 250g / 9 ounces
granulated sugar 50g / 2 ounces
a pinch of salt
organic eggs 4
milk 1/2l / 2 cups
butter, to fry the crêpes
For the sweet cream
sour cream 400g / 14 ounces
icing sugar 6 tablespoons plus more to taste
Whisk the sour cream and icing sugar to a light and fluffy cream and sweeten to taste.
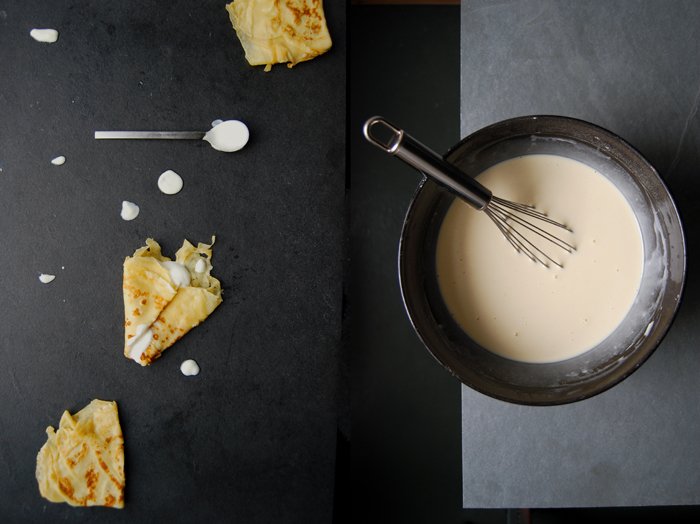
Mix the ingredients for the crêpes to a smooth dough (with an electric mixer) and let it sit for 15 minutes.
In a non-stick pan, heat a teaspoon of butter. Pour in a ladle of the dough, holding the pan in your hand and turning it so that the dough spreads evenly and very thinly. The temperature should be on medium-high as the crêpes won't need more than 1 minute on each side once the heat is set right. I always use the first two crêpes to find the right setting. When the crêpe is golden on both sides, fold it twice and keep it warm in the oven at 80°C / 175°F. Always heat a teaspoon of butter before you add new dough to the pan. When the last batch is done serve with the sweet sour cream.


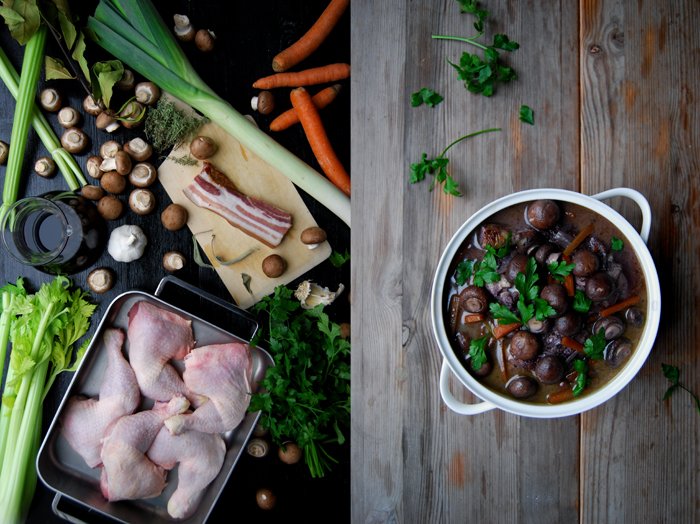
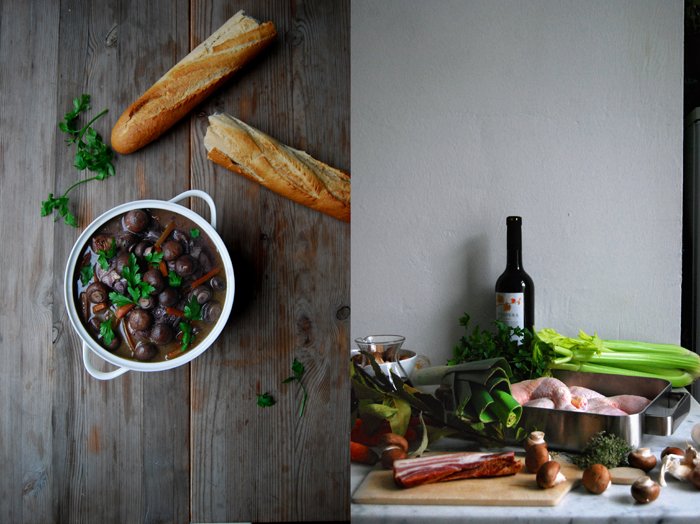
Coq au Vin - a drunken Chicken in Red Wine
A mother's kitchen can be the best cooking class in the world, the place to learn all the little tricks and secrets passed on from one generation to the next. In my mother's kitchen, I learned almost everything I needed to know to become a passionate cook with love and curiosity for ingredients. She nurtured my trust and boldness to create my own cooking style. Her kitchen is still a magic place to me where she creates all these tastes and smells which I'll never forget in my whole life, especially when it comes to meat and gravies cooked the traditional way.
Most of us savoured the first stews and roasts in our mother's and grandmother's creative culinary spaces, where our taste buds were refined to distinguish between the woody herbs like sage, thyme and rosemary and the strong aroma of bay leaf, juniper and allspice. Sauces cooking in pots for hours fogging the kitchen windows on cold November afternoons became more important to me than the meat as this was the spice for my beloved knoedel, mashed potatoes or spaetzle. All the vegetables, spices and green leaves would cook down to a concentrate, the essence of natural, rich flavours, created to soak into the soft sponginess of a slice of soft white bread or a waxy potato mashed into these juices. This was always the pinnacle of cooking to me, an art. My mother, who makes the best sauces I know, would chop and stir for hours to come up with a deep, brown gravy - the grande finale.
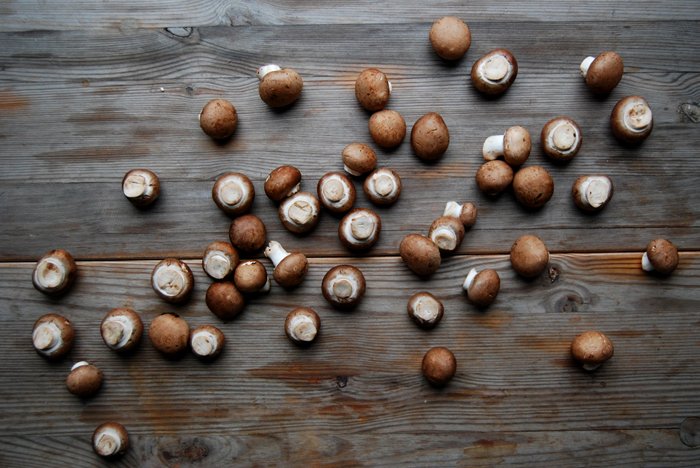
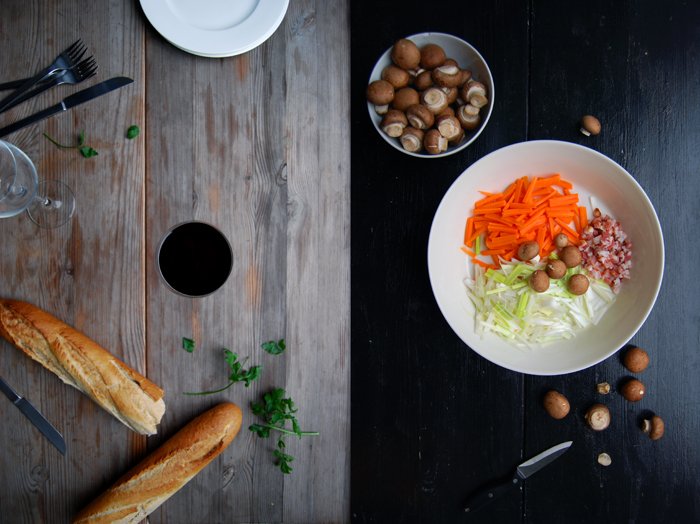
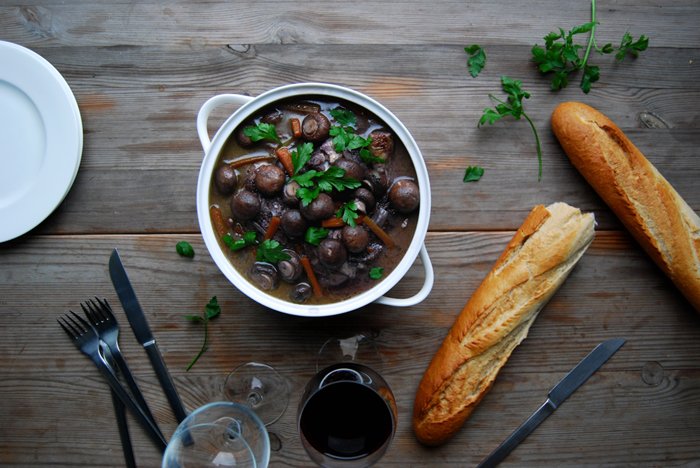
For years, Coq au Vin was saved in my mind as one of the time consuming recipes which would take an afternoon of preparation, until I made it myself for the first time. I called my mother twice to double check her recipe and to see that we didn't have any misunderstandings but her recipe was so much easier than expected. It really doesn't take more than 40 minutes to turn a few chicken legs, a bottle of wine, some mushrooms and lots herbs and spices into this amazing French classic. The sauce is so aromatic, it's hard to believe that it wasn't on the cooker for longer. The mushrooms are still crunchy and fresh as they only cook in the juices for the last 10 minutes, some fresh parsley leaves sprinkled on top of the drunken chicken finish it off. Then you can savour the juiciest meat, turned red from the wine and lots of sauce, deep, rich and fragrant.
Coq au Vin
For 4 people you need
chicken legs 5-6 (about 1.5kg / 3.5 pounds)
medium carrots, cut into julienne, 2
large leek, the light part only, cut into julienne, 1/2
bacon, cut into small cubes, 50g / 2 ounces
celery, cut into large pieces, 1 stalk
garlic, crushed, 2 big cloves
small mushrooms (whole not cut!), bottom cut off, 400g / 14 ounces
red wine 1 bottle (0,75l)
olive oil
salt and pepper
parsley leaves, a small handful, for the topping
For the bouquet garni (bound with a cotton string)
parsley, a small bunch
thyme, a small bunch
sage leaves 3
bay leaf 1
In a large pot, heat a splash of olive oil and sauté the chicken legs in batches for a few minutes on each side until golden brown , season with salt and pepper. Set the chicken aside and sauté the bacon for 2 minutes until crisp. Add the carrots, leek, celery and garlic and cook for 2 minutes, stirring constantly. Add the chicken, the bouquet garni and red wine, season with salt and pepper and close with a lid. Cook on medium-low heat (simmering) for 30 minutes.
After half an hour, put the mushrooms on top of the chicken, dip them a little into the juices and cook for 10 minutes. Take out the bouquet garni and celery, season to taste and serve sprinkled with fresh parsley leaves and some crunchy baguette or potatoes.

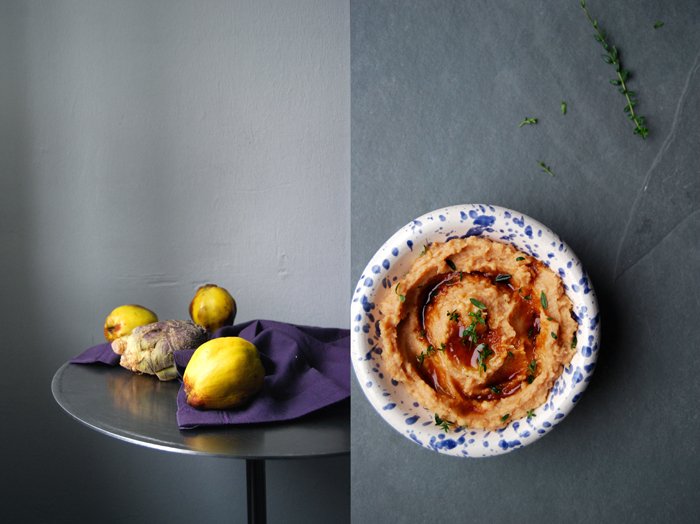
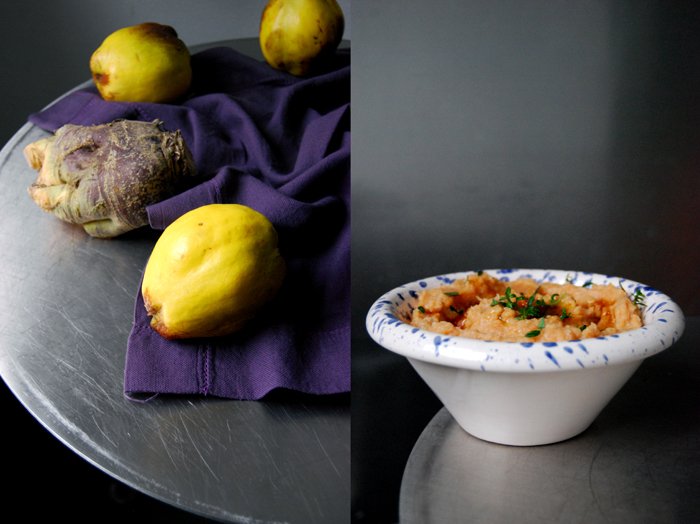
Quince and Rutabaga Purée with Apple Balsamico and Thyme

What can be done with leftover quince and rutabaga? Throw them together and mash them with sweet Apple Balsamico vinegar and thyme! When I made my ginger lemon brandy with quince last week I bought too many of the fruits (as always) and their colour slowly changed from yellow to brown in the past few days. It was time to use them before they looked like potatoes. I could have also made jelly out of them but I still have a couple jars left, I just use it to refine sauces but it never finds its way onto my breakfast table. The competition in my pantry is tough, there's also white vineyard peach jam, Tyrolean plums and my all time favourite, chunky strawberry. Soon I'll make new batches of my tangerine and my blood orange marmalade and I'm slowly running out of space.
So no more jam but a purée which is a fruity alternative to mashed potatoes, ideally with a hearty roast and some aromatic gravy on the plate - heavenly! Both the quince and rutabaga flavours came through quite balanced and merged with the woody thyme, a little maple syrup and thick Apple Balsamico. You could use normal balsamic vinegar as well but the apple complements the quince and adds a little more sweetness, pear balsamico would be nice too. If you have it at hand, here's the perfect dish for it to show off its qualities!

Quince and Rutabaga Purée with Apple Balsamico and Thyme
As a side dish for 4 you need
rutabaga, peeled and cut into little cubes, 300g / 10.5 ounces
quince, peeled, cored and cut into little cubes, 3
white wine
granulated sugar 1 teaspoon
salt and pepper
a pinch of cinnamon
olive oil
maple syrup, 1-2 tablespoons, to taste
apple balsamic vinegar, 1-2 tablespoons, to taste
fresh thyme leaves, 1 tablespoon plus more for the topping
In a sauce pan, heat a little olive oil and sauté the quince and rutabaga with the sugar for 2-3 minutes on medium heat. Deglaze with a splash of white wine and add some water, it should come up about 2.5cm / 1". Season with salt, pepper and cinnamon and stir in the maple syrup. Close with a lid and let it simmer on medium-low heat for about 30-40 minutes or until the fruit and root are soft, purée in a blender and season to taste. Serve warm, sprinkled with thyme and a little more Balsamico vinegar.

Smoked Salmon Dip with Horseradish and Dill on Pumpernickel

Salty, smoky and creamy! I've wanted to make this sandwich for months but whenever we had thin slices of pink smoked salmon lying in front of us on the kitchen table, we decided that it would be a pity to put this delicacy in a food processor. So we put some bread in the toaster instead and ate the fish puristically, just with toast, delicious as well but not what I had in mind today. I wanted to mix the fish with cream cheese, puréed and seasoned with a little horseradish, a simple composition which tastes fantastic on sweet and dark pumpernickel. It just needs some fresh dill on top and it's a stunner!
In summer, I like to make these sumptuous open sandwiches for a late breakfast or brunch but at this time of the year it's the perfect nibble for dinner parties. You can mix the spread in advance and put it on the table as a little appetizer with some more dips, like hummus or tzatziki with loaves of bread while you finish the last preparations in peace. It makes me nervous when I know that everybody is hungry waiting for me to get ready, so I'd rather see my friends happy with some finger food before the feast begins. It relaxes them as much as me.


Smoked Salmon Dip with Horseradish and Dill on Pumpernickel
For 12 small open sandwiches you need
pumpernickel bread, cut into triangles, 6 slices
smoked salmon 100g / 3.5 ounces
cream cheese 150g / 5.5 ounces
a pinch of freshly grated horseradish, to taste
fresh dill, snipped, a small bunch
Purée the salmon with the cream cheese in a food processor and season with horseradish to taste. Spread on the pumpernickel slices and garnish with dill. Enjoy!


Roasted Ginger Lemon Brussels Sprouts
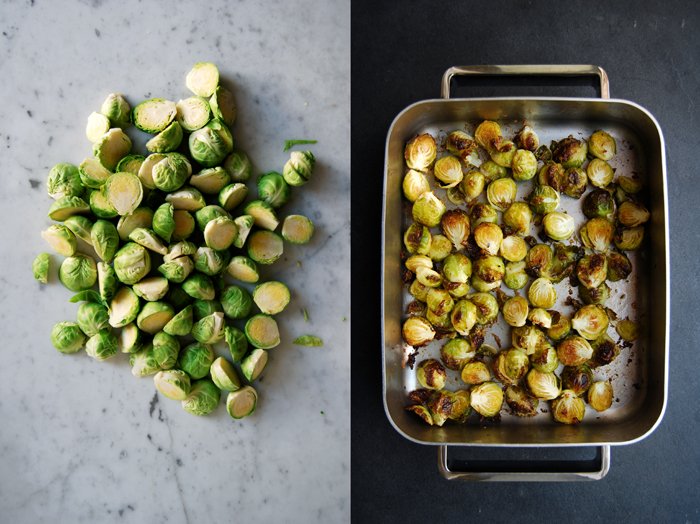
The fact that I found a bag with little green Brussels sprouts at the far, far end of my fridge says a lot about my relation to this miniature cabbage. When I have them on my plate, I enjoy eating them, but if I'm not asked to cook them, they barely find their way into my pots. But this might change as I made a new discovery, roasted ginger lemon Brussels sprouts! It's amazing how the two lemony spices manage to turn the strong aroma of the green leaves into something new, less heavy and almost fresh. I was impressed! I often mix Brussels sprouts with smoky bacon to soften their dominance, the meat's saltiness is one of the few flavours that can handle this cabbage, but my new find is even better!
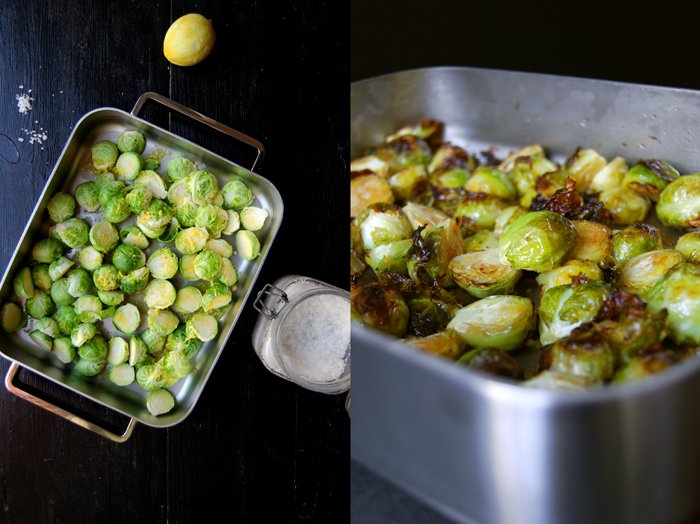
This dish is really easy to prepare, once you removed the outer leaves, the cabbages are completely coated in a strong ginger lemon olive oil and roasted in the oven for about half an hour. If you're a big fan of these two flavours (like me) you can add a lot of grated ginger and lemon zest to the aromatic oil to give the vegetable a completely new direction. A while ago, these two aromas worked wonders in another recipe of mine, my refreshing cauliflower soup. I also wanted to bring out the Brussels sprouts' sweet side in this recipe so I sprinkled them with a bit of sugar before I put them in the oven to caramelize them a little. The added sweetness fit perfectly!
This makes a great side dish for poultry or Sunday roasts but also a delicious vegetarian lunch, if you're still looking for some greens for your Thanksgiving table, here you go!

Roasted Ginger Lemon Brussels Sprouts
For 4 people you need
Brussels sprouts, trimmed, cut in half, 750g / 1 3/4 pounds
olive oil 50ml / 1/4 cup
freshly squeezed lemon juice 1 tablespoon
zest of 1 lemon
freshly grated ginger 1 tablespoon
sea salt
granulated sugar 1/2-1 teaspoon
Set the oven to 200°C / 390°F (I use the Rotitherm setting).
Whisk the olive oil with the lemon juice, zest and ginger. Spread the Brussels sprouts in a baking dish and mix them with the aromatic oil using your fingers to coat them thoroughly. Sprinkle them with sugar and salt. Put the baking dish in the oven and turn the cabbages with a spoon or spatula after about 10 minutes and then every 5 minutes to prevent them turning too dark. Take them out of the oven after about 25-30 minutes or when they are golden brown and al dente.


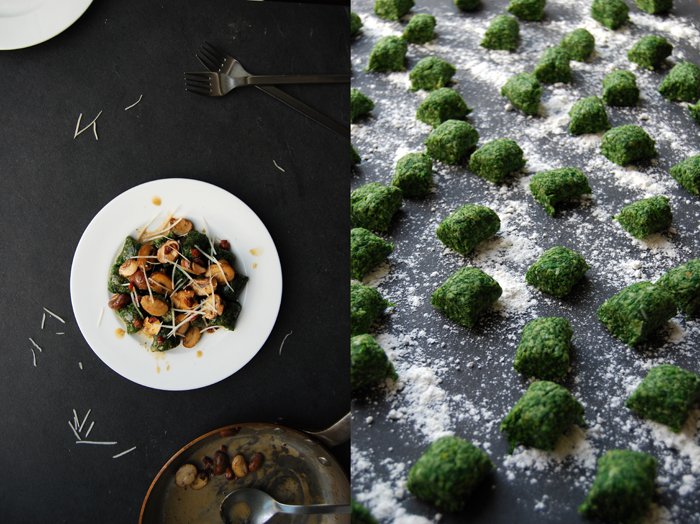
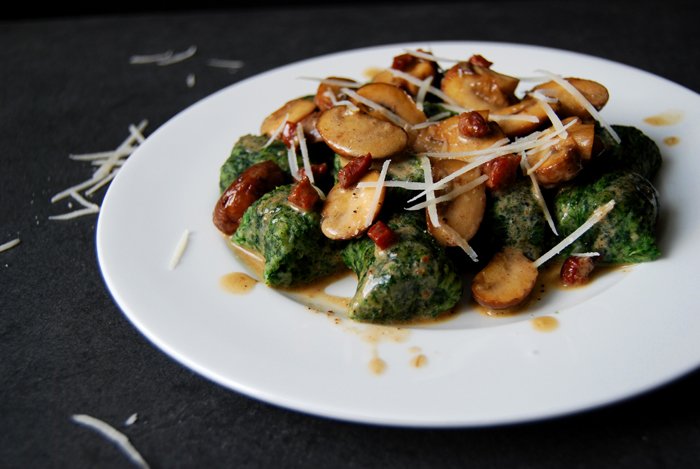
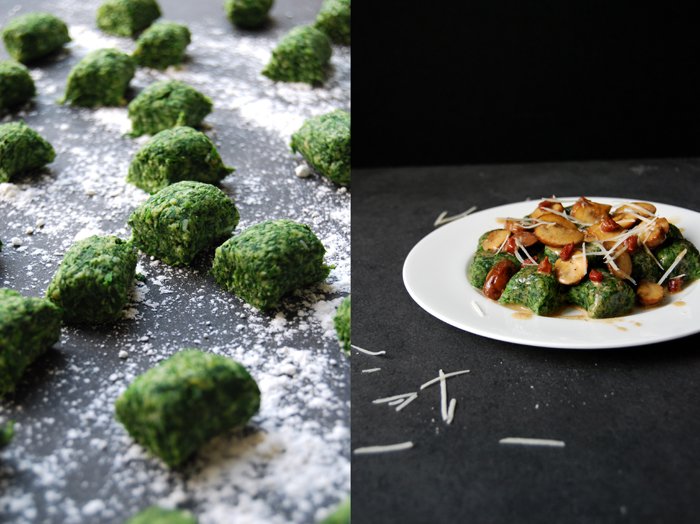
Spinach Gnocchi with creamy Mushrooms
A homemade gnocchi dinner is quite a satisfying experience on many levels. Let's start with the preparation: it takes a bit longer than cooking spaghetti but it rewards you with the feeling that you've created something special, something pretty and impressive on your plates. Here you don't cook someone else's product in hot water, this is your own dough made with fresh ingredients, gnocchi formed with love and attention. I believe that the effort you put into a meal is saved in it, you can taste it!
Making gnocchi can be intimidating but it doesn't have to be, it's about the right ratio between dry and moist ingredients, and taste obviously. When I make my potato or pumpkin gnocchi I know that I have to follow a few rules. The most important one is not to mix the flour into the vegetable mixture when it's still warm, it has to cool off completely or the gnocchi won't stay in shape. If you think that your dough is too sticky you just add a little more flour until you can hold it in your floured hands. It should feel a bit like yeast dough for pizza, when it's more like glue, impossible to get off your fingers, you have to make some more adjustments. Be brave and it'll work out!
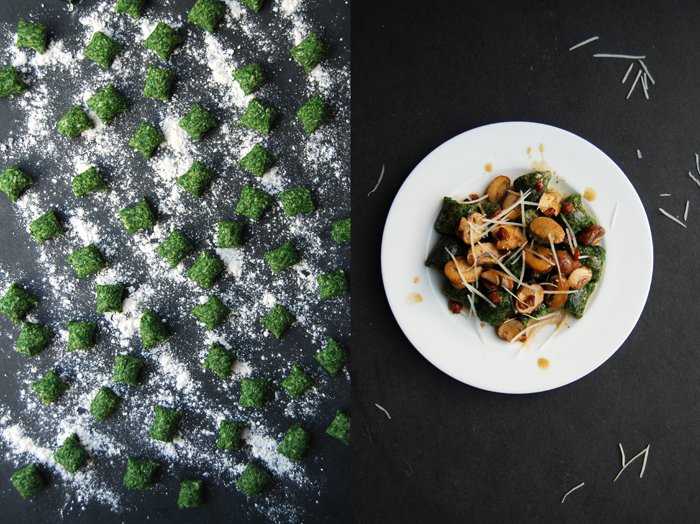
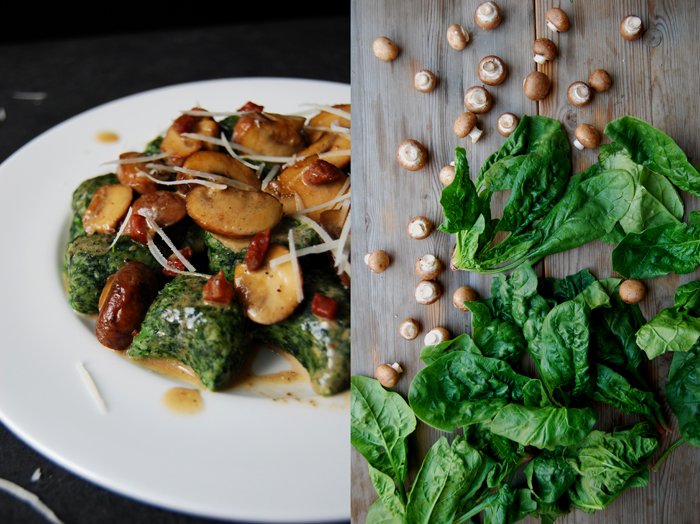
Although my spinach gnocchi are made with fresh breadcrumbs and not potatoes, they follow the same rules. I blanche lots of crunchy winter spinach, squeeze it well and let it cool. Again, if it's too moist and still warm it can cause hassles. Once it's done, I mix it with the bread, a little flour, the spices and parmesan. The green dumplings are very easy to handle, you can even prepare them a few hours ahead before you cook them. I wanted the spinach to come through strong and earthy to keep up with my creamy sauce made of sautéed mushrooms. I also added some salty bacon bits but it's just as good without the smoky flavour, the meat gives it a hearty touch, just choose what you feel like.
When I saw the plate in front of me, a perfect picture of comfortable Italian food, I knew why I don't buy gnocchi from the store. They never taste as good, that's for sure, but they also don't have my kitchen memories saved in every little bite.
Spinach Gnocchi with creamy Mushrooms
For 3-4 people you need
For the mushrooms
mushrooms, the bottom cut off, cut into thick slices, 300g / 10.5 ounces
heavy cream 150-200ml / 5.5-7 ounces
brandy
olive oil
salt and pepper
optional: bacon, cut into small cubes, 60g / 2 ounces
In a large pan, fry the bacon in a little oil for a few minutes on medium heat until golden brown and crisp. Take the bacon out of the pan and add a little more oil if necessary, sauté the mushrooms on high temperature for 1 minute on each side. Deglaze with a splash of brandy, season with salt and pepper to taste and add the cream.
For the gnocchi
fresh spinach leaves (stems cut off), rinsed, 500g / 1 pound
breadcrumbs, freshly ground with a grater or in a food processor, 250g / 9 ounces
organic egg yolks 2
plain flour 70g / 2.5 ounces
Parmesan, freshly grated, 40g / 2 ounces plus more for the topping
salt 1 1/2 teaspoons
nutmeg
pepper
Blanche the spinach in a large pot of boiling, salted water for 1 1/2 minutes. Drain, rinse with cold water and let it cool in a colander for about 10 minutes. Squeeze the spinach in batches in between your hands but mind that it isn't hot anymore. The spinach should be quite dry. Purée the leaves in a food processor and mix with the other ingredients until well combined.
On a well floured surface, roll the dough in batches into a 2cm / 3/4" sausage shape and cut off 3cm / 1 1/4" gnocchi. Spread them on a well floured baking sheet.
In a large pot, bring salted water to the boil and cook the gnocchi in batches on medium heat (simmering). When they start to rise and float on the surface after about 4 minutes take them out with a slotted ladle and drain them for a few seconds. Keep the gnocchi in a covered ovenproof dish in the warm oven (100°C / 210°F) until the last batch is done.
Serve the gnocchi with the mushrooms, sprinkled with freshly grated Parmesan and crushed black peppercorns.


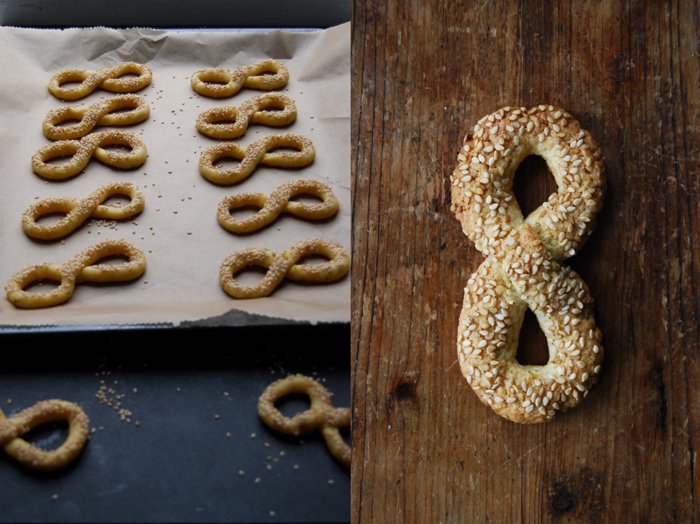
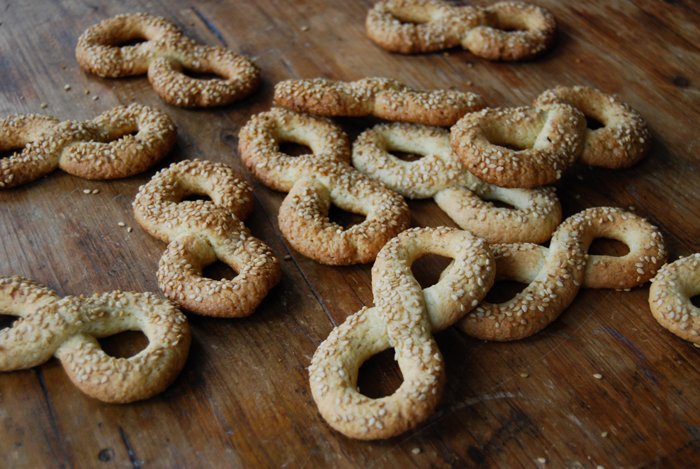
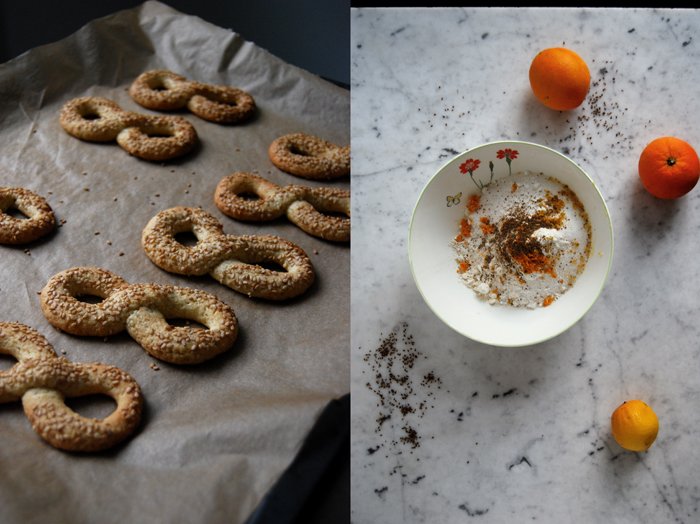
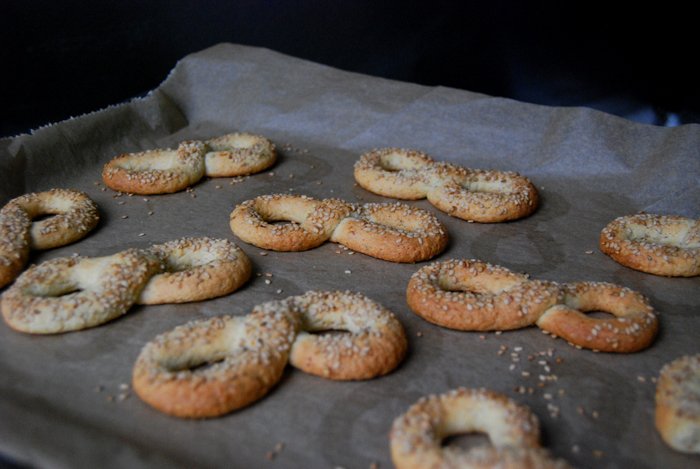
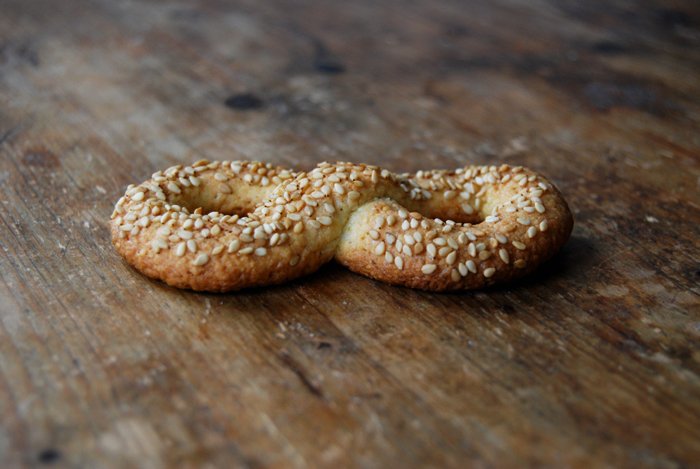
Ottijiet - Maltese Tea Time Cookies with Sesame Seeds, Cloves and Aniseed
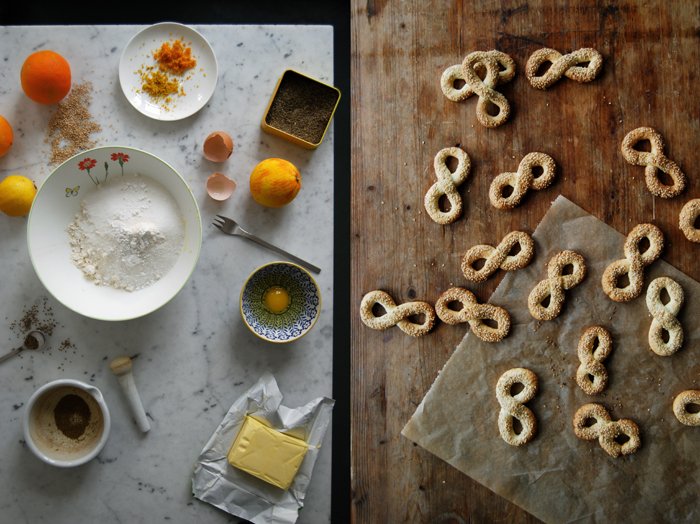
Almost ten years ago, I found my favourite tea time cookie on a little island in the Mediterranean. The Maltese Ottijiet are crumbly short crust based cookies, shaped in a figure of 8, hence the name ottijiet (the plural of otta) derived from the Italian word for eight, otto. The composition is not very sweet but packed with wonderful flavours ripened under the Mediterranean sun: orange, lemon, aniseed, cloves and sesame. It's one of the most aromatic sweets I know. Imagine the smell of the air in my kitchen while they're baking in the oven, it's beautiful!
When we're on the island, I always go to my trusted confectionary Busy Bee in Msida on the first or the second day of our stay to stock up on ottijiet for our traditional 5 o'clock tea breaks in Jenny's kitchen. As I'm not the only one in the house who is obsessed with them, I buy a few bags right away to avoid cookie shortages. This sweet became an important part of our daily ceremony, we all come together and meet around my Maltese mother's big wooden table in the afternoon to chat and savour our caramel coloured teas. Many Maltese like to dip the crunchy rings into their warm beverage and our family has often tried to convince me of this ritual - without success, it's not for me!
Whenever friends and family visit us in Berlin, they know how to make me happy and bring a few packages of ottijiet to our kitchen. But after so many years and cookies, I felt ready to bake my own. I was a bit nervous but luckily we still had a package from Jenny's last visit so I didn't have to depend on my taste memory. Ottijiet are kind of a national dish and I have learned a lot about the various traditional recipes and the obligatory spice mixtures from the cooks I met over the years. I knew roughly what I had to do but it took two batches of dough until my Maltese partner approved the result and I was happy too. But then, they were as good as Busy Bee's!
Ottijiet - Maltese Tea Time Cookies with Sesame Seeds, Cloves and Aniseed
Before you bake the cookies, the dough should rest in the fridge for about 1 hour.
For 22 ottijiet you need
plain flour 300g / 10.5 ounces
granulated sugar 100g / 3.5 ounces
baking powder 2 teaspoons
a pinch of salt
aniseed, ground in a mortar, 3 leveled teaspoons
cloves, ground in a mortar, 20 (about 1 1/2 teaspoons)
vanilla, the seeds of 1/2 pod
orange zest 1 teaspoon
lemon zest 1 teaspoon
butter, cold, 100g / 3.5 ounces
organic egg, beaten, 1
freshly squeezed lemon juice 1 tablespoon
freshly squeezed orange juice 1 tablespoon
water, cold, 1 tablespoon
sesame seeds about 50g / 2 ounces, for the topping
Combine the flour with the sugar, salt, baking powder, spices and citrus zest. Cut the butter with a knife into the flour until there are just little pieces of butter left. Continue with your fingers and rub the butter into the flour until combined. Add the egg, juices and water and continue mixing with the hooks of your mixer until you have a crumbly mixture. Form a thick disc, wrap in cling film and put in the fridge for about 1 hour.
Set the oven to 200°C / 390°F (fan assisted oven) and line a baking sheet with parchment paper.
Put the sesame seeds on a plate.
Break large walnut sized pieces off the dough and roll them between your hands for about 5 seconds. On the kitchen top, roll them into thin, 25cm / 10" long sausage shapes and close them well to form a ring. Twist the ring to an 8 shape, dip it into the sesame seeds and spread the cookies on the baking sheet with some space in between them as they will rise. Bake the ottijiet for 11 minutes or until golden brown and let them cool on a rack. Store them in your cookie jars and enjoy with a cup of tea!


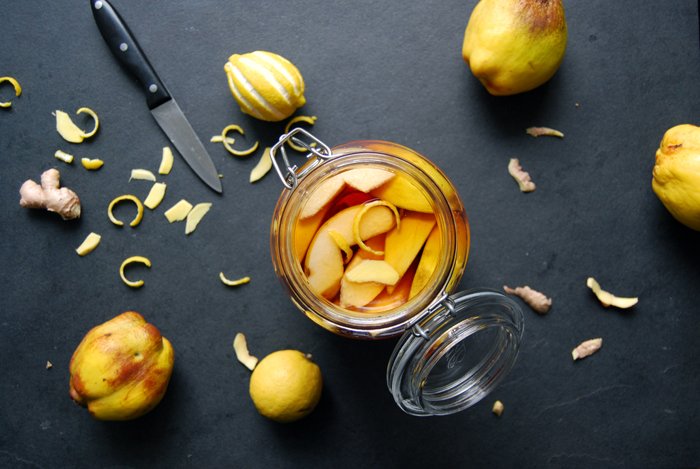
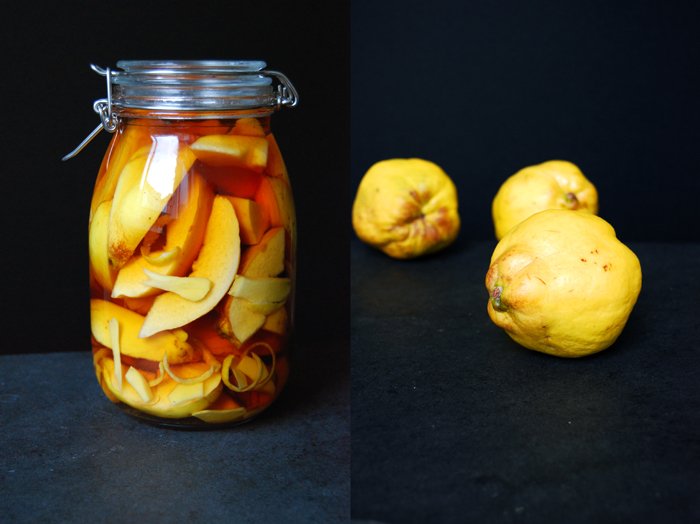
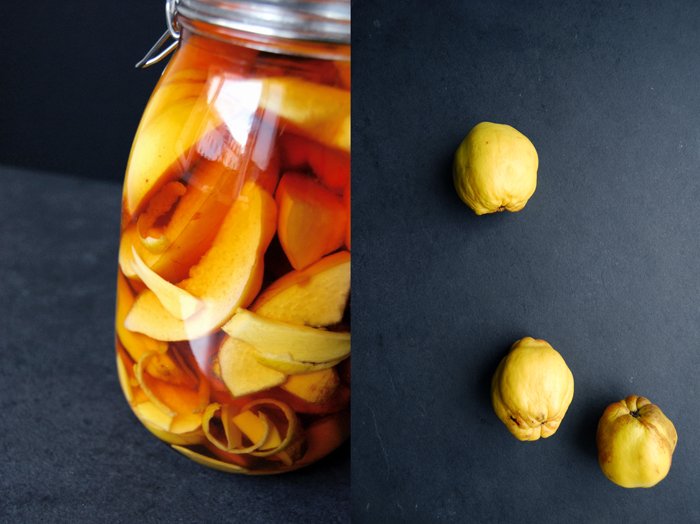
Ginger, Lemon and Quince Brandy

This is one of my little kitchen traditions, every year in November, I go to the market to buy quinces to make Nigella Lawson's Quince Brandy with Cinnamon and Star-anise. After a few weeks, the spirit turns into an aromatic composition that works wonders in mince pie fillings, stews or to deglaze meat and vegetables. But this year, things have changed! I will celebrate the first anniversary of my blog on the 23rd November, a whole year of my own and some of my family's recipes written on the pages of eat in my kitchen. Here, I found my playground where I can write about all my culinary ideas and creations, my new finds and beloved traditions. I cook and eat the food in my kitchen but there are no words to describe how thankful I am for all the response and support I get from you. There are moments when it all feels so overwhelming and almost unreal. It's a great inspiration for me to stay creative and open in the kitchen!
As Nigella already came up with the best recipe for her wintery cinnamon and anise brandy, I started to think about a variation on it that would create a completely different taste without disturbing the quince. I wanted something more fresh and fruity but still powerful enough to refine all the various recipes that I'll need it for in the next few months (especially at Christmas time). The strong and dominant aroma of ginger and lemon peel seemed like the right choice to me. And although it's only been a few days since I prepared the jar, I can already say that the result is very satisfying. I think I'll use it soon for my first mince pies of this season and until then I'll just enjoy its amber coloured beauty on my kitchen top.

Ginger, Lemon and Quince Brandy
For a 1.8l / 4 pints jar you need
quinces, wiped and scrubbed dry, not rinsed, about 6
brandy 1l / 2 pints
ginger, peeled and cut into thin slices, 2 thumb-sized pieces
peel of 1 lemon, cut into long, thin strips
Fill half of the jar with brandy. Cut the quinces with the skin and core into 8 pieces and put them into the jars, layering them with the ginger and lemon peel. Fill with the remaining brandy to the top and wait patiently for about a week, shaking it every couple of days before you start to use it.