A Nordic Herring Sandwich with Beetroot, Pear and Walnuts
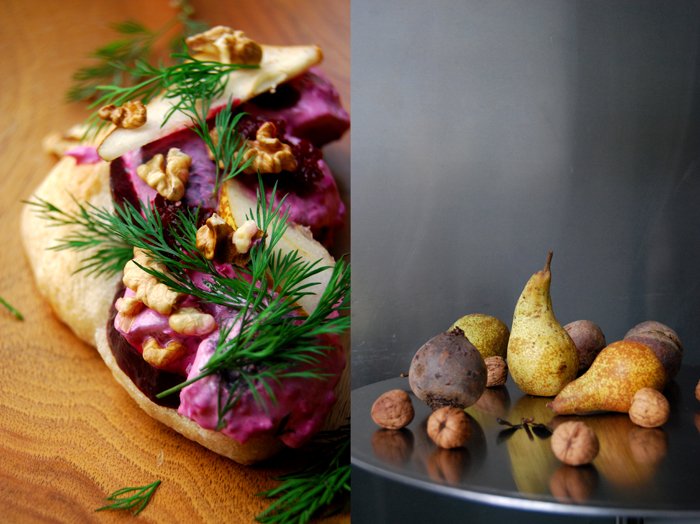
A few years ago we went to a green island in the Baltic sea called Rügen. It was one of those spontaneous holidays that turned into four perfect days of beach and forest walks, late breakfasts and long nights by the fireplace with a mug full of steaming mulled wine on our laps, it was great. A friend offered us her cute little house right behind the cliffs, the cottage was surrounded by dense trees and total silence. Although the strong November storms had just started we wrapped ourselves in our warm jackets and scarves up to our eyes to discover this quiet island. One of our culinary finds was Rügen's delicious seafood, fresh, smoked and pickled, especially the herring is of excellent quality!
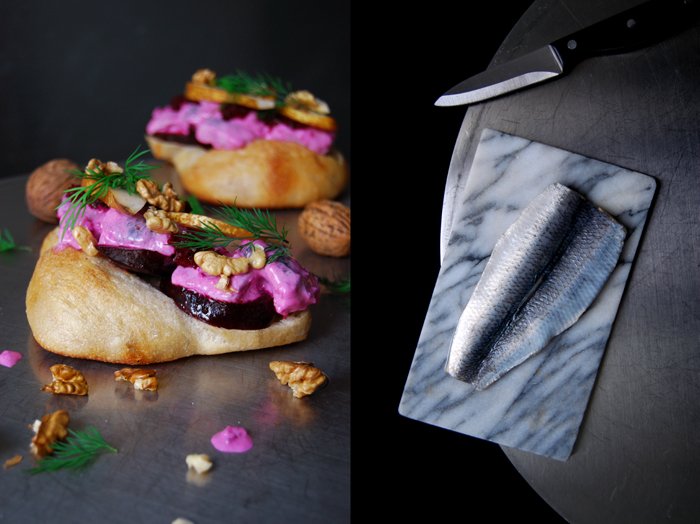
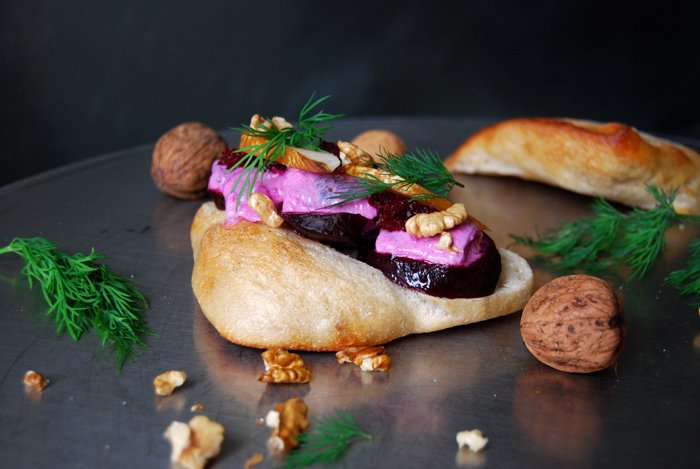
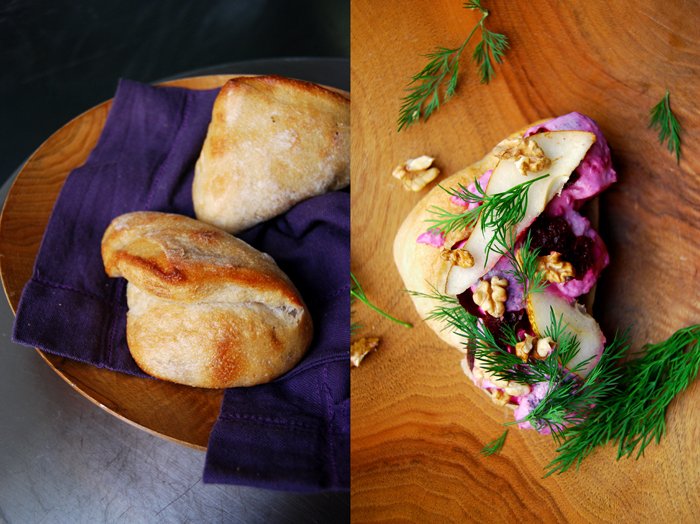
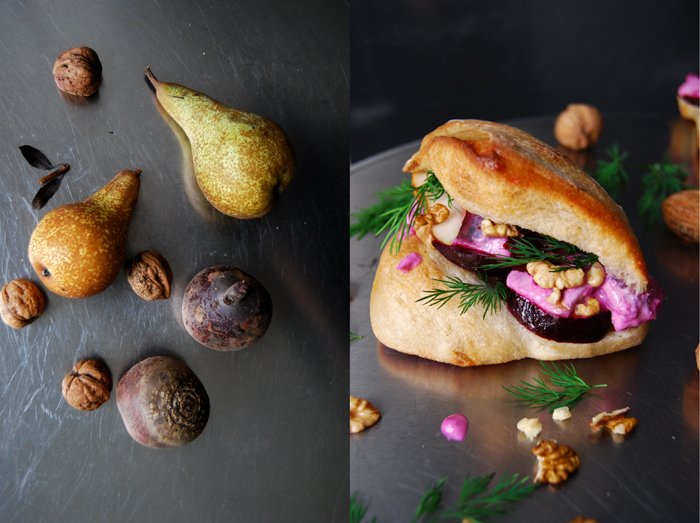
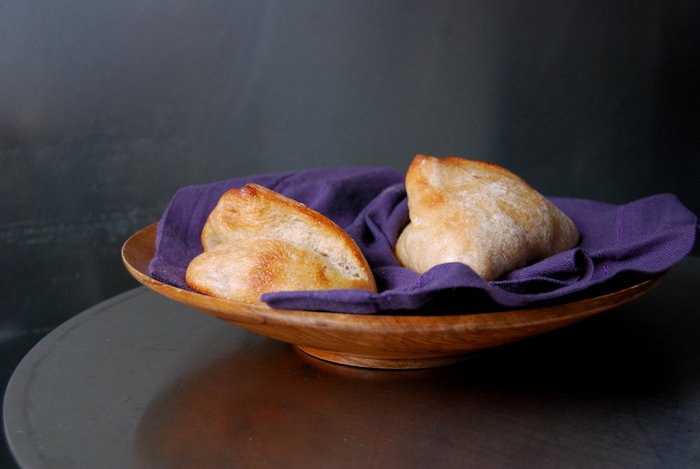
When I went on an aimless shopping trip a few days ago, I made a great discovery! With excitement I spotted jars with Rügen's pickled herrings in one of the grocery stores in my area. Within a split second I could see it right in front of me, a pink sandwich, Nordic style with a sour herring and beetroot salad, thick beetroot slices, pear, walnuts and dill. I chose some crunchy potato buns at the bakery and, back at home, I put the roots on the hob immediately. My kitchen impatience called for a sandwich!
A Nordic Herring Sandwich with Beetroot, Pear and Walnuts
For 4 sandwiches you need
hearty white buns, cut in half, 4
beetroot (with skin) 200g / 7 ounces
bay leaf 1
pickled herring (of good quality!), boned, drained and cut into thick strips, 200g / 7 ounces
sour cream or yoghurt 2 heaping tablespoons
olive oil
salt and pepper
crisp pear, cored and sliced, 1
dill, snipped, a small bunch, for the topping
walnuts, broken into small pieces, 4-6, for the topping
Cook the beetroots in salted water with 1 bay leaf for about 50-60 minutes or until al dente. Peel the roots and purée 1/3 of the them with 1 tablespoon of olive oil in a blender and season with a little salt. Cut the remaining roots into thick slices and coat with olive oil.
Mix the herring with the sour cream and 1 heaping tablespoon of the puréed beetroot.
Brush the bottom of the buns with a little olive oil and lay 3 slices of beetroot on top. Put some of the herring salad and a bit more of the puréed beetroot on top. Gently cover with pear slices and sprinkle with walnuts and dill.

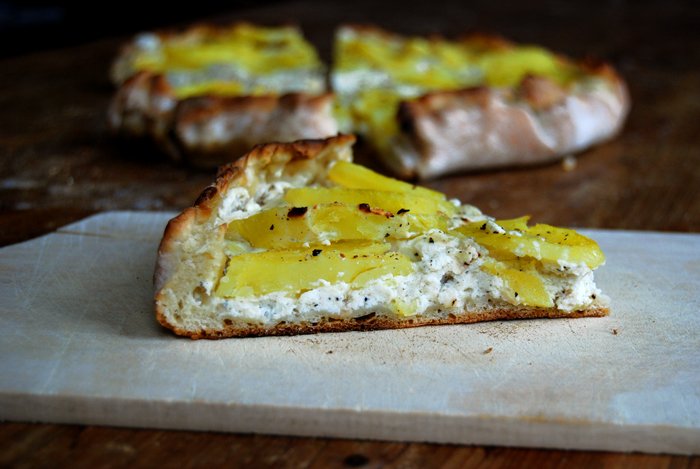
Gozitan Pizza with Ricotta, Goat Cheese and Potatoes
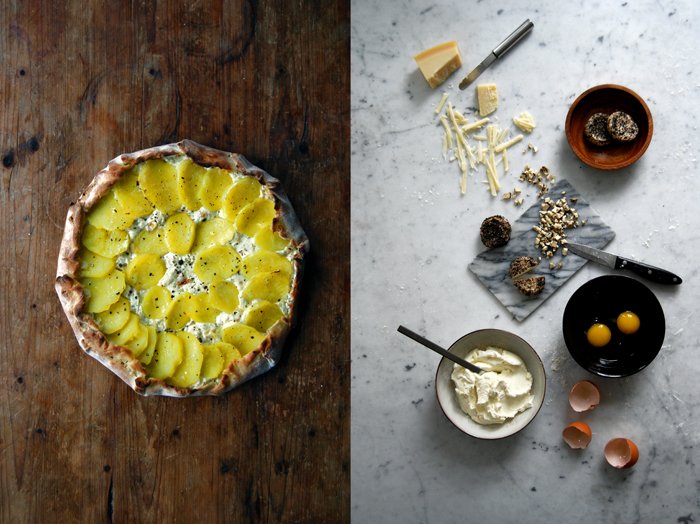
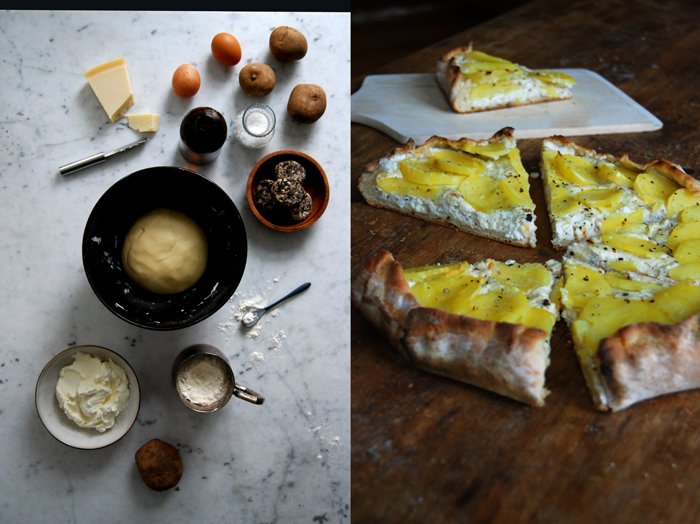
This is one of my favourite summer treats whenever we visit the island Gozo in the Mediterranean: the fabulous local pizza! It's shaped like an open galette, the rim fold up to hold the richest filling a pizza has ever seen: ricotta mixed with goat cheese and eggs, topped with potatoes and crushed black pepper. I love it!
Every year, when I pick up my first Gozitan pizza of the summer from my beloved Maxokk Bakery in Nadur I open the box with hungry impatience to start the feast. We always drive to a near-by park above San Blas beach to savour our pizzas, it's tiny but full of pine trees and oleander. The few wooden benches allow the most amazing view of the bay! While they others wait to get there, I'm often the only one nibbling on the first piece. No matter how hot is, it can be noon, the sun at its peak turning the inside of the jeep into a sauna, but nothing can stop me from enjoying this moment that I always long for like a child. The bakery calls this pizza a Ftira, not to be confused with the popular Maltese Ftira sandwich that I wrote about in July while we stayed on the islands. The bread for this sandwich and the pizza are made of the same dough, hence the same name.
Back to the pizza, I decided that the time had come to give this recipe a try, here at my home, to have some sunshine on our plates at least - and it worked! I used my normal pizza dough and baking technique, I just folded up the sides for the authentic look and to hold it all together. The filling is rich, there is no way around it, it needs lots of ricotta and it doesn't make sense to spare on calories in the wrong situation (and here, it would be wrong!). Luckily, my Maltese sister Emma had just given us a package of Gozitan cheese while she was here to visit us, the strong peppered Gbejna made from local goat milk. As long as you don't live on the Islands of Malta, you will have to miss out on this treat but you can use any other strong, firm substitute.
If you get in the mood for pizza, here are some more recipes:

Gozitan Pizza with Ricotta, Goat Cheese and Potatoes
I start to prepare the dough 2 hours before I bake the pizza to give it enough time to rise and I bake it on a hot baking sheet which has a similar effect to a pizza stone.
For 2 round pizzas you need
For the dough
plain flour 350g / 12.5 ounces
dry yeast 1 sachet (7g / 1/4 ounce)
water, lukewarm, 190ml / 3/4 cup plus 1 tablespoon
olive oil 5 tablespoons
salt 1 teaspoon
Combine the flour with the yeast and salt, add the lukewarm water (you might not need all of it) and olive oil and mix with the dough hooks of the mixer for a few minutes. The dough shouldn’t be moist and sticky at all, more on the dry side. Continue kneading and punching with your hands until you have an elastic dough ball. Put the dough back into the bowl, cover with a tea towel and let it rise in the warm oven (35°C / 95°F) for 45 minutes (top/ bottom heat and not fan-assisted!).
When the dough is well risen, divide in two parts, and roll them out in two circles on a very well floured working surface. Each should fit on a baking sheet. Cover with a tea towel and let it rise for another 10-15 minutes.
For the topping
ricotta, 500g / 1 pound
firm, aromatic goat milk cheese (peppered Gbejna is best), finely chopped or grated, 150g / 5.5 ounces
Parmesan, grated, 70g / 2.5 ounces
organic eggs 2
black peppercorns, crushed in a mortar, to taste (if you don't use peppered cheese)
medium potatoes, boiled, peeled and thinly sliced, 6
olive oil
Whisk the ricotta, goat cheese and Parmesan and season with pepper to taste before you mix in the eggs. Add a little salt if necessary.
The pizza
Set your oven to 260°C / 500°F. My oven has a pizza setting but you can also use top / bottom heat. Put the baking sheet on the bottom of your oven to heat it (for about 10 minutes).
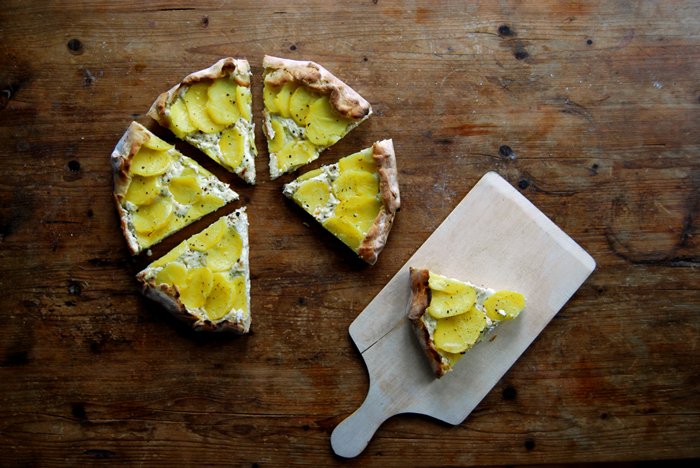
Take the hot baking sheet out of the oven, turn it around and place it carefully on two stable wooden boards or mats as it will be very hot. Quickly put one of the risen dough discs on the baking sheet, spread with half the ricotta filling leaving a rim around it. Arrange the potato slices on top and fold up the rim, gently pushing it onto the outer potatoes. Sprinkle with a little pepper and olive oil and bake for about 8 minutes or until the pastry is golden brown and the ricotta filling is set. Repeat with the second pizza.


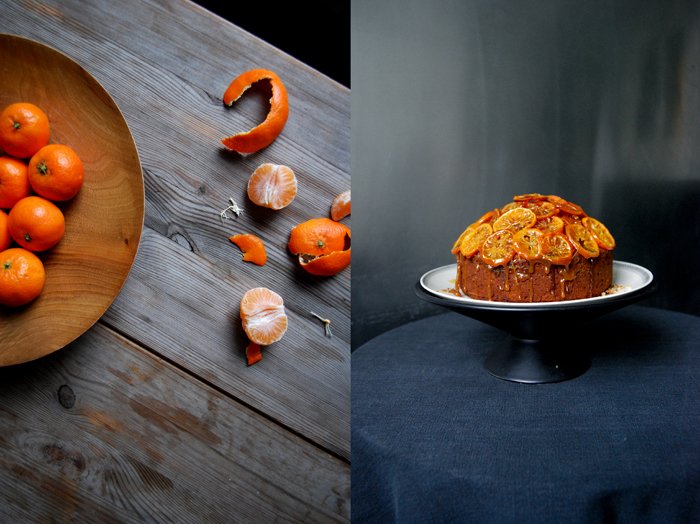
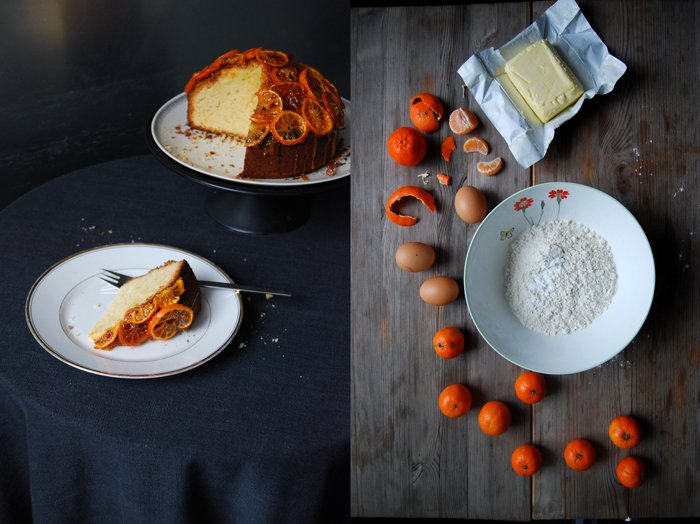
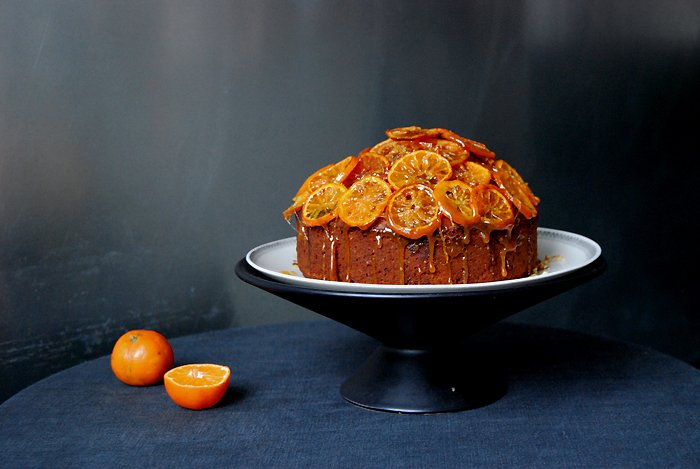
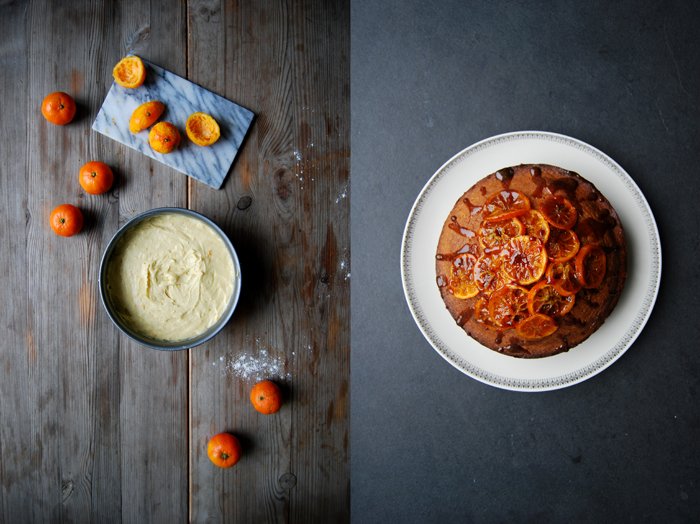
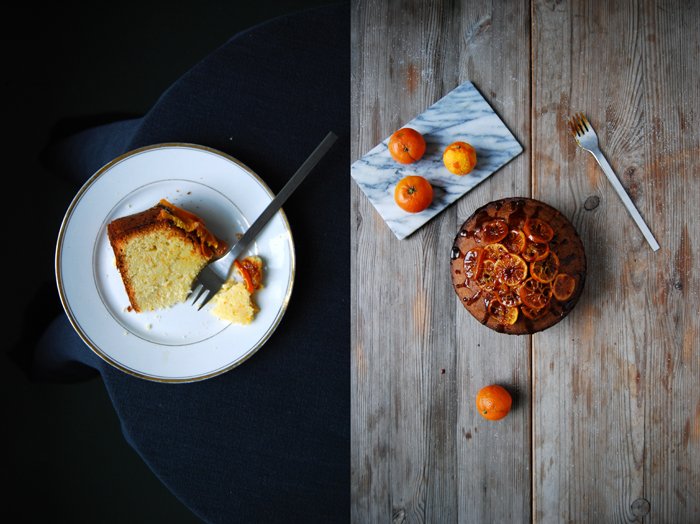
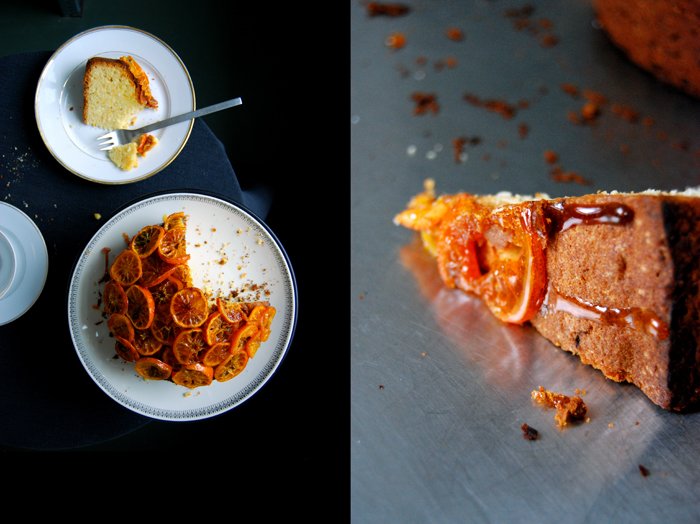
Madeira Cake with Caramelised Tangerines
Weekend baking is my meditation, my time to relax and reflect, to slow down my pace and review the past few days. I enjoy the peaceful silence in the kitchen when I place bowls and butter, eggs and flour on my marble kitchen tops before I get started. My mother prepares her pastries in heavy ceramic bowls in black, green and blue and when I moved into my first flat she passed one of them on to me. Her old black bowl is my baking companion, this is where my sweet mixing and tasting begins, traced with scratches and cracks.
In the winter months I'm quite a coach potato on my lazy Sundays, I love my cosy afternoons on the sofa, with piles of books, magazines, pillows and blankets to defy the uncomfortable cold outside. Just give me a cup of tea and a warm cake freshly out of the oven and I'm happy. At the moment I love simple tea time treats that you can eat with your fingers, nothing too complicated. A spongy Madeira cake is perfect, the dough refined with the zest of tiny tangerines and their sweet juices. I could have stopped at that point but I went a bit further and topped it with caramelised slices of the citrus fruit which is easily done in five minutes. They were soft and sticky and brought even more fruitiness to this wonderful English treat which is, despite its name, not made with Madeira. Traditionally, it used to be savoured with the sweet Portuguese wine which led to its name, I skip that tradition and stick to my tea.

Madeira Cake with Caramelised Tangerines
I recommend using small, firm organic tangerines for this recipe as they are easier to grate and sweet in taste.
For an 18cm / 7" springform pan or a 1l / 2 pint loaf tin you need
plain flour 250g / 9 ounces
baking powder 1 teaspoon
a pinch of salt
a pinch of ground cinnamon
tangerine zest 2 tablespoons
freshly squeezed tangerine juice 3 tablespoons
butter, at room temperature, 200g / 7 ounces
granulated sugar 200g / 7 ounces
organic eggs 3
For the topping
small organic tangerines, rinsed and very thinly sliced, 4-5
granulated sugar 100g / 3.5 ounces
water 4 tablespoons
Set the oven to 180°C / 355°F (fan-assisted oven) and butter the springform pan.
Combine the flour, baking powder, salt and cinnamon and rub the zest into the mixture with your fingers.
In a large bowl, mix the butter until fluffy, add the sugar and continue mixing for a few minutes until light and creamy. Add the eggs one at a time, mix well in between. Quickly mix in the dry flour mixture and the tangerine juice, it should be well combined. Pour the batter into the pan and bake for about 60 minutes or until golden and firm on top. Check with a skewer, it should come out clean. If you bake the cake in a loaf tin, check after 45 minutes. Let the cake cool for 5 minutes before you take it out of the pan.
I caramelised the tangerines in 2 batches. In a sauce pan, bring half the tangerine slices, half the sugar and 2 tablespoons of water to the boil and cook on high temperature for 3-5 minutes. The water should bubble and evaporate. Take the pan off the heat immediately when the sugar starts to turn golden and caramelises. Quickly arrange the citrus slices on top of the cake as the caramel will become hard after a minute. Cook the remaining fruit slices to finish the cake. Use a very sharp kitchen knife to cut the caramelised top of the cake.

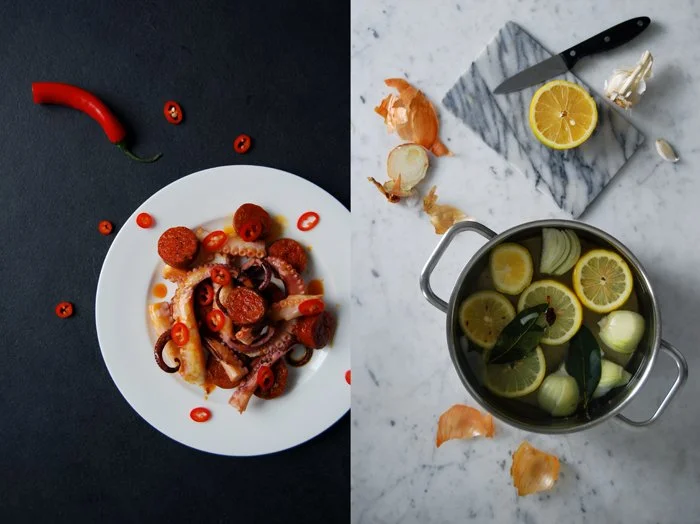
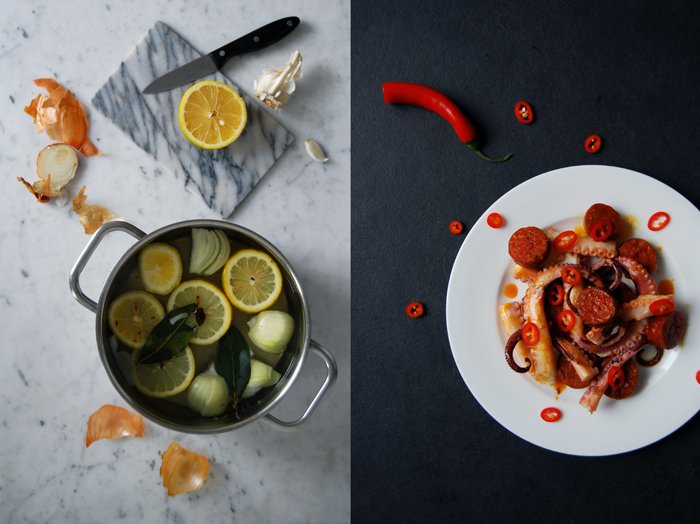
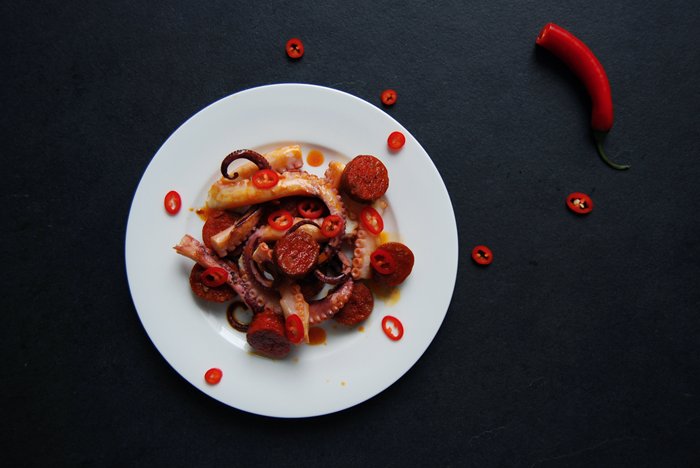
Spicy Octopus with Chorizo Sausage and Red Chili Peppers

I've been a big fan of Mediterranean octopus recipes for years but last summer I discovered something new. It started in Chef Kurt Micallef's culinary working space who I met for one of my meet in your kitchen features in Marsaxlokk in the south of Malta. The young and internationally experienced chef used fennel seeds and star-anise for the octopus broth, an addition that was completely new to me. The two spices bring out all the fine aromas of the imposing sea dweller, even more than the obligatory lemon and bay leaf. I learned my lesson and adapted to this new technique since then.
A couple weeks later I moved on to another date for my kitchen series and met Karl Chetcuti at the Meridiana Wine Estates. Although wine is his profession, the two of us also share another passion. We spoke for hours about food, recipes and restaurants, apart from wine making obviously. He told me about his favourite spots on the islands and he also gave me a recipe which he often enjoys together with his wife at one of the restaurants at the sea, golden calamari with chorizo with a glass of chilled Isis wine. Just the thought of it makes me want to change the season and go there right now!
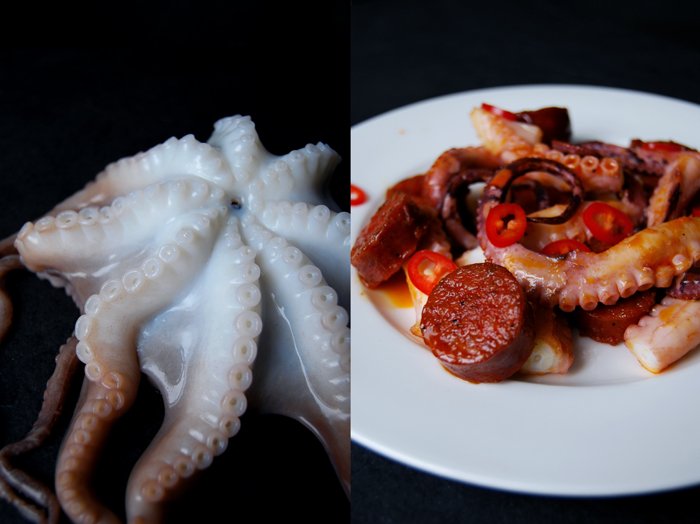
When I tried Karl's recipe in my Maltese kitchen (which my partner's mother Jenny is so kind to share with me!) I used chorizo salami as I didn't know that he was talking about fresh sausages, I found out later. This misunderstanding didn't do our Mediterranean lunch any harm, it was fantastic, but since then I wanted to cook it again, Karl's way. Although it's been almost six months of waiting, I finally got fresh chorizo sausages. This time, I decided to make another change, I combined them with octopus instead. The meat seemed too strong and overpowering for the fragile calamari, and I was right. It's an amazing combination, powerful and rich, but we had to cut the sausage thinner than you can see in the pictures. The Spanish chorizo has quite an impact on the seafood but it works, we even sprinkled some spicy chili pepper slices over the red juices. If you're after the pure buttery taste of octopus I recommend a simple salad with fresh fennel (which we ate the next day as I cooked a bigger batch of it), but if you want to try something new and experiment a bit, go for it and savour as we did!
Spicy Octopus with Chorizo Sausage
For 2-3 people you need
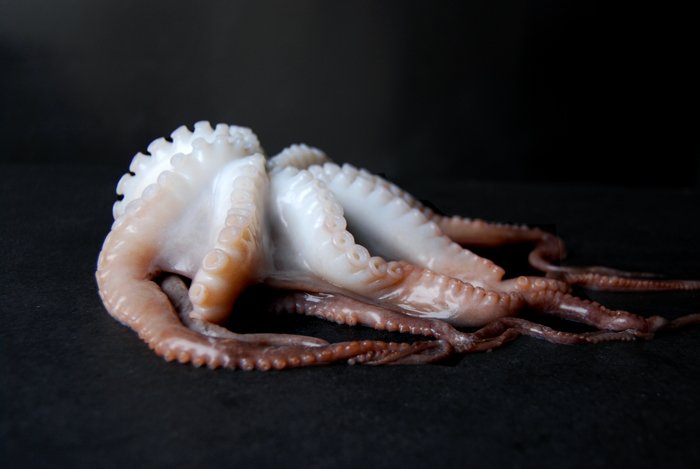
octopus, skinned and cleaned, 500g / 1 pound
star-anise 1 piece
a pinch of ground fennel seeds
bay leaves 2
garlic, cut in half, 2 cloves
medium onion, quartered 1
lemon, sliced 1
fresh chorizo sausages 2
fresh red hot chili pepper, thinly sliced, 1
In a large pot, bring water with the star-anise, fennel seeds, bay leaves, garlic, onion and lemon to the boil. Add the octopus and cook on low heat (simmering) for about 45 minutes or until the octopus is tender. Take the octopus out of the broth and cut into big pieces.
Fry the sausages in a little olive oil on medium heat for about 10 minutes, turning them every 2 minutes. When they are done, slice them. Mix the octopus with the chorizo and the juices in the pan. Sprinkle with chili pepper.

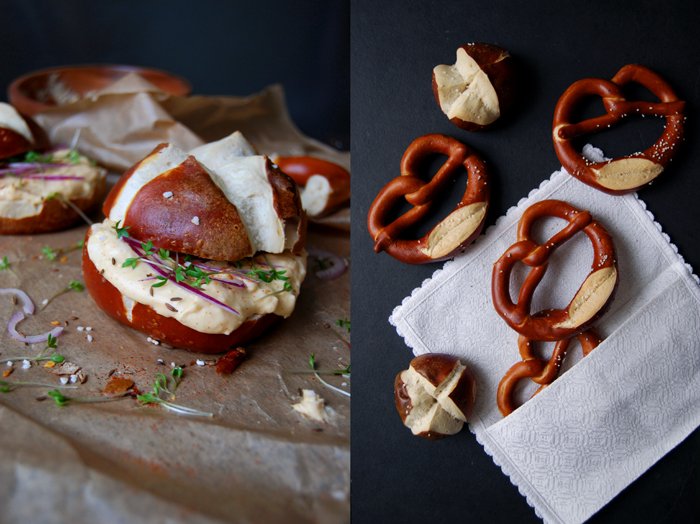
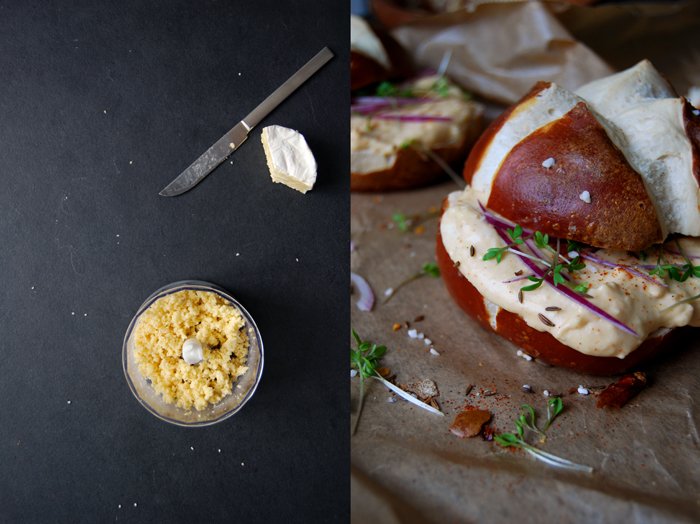
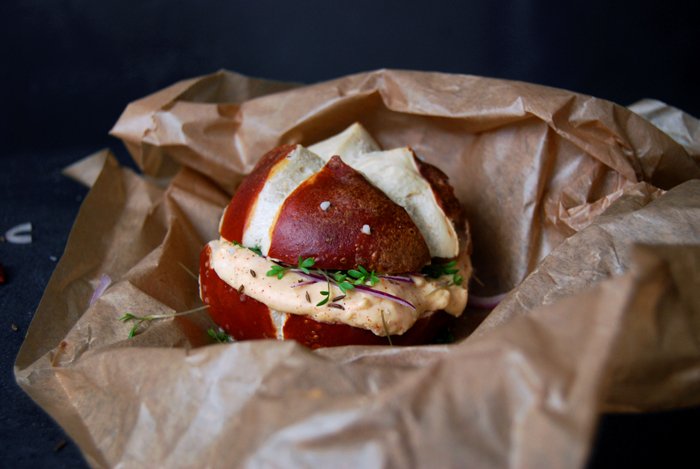
Pretzel Buns with Camembert, Caraway Seeds and Red Onions
It's been dark for days and the sky is painted in a dull grey that doesn't seem to fade away. It welcomes me in the morning as soon as I open the curtains in our bedroom and it changes into pitch black in the afternoon without showing a single patch of blue all day. I don't even want to look outside the windows anymore, I start daydreaming instead, a skill I improved to perfection over the years. I can stare at my computer for minutes before I realise that my mind is already in Dwejra in Gozo, exploring the deep blue of the Mediterranean sea. Another one of my favourite imaginary winter escapes is to stroll down the narrow streets of Valletta, the stone of the baroque buidings glowing in the golden sun and a soft breeze cooling my skin. If I get hungry I just dream myself into Caffe Cordina, I sit at one of the little tables at the Piazza Regina with an espresso and a pastizz tal-irkotta and I completely forget about reality, the grey sky and January's sober melancholy. I'm not in Berlin anymore.
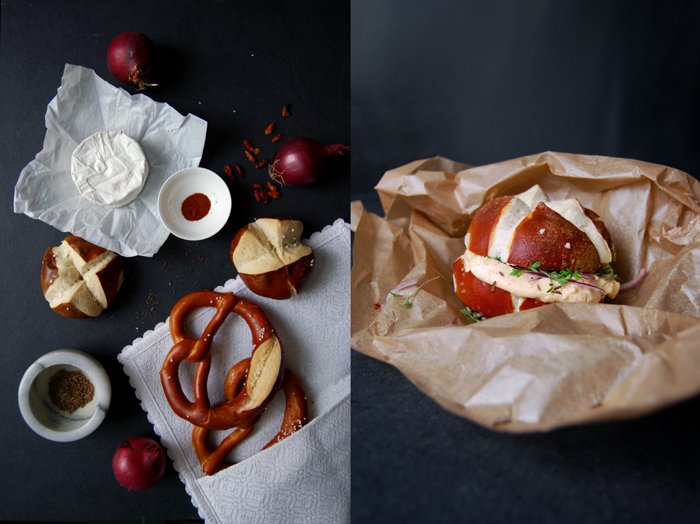
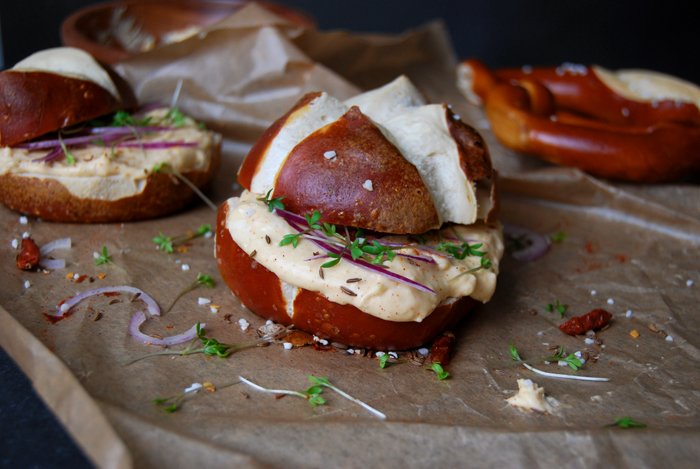
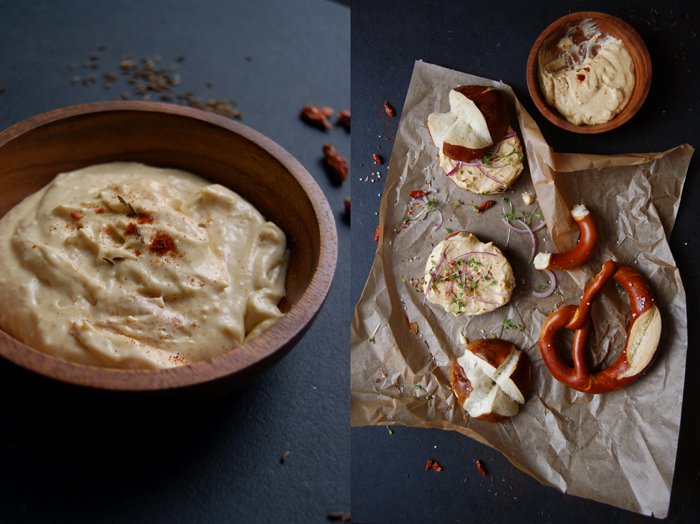
This works with any place in the world which made me happy at one point, a few days ago I found myself in the mountains, in Bavaria. I imagined a summery Biergarten scene, wooden benches, hearty food and beer mugs on rustic tables under green trees. After a few seconds, I got hungry, but not an imaginary kind of hunger. I felt like pretzels and Obatzda, the famous Bavarian dip made of whipped camembert, caraway seeds and sweet paprika. Daydreaming wakes up all the senses, it doesn't matter if you see a real sandwich in front of you or if it's just in your head, all you want is this sandwich on your plate! So I got on my bike, drove to my favourite pretzel bakery and picked a young camembert at the market on my way home. Last year, in early spring, I made an Obatzda variation with rucola and I used a well aged cheese but this time I was after a light aroma to give the spices more space. Back in my kitchen, I put the camembert in the blender and mixed in the spices. When I spread the thick dip voluptuously on a pretzel bun and garnished it with red onions, garden cress and crushed hot chili peppers I could see the Bavarian Biergarten right in front of me.
Update: You can find my recipe for Pretzel Buns here!
Pretzel Buns with Camembert, Caraway Seeds and Red Onions
For 4 sandwiches you need
pretzel buns or large pretzels, cut in half, 4
mild camembert 100g / 3.5 ounces
cream cheese 80g / 3 ounces
heavy cream 1 tablespoon
caraway seeds, ground in a mortar, 1/8 teaspoon
ground sweet paprika 1 teaspoon
ground cayenne pepper, a pinch
salt and pepper
small red onion, cut in half and into thin slices, 1, for the topping
small dried chili peppers, ground in a mortar, 2-3, for the topping
garden cress, a small handful, for the topping
Purée the camembert, cream cheese, heavy cream and spices in a blender until smooth and season to taste. Spread on the buns and sprinkle with onions, garden cress and chili.
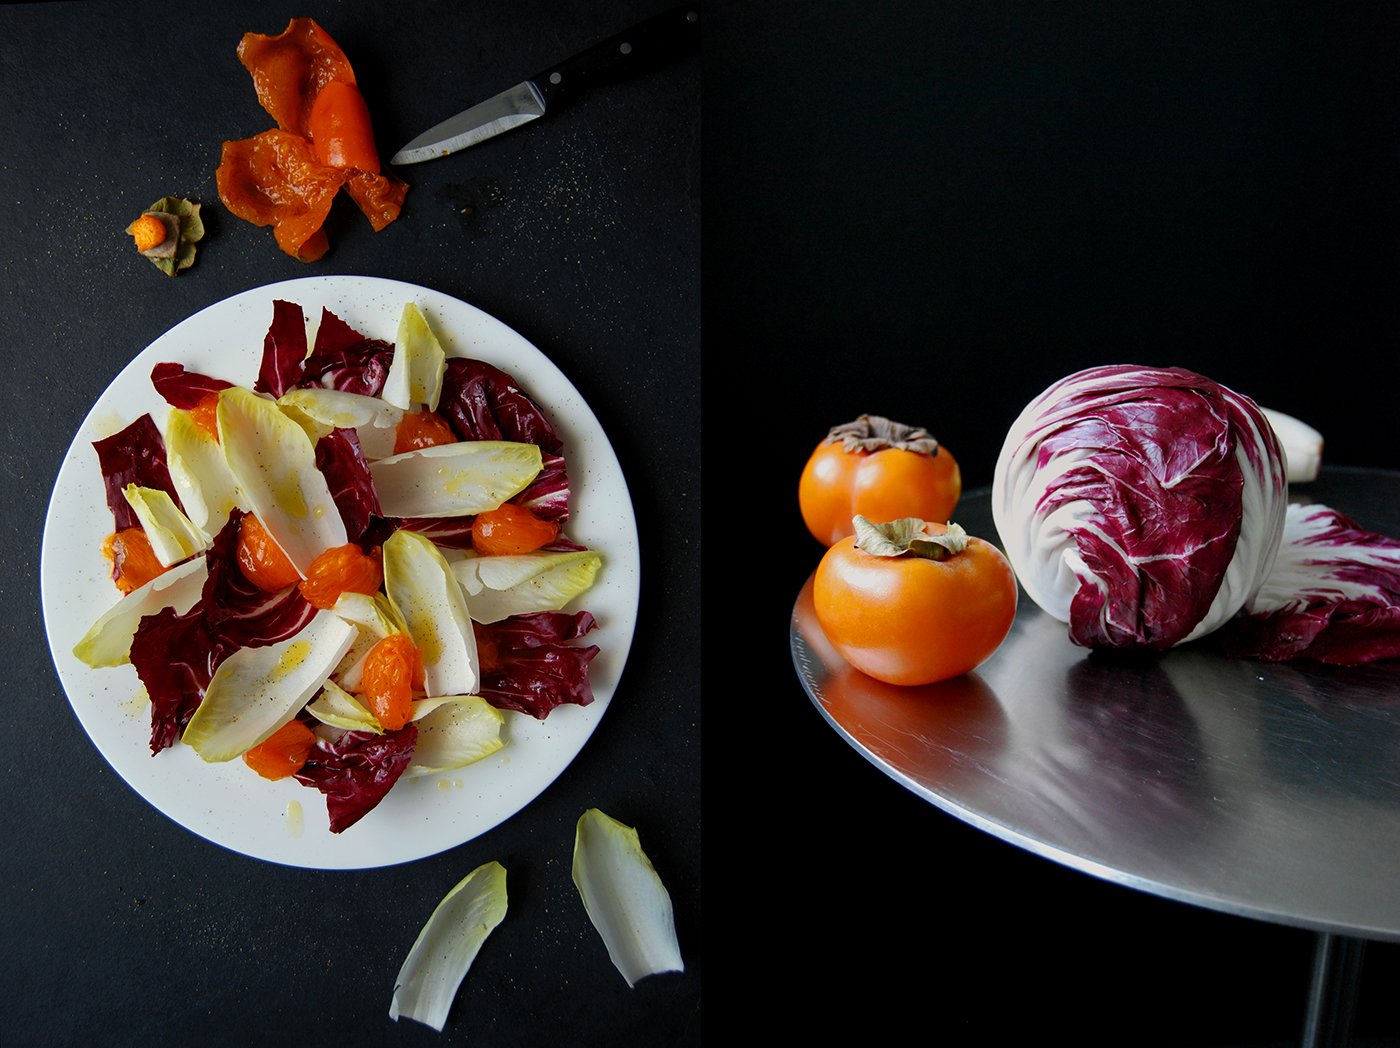
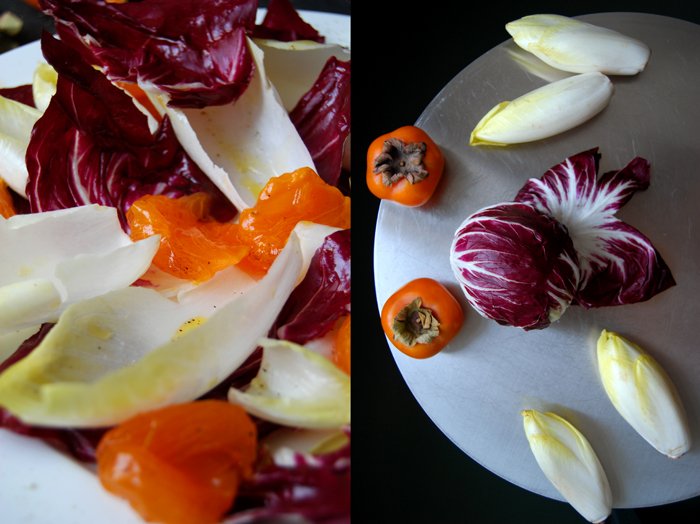
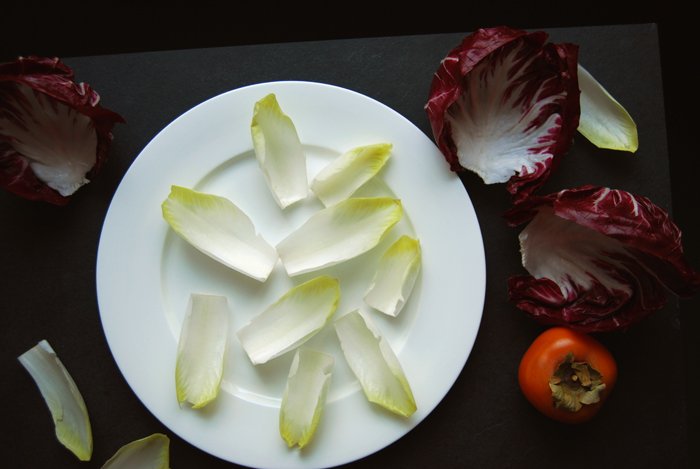
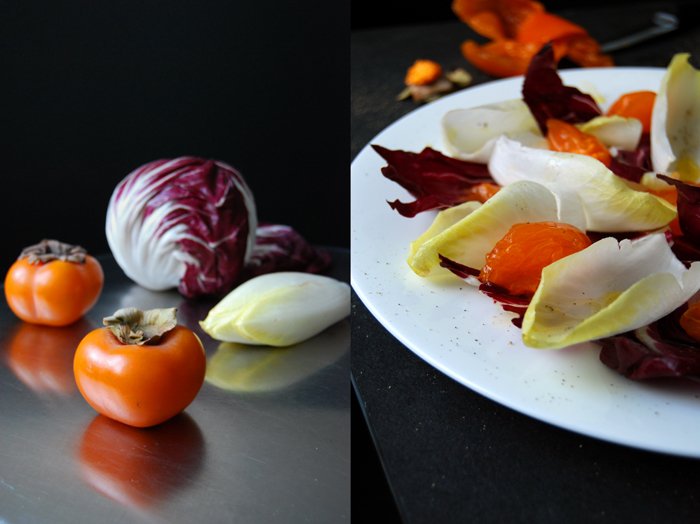
Bitter Endive and Radicchio Salad with sweet Persimmons

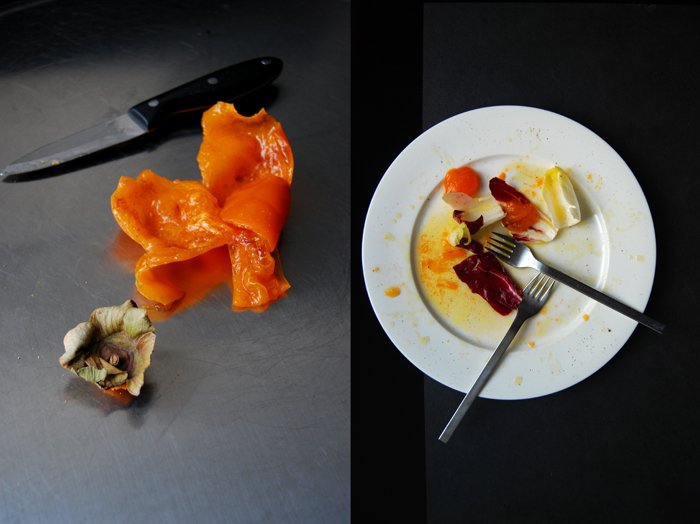
Since I bought my first persimmons at a farmer's market in Paris many, many years ago I have been hooked on this fruit. Back in those days I wasn't familiar with how to eat this orange ball of sticky juiciness so I made quite a mess. It was worth it! The rich sweetness that feels like jellied honey in the mouth was an overwhelming experience of taste I would never forget. Since then, I always look forward to this delicate fruit's season in the winter months. I only buy them when they are very ripe to enjoy their qualities and I prefer sharons, a certain kind of persimmons from Israel. A couple days ago I spotted a few that were so soft that their skin almost burst. Persimmons are a bit like figs, best when they are close to becoming mousse right in your hands, but if you handle them with care they will reward you with the nicest aroma a fruit can offer!
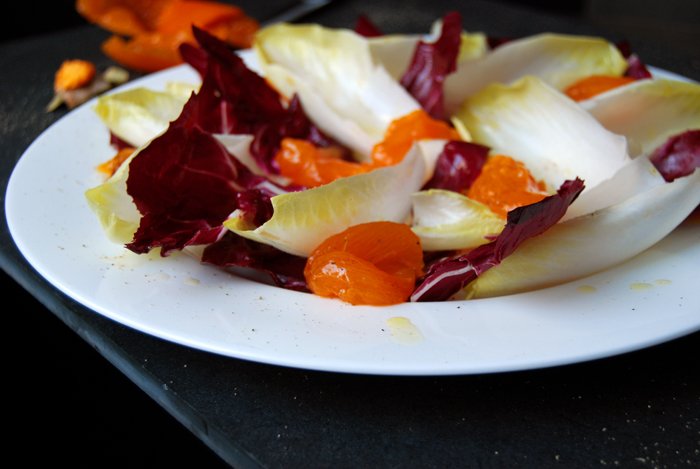
The sharon has so much natural sweetness, they can easily deal with some bitter flavours. I chose endive (chicory) and radicchio for my light Monday salad, both not particularly shy vegetables which I always buy organic as they still have have their distinct bitterness. Combine the red and pale leaves with the ripe fruit and you'll have a real firework of aromas in your mouth. This bittersweet combination goes with the seasons, soft vineyard pears in autumn, bright red strawberries in summer, or my glowing persimmons in January. The dressing is also more on the sweet site, some olive oil whisked with orange juice, white Balsamico vinegar and maple syrup to balance out the tart leaves. Heavenly!
Endive and Radicchio Salad with Persimmons
For 2 people you need
Belgian endive (chicory) 1
radicchio 3 large leaves
sharon (or any other ripe and soft persimmon), peeled and cut into bite sized pieces, 1
For the dressing
olive oil 3 tablespoons
freshly squeezed orange juice 1 tablespoon
white balsamic vinegar 1 tablespoon
maple syrup 1 teaspoon
salt and pepper
Tear the endive and radicchio leaves into pieces and arrange them with the persimmon on a plate. Whisk the ingredients for the dressing, season to taste and sprinkle on top of the salad.


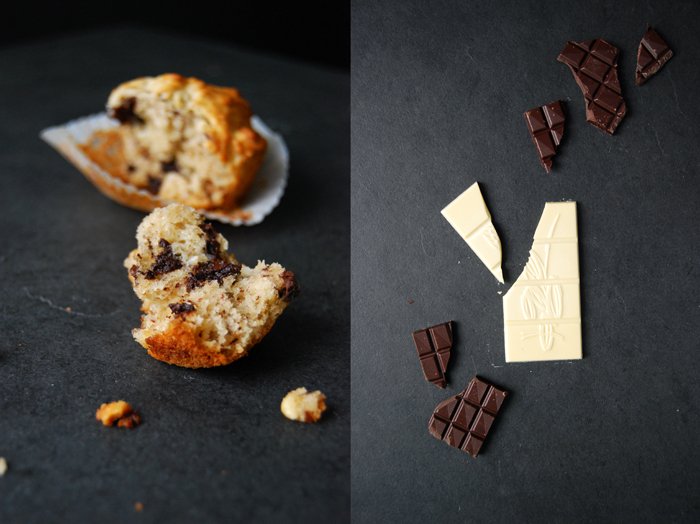
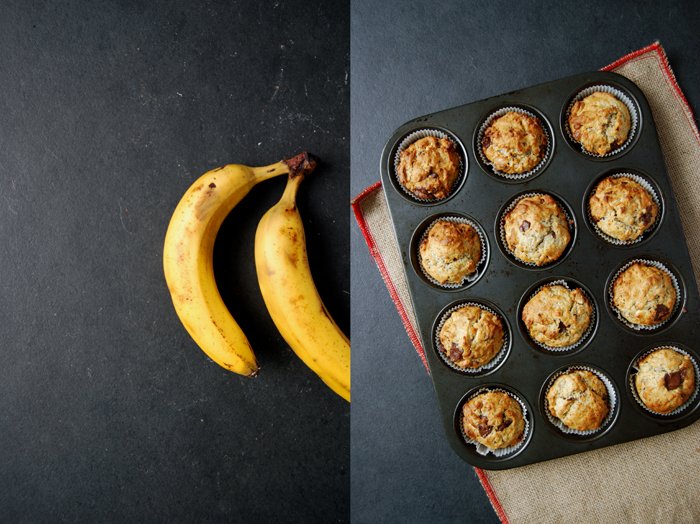
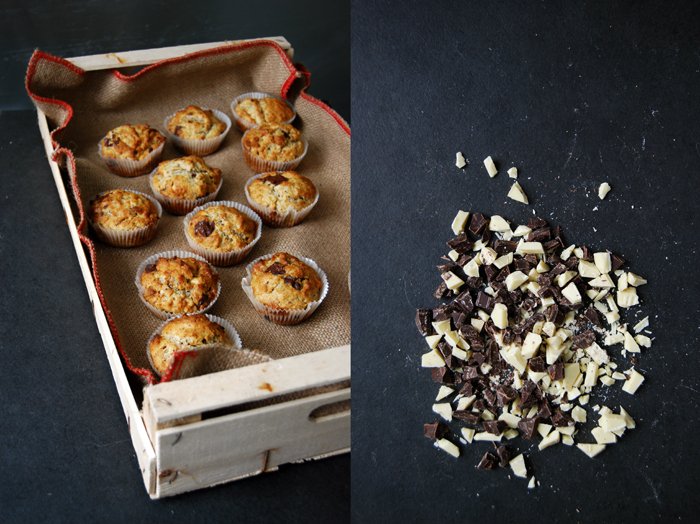
Banana Muffins with White and Dark Chocolate Chunks
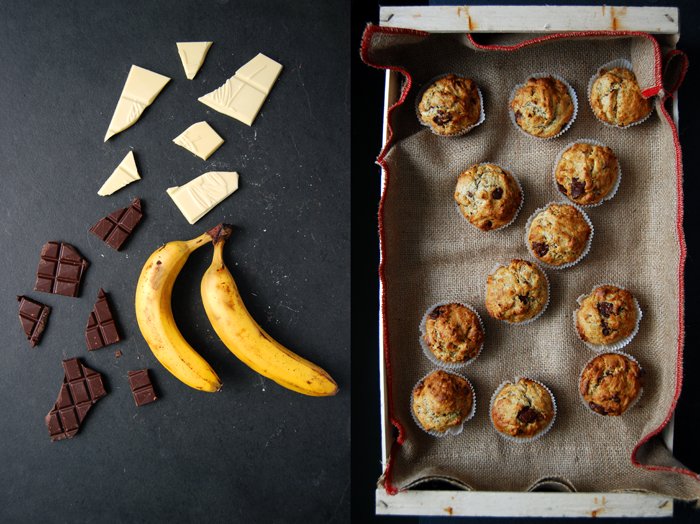
We had a muffin feast in my kitchen this week, it started off with my marmalade muffins which I made with my tangerine jam instead of the blood orange spread that I normally use. They were fantastic, sweet and christmassy! The golden citrus muffins filled the air with a wonderful smell that only muffins can create after only a few minutes in the oven. It's so good I could have it in the kitchen all the time! Inspired by this sweet aroma, I had an idea for another recipe, banana muffins with lots of chunky white and dark chocolate. Luckily I bought too many bananas (again), they started to get darker and darker and seemed to say "you had better decide what you're going to do with us". When they are deep yellow with some brown patches they have just the right texture to be turned into a fruity purée for juices or muffins, honey sweet and velvety. I added milky white chocolate and its bittersweet counterpart to the dough and while I stirred the chunks in I could already smell that this would lead to a satisfying result. The two kinds of chocolate are a great match to the ripe fruit!
When I took pictures of these muffins, Emma from Malta was still here with us. She joined me in the kitchen which was freezing cold at that point as I had to leave the window wide open to have better light for my photos. Emma watched me impatiently like a hungry little squirrel, asking me once in a while how it was going. It looked quite funny, both of us in winter jackets, taking pictures of the most tempting sweets right in front of our noses as red as Rudolph's!

White and Dark Chocolate Banana Muffins
For a muffin tray with 12 molds you need
ripe bananas, 2 (about 200g/ 7 ounces)
plain flour 200g / 7 ounces
baking powder 2 1/2 teaspoons
baking soda 1/2 teaspoon
salt 1/4 teaspoon
butter, melted, 80g / 3 ounces
organic egg 1
maple syrup 2 tablespoons
vanilla bean, scraped, 1/4
white chocolate, roughly chopped, 70g / 2.5 ounces
bittersweet chocolate, roughly chopped, 70g / 2.5 ounces
Set your oven to 190°C / 375°F (fan-assisted oven) and put paper baking cups into the 12 molds of the muffin tray.
Purée the bananas in a food processor.
Combine the flour, baking powder, baking soda and salt in a large bowl. Whisk the melted butter, the egg, maple syrup and vanilla in another bowl and pour into the dry mixture. Stir with a wooden spoon until you have a lumpy dough (with a bit of flour left here and there). Gently fold in the chopped chocolate, and keep in mind, the more you mix it the more it will lose its light texture.
Fill the muffin tray with the dough and bake for 15 minutes or until golden.


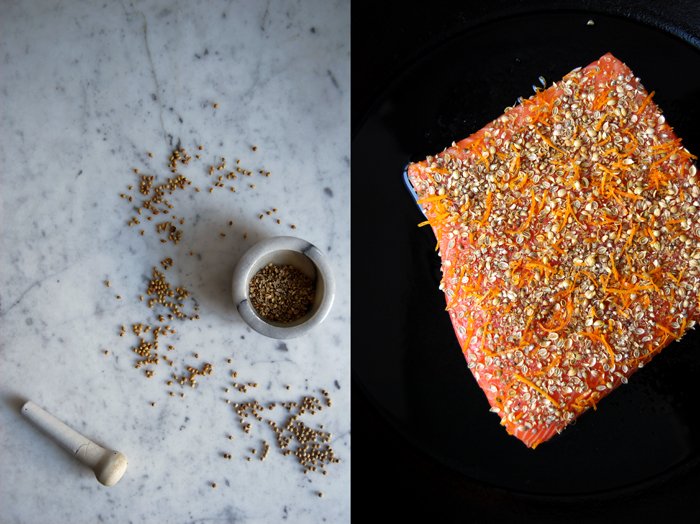
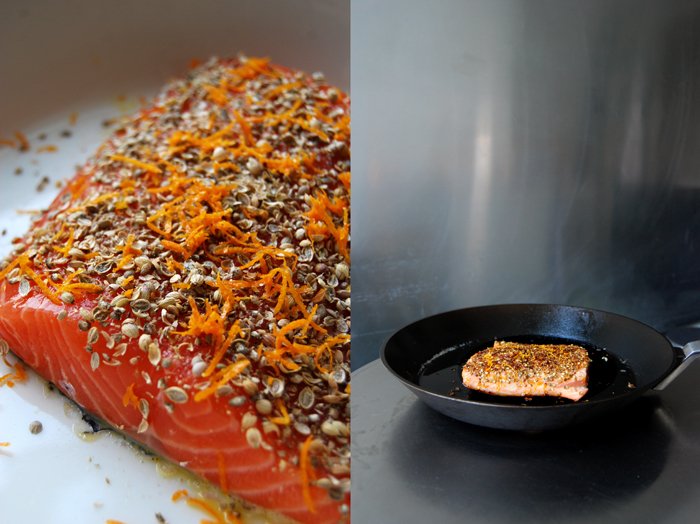
Salmon with a Coriander, White Pepper and Orange Crust
After a week of daily feasting I need a change in my cooking, some fresh aromas to shake my taste buds a little. Together with my Maltese sister Emma and her boyfriend Mariano we savoured like the Romans, the table was practically piled with paté and cheese, roasts, pies and cookies every day. I need a culinary turnaround to bring back some hot spiciness and light fruitiness to my kitchen. I loved the opulence of December and enjoyed each bite but every feast has its end and I'm definitely ready for that!
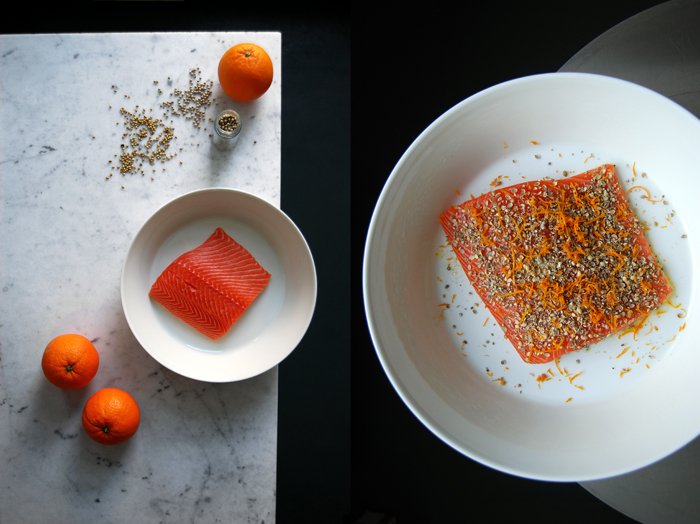
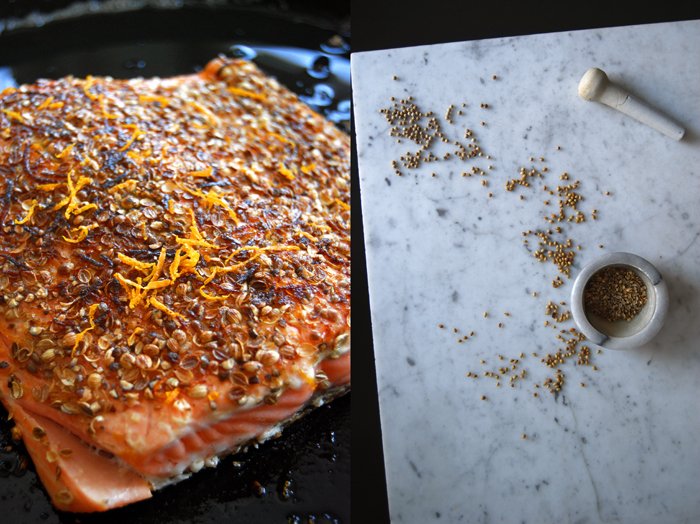
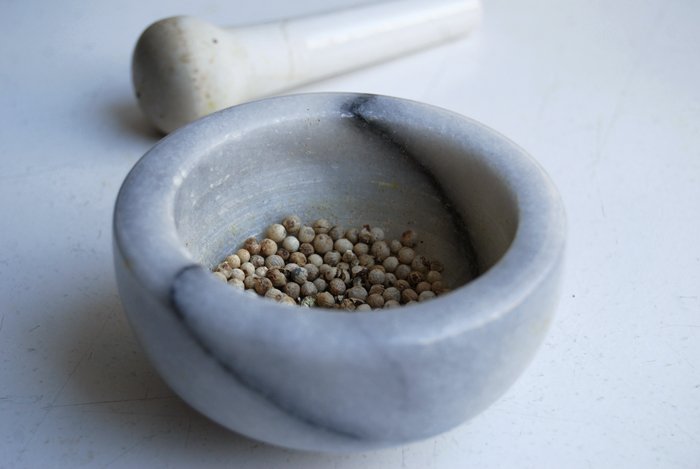
I went shopping (the best way to get some inspiration) and seafood was first on my list. I wanted to get a big bag of mussels to steam with fresh fennel, ginger and lots of garlic but a large fillet of salmon changed my plans. It just looked too good so the mussels have to wait. Back home, I took out the mortar, the white peppercorns which I have neglected for months, coriander seeds and an orange. There are tons of oranges in my kitchen at the moment, it looks quite Mediterranean and brings in some brightness to contrast Berlin's monotonous winter grey. I like to squeeze a couple fruits for our morning juices, grate their skin for almost everything I put into the oven and enjoy their fillets as a snack from morning until midnight. For my salmon, I just used the grated skin mixed with crushed peppercorns and coriander for an aromatic crust. It was strong but the the fish's pink meat can take it. I find it easiest to brush the salmon with an egg wash before I dip it into the spices, they stick to it and turn into a crunchy topping. I cooked my salmon in a pan but you could also fry it for just a minute and finish it in the oven. For the crust, I used a bit of orange zest to cook with the fish and sprinkled it with half a teaspoon when it was done. Next time I would put the zest on in the end as the little citrus bits can easily turn dark in the pan and most of the flavour came from the fresh zest anyway. The result was spicy and fresh, exactly what I needed on the table!
Salmon with Spice and Orange Crust
For 2 hungry people you need
salmon fillet, with skin, 400g / 14 ounces
organic egg, beaten, 1
coriander seeds, crushed in a mortar, 1 tablespoon
white peppercorns, crushed in a mortar, 1/2 tablespoon
orange zest 1/2 - 1 teaspoon
salt
olive oil
Dip the salmon in the egg wash (just the side without skin). Mix the coriander and pepper, spread the spices on the pink side and push them gently into the egg wash.
Heat a splash of olive oil in a pan and cook the salmon on medium heat skin side first. Add a little more oil if necessary and quickly turn the fillet around. Turn the temperature down to a medium-low and cook for just 2 minutes. Turn it around again and finish on the skin side for another 2 minutes or until it's cooked through. Season with salt and sprinkle the warm crust immediately (in the pan) with orange zest.
If you prefer to cook the salmon in the oven, fry it for a minute on each side before you sprinkle it with orange zest and cook it in the 200°C / 390°F hot oven for about 6-8 minutes depending on the fillet's thickness.

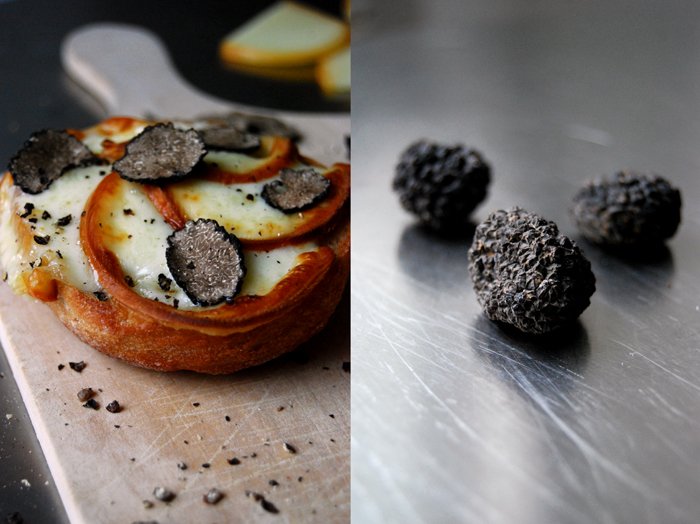
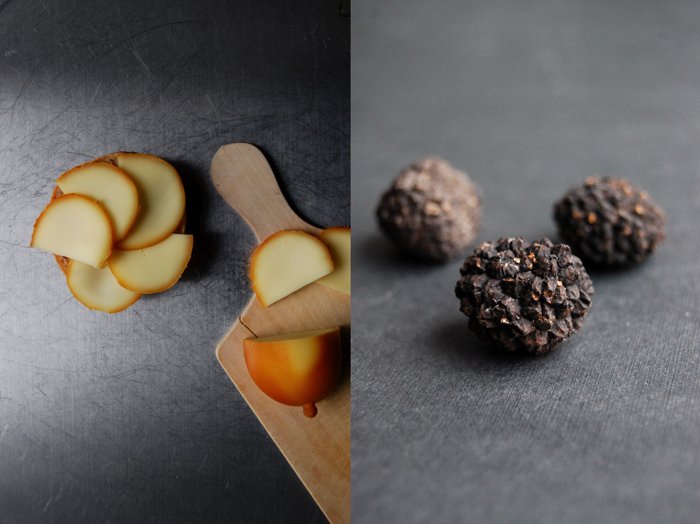
Truffle and Grilled Scamorza Sandwich
What a year, full of excitement, with more ups and downs than a roller coaster, with many amazing people who I got to know in the real and digital world. So much has happened through eat in my kitchen that I feel unbelievably thankful for, the blog became a catalyst on so many levels. Marilena taught me about her fantastic Milk Pan di Campobasso from the Molise region, I got to know Arnold the beekeeper in Malta, I met Joanna Bonnici, Mary Licari and the young Maltese chef Kurt Micallef in their kitchens. I could show you Emmanuel Cini's ancient salt pans in Gozo and share so many other meet in your kitchen stories with you. The white pages I fill every week with one of my biggest passions, stories about my beloved food and kitchen, are more than just a tiny space in the endless spheres of the internet. Any recipe that made us happy at our home in Berlin and that's been cooked or baked by you in your kitchen, every email and conversation we shared, every picture that sparked your attention and tickled your appetite, it all left the digital world and entered real life, mine and yours. This is just wonderful, overwhelming and sometimes, hard to believe. I feel thankful for this experience! And that's how I want to end this challenging year, with gratefulness and humbleness. As long as a year is packed with lessons which make me grow and people who give me so much love and support, I can say that it's been a good year!
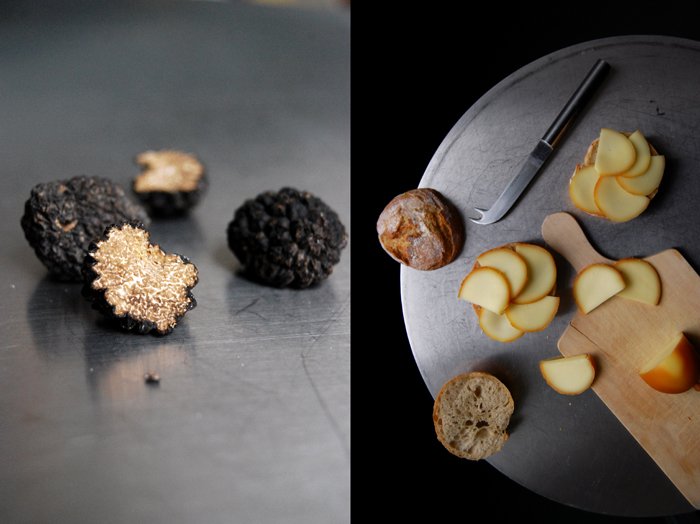
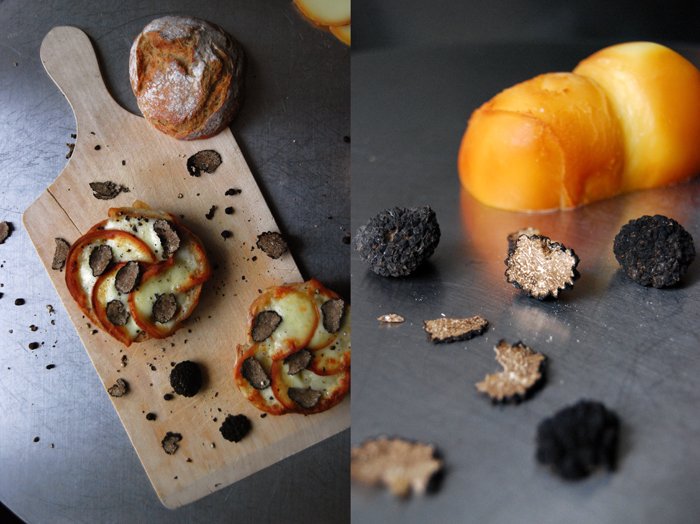
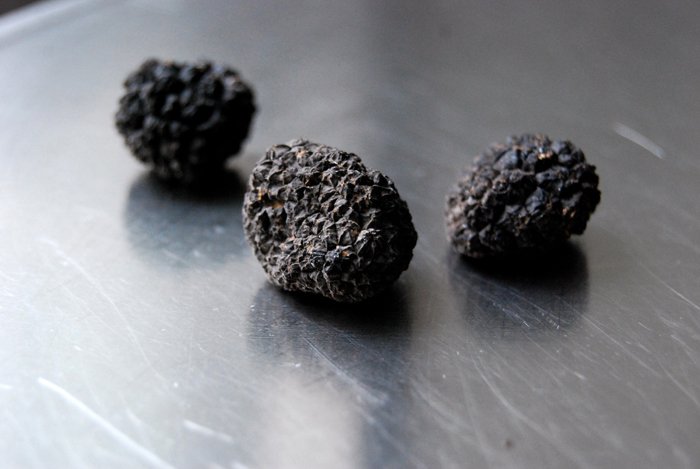
I want to end 2014 with a sumptuous treat, I spoiled us a little with an ingredient which I don't have in my kitchen so often, black winter truffle from Piemonte. The Italian tartufi is a culinary treasure, aromatic, powerful and delicate. It's not as fine as the region's famous white truffle but today I'm making sandwiches with grilled cheese so the black one is just perfect. I bought them at the market from a young Italian man who also makes fantastic pasta and when I told him that I would use them for a sandwich he told me to try it with grilled Scamorza. This is very popular in Tuscany, truffle with grilled Scamorza on crunchy slices of bread. The smoky and earthy flavours merged wonderfully, I just added some crushed black pepper. There couldn't have been a better culinary end to this year!
I wish you an inspiring 2015, enjoy and indulge!
Meike xx
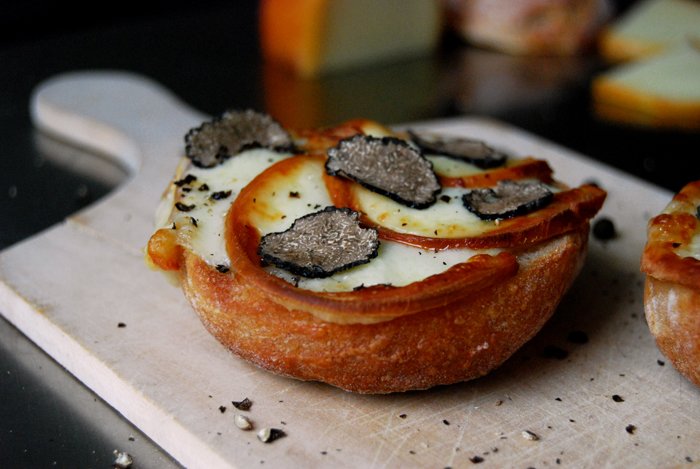
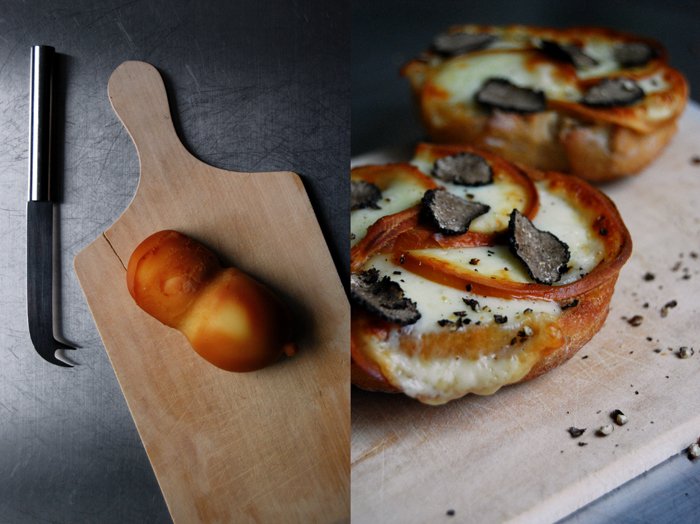
Truffle and Grilled Scamorza Sandwich
For 4 sandwiches you need
rustic white sourdough buns (or bread), cut in half, 4
black truffle, very thinly sliced (with a truffle slicer or a very sharp knife), 10g / 1/2 ounce
smoked Scamorza cheese, thinly sliced, 200g / 7 ounces
black peppercorns, crushed in a mortar, to taste
Spread the cheese slices on the bottom sides of the buns and put them under the grill for a few minutes until the cheese starts to melt and bubble. Put the truffle slices on the warm cheese immediately and sprinkle with pepper. We enjoyed it as an open sandwich.

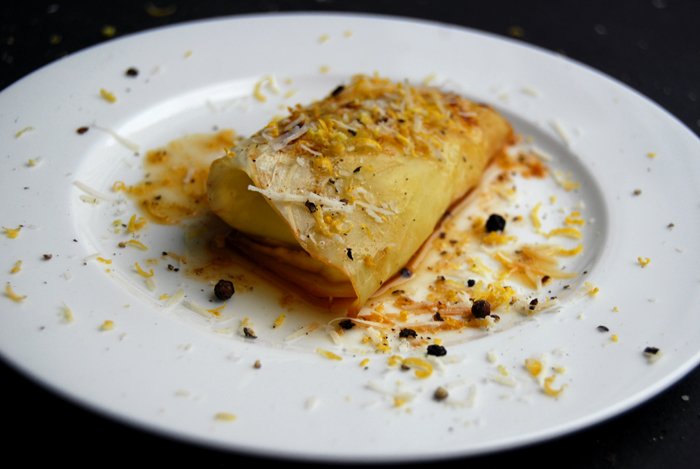
Ginger Lemon Ricotta stuffed Cabbage Rolls
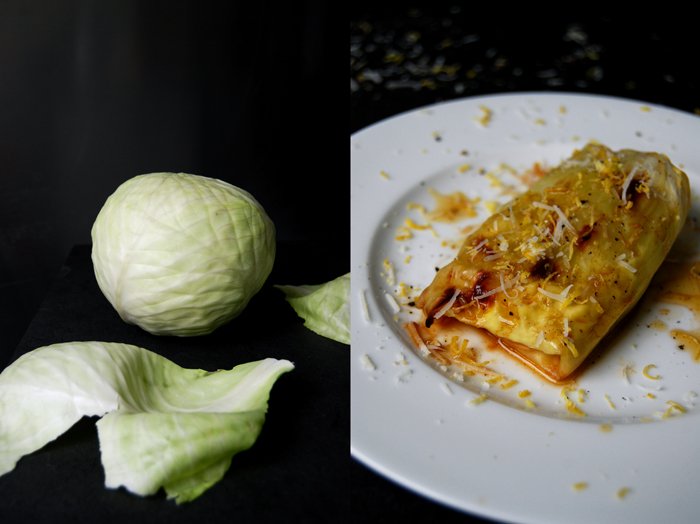
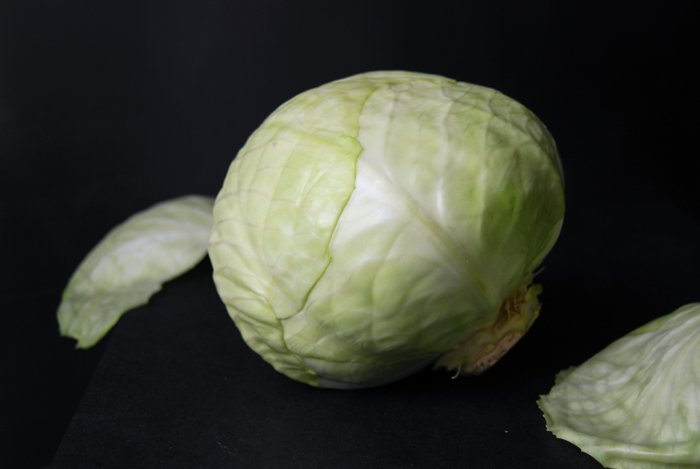
The idea for this quick lunch started with leftover ricotta in the fridge and lots of ginger roots, tons of lemons and a lonely cabbage on the kitchen counter. Sometimes these days bring out the best recipes!
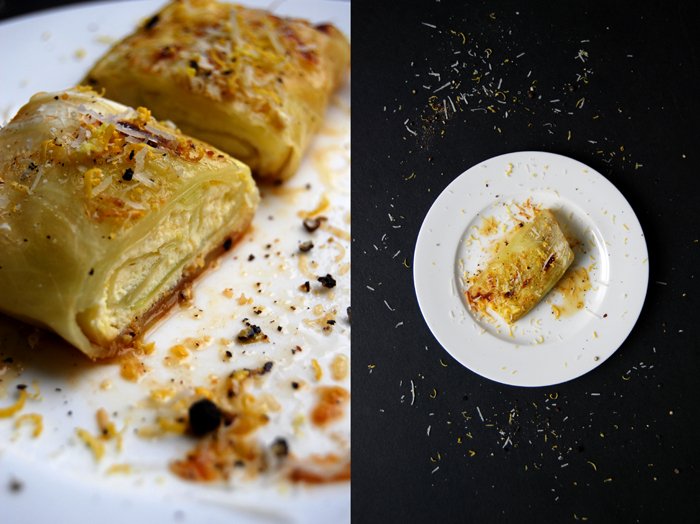
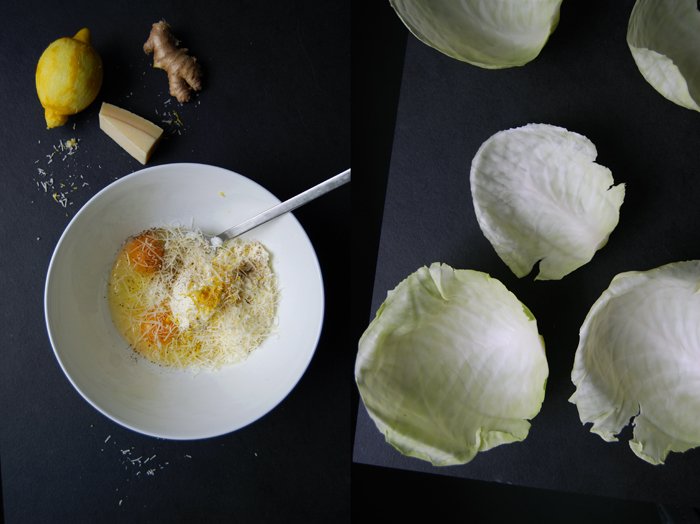
A while ago I heard about a traditional Maltese recipe which uses ricotta and raisins to stuff white cabbage leaves. The raisins didn't strike me as much, although I want to try it one day, but the ricotta caught my attention. I mixed it with some eggs, parmesan and lemon zest like I did for my Moussaka in May and I also added plenty of tangy ginger, that gave the whole dish an Asian inspired touch. The large leaves were blanched for just a few minutes, the filling was whipped together even quicker and off it went into the oven. My rolls turned out more like packages, I just lack the skill and patience, but that didn't do them any harm. I served them with fresh lemon butter and even more zest, cheese and ginger on top. We were more than impressed!
Ginger Lemon Ricotta stuffed Cabbage Rolls
For 2 as a main or 4 as a side dish you need
large white / green cabbage leaves 8
ricotta 200g / 7 ounces
organic eggs 2
freshly grated Parmesan 20g / 1 ounce, plus more for the topping
lemon zest 1 teaspoon, plus more for the topping
fresh ginger, grated, 2 teaspoons, plus more for the topping
salt
black peppercorns, crushed in a mortar
white wine to cook the cabbage rolls
For the lemon butter
butter 50g / 2 ounces
freshly squeezed lemon juice 1 tablespoon
Set the oven to 200°C / 390°F (fan-assisted oven).
Heat the butter in a sauce pan with the lemon juice.
Whisk the ricotta, eggs, Parmesan, zest, ginger, salt and pepper and season to taste.
Blanch the cabbage leaves in lots of salted water for about 4-6 minutes or until soft. Rinse them under cold water, drain them and cut out the hard stalk. Dry them with a kitchen paper and lay them flat on the kitchen counter. Put a tablespoon of the ricotta filling in the middle of the cabbage leaves, fold up both sides and roll it up.
Gently place the cabbage rolls in a baking dish and cover the bottom with a splash of white wine and some water. You might have to add some more water while the rolls are cooking. Cook in the hot oven for about 25 minutes or until golden and the filling is set. Serve with the lemon butter and some more Parmesan, zest, ginger and pepper.

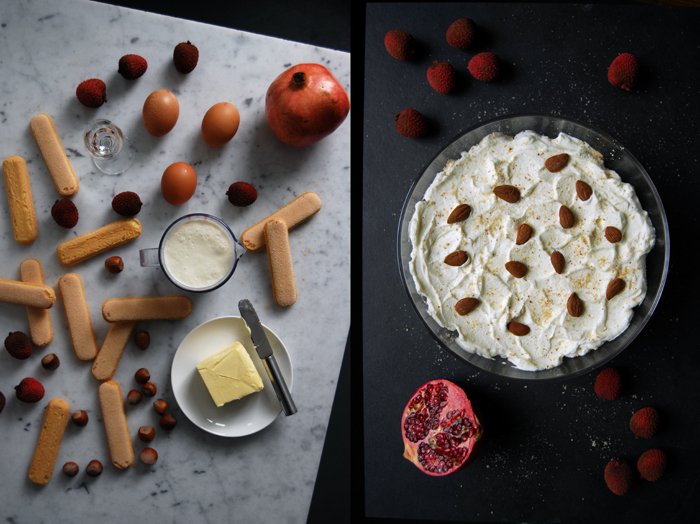
Crème Malakoff - an Austrian Almond Cream Trifle

The Malakoff trifle is one of the most tempting desserts I have ever had on a spoon and although it's quite a rich treat, I can't get enough of it! My favourite recipe is from our dentist's wife Margit. This passionate baker and her husband are longtime friends of our family and they are one of the sweetest couples I know, they make a great team on many levels! Margit is from Austria and she truly mastered the art of her country's extravagant sweet creations. The Austrian cuisine is famous for its cakes, cookies and creams, what would the world be without the elegant Sachertorte, the rustic Kaiserschmarrn, chocolaty Brabanzerl cookies, cinnamony and buttery plum dumplings or the amazing Malakoff trifle? This is pure opulence on a plate!
Whenever Margit brought one of her delicate glass bowls filled with her luscious signature dish to my mother's kitchen, my childish heart jumped with excitement. I could barely wait for the next birthday, Christmas or New Year's party which would bring another Malkoff trifle to our table!
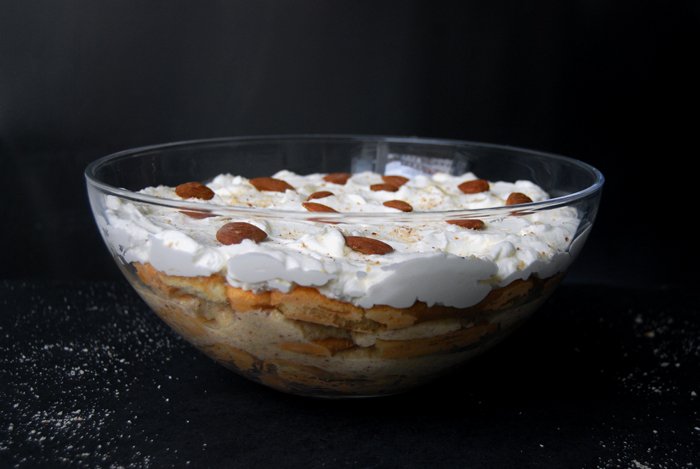
My beloved dessert starts with a heavenly buttercream refined with the sweet smoothness of liquid cream and lots of nutty almonds. This velvety richness is layered with rum and milk soaked ladyfingers and topped with whipped cream. The final result looks surprisingly light and fluffy, you just have to whip it long enough and all those eggs, butter and cream turn into fluffy clouds. Like Margit, I always make a trifle with the Malakoff cream, some prefer to turn it into a Charlotte or a cake, the Malakofftorte with homemade sponge cake. I like the convenience of a trifle made with store-bought ladyfingers, especially when I have guests over, like for Christmas or New Year's Eve. I just layer the cream and sponges the day before the big event to let it soak overnight and then finish it off with whipped cream before serving.


Malakoff Trifle
The ingredients for the buttercream (butter, eggs and heavy cream) have to be at room temperature!
For a 2l / 4.5 pint glass bowl for 4-6 people you need
120g / 1/2 cup butter, at room temperature (!)
140g / 3/4 cup granulated sugar
3 very fresh large egg yolks, at room temperature
250ml / 1 cup heavy cream, at room temperature (!), plus 250ml / 1 cup cold heavy cream for the whipped topping
140g / 5 ounces ground almonds, plus 1-2 tablespoons for the topping
About 250g / 9 ounces ladyfingers
150ml / 2/3 cup milk, to dip the ladyfingers in
50 - 75ml / 1/4 - 1/3 cup rum, to dip the ladyfingers in
14 almonds, for the topping (optional)
In a bowl, beat the butter with an electric mixer until very soft and creamy. Add the sugar and mix for about 2 minutes before you whisk in the egg yolks. Mix for a few minutes until the sugar dissolved, the mixture should be light and fluffy. Slowly (!) pour in the warm heavy cream (in drops) and continue mixing until the the egg-butter mixture and the heavy cream are combined, this will take about 7 minutes. Gently stir in the ground almonds with a wooden spoon.
In a deep plate, mix the milk and rum, briefly dip in the ladyfingers (both sides) and spread 1 layer of soaked ladyfingers at the bottom of the glass bowl. Cover with half the buttercream and continue with the next layer of soaked ladyfingers. Spread the remaining buttercream on top and finish with the third (and the last) layer of soaked ladyfingers. Cover with cling film and keep in the fridge overnight.
Take the trifle out of the fridge about 15-20 minutes before serving. Whip the cold heavy cream and spread on top of the trifle. Sprinkle with ground and whole almonds.


Leftover Boxing Day Pie

There are two options for the 26th December in my kitchen: pasta with leftover meat (= pappardelle al ragù) or a pie filled with leftovers (= Boxing Day Pie). This year, I'll go for pie, a cozy Boxing Day Pie, to use all that delicious meat, gravy, vegetables and stuffing that’s left from the past couple days. A buttery golden short crust holds the rich filling together - all those deeply satisfying flavors wrapped in a pretty pastry shell.
It's that easy: you just have to chop up whatever is left of your Christmas goose, duck or stew, mix it with carrots, peas and boiled potatoes and stir in some leftover gravy. The mixture should be thick and not too liquid as this would make the pastry soggy. A thick stew is what you’re after.
If there's nothing left of your Christmas lunches and dinners, you can make the pie I baked last week (which you can see in the photos). It was filled with a wonderfully tender and aromatic wild boar stew that cooked for hours. I prepared the stew the night before I baked the pie to let it sit and cool (a warm filling would soak the pastry before it even sees the oven).


Wild Boar Pie
For a 20cm / 8″ springform pan you need
For the filling
wild boar goulash, cut into 3 x 3 cm / 1 x 1" cubes, 1kg / 2 1/4 pounds
medium sized onion, chopped, 1
medium tomato, chopped, 1
carrots, cut in half and sliced, 2
celery stalk, cut into cubes, 1
brandy or port 75ml / 1/3 cup
red wine 350ml / 1 1/2 cups
garlic, quartered, 2 cloves
tomato paste 1 tablespoon
mustard 1 teaspoon
juniper berries, cracked, 4
fresh sage leaves 4
a small bunch of thyme
bay leaf 1
salt and pepper
olive oil
potatoes, peeled and boiled, cut into cubes, 280g / 10 ounces, to mix into the filling
peas (fresh or frozen), uncooked, 100g / 3.5 ounces, to mix into the filling
In a casserole dish, heat a splash of olive oil and sear the meat in batches on all sides for 1-2 minutes, season with salt and pepper. Set the meat aside, add a little more olive oil and sauté the vegetables for 2 minutes, add the tomato paste and cook for 1 minute. Deglaze with the brandy, put the meat back into the pot and add the red wine, spices, herbs and mustard. Season with salt and pepper, close with a lid and cook on medium-low heat (slightly simmering) for 2 hours or until the meat is tender. Take out the meat and vegetables and cook down the sauce on high temperature for about 1o minutes or until thick and not too liquid. Put the meat and vegetables back into the casserole dish, season to taste and let it cool completely. Stir in the peas and potatoes.
For the pastry
plain flour 250g / 9 ounces
salt 1/2 teaspoon
butter, cold, 75g / 2 3/4 ounces
vegetable shortening, cold, 75g / 2 3/4 ounces
organic egg yolk 1
cold water 1 tablespoon
For the glaze
organic egg yolk 1
milk 1 tablespoon
a pinch of salt
Combine the flour with the salt. Cut the butter and vegetable shortening into the flour with a knife until there are just little pieces left. Continue with your fingers and work the butter into the flour. Add the egg and water and continue mixing with the hooks of your mixer until you have a crumbly mixture. Form 2 discs, dividing them roughly 2:1, wrap in cling film and put in the freezer for 10 minutes.
The pie
Set the oven to 200°C / 390°F (top/ bottom heat).
Whisk the egg yolk, milk and salt for the glaze.
Take the dough out of the freezer, put the smaller disc in the fridge and roll out the bigger one between cling film. It should be roughly 34cm / 13.5", big enough to line the bottom and the sides of the springform pan, overlapping the rim about 1 cm / 1/2“. Gently line the pan with the pastry (leave the cling film on the top side to put it in place) and put the springform pan in the fridge.
Roll out the remaining disc, a bit bigger than the springform pan.
Take the pastry-lined springform pan out of the fridge and fill it with the thick stew. Put the smaller disc on top and gently push the sides onto the bottom layer of pastry, sealing it by rolling it inwards. Brush the top with the glaze and bake the pie for 15 minutes before you turn it down to 175°C / 350°F and bake for another 55 minutes or until golden and baked through. Let the pie cool for at least 20 minutes before you open the springform pan and cut it into pieces.


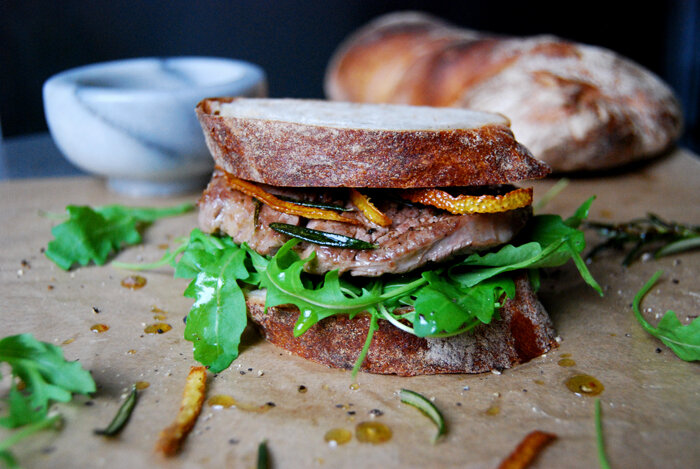
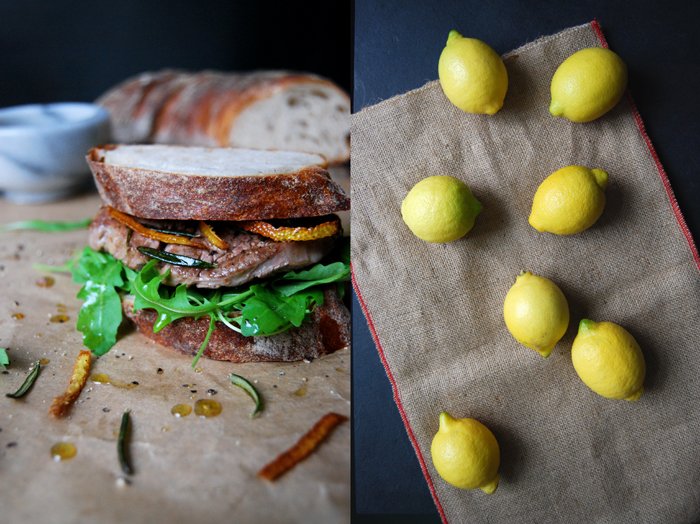
Fillet of Beef Sandwich with Lemon and Rosemary Oil
The year is almost over and there are just two Sandwich Wednesdays left. I can hardly believe that today's creation is the 55th sandwich on the blog! Sometimes, when you do something so consistently and uninterrupted you lose any feeling for time. Since I started making sandwiches for eat in my kitchen every week, I have never thought about what I did the week before or what I would come up with for the following Wednesday. It's been a natural flow guided by my mood, the season and my appetite for specific ingredients and so far it has never let me down. I look forward to all the sandwiches and other culinary adventures and treats to come in the new year!
This Sandwich Wednesday is special, today we celebrate Christmas in Germany. I always feel excited on the 24th December, happy and a bit hyperactive like a child waiting for Santa to visit. I'm lucky to be able to spend this day with the ones I love so much, to share the food we make together, a glass of Champagne and some nice Chianti. We will celebrate and feast today and tomorrow and maybe the day after as well, we'll forget about our duties and worries and just enjoy what life gives us. No matter if it was easy or challenging at times, this year has been an amazing gift, and on Christmas, I take my time to feel grateful and humble for this great adventure!
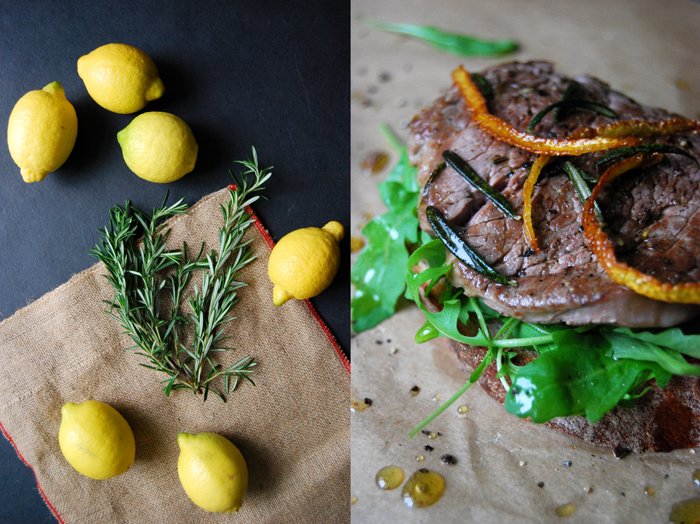
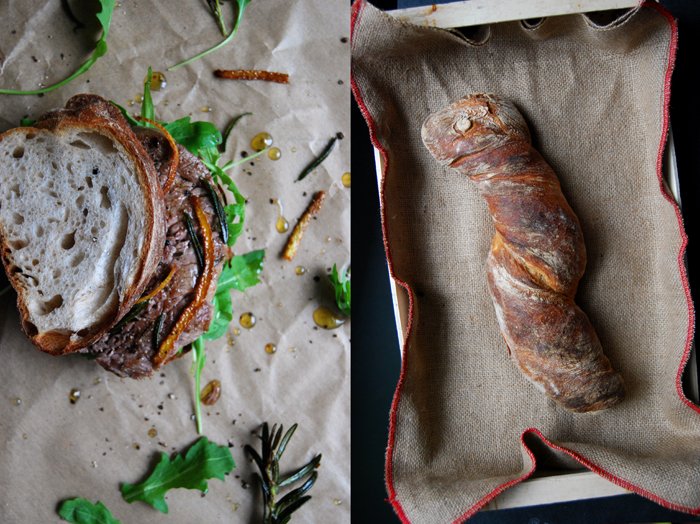
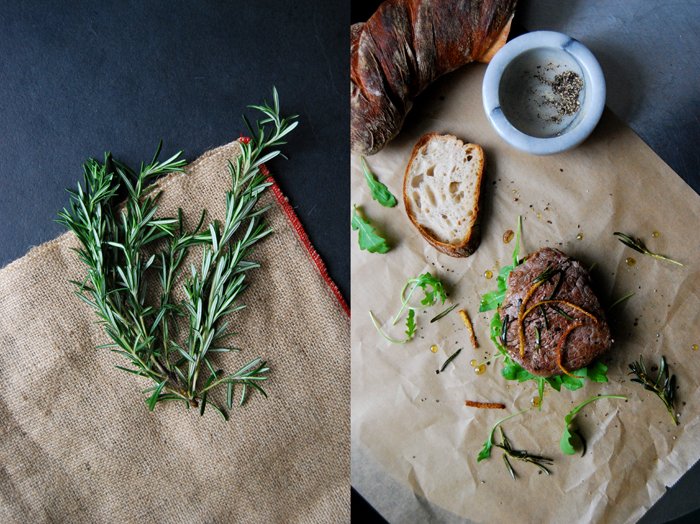
As much as I love the sumptuous treats during the Christmas holidays, they still have to be comfortable and not too complicated, like my sandwich. I got a nice fillet of beef, just a small piece big enough to cover the slice of a rustic sourdough bread. This is just a little luxurious lunch before the big feast begins. First I fried some rosemary and lemon peel in olive oil to garnish the sandwich but I also made use of the aromatic oil to quickly fry the meat. I packed the fillet in between two slices of bread which I brushed with the rich juices and layered with crunchy rucola, the crispy lemon peel and rosemary and some crushed black pepper. A luscious sandwich which features the finest beef refined with citrus and the woody herb and if you still don't know what to cook tonight, just make a sandwich!
I wish you a wonderful Christmas wherever you may be, with the people and the food you love, enjoy!
Merry Christmas! Meike xx

Fillet of Beef Sandwich with Lemon and Rosemary Oil
For 1 sandwich you need
rustic white sourdough bread, 2 slices
beef fillet 100g / 3.5 ounces
olive oil 3 tablespoons
lemon peel 3-4 long strips
fresh rosemary 2 small sprigs
rucola, a small handful
black peppercorns, crushed in a mortar, to taste
In a heavy pan, heat the olive oil, lemon peel and rosemary and cook for about 2 minutes until the peel is golden and crisp but not dark. Take out the citrus peel and herbs, heat the oil and sear the beef fillet for a minute on each side.
Brush the bread with the juices from the pan, spread some rucola on one slice and put the meat on top, sprinkle with the roasted lemon peel and rosemary and some pepper. Enjoy!


Arancine - Sicilian Rice Balls with Saffron and Mozzarella
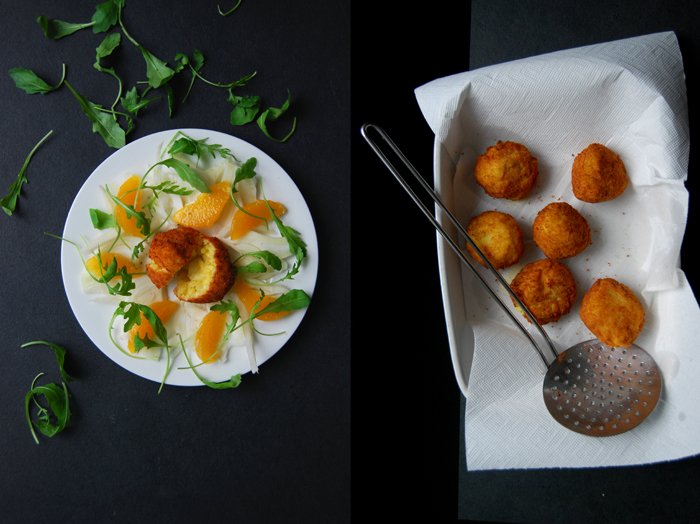
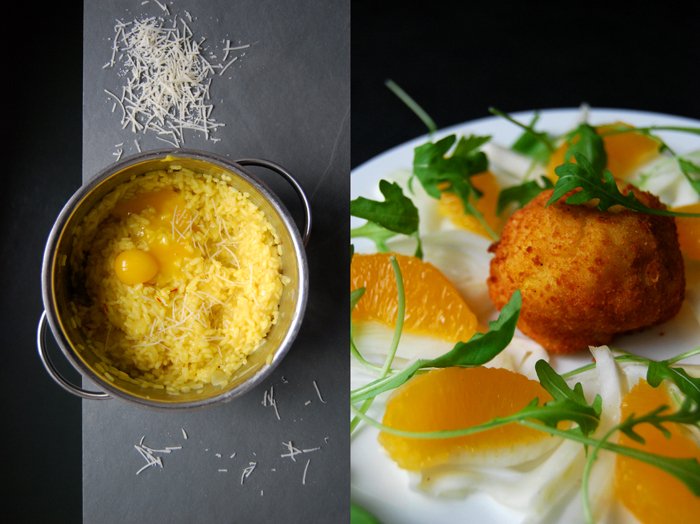
If you're still looking for a festive vegetarian dish for your Christmas table I can only recommend these little golden balls of rice refined with saffron and stuffed with melted mozzarella, the famous Sicilian arancine! Imagine a bright yellow risotto alla milanese cooked with aromatic saffron in a strong both, mixed with egg yolk and parmesan and shaped into little dumplings. The balls are stuffed with mozzarella and fried with a coating of flour, egg and breadcrumbs until golden brown (which is done in less than a minute). The result looks like tiny oranges which gave them their name arancini or arancine in Sicily, derived from the Italian word for orange, arancia.
Sometimes they are also filled with mushrooms, pistachios or aubergine, or with a meaty tomato sauce, a rich ragù, like in Malta where I love to eat them for lunch at my local confectionary, Busy Bee. The old fashioned atmosphere of the marble panelled cafe on the Msida seafront is my favourite place for a little midday snack and an espresso when we're on the Mediterranean island. The room is often filled with the same business people and elderly couples and I imagine them meeting at this café for a date like they have done all their life. We all enjoy the authentic cooking and traditional Maltese and Italian dishes which taste like mama's kitchen.
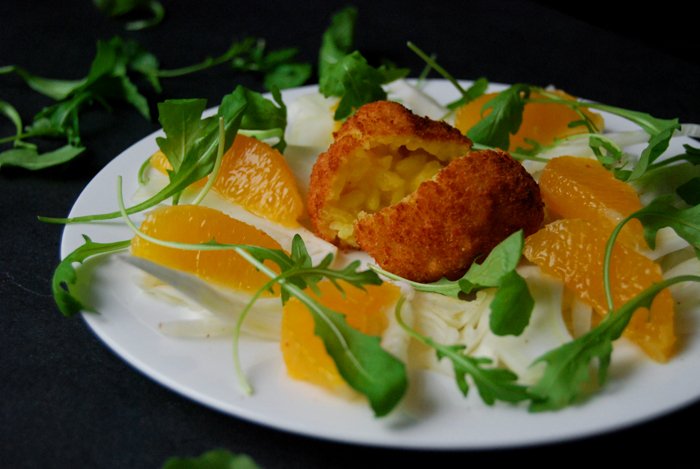
I went for a simple filling with mozzarella as I wanted to enjoy my arancine on a light and fruity salad of orange, fennel and rucola. The mild cheese merges perfectly with the risotto's saffron aroma and the whole composition makes quite a pretty platter!

Arancine with Mozzarella
The oil is very hot, so you should always fry with lots of care!
For 4 people (about 15 small arancine) you need
Arborio rice 200g / 7 ounces
medium onion, finely chopped, 1
vegetable or meat broth around 600ml / 2.5 cups (depending on the rice you will need more or less liquid)
white wine 100ml / 1/2 cup
a pinch of saffron
salt and black pepper
olive oil
organic egg yolks 2 plus 2-3 eggs to coat the arancine
Parmesan, freshly grated, 20g / 3/4 ounce
mozzarella, cut into small cubes, 80g / 3 ounces
plain flour, a large handful, to coat the arancine
breadcrumbs, a large handful, to coat the arancine
vegetable oil for deep-frying, around 1l / 2 pints (plus more depending on the size of the pot you use)
fennel bulb, very thinly sliced, 2
orange, peeled and cut into filets, 2
rucola (arugula), a big handful
Mix the wine and saffron.
In a large pot, heat a splash of olive oil and sauté the onions on medium heat for about 2-3 minutes until soft. Stir in the rice and cook on medium heat for 1 minute. Add the saffron wine and some of the broth, the rice should be covered, stir and turn the heat down to medium-low. When the liquid has been absorbed add more broth, a little at a time, stirring in between. Depending on the rice, it will need more or less liquid. When the rice is al dente and the broth is absorbed take it off the heat and season with salt and pepper to taste. Close with a lid and let the risotto sit for a minute. Stir in the egg yolks and Parmesan and let the mixture cool completely.
Heat the vegetable oil in a large pot. Check if it’s hot enough with a wooden toothpick, little bubbles should form around the toothpick.
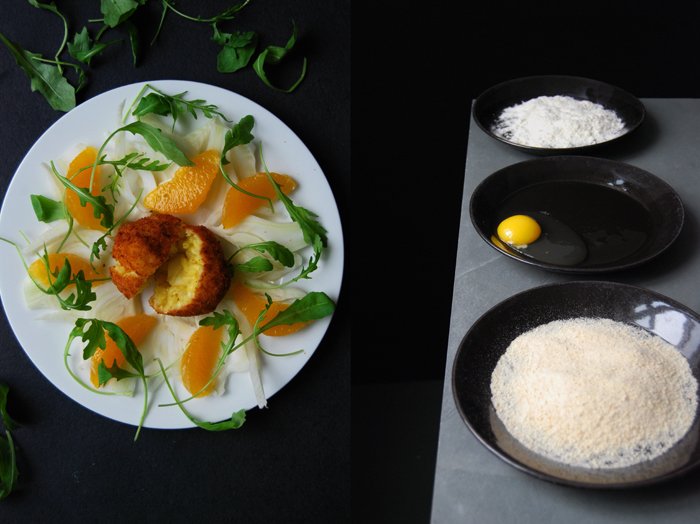
Prepare three deep plates, spread flour on the first one, beat the eggs on the second one and fill the last one with breadcrumbs.
Prepare a little bowl with water, wet your fingers and take a heaped tablespoon of the risotto. Form a small, thick disc in your wet hand palm, put 2-3 mozzarella cubes in the middle of the rice and form a round dumpling. The cheese should be completely covered. Gently roll the dumpling like a snow ball in the flour, then in the eggs (this has to be done quickly so that it doesn't fall apart) and finally, roll it in the breadcrumbs. Continue with the remaining risotto and put the arancine on a large plate or baking sheet (they will flatten a bit, you have to put them back into a round shape before you fry them in the oil).
Fry the arancine for about 1 minute in the hot oil, turning them in between. They should be golden brown but not dark. Take them out with a slotted ladle and put them on kitchen paper to remove excess oil.
Divide the fennel, orange and rucola between the plates and drizzle a little olive oil over it. Serve the warm arancine on top of the salad.


Ginger Orange Christmas Cookies

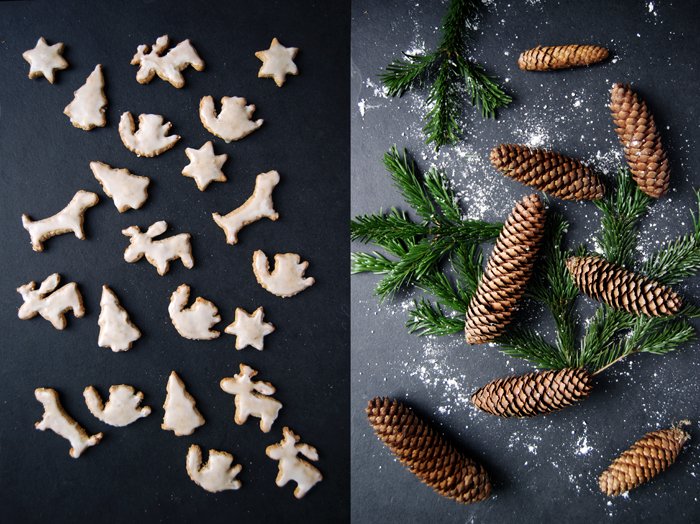
There is a very popular Christmas cookie in Germany called Zimtstern, meaning cinnamon star. They are a tiny bit chewy inside, soft and juicy. The dough is made without flour and butter but with lots of ground almonds or hazelnuts and egg whites which gives it its typical texture. This sweet is a classic which you can find on every German Christmas cookie platter and I have faithfully baked them for years. It has always been one of the recipes that I look forward to with excitement, these cookies bring out the best of my beloved cinnamon!
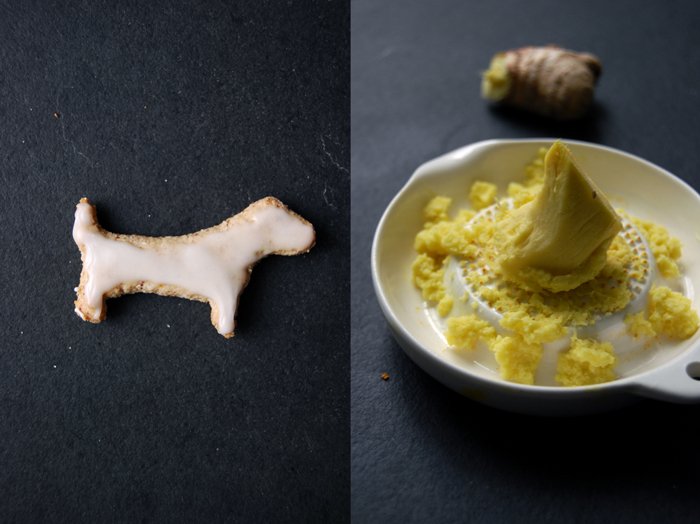
As so often when I follow a tradition with such consistency, at one point I need a little change or at least a variation, which is the substitution of spices in this case. I took out the cinnamon and replaced it with lots of freshly grated ginger, orange zest and cloves. The result is an extremely aromatic cookie with the same texture as the Zimtstern, they are equally soft and chewy inside. I covered them in a thin layer of orange glaze to give them a glowing festive look. As I had already broken with the tradition I thought I might as well give them different shapes. When I took out my cookie cutters I went straight for the sausage dog, reindeer and squirrel apart from the classic trees and stars!
I wish you a happy Advent!
Meike xx
If you're looking for some more baking inspiration for the next days, here are my


Ginger Orange Christmas Cookies
For about 60 cookies you need
ground hazelnuts and/ or almonds 320g / 11.5 ounces (I used 100g / 3.5 ounces hazelnuts and 220g / 8 ounces almonds)
organic egg whites 2
a pinch of salt
sieved icing sugar 250g / 9 ounces plus 100g / 3.5 ounces for the glaze
freshly grated ginger 20g / 3/4 ounce (about 3 teaspoons)
zest of 1 orange (about 2 tablespoons)
cloves, crushed in a mortar, 20 (about 1 teaspoon)
freshly squeezed orange juice, about 6 teaspoons, for the glaze
granulated sugar, to roll out the dough
Set the oven to 160°C / 320°F (fan-assisted oven) and line a baking sheet with parchment paper.
Combine the ground nuts with the ginger, zest and cloves. Spread and rub the ginger with your fingers into the nuts until well combined.
Whisk the egg whites and salt until stiff and mix in the icing sugar (gradually). Mix in the nuts and spice mixture with a wooden spoon until well combined. Scrape the dough onto cling film, form a ball and keep in the fridge for about 2 hours.
Roll out the dough between sugared cling film, it should be about 1/2cm / 1/4" thick. Dip the cookie cutters in sugar and cut out cookies, spread them on a baking sheet with a little space in between them and bake for 11-12 minutes or until golden. They should still feel a bit soft. Let them cool for a few minutes before you put them on a wire rack.
For the glaze, mix 100g / 3.5 ounces of icing sugar with 5 teaspoons of orange juice, the mixture should be very thick and slightly runny. Add a few more drops of the juice if necessary, mix until smooth and brush the cookies with the glaze.


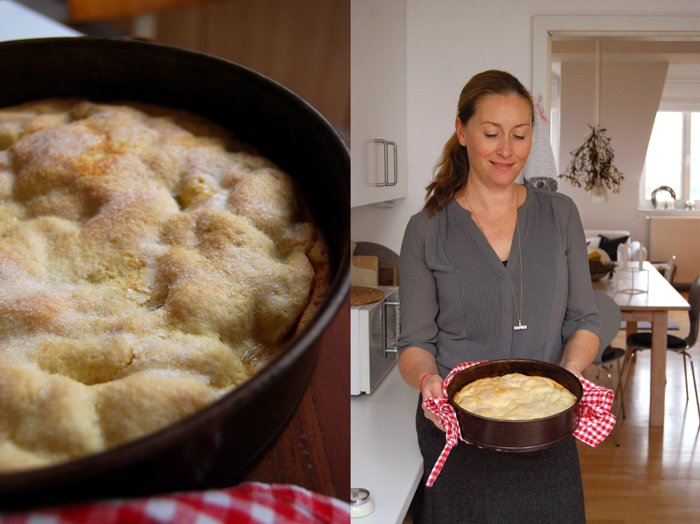
meet in your kitchen | Designer Imke Laux bakes her Aunt Herta's German Apple Pie

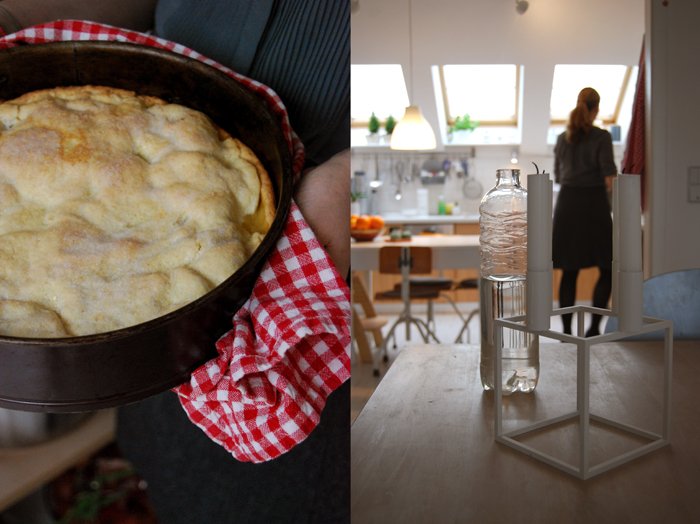
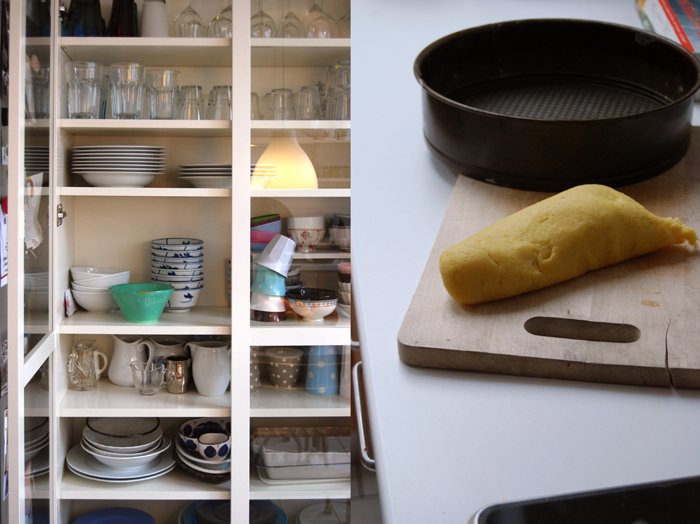
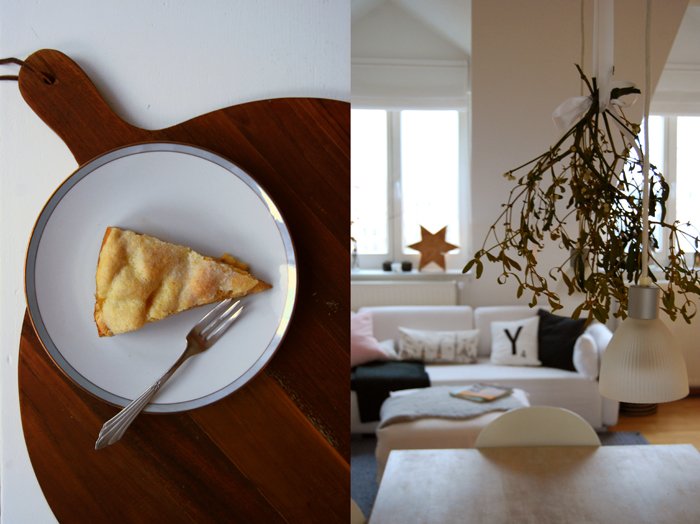
When I met Imke in her kitchen on a cold and dark Berlin morning, it started snowing. It was the first snow of the winter (and the last so far) and I couldn't have found myself at a warmer and more comfortable place than her stunning roof top apartment. The interior designer created a beautiful world for her family of four in shades of white and light grey, with lots of light, cushions, candles and cosy corners. Her open kitchen, living and dining room is the place where you want to sit with a cup of tea and chat for hours. I can imagine that the long table, the centrepiece of the room, has already seen many special nights of feasting. Imke created the perfect place to gather and savor, to feel at home as a guest and enjoy.
My kitchen host is a fascinating woman who I met not too long ago but there was something in her eyes that made me want to find out more about her. Imke is a renowned interior designer, her clients appreciate her sensitivity, confidence and style. She understands and respects their needs and creates spaces that make you feel good. Not a single chair, sofa, table or lamp is pretentious, it all makes sense and is a functioning part of her daily life. But it also pleases the eye, it just seems very effortless.
Imke found her present profession over the past few years. She studied law and worked as a lawyer for a photo agency in Hamburg but then moved to California together with her husband just after their first child was born. In the new country she decided to make another change in her life, she studied design at the New York Institute of Art and Design. She successfully finished her correspondence course and her first projects began. After the family moved back to Berlin a few years later, it wasn't long before she established herself in a new situation again. From the start, the demand for her stylistic advice, help and guidance was just as high on this side of the world.
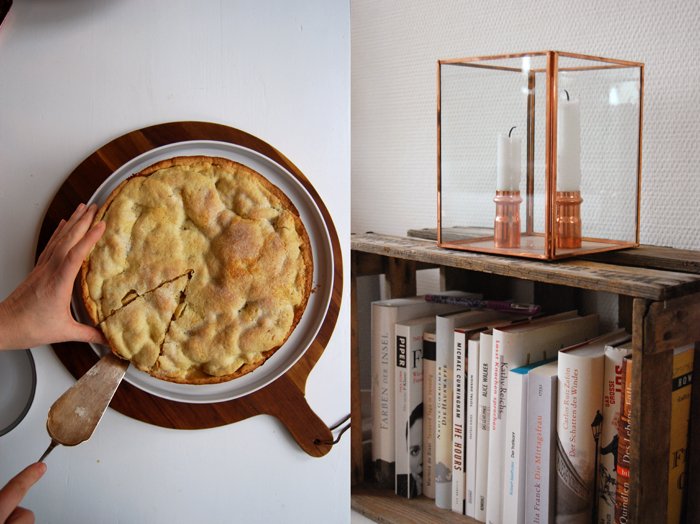
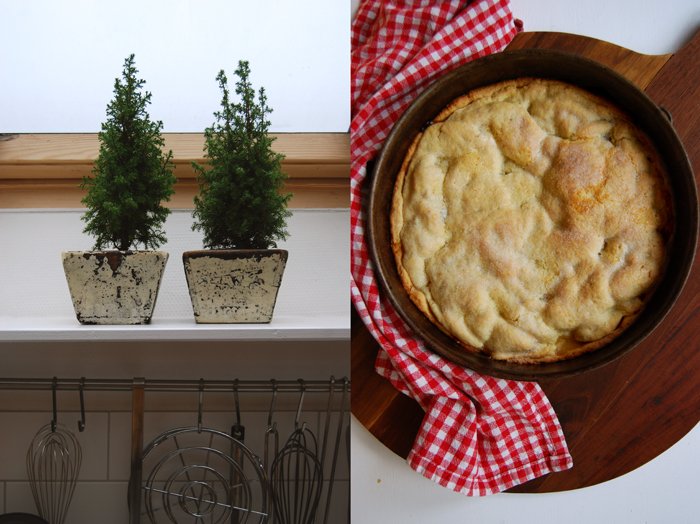
This summer the family bought a little weekend house at a river outside Berlin which they are renovating themselves. A new project for Imke, her husband and their two 13 and 7 year old daughters, lots of building and painting but also picnics and looking for mushrooms in the countryside. When the four need a break, they love to travel without planning much to see where life takes them, a 3 week trip to India is next on their list! Imke's eyes sparkled when we talked about this adventure and when I asked her about the difficulties of traveling with two young girls, she didn't seem too worried. The effortlessness which fascinated me from the start is built on trust and a positive attitude. That's also what Imke prooved when we started our kitchen session. She couldn't find the apples which she hid from her family for the pie she wanted to bake with me. Her aunt Herta's Apple Pie (gedeckter Apfelkuchen in German) is an old family recipe which needs lots of sour fruits so she bought a big bag full but couldn't find them. I offered to run to the grocery story but Imke stayed calm and was sure that they must be somewhere. She was right and we could start. As if life wanted to test her patience, a second obstacle came into our way. The oven broke and refused to keep the right temperature. Imke kept her cool, sat right next to the oven, put it on the highest temperature and kept an eye on our pie. It all worked fine in the end, the pie was fantastic, packed with lots of juicy apples and a crisp thin pastry. On my way home I noticed that this lady, her pie and her gorgeous apartment left me with a really good feeling, life is good when you trust!
You can see Imke's work her on Laux Interiors and follow the progress of her country house on her new blog Laux Haus.

Aunt Herta's Apple Pie
For a 26cm /10″ springform pan you need
large sour baking apples, peeled, cored, quartered and sliced, 5
vanilla sugar 1 package (or 1 1/2 teaspoons of sugar mixed with 1/4 vanilla bean, scraped)
plain flour 300g / 10.5 ounces
a pinch of baking powder
granulated sugar 65g / 2.5 ounces plus 1 tablespoon for the topping
a pinch of salt
eggs 2
butter 150g / 5.5 ounces plus 1 tablespoon for the topping
Mix the flour, baking powder, sugar, salt, eggs and butter with an electric mixer until well combined. Form the dough into a ball and keep in the fridge for at least 1 hour.
Set the oven to 210°C / 410°F (fan-assisted oven) or 225°C / 440°F (top / bottom heat).
In a large pan, cook the apples and vanilla sugar for a few minutes until soft and let them cool for a few minutes.
Roll out 1/3 of the dough between cling film until it's roughly the size of the springform pan. Roll out the remaining dough between cling film and line the bottom and the sides of the springform pan. Fill the apples into the dough-lined springform pan, even them out and put the remaining pastry on top. Close the pie and spread around 1 tablespoon of butter (in small pieces) and 1 tablespoon of sugar over the top. Bake for 20-30 minutes or until golden brown and crisp on top.
You lived in California for seven years with your husband and two daughters before you decided to make Berlin your new home. How did your lifestyle change through this move?
We moved from a big house with a garden in the suburbs in California to an apartment on the 5th floor in downtown Berlin. What changed drastically is the convenience of our daily life. Grocery shopping for example is a whole different story when you don’t have parking on the same level as your kitchen. I go grocery shopping more often now and buy smaller amounts of food because I have to carry it up the stairs to the 5th floor.We also spent much more time outside in California. We used to go to the beach almost every weekend or went hiking in one of the great State parks. Now in Berlin we are far away from the coast or the mountains but we love to bike around the city or go swimming in a lake in the summer.
How did the new city influence your cooking and eating habits?
In Berlin we have a ton of great restaurants in walking distance. So we definitely go out to eat way more here than in the States. My cooking hasn’t changed much I believe.
What did you miss about German food when you lived in the US? Did you adapt to any American kitchen habits that you miss since you've been back in Germany?
I missed the German bread! The American bread is way too soft and sweet. So I baked our own bread in the USA. Here in Germany you find a bakery at every street corner with a big selection of whole grain breads and rolls – so we eat more bread here.In Germany I miss being able to buy freshly baked cupcakes in the supermarket. That was so convenient. The table ready (pre-washed and pre-cut) vegetable and salad selection in the States is amazing. Also there are some really good ready made organic dressings. I loved grocery shopping at Whole Foods or Trader Joe's. I really miss that. Everything looked so nice and you could always sample things.
You told me that you enjoy baking more than cooking, who or what sparked your love for sweet creations?
I enjoy baking more but I still cook more than I bake, because I have to cook dinner almost every night. I bake just occasionally. I think baking is more fun for me because I really like to eat cakes, pies and cookies. I am a big fan of sweets. I love the smell of freshly baked goods in the house. My mother and my aunt are to blame. They bake amazing things!
What was the first dish you cooked on your own, what is your first cooking memory?
I baked a pie for my mother as a surprise. I think I was 8 or 9 years old and I forgot to add the butter to the dough. So what came out of the oven was solid as a rock. But we still ate it and my mother pretended that she loved it.
What are your favourite places to buy and enjoy food in Berlin?
I love to go grocery shopping at the farmers markets – the organic food market at Kollwitzplatz on Thursday afternoon and the weekly farmers market on Saturdays. I buy fresh pesto, cold cuts and cheese at the Italian Deli Giannis Pasta-Bar on Schönhauser Allee. I love the bread selection at Zeit für Brot on Alte Schönhauser Strasse. I am a also member of the organic supermarket LPG Biomarkt at Senefelder Platz. My favorite supermarket is Kaiser’s at Winsstrasse. They have everything.My favorite café is the Meierei on Kollwitzstrasse, they serve great coffee and have a small selection of sweet or savory dishes.Restaurants that we like to go to are Aromi e Sapori on Straßburger Strasse, Leibhaftig on Metzer Strasse, Due Forni and Fleischerei on Schönhauser Allee, Lemon Grass Scent, Donath and Pappa e Ciccia on Schwedter Strasse.
You worked as a lawyer for a photo agency in Hamburg and couldn't follow your profession when you moved to California. How did you come up with the idea to start something completely new, your own design company Laux Interiors?
I always had an interest in interior design. I was the one friends would turn to for advice when rearranging their home. I had the constant urge to move furniture around in our home. When we moved to the States I was surprised to learn that interior design was/ is such a big thing over there. There are entire TV channels dedicated to it. So I decided to turn my passion into a profession and went back to school – this time for interior design.
Your father is a goldsmith and your mother was a home economics teacher and is now a full time artist. How did your parents influence your aesthetic perception and your creative work?
My parents always took me to museums, exhibitions and galleries. Growing up my father had his own gallery where he would exhibit his own jewellery along with paintings and sculptures of other artists. His aesthetics in jewellery design are very clean, elegant with flawless craftmanship.My mother is very expressive, caring and has a big heart. Her art is colourful and earthy. Sometimes I feel that I am torn between these two aesthetics.
This summer you bought a little weekend house built in 1974 at the picturesque Oder-Havel canal and you write about the progress of the renovations on your new blog LauxHaus. What is the biggest challenge and what is the great gift of renovating something old rather than buying new?
The biggest challenge for me is to be patient. I would love to do it all at once. But we are only there on the weekends, so it takes time to finish something. The huge garden also is something that scares me a little. Actually I would have loved to built a brand new house – something energy efficient with green materials and tons of glass - but the house is located in a protected nature reserve so we can only preserve the status quo but not build anything new there. We bought it mainly because we love the location at the riverside so much.In really old buildings that I often have to renovate here in Berlin for clients I adore the craftmanship that you find in elements like stucco, panelling, doors, windows, floors, glass and hardware. You don’t see this anymore in homes that were built after World War II.
What did you choose to share on eat in my kitchen and why?
I chose to share an old family recipe with you – Apple Pie Aunt Herta. It’s a classic for decades. This pie is a staple at every birthday or special occasion in my family. The recipe was given to us from my great aunt Herta, my grandfather 's sister. I thought I’d share it with you because I always get positive feedback for this pie. I love that the crust is so crispy and the apples are so juicy and still a bit sour.
If you could choose one person to cook a meal for you, who and what would it be?
It would be a tie between my grandmothers Wilma and Resi. Wilma would have to show me how to preserve apples and pears from the garden by cooking them in jars with cinnamon sticks. Resi would have to show me how to cook East Frisian Sniertjebraa, a slow cooked pork roast.
You're going to have ten friends over for a spontaneous dinner, what will be on the table?
Roasted pork loin with oven roasted vegetables and rosemary potatoes. If it’s really short notice - pasta with pesto Genovese and salad.
What was your childhood's culinary favourite and what is it now?
My favorite as a child was Paprikagemüse – a dish in a pan with ground meat, red and green bell peppers and tomatoes served with rice. Now I could eat tagliatelle with truffles and parmesan cheese every day. Or Sushi.
Do you prefer to cook on your own or together with others?
Together with others. It’s more fun when you can chat and have a glass of wine while cooking. Although I am more focused and quicker when I cook alone.
Which meals do you prefer, improvised or planned?
I mostly improvise a little – probably I would be calmer and less stressed if I planned ahead.
Which meal would you never cook again?
Can’t think of one.
Thank you Imke!


My Granny's Beef Rolls with Potato Dumplings
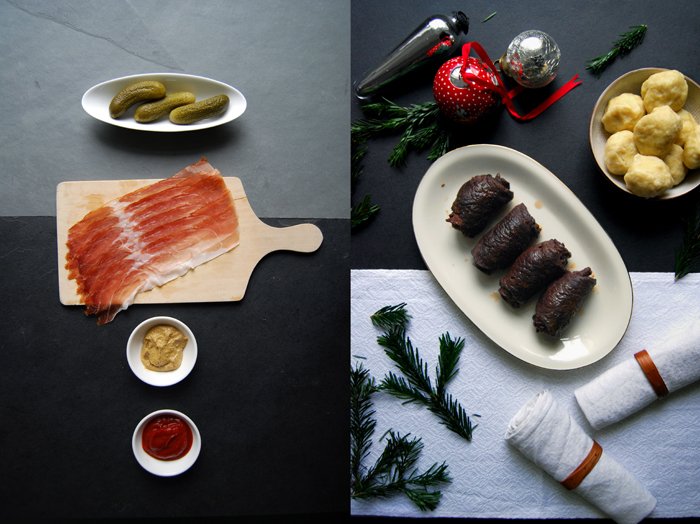
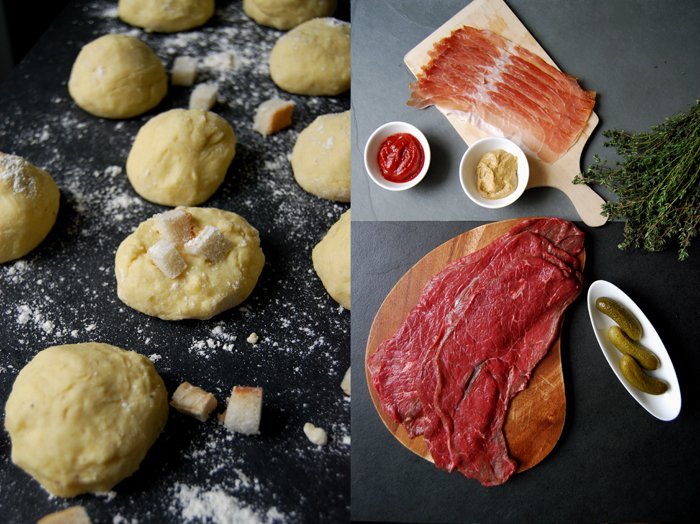
Beef rolls were my granny's signature dish always served on her Sunday lunch tables with potatoes and traditionally followed by another German classic, her unbelievably good (and rich) Frankfurt Crown Cake (Frankfurter Kranz in German). This was her ritual, she dressed up, put on her lipstick and set up the table with her best linen and 'the good tableware'. Her generation used to have two sets of plates, the more simple (and cheaper) selection for the weekdays and the delicate bone china porcelain for special occasions. I never quite understood this concept and to me it didn't make much sense, if I really like something, a plate, a glass or a vase, I want to see and use it every day. I like to mix the simple with the extravagant, every day, whenever I'm in the mood. There's no such separation between the formal and the normal plates in my kitchen, but to her it felt right to underline the importance and the special status of these events with a different kind of tableware. Only her Sunday, birthday and Christmas lunches saw the gold rimmed and ornamented plates and crystal glasses which were usually locked in the dark cupboards.
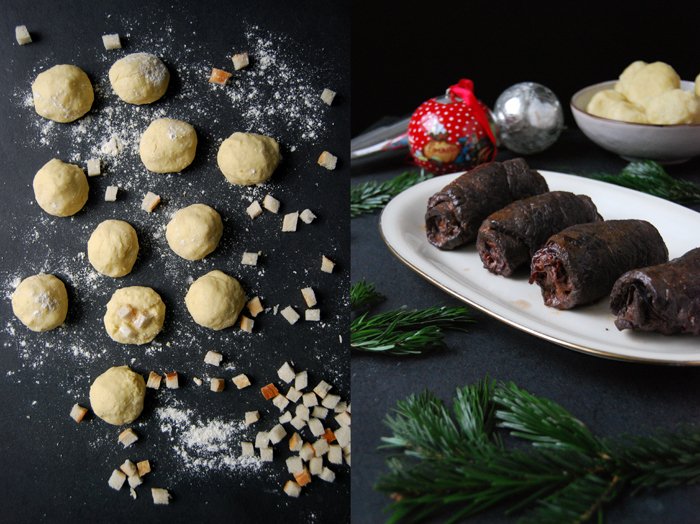
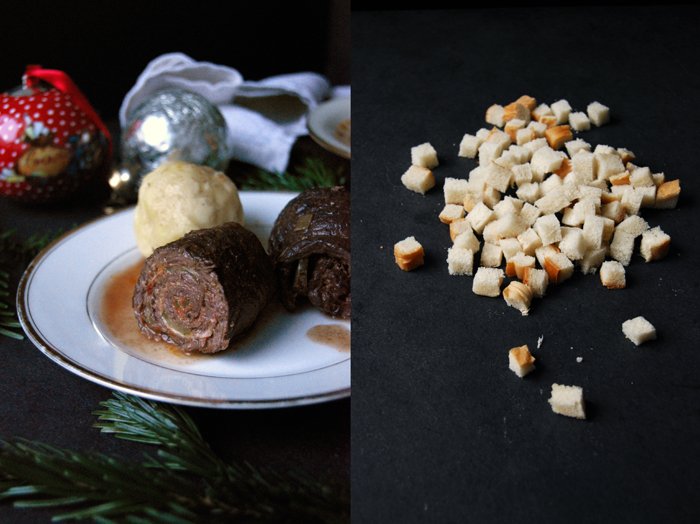
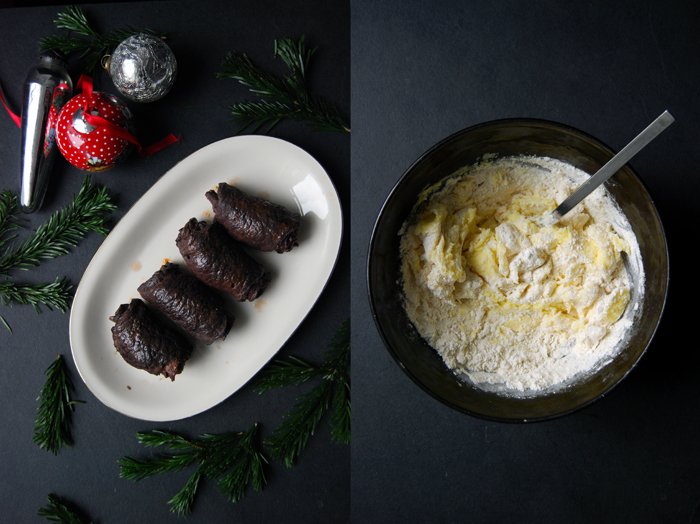
Times and habits have changed, and our kitchens and their functions changed over the years. It's no longer a seperate room where food is produced, this space became an open centrepiece in houses and apartments. In our kitchen, we create, meet our friends, relax, enjoy a cup of tea or read our cook books, this is where our daily life happens and we need tools (and plates) which support this lifestyle. This is where our life takes place, and more than just the culinary one, it's the quality of our entire life which is influenced by this space. My granny's kitchen used to feel like a secret laboratory where she created all these fantastic treats, but contrary to my mother's mother, she didn't allow much of an insight. That might also be the reason why we don't have many of her recipes anymore which is really sad. I have to remember the taste of the stews, cakes and cookies and try to recreate them out of my memory, like her beef rolls (Rinderrouladen in German and braciole in Italian). The thin meat is rolled up with tomato paste, mustard, bacon and gherkin slices to a thick roulade, it cooks in lots of wine, herbs and vegetables for a couple hours which makes the beef tender and the sauce very rich. My granny mastered this dish to perfection. For my rouladen, I combine what I learned about aromatic stews from my mother with my memory of the strong meaty flavours of my granny's dish refined with the fruitiness of tomatoes, the spiciness of mustard, the saltiness of Tyrolean prosciutto and the subtle sourness of gherkins. And it's back, the Sunday lunch with its wonderful tastes and the childish enjoyment of the meat and sauce mixed with potato dumplings. I make my dumplings (Kartoffelknödel in German) with the same dough as my gnocchi, I just give them a bigger round shape and fill them with a couple bread cubes. This is a great Christmas dish as you can prepare everything in advance and warm it up when you need it. Although the dumplings are best when they are made fresh, sometimes I warm them up by cooking them in hot water for 1 minute.
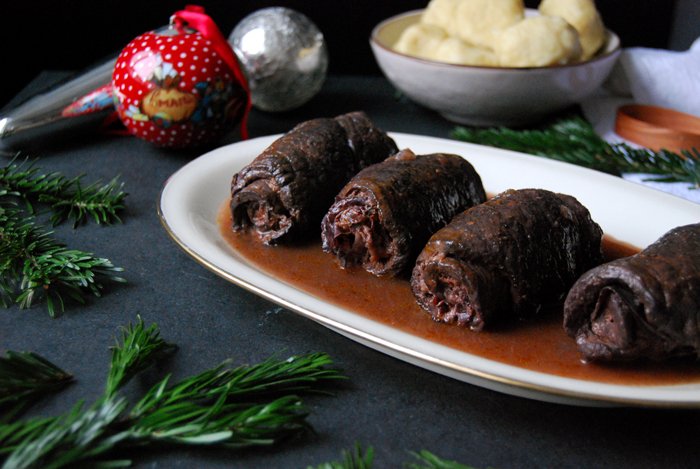
A few weeks ago I found an old oval serving plate with a gold rim in one of Berlin's vintage shops, I had to buy it as it reminded me of both of my grannies. Beef rolls have a rather rustic look but on this plate they get a festive frame. I'm sure these two ladies would have enjoyed watching their granddaughter keeping up their tradition (and not just at Christmas time)!
Beef Rolls with Potato Dumplings
For 4 people you need
For the beef rolls
large flat slices of beef, topside or silverside, 4 (about 700g / 1.5 pounds), each about 30 x 10cm / 12 x 4"
Tyrolean prosciutto, or thin bacon slices, 8
large gherkins, sliced thinly (lengthwise), 4
tomato paste 4 heaping teaspoons
spicy mustard 4 teaspoons
red wine 1 bottle (750ml)
brandy or port 1 shot
medium carrots, cut in half and sliced, 2
celery stalk, cut into cubes, 1
leek, sliced thinly, 1/3
celery root, peeled, 1/4
garlic, cut in half, 2 big cloves
fresh thyme, a small bunch
fresh sage leaves 3
bay leaf 1
juniper berries, cracked, 3
salt and pepper
vegetable oil
tooth picks or cotton string to fix the rolls
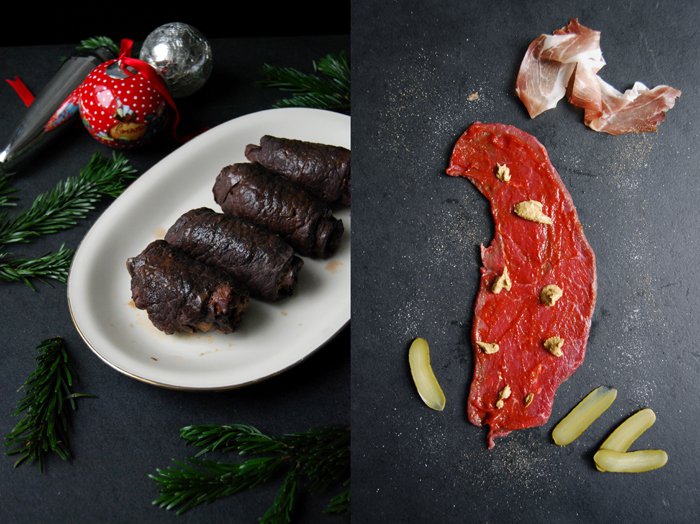
Lay the meat flat on the kitchen top, season with salt and pepper and spread a teaspoon of tomato paste and mustard on each slice. Put 2 slices of prosciutto and 3-4 slices of gherkin on top. Carefully roll up the meat and fix with 2 toothpicks at the ends or tie the roll with string.
In a large casserole dish, heat a splash of oil and sear the beef rolls on each side for 1 minute. Take them out, add a splash of oil and sauté the vegetables for a few minutes. Add the tomato paste and cook for 1 minute before you deglaze the vegetables with brandy. Put the beef rolls back in. Pour in the wine, the meat should be almost covered, add the herbs and spices and season with salt and pepper. Close with a lid and cook on medium-low heat (slightly simmering) for 2 1/2 - 3 hours or until the meat is tender. Take out the meat and vegetables and cook down the sauce for a few minutes. Season to taste and put the beef rolls and vegetables back into the casserole dish. Serve with the potato dumplings.
For the potato dumplings
potatoes, peeled and cut into cubes, 450g / 16 ounces
butter 30g / 1 ounce
organic egg yolks 2
plain flour 150-200g / 5.5-7 ounces
nutmeg, grated, to taste
salt 1 1/2 teaspoons
black pepper, to taste
white bread, cut into 1cm / 1/2" cubes, 3-4 slices
Cook the the potatoes in salted water until soft (around 15 minutes). Drain them before you press them through a potato ricer and mix immediately with the butter and egg yolks. Put in a cool place (in the fridge) until the mixture is completely cool(!).
In a large pot, bring plenty of salted water to the boil. Set the oven to 100°C / 210°F and put an ovenproof dish inside. You will need it to keep the dumplings warm while you cook them in batches.
With a spoon (or your hands), mix the cold potato mixture with the flour (use enough so that the mixture isn't too sticky), salt, nutmeg and pepper until combined. Dust your hands with flour, take a heaped tablespoon of the dough and from a small, thick disc. Put 3 bread cubes in the middle and roll into a ball. Put the dumplings onto a floured baking sheet. Before you cook them in the water you might have to put them back into a round shape as they tend to flatten.
Cook the dumplings in batches in the boiling water so that they can float, turn the heat down to medium heat (simmering). Let them cook for 10 minutes and take them out with a slotted ladle. Keep them in the warm dish in the oven until you are done with the last batch.
This will make about 10-12 dumplings. They also taste great fried in butter the next day!

Grilled Feta and Fennel Sandwich with Caper Berries
There are two ways to deal with Christmas, some stay at home and celebrate with family and friends and others travel as far away as they can. I belong to the first group, I'm too bound by tradition and memories to let go of my annual rituals and jump into something completely new. Although it sounds exciting (and the exodus has started already around me), I'm very happy where I am, at home! I love to listen to all the plans and stories of the exotic places where some of my friends go, but I wouldn't want to change the cold here with the warmth of a Caribbean beach. I would feel strange sitting under a palm tree in a bikini with a Piña Colada in my hand while imagining everyone else having roast duck and warm eggnog under the Christmas tree. I never tried, as I was always worried that it would make me nostalgic at one point and that is the only thing I don't want to happen on that day.
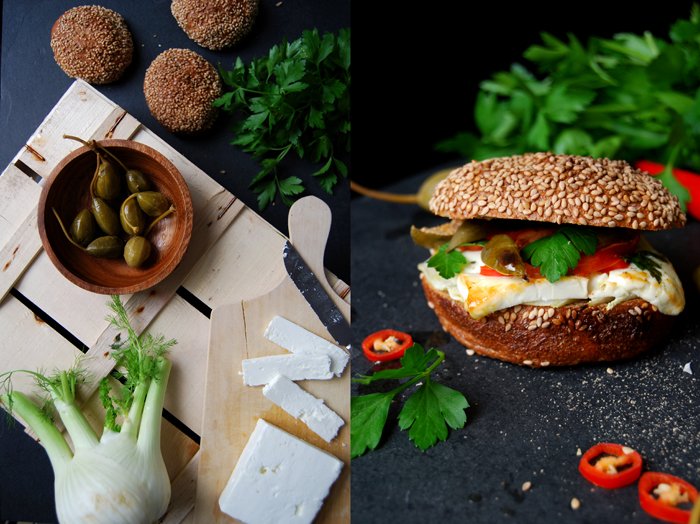
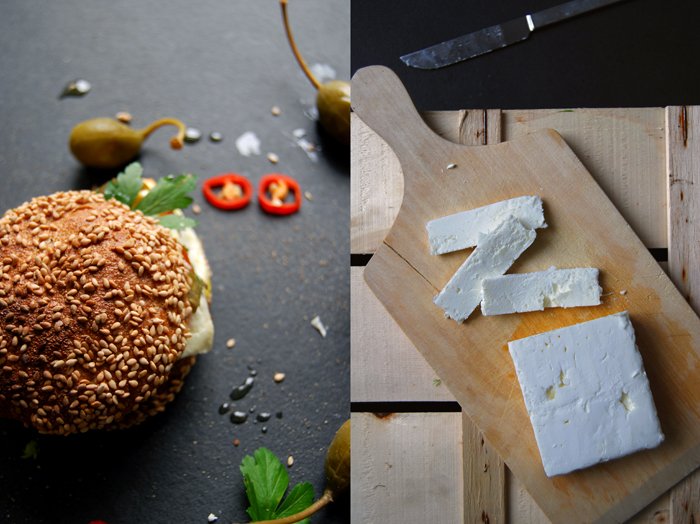
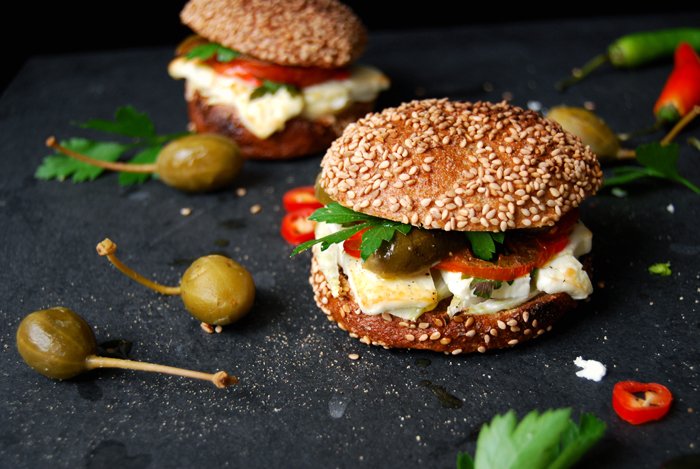
So this year, many of my friends are off to India for some reason and I caught myself in a quiet moment thinking of our summer holiday. The first memory that came into my mind was about food (as always). I had to think of our quick salads, tomatoes and greens tossed together with olive oil, capers and Gbejna, the wonderful Maltese goat cheese. I felt a bit melancholic so I might as well live it out in a sandwich, and here it is: a sesame sandwich with grilled feta, crunchy fennel, tomato, parsley, chili peppers and caper berries. It's not summer, the vegetables aren't really in season (and not at their aromatic peak either) but I just felt like it and it was good! The grilled cheese covered up some of the missing flavours of ripeness but we enjoyed every bite!


Grilled Feta and Fennel Sandwich with Caper Berries
For 4 sandwiches you need
sesame buns, cut in half, 4
feta cheese, sliced, 200g / 7 ounces
small fennel bulb, cut into very thin slices, 1
medium tomato, thinly sliced, 1
fresh chili pepper, cut into rings, 1
caper berries, the stem cut off, quartered, 4
fresh parsley leaves, a small handful
olive oil, for the topping
black peppercorns, crushed in a mortar, for the topping
Spread 2 slices of fennel on the bottom of each bun and put the feta cheese and a slice of tomato on top. Sprinkle with chili pepper, parsley, a little olive oil and black pepper and put a quartered caper berry on top. Grill for about 3 minutes or until the cheese turns golden. Close the bun and put it under the grill for another minute. Serve immediately. Enjoy!


Spinach and Gorgonzola Quiche

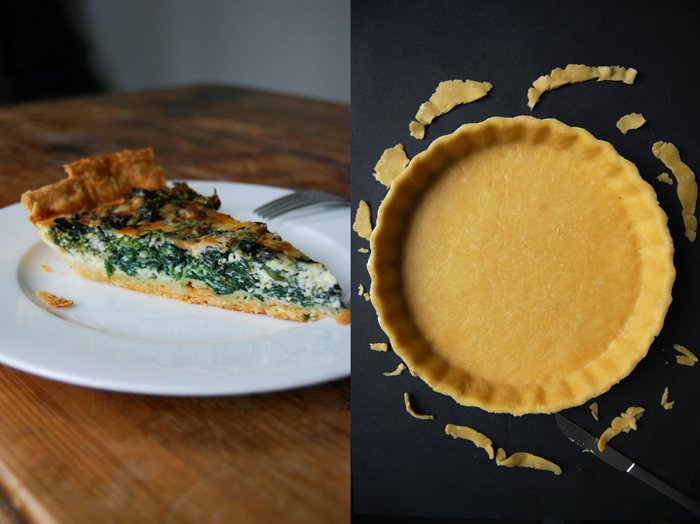
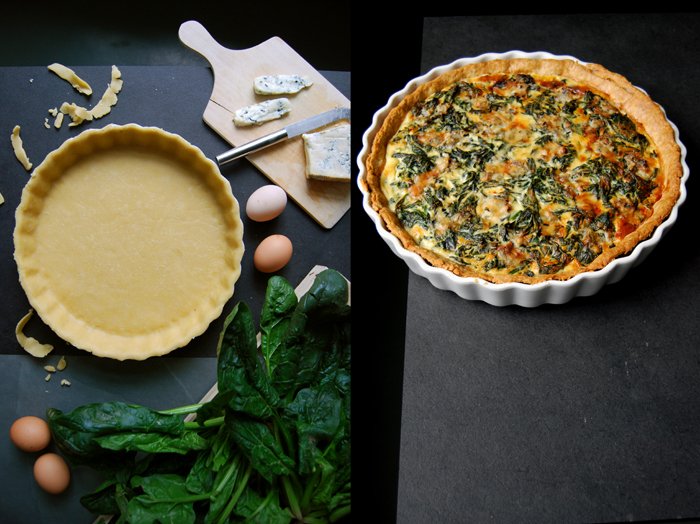
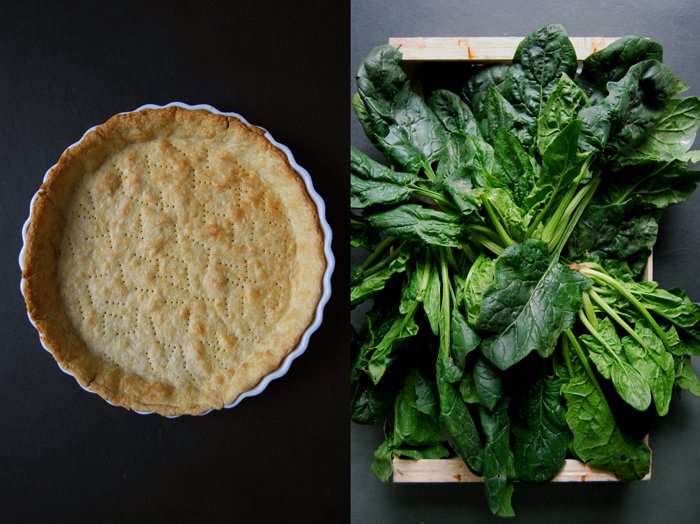
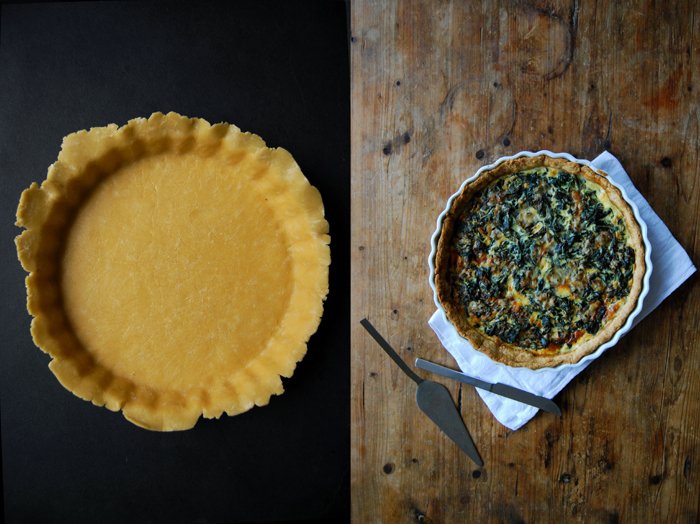
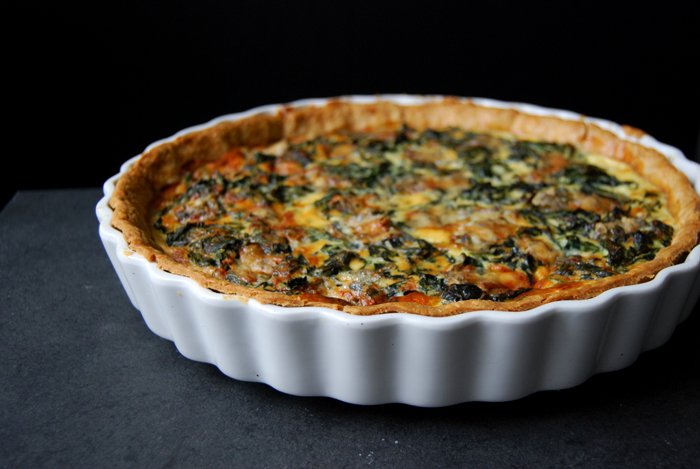
Here's my perfect starter for the soon to come Christmas lunch (or dinner): a golden spinach and gorgonzola quiche! It tastes fantastic, looks beautiful and I can prepare it in advance which means I can spend more time nibbling cookies with friends and family in front of the tree. The wonderful buttery pastry and the aromatic topping of hearty greens and cheese add a rustic touch to the festive table with linen, candles and ornaments. Just garnish it with some sprouts and nuts on the side and it's done!
Although there will be lots of activity, excitement and people at the table next week, I refuse to put myself under pressure. I want to enjoy these days in peace with my full attention on the people and food around me. Last year, I made a silly decision, I took pictures of our Christmas dinner for the blog before we ate and that didn't really help the festive mood. This time I don't want a camera, my computer, a phone or any other technical device around me, this Christmas will be analog!
When it comes to festive cooking, the right organization can make life so much easier. I always try to finish my grocery shopping 1-2 days before there's the big run on the supermarkets, butchers and delicatessen stores. It makes me nervous to wait in long queues for half an hour to buy a few pieces of cheese and paté. As soon as everything is gathered in my kitchen, I can relax. I always choose dishes that I can prepare in advance as much as possible, especially the starter and dessert. When the main course is an oven dish, a roast or a slow cooked stew which does the job on its own without my help, there are just the side dishes left to prepare, which is fun to do together with the guests (and a glass of wine or champagne)!
If you go for the quiche, you can eat it warm or cold, we like both, especially if you serve it with a salad, but you could also warm it up quickly if your oven is on anyway.
Here are more quiche / tart variations:
Spinach and Gorgonzola Quiche
For a 30cm / 12" quiche in 1 baking dish or tart pan you need
For the short crust base
plain flour 250g / 9 ounces
butter, cold 125g / 4.5 ounces
organic egg 1
salt 1 teaspoon
Combine the flour with the salt. Cut the butter with a knife into the flour until there are just little pieces of butter left. Continue with your fingers and work the butter into the flour until combined (there shouldn’t be any lumps of butter left). Add the egg and continue mixing with the hooks of your mixer until you have a crumbly mixture. Form a disc, wrap in cling film and put in the freezer for 10 minutes.
Set the oven to 200°C / 390°F top/ bottom heat.
Roll out the dough between cling film and line your baking dish with the flat pastry. Prick it with a fork and blind-bake in the hot oven for 12 minutes or until golden. Take your baking dish out of the oven and set the temperature down to 175°C / 350°F.
The quiche
spinach leaves, rinsed, 500g / 1 pound
Gorgonzola, torn into pieces, 80g / 3 ounces
organic eggs 5
heavy cream 100ml / 3.5 ounces
crème fraîche or sour cream 200g / 7 ounces
salt 1 teaspoon
pepper
nutmeg, freshly grated, a generous amount
Blanche the spinach in salted water for 1 minute, drain and rinse with cold water, drain again. When the spinach is cool enough to touch with your hands (mind that it's hotter in the centre), squeeze it well and chop it roughly.
Mix the eggs with the heavy cream, crème fraîche, salt, pepper and nutmeg.Spread the spinach on top of the pre-baked pastry base and pour the egg and cream mixture over it.
Spread the gorgonzola on top and bake the quiche for about 40 minutes or until golden brown, the top should be firm. Let it cool for a few minutes before serving.


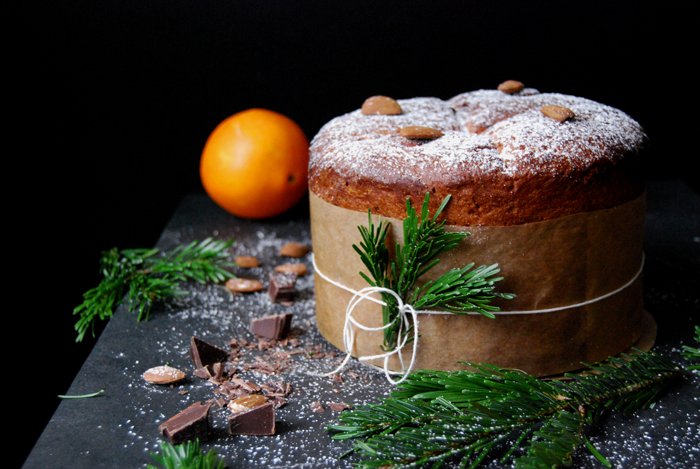
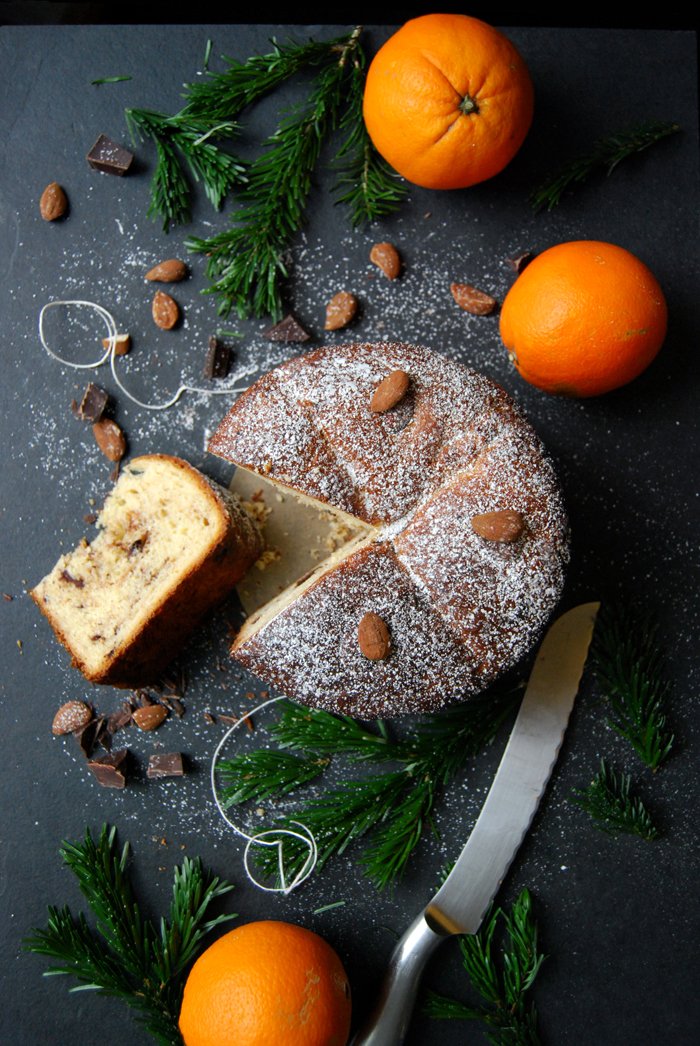
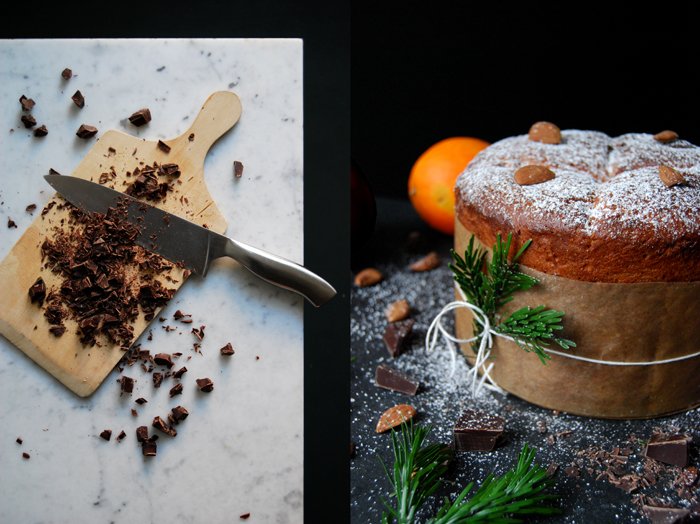
A Christmas Chocolate Panettone
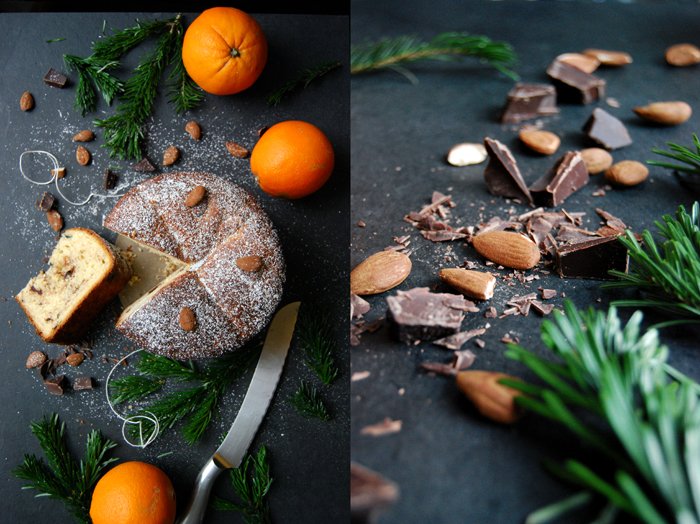
We always had at least one huge panettone under our Christmas tree and I used to be more fascinated by the packaging than the actual bread. I love the Italian way of dramatically packing everything in glossy boxes with bright bows in candy colours. My style is usually so minimal that at Christmas time, I enjoy indulging in a little kitsch and opulence - too much is just right at this time of year. Although I used to enjoy the wrapping so much, the content of the boxes couldn't always keep up with my expectations. The panettone was often too sweet, too dry or so light and airy that it felt (and tasted) artificial.
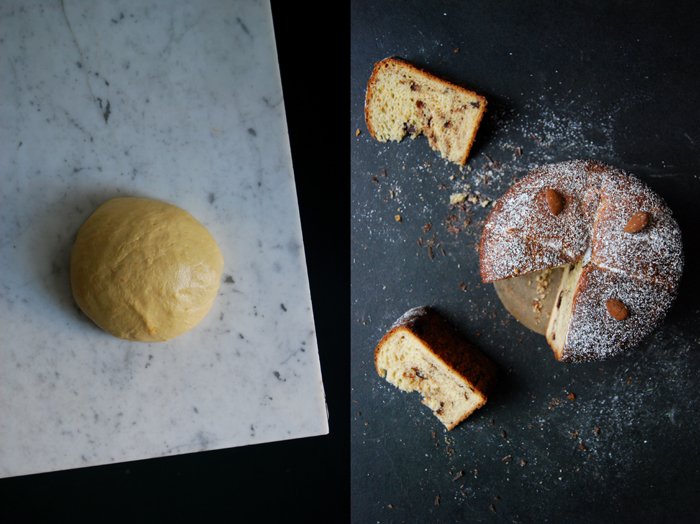
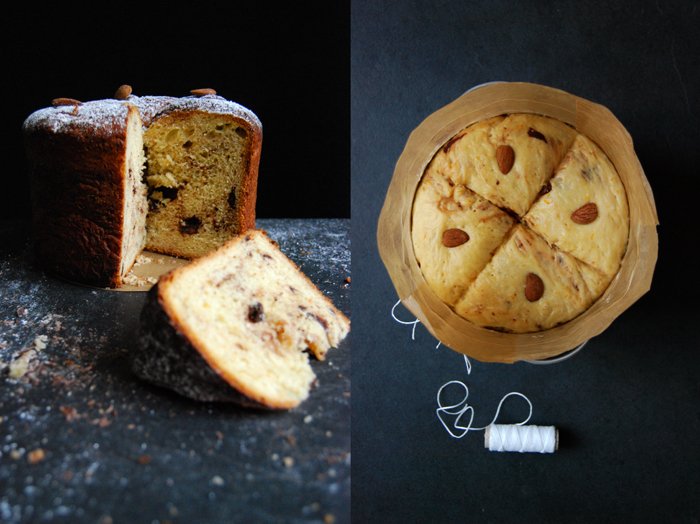
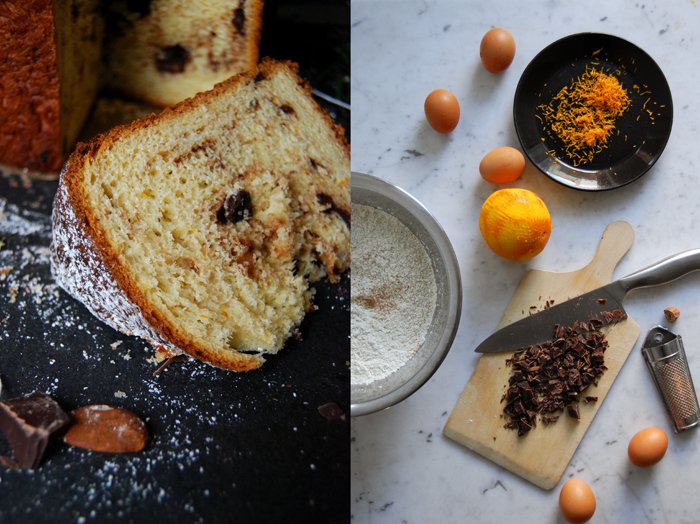
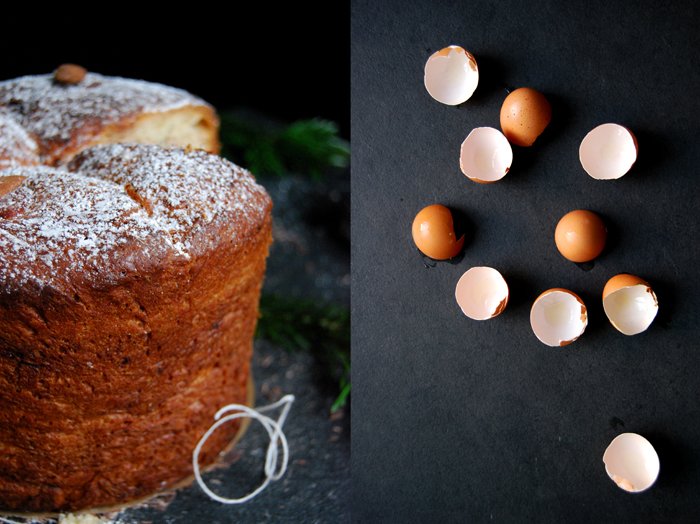
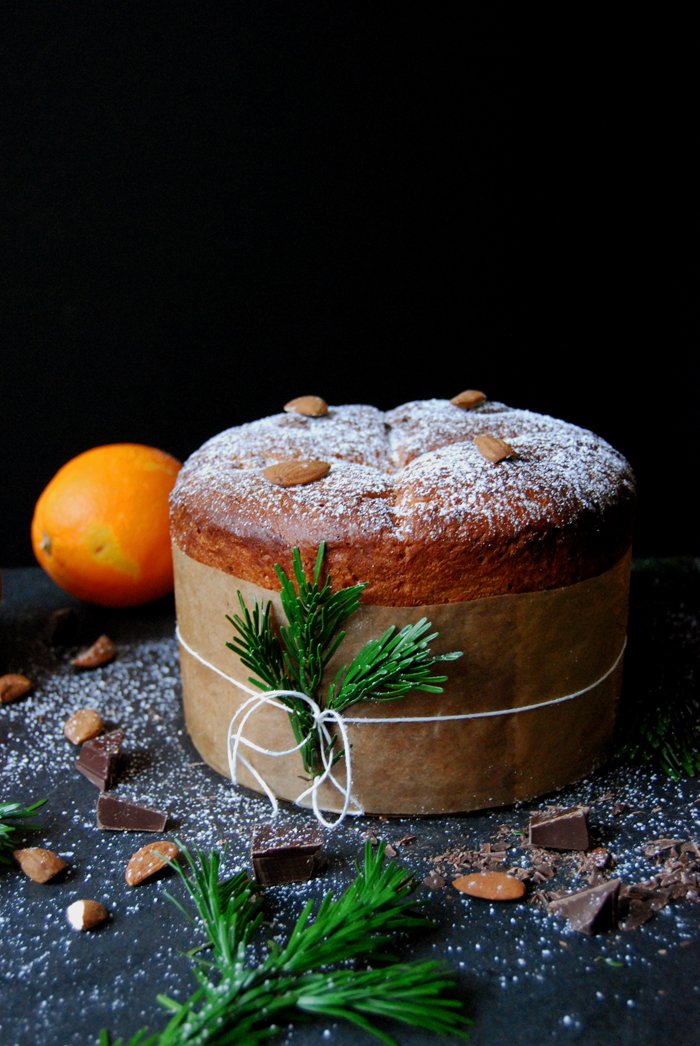
When I decided to bake my own panettone this week, for the first time in my life, I got more and more intimidated the more I read about it. Often it's described as a moody and difficult bread and some bakers had to bake hundreds of loaves before they found the right formula. I didn't have that much time, I'm too impatient, so I thought that a good panettone resembles a French brioche in some ways, the richness and colour, the flowery taste, the subtle sweetness. The Italian bread is just not as soft on the outside and a bit more airy and fluffy inside. So what makes a good brioche? Lots of egg yolks and butter! That was my starting point. Although the most popular panettone feature raisins and candied peel, I went for lots of bittersweet chocolate chunks and orange zest and that was a good choice. When the bread was in the oven, a friend came over spontaneously and said "It smells like Italy, like real panettone!" That relaxed me a bit, at least I had the right smell in the house.
The preparation of the panettone dough takes some time, it has to rise twice, 90 minutes for the first time and 60 minutes when it's already in the form. I made it with dry yeast and let it rise in the warm oven at 35°C / 95°F. I follow this technique with all of my yeast based doughs and it works wonders. It just rises much quicker. You could also use your heater but I find that the oven works best. I didn't buy a special panettone form, I just used a normal cooking pot lined with buttered parchment paper which I let come up high enough for the bread to bake in the shape of a tall cylinder. The baking paper went up 20cm ( 8") which was a bit too high, I could have cut it shorter for the dough to rise above the rim like a mushroom, next time... A panettone is quite dark on the outside but it's important that it doesn't burn. At one point the top has to be covered with aluminum foil and the temperature changes, from 200°C (390°F) to 180°C (355°F) and then to 160°C (320°F) for the last 10 minutes. I took the bread out of the oven after 40 minutes to check if it was done and gently knocked on the bottom (it's quite fiddly to do as it's very hot and fragile), but it needed some more time on a lower temperature setting for the centre to bake through.
When you bake bread for the first time you can just follow and trust your nose, your ears and fingers. When you knock on the bottom it's always exciting, you don't know if it worked out, and in the case of this bread, it made me quite nervous. I had to wait until the next day to cut and taste it as I didn't want the chocolate to still be liquid. So the next morning, I solemnly cut the first slices of my first Christmas panettone, the centre was baked through but soft, so baking time and temperature were right - I felt relieved. The bread was fluffy but rich and it tasted like Mediterranean Christmas, this was all I had hoped for. The flowery aroma of the orange merges beautifully with the bittersweet chocolate. I spread a bit of butter on top and enjoyed my work in peace. Happy Advent!

Chocolate Panettone
For 1 panettone (18cm / 7") you need
plain flour 500g / 1 pound (I used white spelt flour type 630)
dry yeast 2 sachets (each 7g / 1/4 ounce)
granulated sugar 100g / 3.5 ounces
salt 1/2 teaspoon
a pinch of nutmeg
zest of 1 orange (about 1 1/2 tablespoons)
organic egg yolks 5
butter, melted, 170g / 6 ounces
milk 220ml / 1 cup
bittersweet chocolate, roughly chopped, 100g / 3.5 ounces
almonds 4, for the topping
heavy cream 4 teaspoons, to brush the top
icing sugar, for the topping
Mix the melted butter with the milk and egg yolks, the mixture should be lukewarm.
In a large bowl, combine the dry ingredients (flour, yeast, sugar, salt and nutmeg) and orange zest. Add the milk/ butter/ egg mixture and mix with the dough hooks for about 5 minutes or until well combined. Knead with your hands for about 1 minute, it should be soft and glossy. Put the dough back into the bowl, cover with a tea towel and let it rise in a 35°C / 95°F warm oven ( top / bottom heat, no fan!) for about 90 minutes or until doubled in size. While the dough is rising, put the chocolate in a plastic container and keep it in the freezer.
Butter the inside of an 18cm / 7" cooking pot (about 10cm / 4" high). Cut a 15cm / 6" wide strip of parchment paper, long enough to be wrapped around the inside of the pot with both ends overlapping generously. Butter the parchment paper on one side. Line the sides of the pot with the parchment paper (the butter side should be facing inwards). Push the overlapping ends of parchment paper together.
Punch the dough down and take it out of the bowl, give it a quick knead and mix in the cold chocolate with your hands. Form a ball and put it into the prepared pot. Carefully cover it with a light tea towel (on top of the parchment paper) and let the dough rise in the warm oven for another 60 minutes or until doubled in size.
Take the pot out and set the oven to 200°C / 390°F, fan-assisted oven (210°C / 410°F top/ bottom heat).
Brush the top of the dough with the cream and cut a cross into the surface with a sharp kitchen knife. Decorate with the almonds. Bake the panettone for 10 minutes and turn the temperature down to 180°C / 355°F (190°C / 375°F top/ bottom heat). Bake for 20 minutes, cover the top with a piece of aluminum foil if the top gets too dark, and bake for another 10 minutes. Turn the heat down to 160°C / 320°F (170°C / 340°F top/ bottom heat) and bake for another 10 minutes. If you use top / bottom heat bake for another 5-10 minutes. Carefully take the pot out of the oven (it will be very hot!) and let the panettone cool in the pot for at least 30 minutes or until it's stabile enough to cool on a wire rack. When it's completely cool, dust with icing sugar.