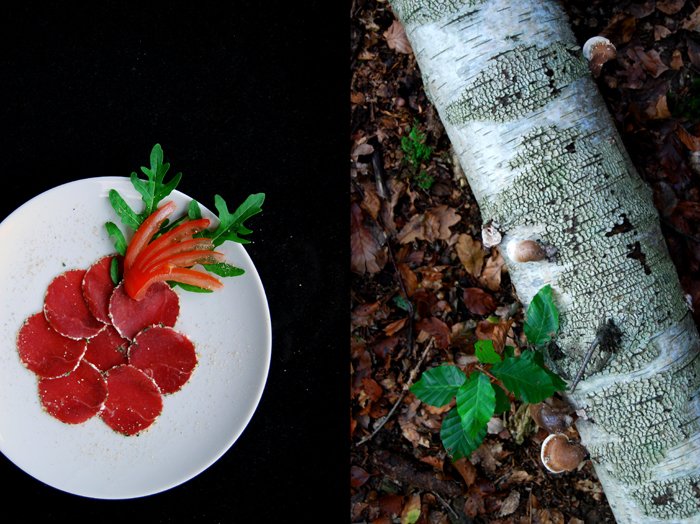
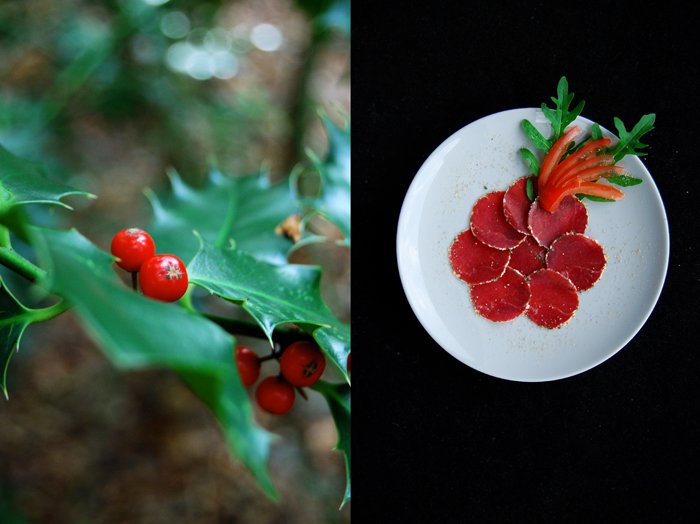
Carpaccio di Capriolo with Herbs, Ginger, Lemon and Parmesan Crust
I forgot about this recipe completely, unfortunately, as it was divine! This isn't one of my own creations, it was made for me and my family by my cousin Thomas, a very talented young chef. It was definitely too good not to share on eat in my kitchen, so here's Thomas' Carpaccio di Capriolo, prepared and savoured by all of us in my mother's kitchen, we were thrilled!
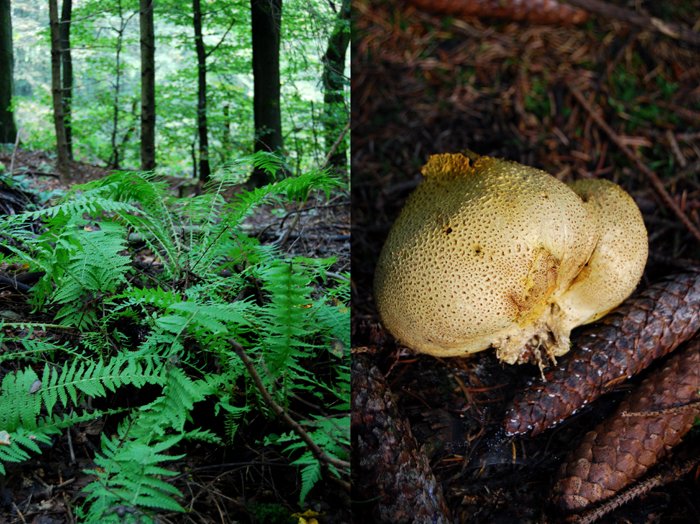
A few months ago, in late autumn, I wrote about a special weekend at my mother's house in the countryside. My family met to eat, drink, chat and savour, as usual, but this time we had a whole deer to prepare. We got the animal from a farmer close by, he's a hunter but he also keeps deer on his vast land. My cousin Thomas who is experienced in butchering gave us more than a helping hand, he prepared the single cuts and parts to be frozen and used some for our extensive cooking. My mother cooked a heavenly stew for us and later on Thomas prepared two dishes himself, Pâté en Croûte, venison pâté in pastry crust, and one of the best carpaccio's I tasted in my whole life. He used the delicate deer's back which he had just cut, it was exceptionally good. If it's hard for you to find quality venison, especially at this time of the year, you could also prepare this recipe with beef fillet. I definitely recommend you to buy it from your trusted butcher or directly from a farmer as the meat has to be very fresh.
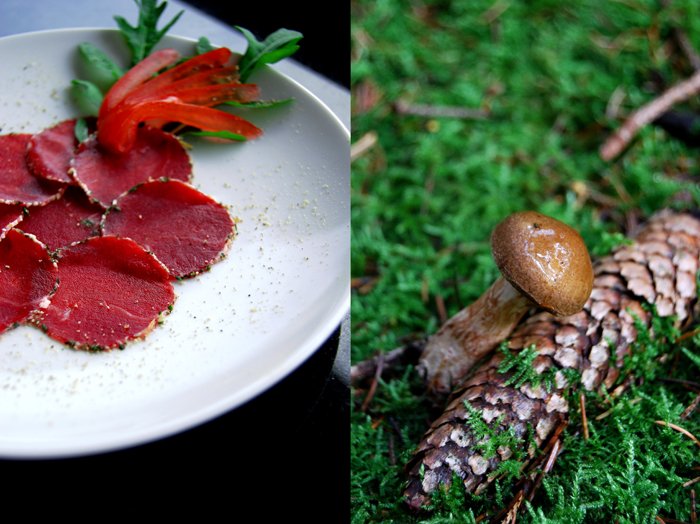
And here's the secret to Thomas' carpaccio: My cousin chef coated the meat in an aromatic crust of finely chopped fresh rosemary, sage and thyme mixed with ginger, lemon zest and aged Parmesan. The thin crust was far from being overpowering, just right to add its quality to the fine flavours of the meat.
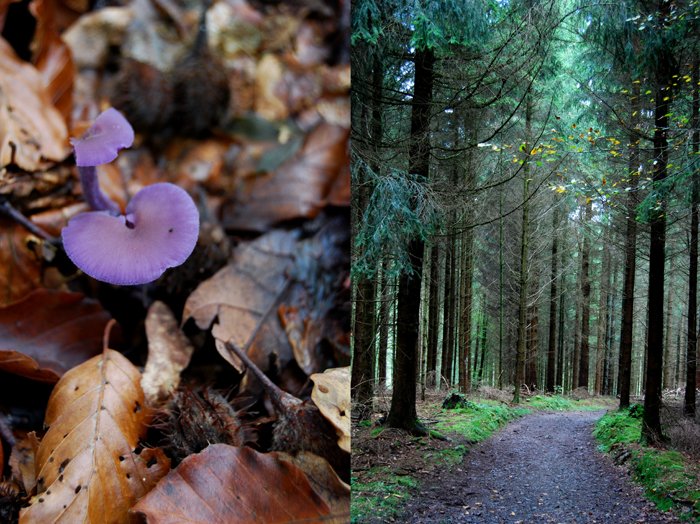
I was so busy feasting this weekend that I didn't take many pictures of all the ongoing preparations in my mother's kitchen so I decided to share some of the amazingly beautiful fungi we found on our long walks in the forest. Not to be eaten but so beautiful!
Carpaccio di Capriolo with Herbs, Ginger, Lemon and Parmesan Crust
It works best to cut the carpaccio very thinly with an electric food slicer.
For 4 people you need
fresh venison fillet (or beef fillet) 300g / 10.5 ounces
mixed fresh herbs (rosemary, sage, thyme), finely chopped, 2 tablespoons
aged Parmesan, finely grated, 1 tablespoon
ginger, finely grated, 1 teaspoon
lemon zest 1 teaspoon
ground black pepper
rucola and tomato slices to serve
Mix the herbs, Parmesan, ginger and zest on a large plate and roll the meat in the mixture until evenly coated. Carefully wrap the fillet in cling film and close it like a bonbon wrapper. Keep in the freezer for at least 4 hours before you cut it very thinly with an electric food slicer. Arrange the slices on plates with the rucola and tomato and sprinkle with a little pepper, serve immediately. You could also drizzle some lemon oil over the carpaccio.

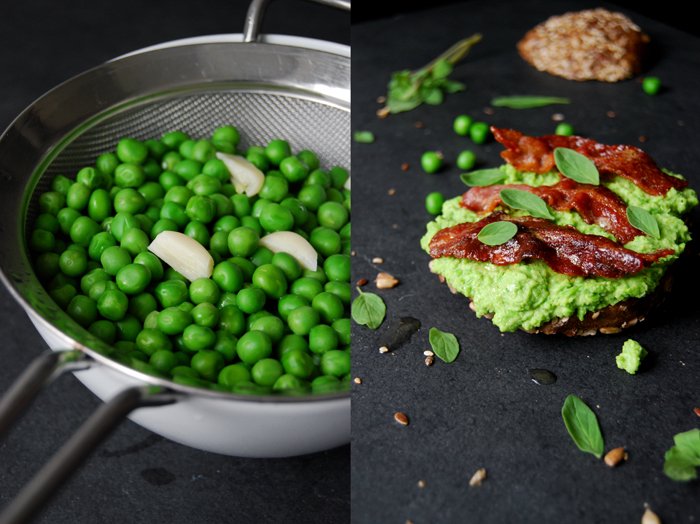
Pea Pesto and Caramelized Honey Bacon Sandwich with fresh Marjoram

My first green pesto in 2015! It's made with peas from my freezer as nature isn't exactly ready for my summery cravings yet, I'll have to wait a couple more months. This is the only frozen vegetable you'll find in my kitchen, throughout the whole year. I like to add them to easy pasta dishes, especially with asparagus, mustard and leak, and salads (like my potato salad with rucola pesto and peas). The legume's vitamins - and its taste - are well preserved in these little green balls of summery freshness when they are frozen and they often taste much better than the fresh ones from the greenhouse.
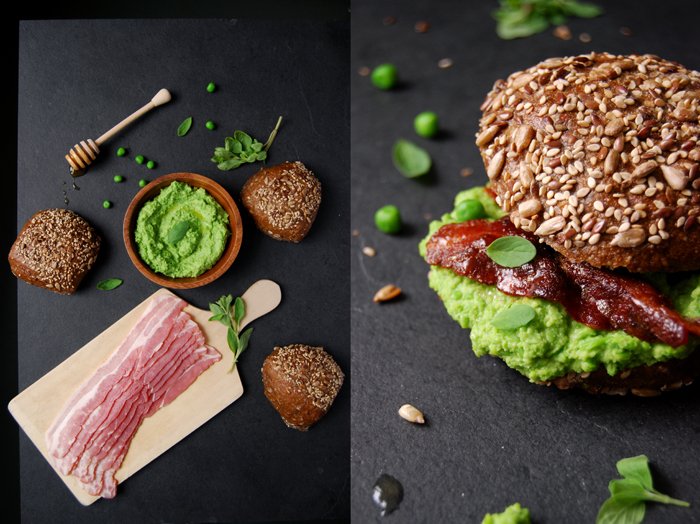
Frozen peas have another lazy advantage, they save me from peeling them which I can enjoy at times but today I wasn't too unhappy about this circumstance. It made the preparation for this sandwich very simple. I blanched the tiny legumes for just a minute to keep them crisp and then mixed them in the blender with fresh marjoram, a little garlic, lemon juice and olive oil. I ended up with the prettiest bright green pesto; the colour was mesmerizing, thick and lush, fresh flavours merged with the marjoram's flowery aroma. I paired it with crunchy bacon, caramelized with a spoonful of honey. Its savoury saltiness was a perfect addition to the sweet and smooth pesto.
When a sandwich is made with such tasty ingredients it can easily deal with strong, dark bread. I went for a nutty whole wheat bun, topped with linseeds, sunflower and sesame seeds. The whole composition was hearty yet fresh and light at the same time.
So, I’m ready, may spring come soon to pursue all my culinary cravings that have been waiting for months!
Here's the recipe for another one of my legume pestos: Fava Bean Pesto with Mint!


Pea Pesto and Caramelized Honey Bacon Sandwich with fresh Marjoram
For 3 sandwiches you need
fresh whole wheat buns, cut in half, 3
breakfast bacon 6 slices
honey 1/2 teaspoon
olive oil
For the pesto
peas (fresh or frozen) 200g / 7 ounces
garlic, quartered, 1 clove
fresh, young marjoram leaves, chopped, 3/4-1 teaspoon, to taste (mind that it's very aromatic), plus a few leaves for the topping
water used to cook the peas 1-3 tablespoons
freshly squeezed lemon juice 1 teaspoon
olive oil 2 tablespoons
salt and pepper
Blanch the peas and the garlic in boiling salted water for 1 minute, reserve 3 tablespoons of the water, drain and quickly rinse them with cold water. Purée the peas, garlic, chopped marjoram, water used to cook the peas, lemon juice, olive oil, salt, and pepper in a food processor until smooth, season to taste.
Heat a splash of olive oil in a heavy pan and fry the bacon on medium-high for a few minutes on each side until golden brown and crisp. Add the honey and caramelize for 1 minute.
Spread the pea pesto on the bottom side of the buns, lay the bacon on top and sprinkle with a few marjoram leaves. Enjoy!


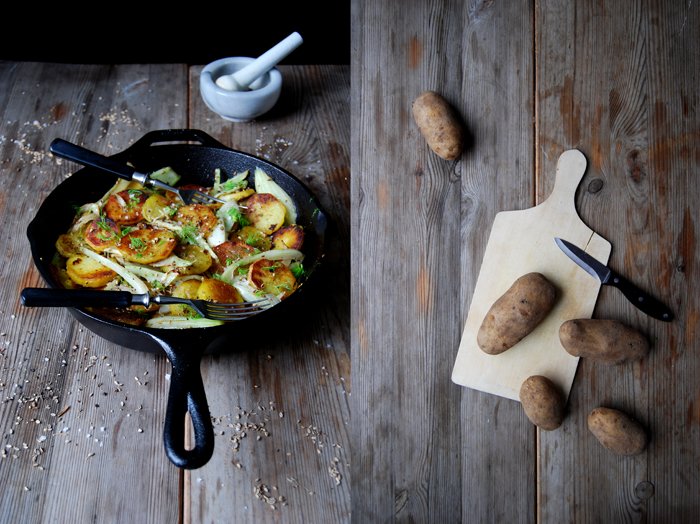
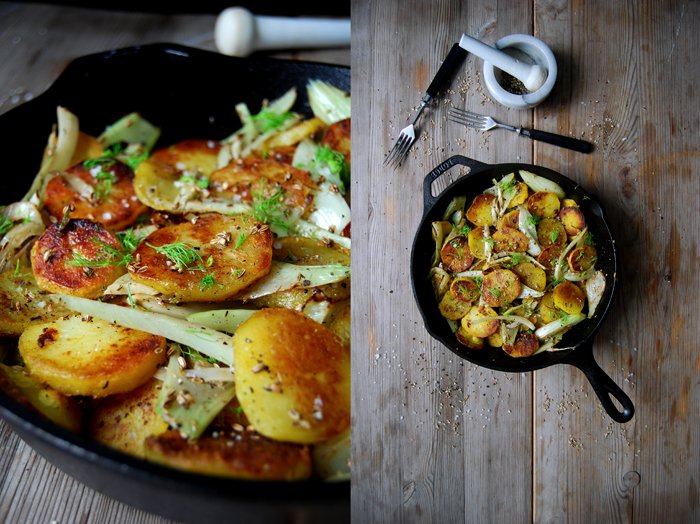
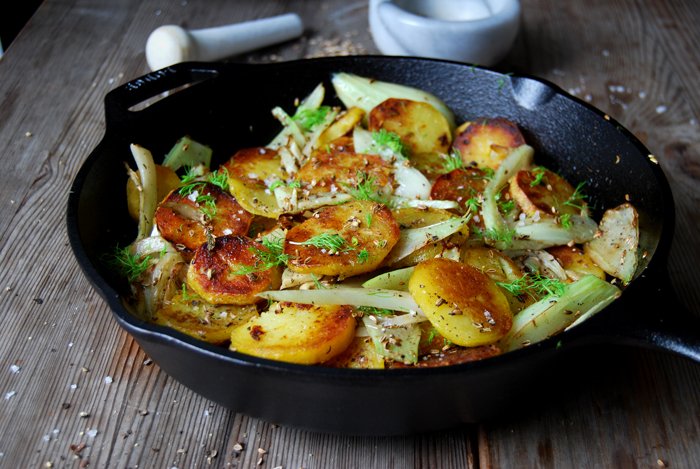
Crispy Pan-Roasted Fennel Potatoes
Fennel seeds are one my favourite spices, preferably the ones I buy from a lovely lady at the market in Marsaxlokk in Malta. Her harvest grows under the hot Mediterranean sun, the plants dig their roots into the limestone soil and clay, in the rich Garrigue. This is the name of a unique and protected ecoregion, scrubland that you find close to the island's coast line, it's rocky and dry and looks a bit like a moon landscape. The ground seems poor but it's actually quite rich in minerals washed out from the rocks, they nurture wild thyme and fennel and add a strong aroma to the vegetation. A single fennel seed is enough to smell and taste the difference compared to the products you can buy in most shops.
My Maltese fennel seeds and the plant's bulb (not from Malta but organic) are the fragrant secrets of my rustic pan filled with golden crisp potatoes. The seeds' and vegetable's sweetness fits perfectly to the yellow roots, together they create an aromatic variation on a comfy kitchen classic. I roasted my potato slices a few hours after they cooked, you have to give them some time to dry out a little if you're after a crisp result. They should always spread evenly in the (heavy) pan and not on top of each other while they are cooking. You might have to roast them in batches but the effort is worth it. I cut the fennel bulb in very thin slices, like a carpaccio, and sautéed them for only 2 minutes in fennel seed infused olive oil. They were just al dente when I mixed them in the pan with the roasted potatoes, crunchy fennel seeds, sea salt and coarsely crushed pepper. We picked up our forks and ate straight out of the skillet, a rather rustic style of eating that fit perfectly to the dish.


Crispy Pan-Roasted Fennel Potatoes
For 2-3 people you need
waxy potatoes, peeled, boiled and rinsed, 700g / 1 1/2 pounds
small fennel bulb, very thinly sliced, the green chopped, for the topping, 1
quality fennel seeds (preferably organic), 1 1/2 tablespoons
olive oil
sea salt
black peppercorns, crushed in a mortar
Let the potatoes cool and dry on a wire rack for at least 1 hour or a day and cut them into thick slices. In a large heavy pan, heat a generous splash of olive oil and fry the potatoes on medium-high for a few minutes on each side until golden brown. Cook them in batches and turn them one by one with a fork to keep their shape. Season with salt and pepper.
Heat a splash of olive oil in another pan and cook the fennel seeds on medium heat for 1 minute (they shouldn't get dark). Pull the pan off the heat, take just the seeds out with a tablespoon and set them aside. Put the pan back on and add the fennel slices, sauté them on medium for about 1 minute on each side without getting dark, they should be al dente. Gently mix the roasted potatoes, fennel seeds and slices in the pan and season with salt and pepper to taste, serve immediately.


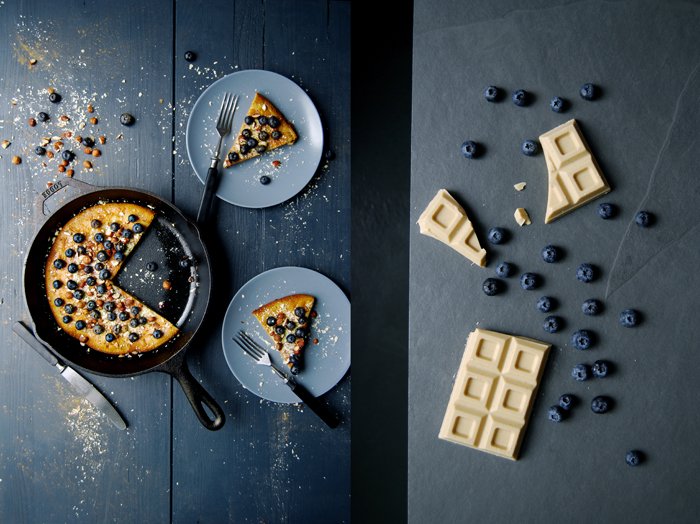
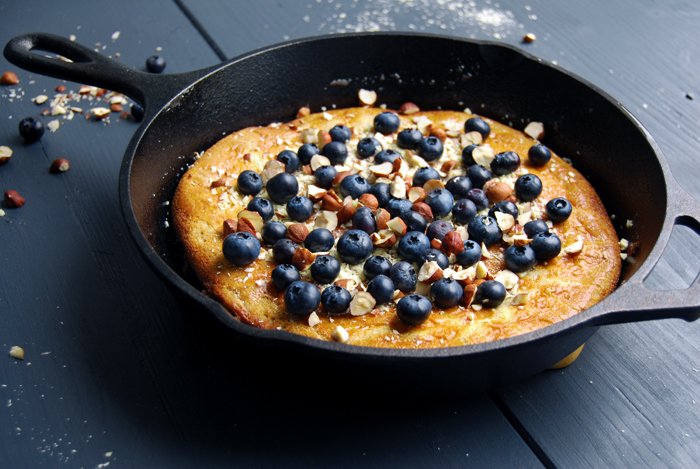
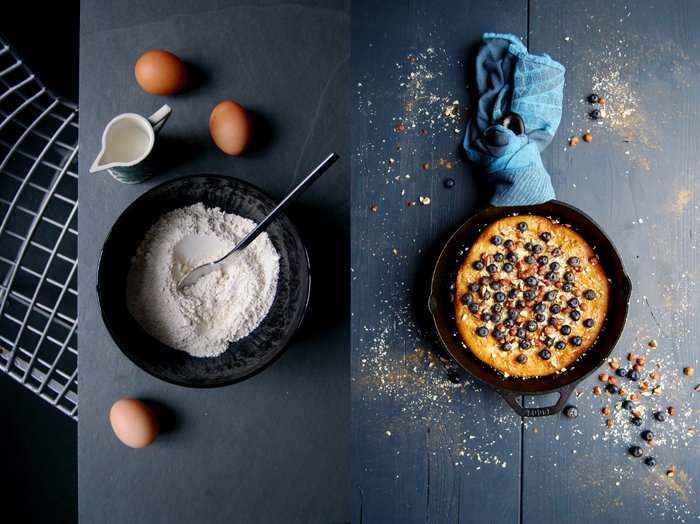
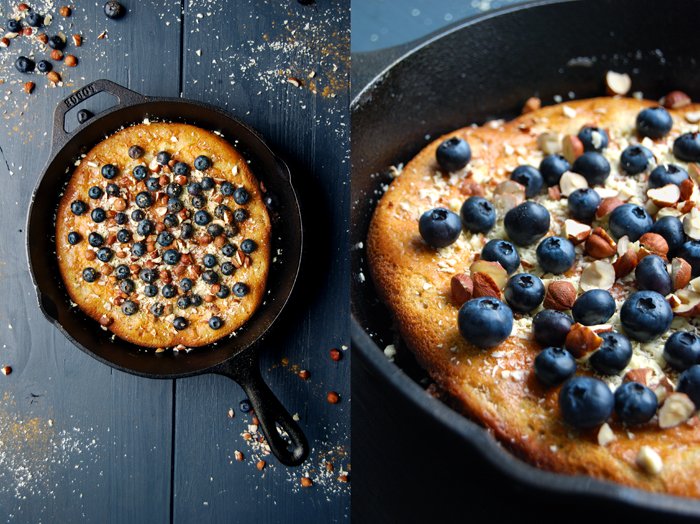
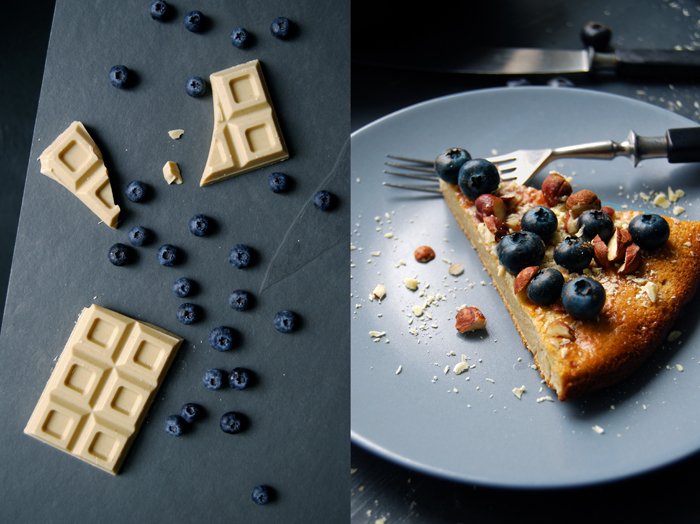
Buckwheat Dutch Baby with White Chocolate, Blueberries and Hazelnuts
I ate my first Dutch Baby in Marta Greber's kitchen, the cook and baker behind the beautiful blog What Should I Eat For Breakfast Today?. We met last October for one of my meet in your kitchen features, I was curious about this woman who is known to be so passionate about the first meal of the day. When Marta told me that she'd like to make a Dutch Baby for me I had to ask her for further information, unfortunately I had no idea what to expect on my plate.
To clear the picture for everyone else who feels as clueless as I did then: a Dutch Baby is a pancake baked in the oven in a heavy cast iron skillet. It rises a bit like a soufflé with a buttery crust on the outside. It's a very simple yet very delicious way to start the day! Marta mastered this dish to perfection, you can find her recipe here in the kitchen feature with her. I didn't want to change her basic formula too much. There are variations on this dish with a thiner result but I particularly liked the richness she created. Her recipe uses more flour than the ones that end up with a paper thin bottom, her Dutch Baby is a proper breakfast and not an airy dessert. I wanted to keep that but there is always room to evolve a recipe, to change it in order to give it a new direction. My new direction is called buckwheat!
Inspired by my hazelnut cake made with this tasty flour which found its way onto the blog only a few weeks before I met Marta, I have been wanting to combine these two creations for months: a hearty buckwheat Dutch Baby refined with cinnamon to underline its nutty flavour. The right cast iron skillet was missing in my kitchen which isn't obligatory for this recipe but I've been longing for this heavy pan from Tennessee for years and I didn't want to start this project without this exact kitchen tool (I know, I sound a bit like a child). Thanks to our family, to lovely Ana and Chris in Florida, my cooking equipment has a few new additions: not only one skillet but three plus a casserole dish, it felt like Christmas when the box arrived. My first Dutch Baby is dedicated to these two wonderful people on the other side of the Atlantic, thank you so much for this kitchen gift!
When I finally got started, it took three attempts to learn that you can't expect the same results from buckwheat batter compared to the ones made with lighter wheat or white spelt, it's just not as airy. Buckwheat is simply too heavy to let the pancake rise and bubble like a perfect soufflé, as long as you're not after after a crêpe-thin Dutch Baby which I wasn't. I wanted Marta's thick German pancake texture combined with the buckwheat's distinct taste. So, using only buckwheat was out of the question, it's impossible. For my first batch I used more or less Marta's recipe replacing half the flour with buckwheat. It created a pancake with a certain density that I wanted to lighten up a little. The second batch made with 1/3 less buckwheat flour tasted perfect but I still wanted a different texture and look. The third and final recipe is made with an additional egg and the same amount of the two different flours, and this time I was finally happy. Don't expect a feather-light soufflé but a cosy, nutty, cinnamony warm breakfast treat, slightly cakey, with sweet and creamy white chocolate melted on top. The addition of chopped hazelnuts and fresh blueberries made this comforting morning treat complete!
So where does the name come from? It's another one of these sweet fairy tales. The dish is derived from the German pancake, the word Dutch is a corruption of the word Deutsch, meaning German. A restaurant owner called Victor Manca is supposed to be the person who made the first Dutch Baby in the early 1900 in Seattle, Washington. At least he owned the trade mark. Legend has it that one of his daughters chose the name, referring to the German-American immigrants, the Pennsylvania-Dutch.
Buckwheat Dutch Baby with White Chocolate, Blueberries and Hazelnuts
For a 25cm / 10" cast iron skillet or heavy baking dish you need
butter 80g / 2 3/4 ounces, to bake the pancake
plain flour 60g / 2 ounces
buckwheat flour 60g / 2 ounces
granulated sugar 2 tablespoons
salt 1/2 teaspoon
ground cinnamon 1 teaspoon
organic eggs 3
milk 125ml / 4 1/2 ounces
quality white chocolate, grated, 60g / 2 ounces, for the topping
blueberries 125g / 4 1/2 ounces, for the topping
hazelnuts, chopped, 20g / 3/4 ounce, for the topping
Set the oven to 230°C / 450°F (top/ bottom heat).
Place the skillet or baking dish with the butter in the oven. Let the butter melt and sizzle slightly (it should be hot but not brown). Combine the flour, buckwheat, sugar, salt and cinnamon in a bowl, add the milk and eggs and whisk for about a minute until combined. When the butter is melted, gently pour the dough into the middle of the pan and bake in the oven for about 10-12 minutes or until golden.
When the Dutch Baby is done, take the pan out of the oven and carefully pour out the excess butter. Sprinkle the surface with the chocolate immediately. Lay the blueberries and hazelnuts on top and enjoy warm!


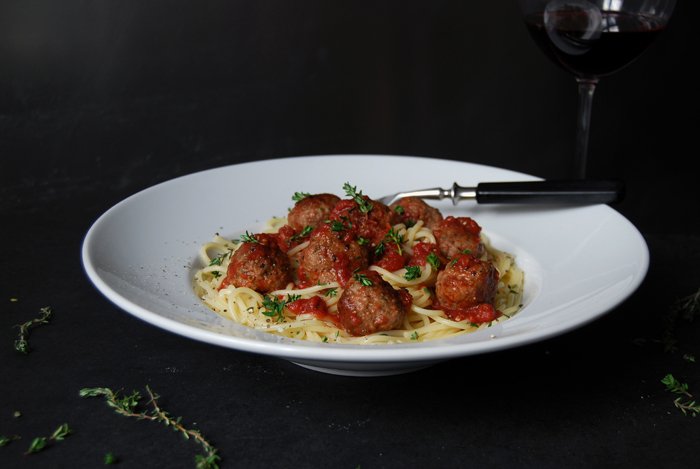
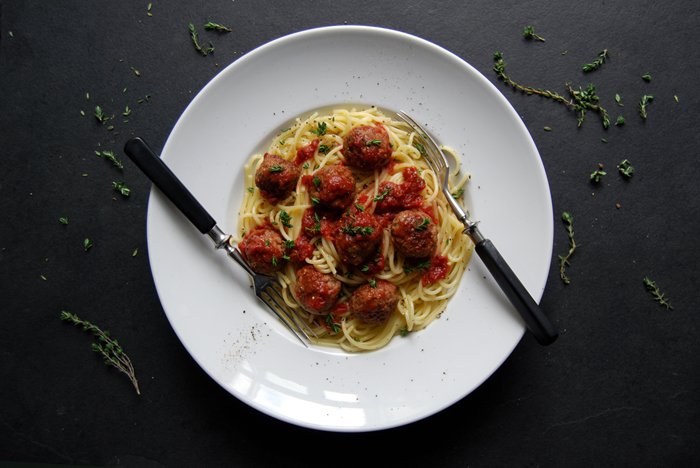
Thyme, Rosemary and Parmesan Meatballs with Pasta and Tomato Sugo
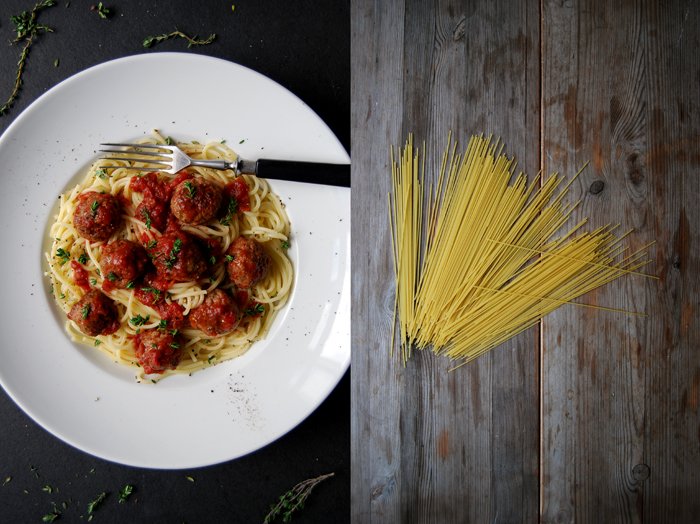
This is the essence of Italian food for me, a huge plate full of warm pasta with tiny meat balls, fruity tomato sugo and fresh thyme and rosemary. A glass of the deepest red wine, Caruso on the vinyl player and the world is as perfect as it can possible be!
I first learned to enjoy burgers through my Maltese/ American partner, he introduced these rather well sized portions of meat to my cooking. In the past, I only used to shape little balls of minced beef, lamb or pork in my kitchen, that's how I learned it from my mother and I followed her recipe for years. She mixes the meat with eggs and breadcrumbs for a fluffy texture and lots of fresh herbs from her garden before she gives them a small round shape. In general, she's not a big fan of huge portions on her plate so the dimensions of a proper burger didn't really appeal to her. This only changed in the past few years, now she tells me with excitement about rustic burger nights in her kitchen!
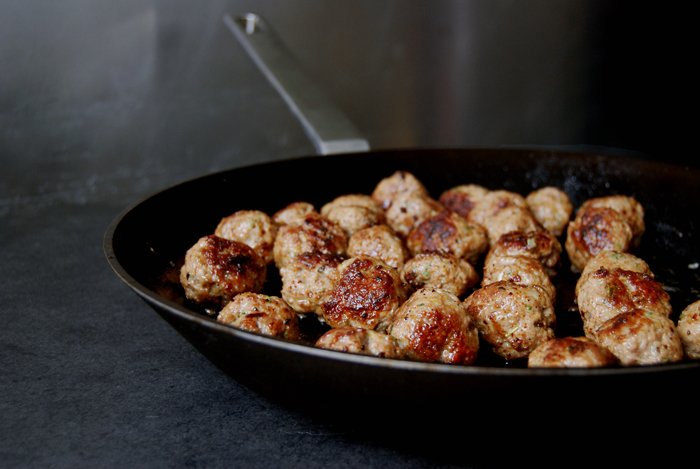
I can't even say which size I prefer, sometimes my appetite calls for a massive burger, preferably pure minced steak stuffed between a bun with some greens and thin tomato slices. Small meatballs are a delicious (and addictive) snack, warm and cold. They are perfect nibbles for a brunch or casual cocktail party, and absolutely tempting when it comes to pasta. Cook them in an aromatic tomato sugo, or with lots of onions and white wine, and you'll have the most comforting dish on your plate. Their size should always be small enough to fit on a fork with a bit of sugo on top, heavenly! And here my mother's recipe comes in again, I mixed the minced meat with lots of fresh thyme, rosemary and garlic to give it a rich Mediterranean touch. And not to forget grated parmesan, 3 heaped tablespoons melted into the tiny balls added the cheese's wonderful aroma to the meat. For the sugo, I used tinned tomatoes, full of summery flavour and sweetness, at this point the fresh ones aren't an option yet. I added some red wine, Balsamico vinegar, a tiny bit of fresh orange juice and chopped rosemary to end up with a concentrated red sauce full of beautiful flavours. It looked stunning and tasted just as good.

Thyme, Rosemary and Parmesan Meatballs with Pasta and Tomato Sugo
For 3-4 people you need
spaghetti 300g / 10 1/2 ounces
For the meatballs
minced beef 500g / 1 pound
organic egg 1
breadcrumbs 40g / 1 1/2 ounces
medium onion, finely chopped 1
garlic, crushed, 2 big cloves
fresh thyme leaves 2 tablespoons
fresh rosemary, finely chopped, 1 teaspoon
freshly grated Parmesan 3 heaping tablespoons
salt 1 1/2 teaspoons
pepper
olive oil, for frying
butter 2 tablespoons, for frying
For the tomato sugo
red wine 75ml/ 2 1/2 ounces
fresh thyme 1 small sprig
quality tinned tomatoes 600g / 1 1/4 pounds
balsamic vinegar 1 1/2 tablespoons, to taste
freshly squeezed orange juice 1 1/2 tablespoons, to taste
fresh rosemary, finely chopped, 1 1/2 teaspoons
salt and pepper
Cook the pasta in lots of salted water al dente.
Mix the ingredients for the meatballs with your hands or an electric mixer until well combined. Wet your hands and form walnut sized meatballs. In a large pan, heat a generous splash of olive oil and 2 tablespoons of butter and fry the meatballs for about 6 minutes on medium heat, turning them so that they can brown evenly. Take the meatballs out and set them aside, cover them with a lid. Put the pan back on the heat and deglaze with the red wine, add the thyme sprig and cook for 1 minute. Pour in the tinned tomatoes, chop them and add the balsamic vinegar, orange juice, rosemary, salt and pepper. Cook for about 5 minutes (bubbling) or until it starts to thicken and season with salt, pepper, orange juice and vinegar to taste. Add the meatballs to the sugo and cook for another minute on low heat. Serve with the spaghetti in warm plates.


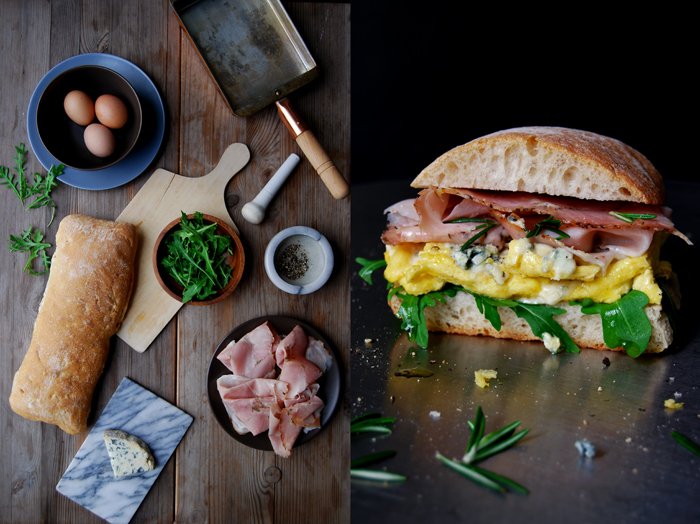
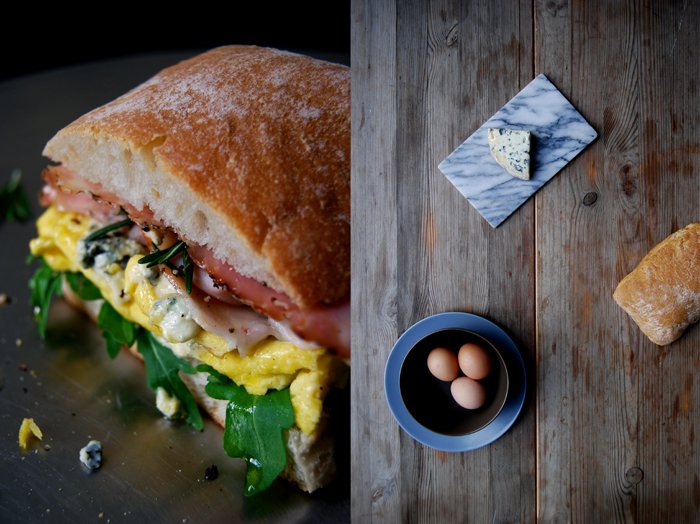
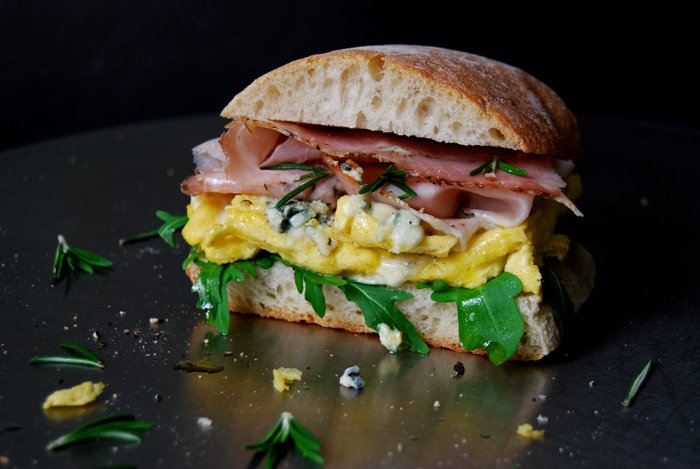
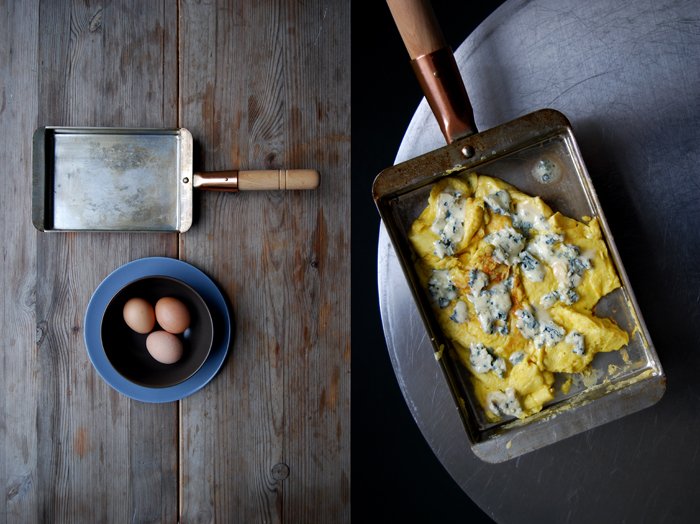
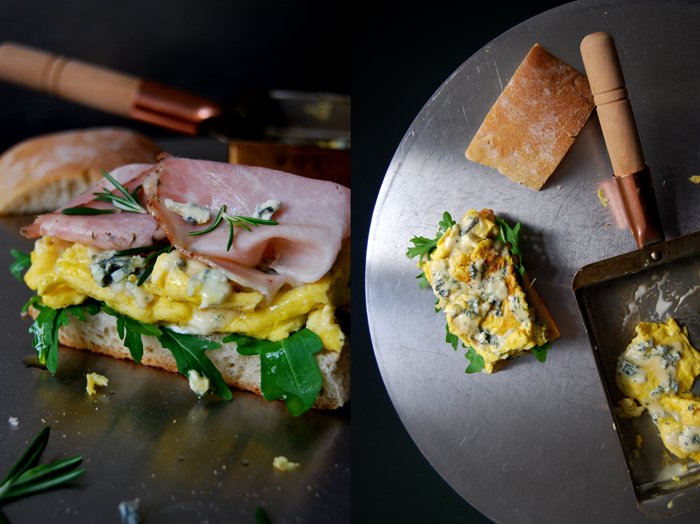
Blue Cheese Omelette and Rosemary Prosciutto Ciabatta Sandwich
An especially luscious sandwich for an especially fun occasion: Anna from Pinterest asked me to join their March Breakfast Campaign with an eat in my kitchen sandwich board on my profile. After 65 creations on the blog dedicated to all the delicious culinary wonders that can possibly happen between two slices of bread, it's time to give the sandwich the attention it deserves.
I started my Pinterest profile around the same time as the blog, in winter 2013, to spark my own inspiration but also to share all my finds from the wide spheres of the web. All the wonderful dishes from all over the world that tickle my taste buds, the kitchen pictures that made me want to remodel parts of my own creative culinary space a couple weeks ago, and the endless great ideas you can find for interior design, fashion, architecture, gardening and traveling. I enjoy the time that I spend on this network as it gives me useful information directly connected to the original creator, that's fantastic! So, if you've followed my Sandwich-Wednesdays over the past 15 months and you're looking for a summary, and some more great recipes from other sandwich lovers, you can take a look at my new Pinterest Sandwich board here!
The celebration of this amazingly easy (most of the time) and highly loved snack called for a voluptuous recipe that combines a few ingredients which almost guarantee a scrumptious result: blue cheese, omelette, rosemary prosciutto and rucola on oily ciabatta bread. The sharp cheese definitely takes the egg to another level, even if you want to leave out the bread, you should try this duo one day. Rosemary prosciutto is my all-time favourite ham, thin slices of the finest Italian art of butchering refined with the woody herb, this is perfection made complete with the slight sweetness of the light and fluffy eggs and the salty cheese. It can't get any better when it comes to the easy enjoyments at table!
Blue Cheese Omelette and Rosemary Prosciutto Ciabatta Sandwich
For 2 sandwiches you need
medium ciabatta bread, cut into 2 pieces, 1
organic eggs 3
heavy cream 50ml / 1 3/4 ounces
freshly grated nutmeg
salt and pepper
blue cheese, crumbled, 50g / 1 3/4 ounces
Italian rosemary prosciutto, very thinly slices, 2-4 large slices
butter 1 tablespoon
olive oil 1/2-1 teaspoon
rucola, a small handful
fresh rosemary, a few sprigs, for the topping
black peppercorns, crushed in a mortar, for the topping
Whisk the eggs, cream, nutmeg, salt and pepper. Heat the butter in a pan and pour in the egg mixture, scramble very lightly and fold onto itself. When the bottom side starts to become golden flip it around. Brown it lightly from the other side for about a minute. Take the pan off the heat and sprinkle the blue cheese on top of the warm omelette.
Cut the ciabatta pieces in half and brush each bottom half with a little olive oil, lay a few rucola leaves on top. Divide the blue cheese omelette in half when the cheese starts to melt and lay on top of the green leaves. Sprinkle with a few rosemary needles and pepper and cover with the rosemary prosciutto. Close the sandwich and enjoy!


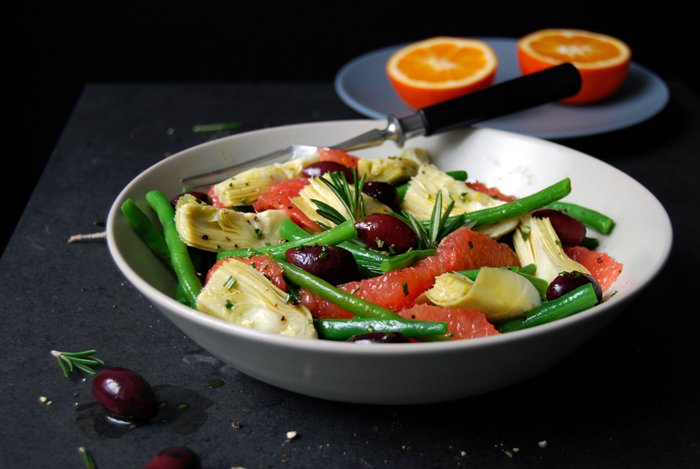
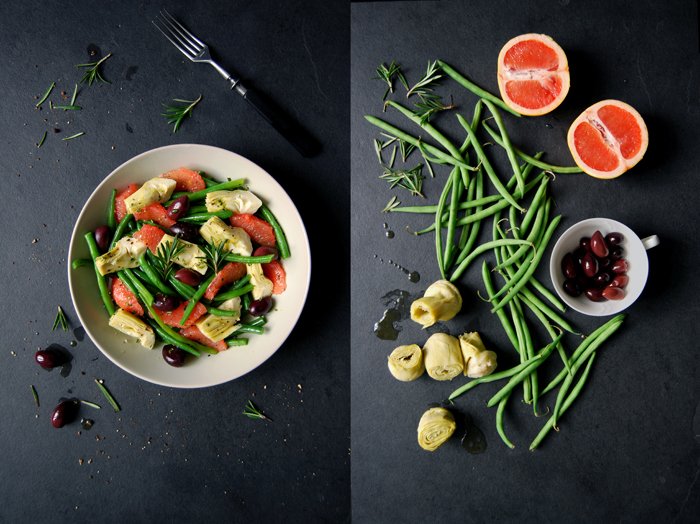
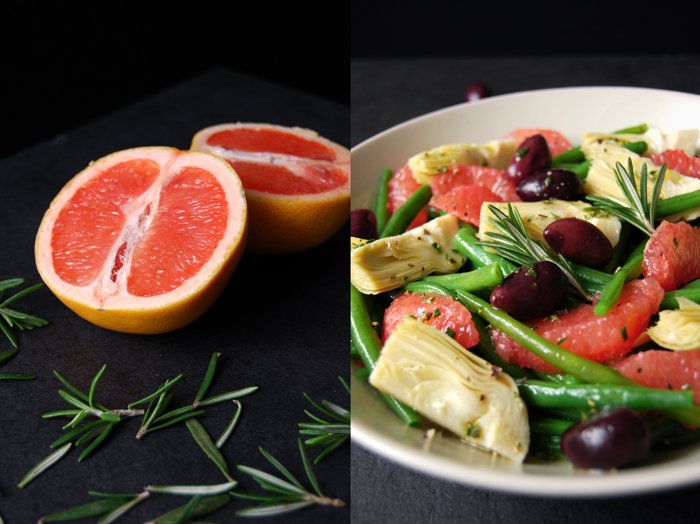
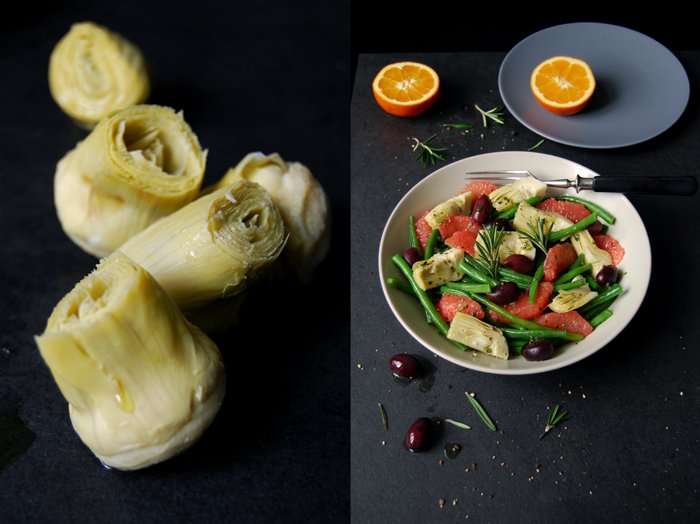
Green Bean, Artichoke and Grapefruit Salad with Kalamata Olives & Rosemary
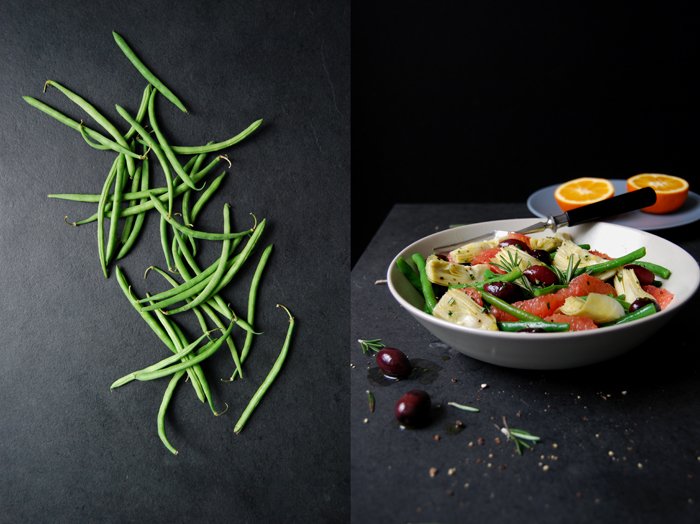
The change of season is nearing (finally!) and the first spring vegetables are back in my kitchen, green beans! They aren't locally grown and had to travel a bit to reach my cooker but their crunchy green gave me culinary proof that the end of winter is near!
The recipe is easy, I went for a quick bean salad with bittersweet pink grapefruit and a light rosemary orange dressing. I had a colourful plate in mind with lots of different flavours, antipasta feeling combined with sharp freshness. I pulled out a few pantry treasures to mix with the fruit and vegetable: preserved artichoke hearts and juicy Kalamata olives. A strong composition without a single overpowering ingredient, the perfect salad to get prepared for all the summery, culinary pleasures ahead of us!
Green Bean, Artichoke and Pink Grapefruit Salad with Kalamata Olives and Rosemary
For 2 people you need
green beans, the ends cut off, 300g / 10.5 ounces
pink grapefruit, cut into fillets, 1
preserved artichoke hearts, quartered, 4
Kalamata olives 8
olive oil 3 tablespoons
freshly squeezed orange juice 3 tablespoons
fresh rosemary, finely chopped, 1 heaping teaspoon
salt and pepper
Blanch the beans in lots of salted water for 4-5 minutes or until al dente, rinse with cold water for 2 seconds and drain.
Arrange the beans, grapefruit, artichoke and olives in a large bowl. Whisk the olive oil, orange juice, rosemary, salt and pepper and season to taste. Sprinkle the salad with the dressing and serve immediately.

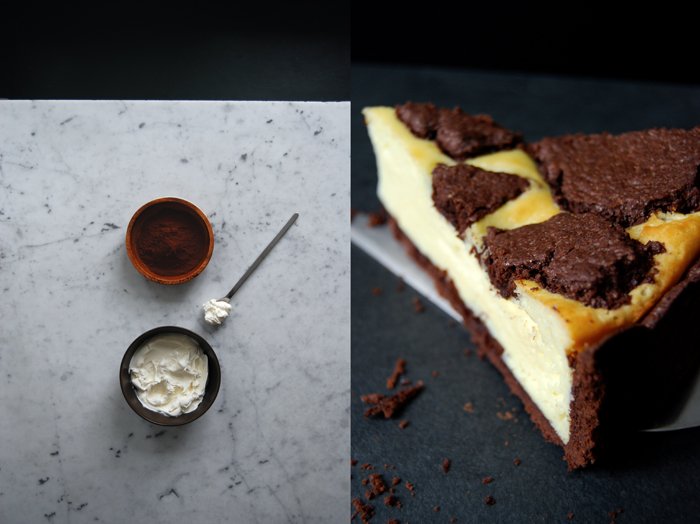
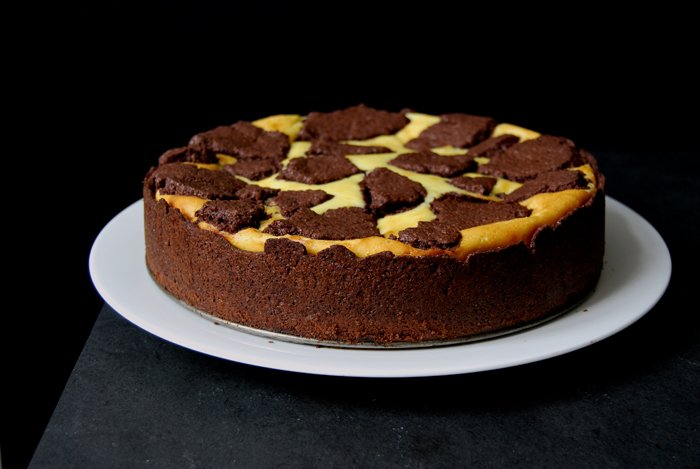
Chocolate Ricotta Cheesecake - my take on Russischer Zupfkuchen

If you like the combination of bittersweet chocolate and creamy cheesecake, this is your recipe! Russischer Zupfkuchen is a German cake classic. Although its history is still relatively young and a little in the dark, this cake gained rising popularity over the past few decades. The name is slightly misleading, there is no proof of a connection to the Russian cuisine, this cake is a culinary mystery, a sweet one, and it might stay that way forever.
Zupfkuchen means plucked cake, which refers to the chocolate dough on top that's also used for the base. It's a dark, crumbly short crust that brings some depth into this sweet and creamy treat. Traditionally, the topping is made with quark, the German dairy product which is similar to ricotta or cottage cheese, it creates a bit of a heavy, more dry texture. I tried many of these cakes in my life and this particular texture was often the reason why I couldn't really warm to it, apart from the fact that many were simply too sweet for my taste.
When I decided to create my own Zupfkuchen I wanted to work on these two points, texture and sweetness. I had something lighter in mind, a filling made with ricotta and a little bit of mascarpone, definitely less sugar and more eggs than you'd find in the usual recipes. The texture turned out to be a cross between a soufflé and a flan, it's like a French take on this rather rustic cake. Especially when you try a piece while it's still warm, it tastes a bit like custard, resembling the fine eggy note of a crème caramel which fades away as soon as the cake cools down. If you're a Zupfkuchen traditionalist, you might be a bit disturbed by this new nuance, but if you savour with an open mind, you can enjoy the contrast of chocolaty darkness and light milkiness. Just add some more sugar if there are children at the table, this is a less-sweet-adult cake.
Before I forget, we found the cake best on the second day!


Russischer Zupfkuchen
For a 26cm / 10″ springform pan you need
For the chocolate short crust
plain flour 300g / 10.5 ounces
granulated sugar 80g / 3 ounces
unsweetened cocoa powder 50g / 1 3/4 ounces
baking powder 1 1/2 leveled teaspoons
a pinch of salt
cold butter 175g / 6 1/4 ounces
organic egg 1
cold milk 1 tablespoon
Combine the flour with the sugar, cocoa powder, baking powder and salt. Cut the butter into the flour with a knife until there are just little pieces of butter left. Continue with your fingers and rub the butter into the flour. Add the egg and milk and continue mixing with the hooks of your mixer until combined. Form a ball, wrap in cling film and put in the fridge while you prepare the cheese topping.
For the cheese topping
fresh ricotta 500g / 18 ounces
mascarpone 250g / 9 ounces
organic eggs 4
cornstarch 50g / 1 3/4 ounces
baking powder 1 teaspoon
a pinch of salt
granulated sugar 120g / 4 1/2 ounces
milk 1 tablespoon
a pinch of vanilla scraped out of its pod
In a large bowl, mix all the ingredients for the cheese topping with an electric mixer until well combined and creamy.
For the Zupfkuchen
Set the oven to 180°C / 355°F (top/ bottom heat) and butter the springform pan.
Divide the short crust in 2/3 for the base and 1/3 for the chocolate topping.
Roll out 2/3 of the dough between cling film, big enough to come up about 2/3 of the rim of the springform pan and line the pan with the pastry. Continue rolling out the remaining 1/3 of dough between cling film (about 1/2cm / 1/4" thick) and pluck it into roundish pieces for the topping, set this dough aside.
Pour the cheesecake topping in the pastry lined springform pan and bake for 20 minutes. Open the oven and gently (and quickly) lay the plucked chocolate dough pieces on top of the cheese topping. Bake for another 35 minutes or until golden and firm on top. Switch off the oven, open the oven door and keep the cake in the oven for another 5-10 minutes. Take it out and let the cake cool before you take it out of the springform pan.


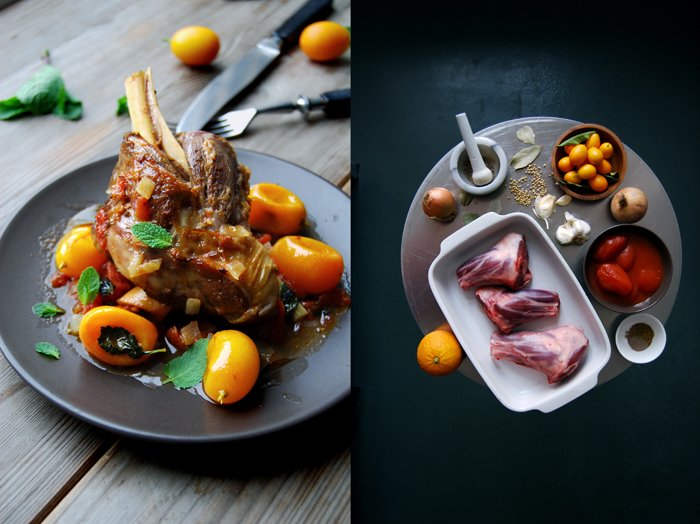
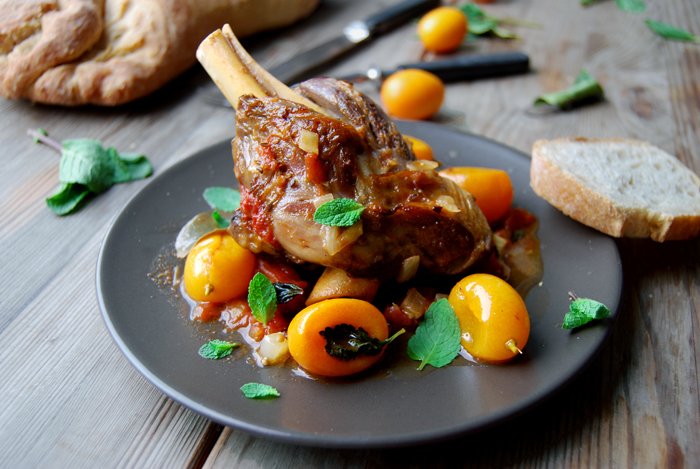
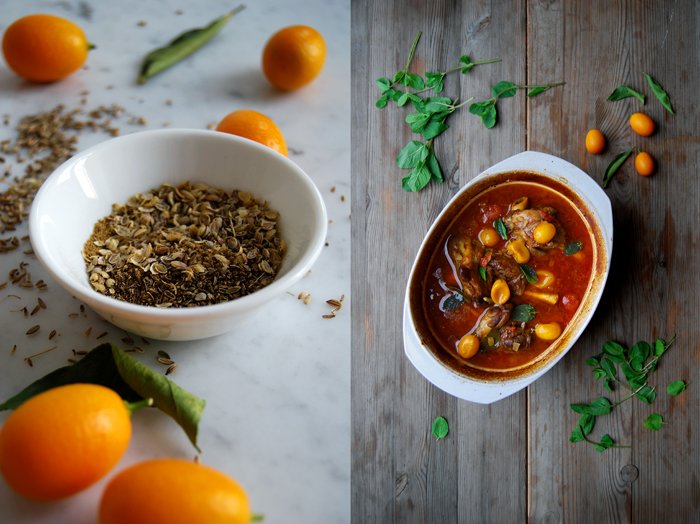
Braised Lamb Shanks with Kumquat, Fennel, Cardamom and Mint
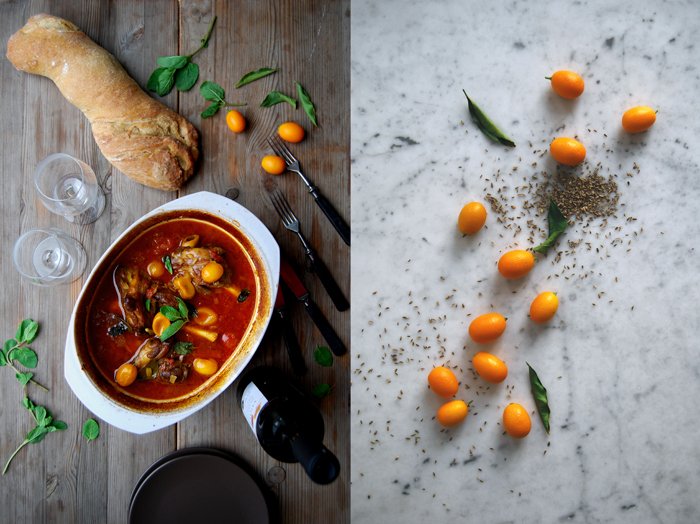
This is the most tender, aromatic and colourful braised dish you can possibly have on your plate at this time of year, at least in the Northern hemisphere. Cardamom, cumin, fennel and coriander seeds refine the deep red juices of summery (tinned) tomatoes cooked with succulent lamb shanks before tiny yellow kumquats add their bittersweet fruitiness. The fresh mint leaves on top are more than just pretty in this warming composition, their job is to freshen it up! A sheer explosions of aromas!
Over the years, I have become a big fan of shanks in my kitchen whenever I'm in the mood for a stew. Be it beef, veal or lamb, I prefer this cut over chuck steaks. The meat around the bone is packed in fat which keeps it juicy and tender while it braises in a fragrant broth of wine, fruit and vegetables. Shanks usually taste quite strong, they can easily deal with spices and herbs, perfect for Mediterranean comfort cooking with lots of rosemary, thyme, sage and garlic, or to find some inspiration in the Arabic cuisine. All those spices, those warming corns, pods and powders, cumin, turmeric, cayenne, cinnamon and many more, this is the best moment to let their qualities shine. Spices are great on their own but even better in a team. Be experimental, combine your favourites and use a little bit more than you usually would, the meat and sauce can take it!

Braised Lamb Shanks with Kumquat, Fennel, Cardamom and Mint
You need an oven proof dish / casserole dish with a lid for this recipe.
For 3-4 people you need
lamb shanks 3-4
fennel seeds, crushed in a mortar, 2 teaspoons
coriander seeds, crushed in a mortar, 1 teaspoon
ground cardamom 1 teaspoon
ground cumin 1 teaspoon
medium onion, finely chopped, 1
garlic, cut in half, 4 cloves
white wine 400ml / 1 pint
tinned tomatoes of good quality (it's worth going for a good brand!) 400g / 14 ounces
bay leaves 2
orange peel 4 long strips
kumquats, rinsed, 8
sea salt and pepper
olive oil
fresh mint leaves, a small handful
Set the oven to 160°C / 320°F.
In a casserole dish, heat a splash of olive oil and sear the shanks for a few minutes until golden brown on all sides. Take the meat out and set it aside but keep the casserole dish on the heat. Add a little more olive oil and the fennel seeds, coriander, cardamom and cumin, cook for about 20 seconds on medium heat or until you smell the spices, stir constantly. Add the onions and garlic and cook for 1-2 minutes. Mix the lamb shanks with the spices and onion and pour the wine over the meat. Season with salt and pepper. Add the orange peel, bay leaves and tomatoes, chop them roughly, mix everything and bring to a simmer. Close the casserole dish with a lid and cook in the oven for 1 1/2 hours. Add the kumquats (whole, not cut) and cook for another 30 minutes or until the meat is tender and you can lift it with a fork off the bone.
If necessary, take out the meat when it's done and cook down the sauce. Season to taste and serve with fresh mint leaves and thick slices of white bread or flatbread.

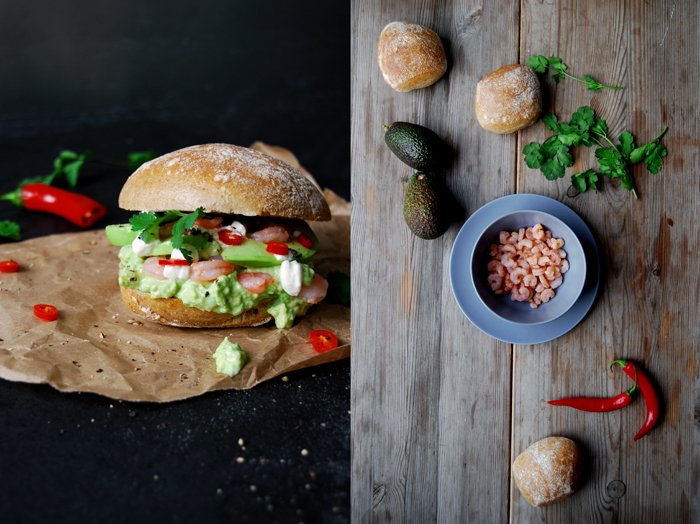
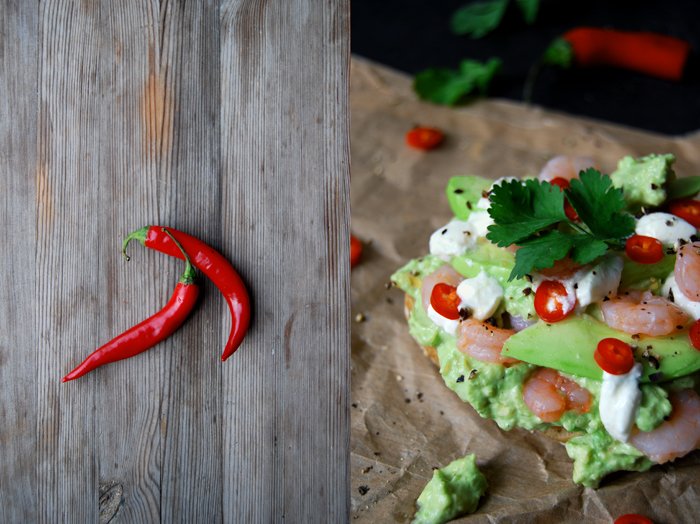
Shrimp Sandwich with Cumin Guacamole, Coriander and Chili Peppers
Sometimes I sit in my kitchen, or on my sofa in the living room, I close my eyes and imagine food. Just food. I can see colourful ingredients, vegetables, seafood, spices and herbs, or beautiful dishes carefully prepared on plates. I don't have to do anything, these pictures appear naturally in front of my inner eye. It's a helpful gift and the reason I never fear running out of inspiration, as long as I take my time to sit down with a cup of tea, relax and let go my kitchen ideas will come to me.
Culinary daydreams are fun and I particularly enjoy the ones about new sandwich creations. It makes me feel like a child in a toy shop. I can pull any ingredient out of the imaginary shelf, mix wildly and create whatever comes to mind on the plates, or I can keep it simple and work (or dream) minimal. Fruit and ripe cheese is always a great match, but there's so much more, sweet and salty, creamy and crunchy, sour and spicy, fresh and aged aromas, there are endless possibilities.
It's an exciting process as I never know how it will taste until I finished taking the last picture and enjoy the first bite. Some recipes are hard to imagine but I always follow my gut feeling (literally) and that's quite reliable. Today I felt like cumin guacamole, it's a great fusion of this distinctive spice and the wonderful velvety fruit, they truly bring out the best in each other! I merged this duo with the salty taste of the sea, fresh herbs and some hot spiciness. Shrimp, avocado, coriander and red chili peppers stuffed between a bun, my daydreaming was right, it was delicious!


Shrimp Sandwich with Cumin Guacamole, Coriander and Chili Peppers
For 2 sandwiches you need
buns, cut in half, 2
shrimps, cooked and peeled, 100g / 3.5 ounces
small ripe avocados, peeled, 2
sour cream 3 tablespoons
freshly squeezed lemon juice, to taste
a pinch of cumin
salt and pepper
fresh red chili pepper, thinly sliced, 1
fresh coriander leaves, a small handful
black peppercorns, crushed in a mortar, for the topping
Cut 1 avocado into slices, chop the second one with a fork and mix with 2 tablespoons of the sour cream. Season with lemon juice, cumin, salt and pepper to taste.
Divide the guacamole between the 2 buns and spread it voluptuously on the bottom half. Lay the shrimp and avocado slices on top and sprinkle with the remaining sour cream, the chili pepper, crushed pepper and coriander leaves. Enjoy!


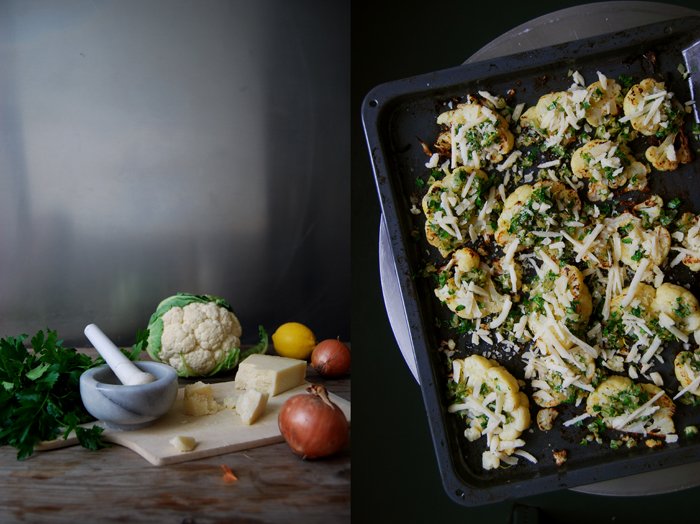
Oven Roasted Cauliflower Wedges with Parmesan, Parsley and Onions
Oven roasting creates certain flavours and aromas in vegetables that you'd never achieve with other cooking techniques like blanching or sautéing. Sometimes it just adds a little finesse to the root, cabbage or squash's own qualities, but in some cases it puts the whole experience on another level. Aubergines are a great example. To me, they show their most delicious side when brushed with olive oil, sprinkled with sea salt and crushed black pepper before they reveal their whole impact under the grill. The exceptional taste of a slice of perfectly grilled aubergine is the best that can happen to this fruit, in my eyes!
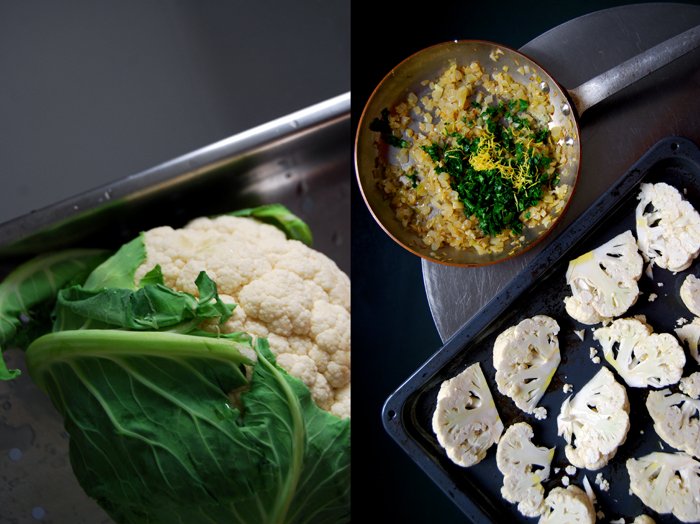
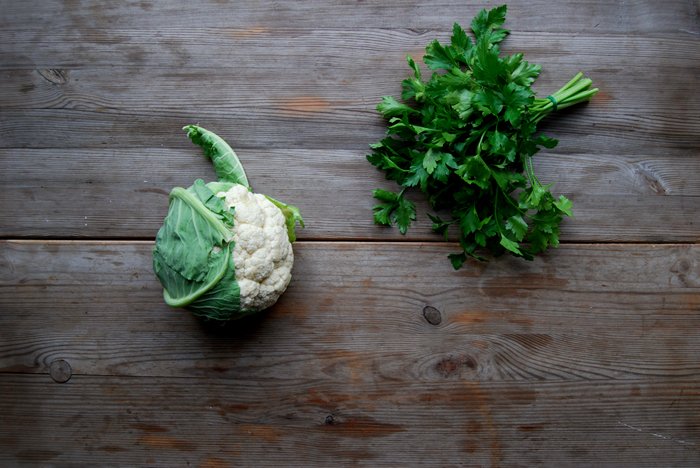
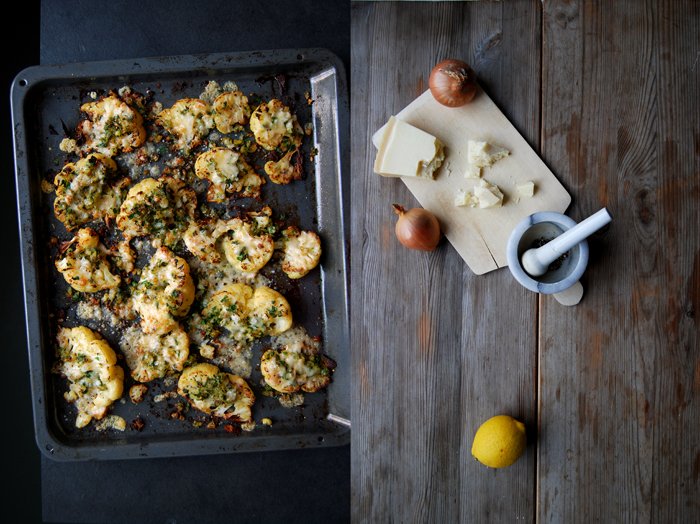
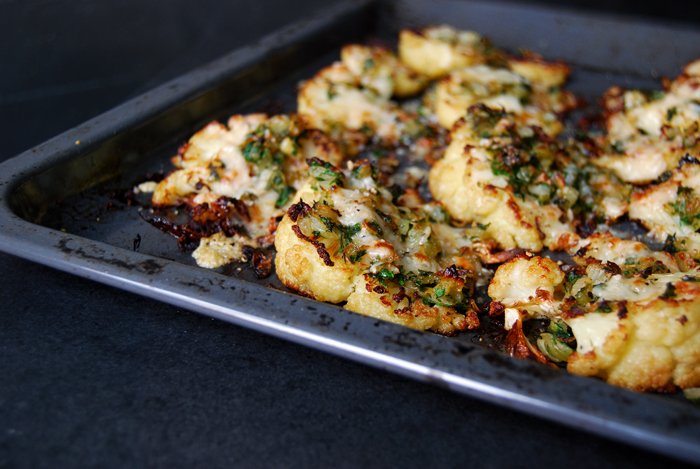
A few days ago, I wrote about my low enthusiasm for cabbage this winter, I'm just not in the mood, but still, I had to buy this little head of cauliflower cuteness when I saw it at the market. Sometimes you just need to the see and smell the food on your plate to wake up the taste buds. Oven roasting came to mind and seemed like the right approach to deal with this pretty vegetable. I remembered my baked fennel with homemade sausage I wrote about a year ago, I topped the blanched bulbs with a crust of fried onions, garlic, parsley and parmesan and roasted them under the oven. I prepared my cauliflower the same way, added some lemon zest but left out the pre-blanching. Cut into slim wedges, they only needed 15 minutes to turn into crunchy bites, al dente and with the wonderful aroma of all the roasted flavours.

Oven Roasted Cauliflower Wedges with Parmesan, Parsley and Onions
For 2-3 as a main or 4 as a side dish you need
small cauliflower, cut into slim wedges, 1
medium onions, finely chopped, 2
garlic, crushed, 2 big cloves
fresh parsley, chopped, 3 heaping tablespoons
lemon zest 1 teaspoon
Parmesan, freshly grated (coarse, not fine), 80g / 3 ounces
olive oil 4 tablespoons plus more for frying
coarse sea salt
black peppercorns, crushed in a mortar, to taste
Set the oven to 220°C / 430°F (I used the Rotitherm setting).
Heat a splash of olive oil in a pan and cook the onions for a few minutes until golden and soft. Add the garlic and cook for another minute, stir in the lemon zest and parsley and set aside.
Spread the cauliflower wedges on a baking sheet and coat them with 4 tablespoons of olive oil. Sprinkle with sea salt and pepper and roast in the oven for 10 minutes. Turn the wedges and roast for another 5 minutes. Cover the cauliflower with the onion parsley mixture and sprinkle with Parmesan. Bake for 4-5 minutes or until golden brown.

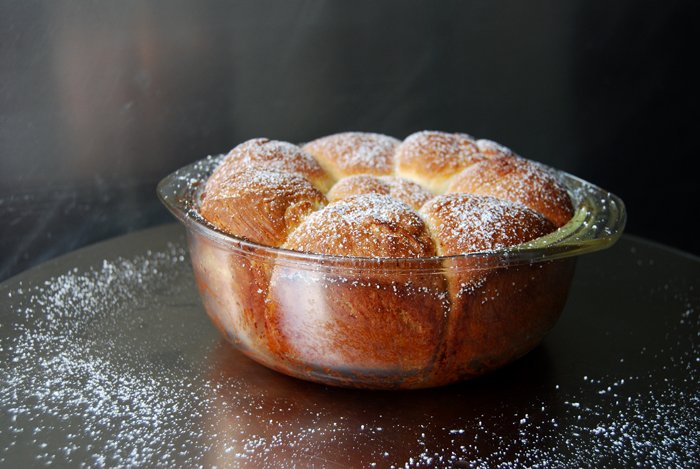
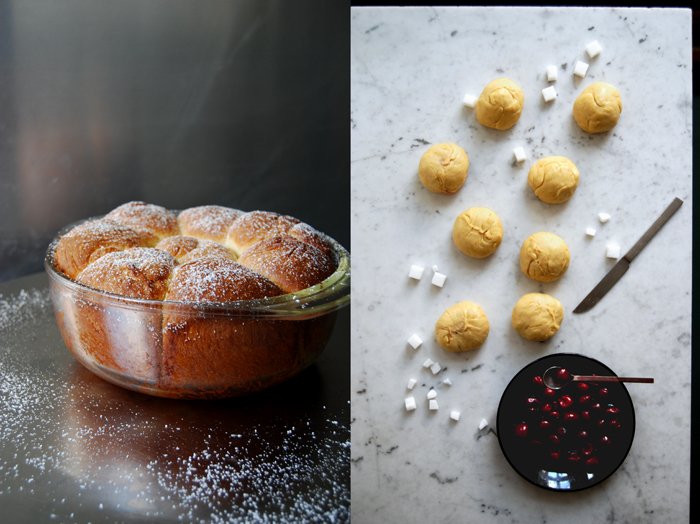
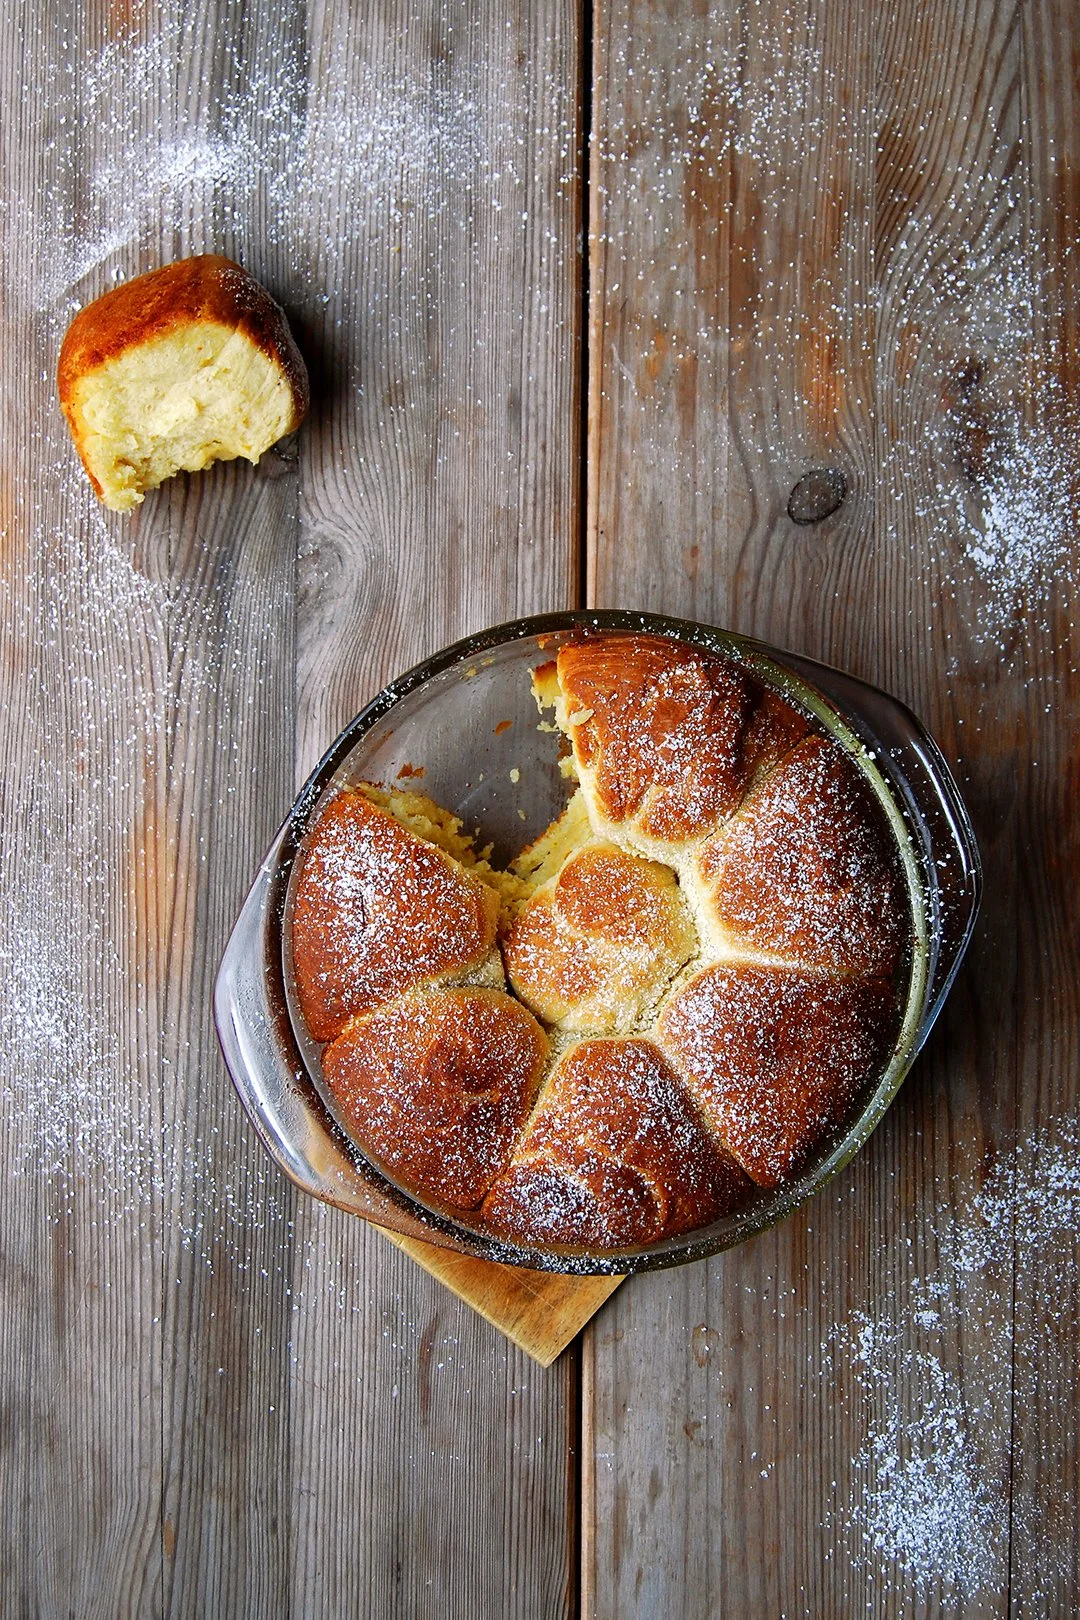
Butter Buchtel Buns with Cherries and Vanilla Custard
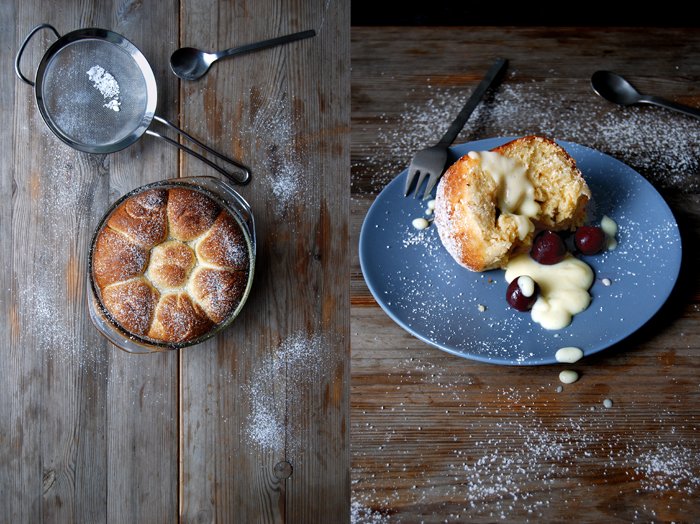
Fragrant and fluffy! Buchteln are buttery sweet yeast rolls tucked together in a baking pan to keep them juicy. Break the warm buns apart when they are freshly out of the oven and you can enjoy the sweetest smell that yeast dough can possibly create. To get an even better idea of what to expect, imagine brioche, just softer, with a flowery aroma and a sweet filling of juicy cherries. Although this is the prefect Sunday morning breakfast treat, they also make a fantastic, rustic dessert, especially when you serve them with a thick vanilla custard. You can replace the cherries with your favourite jam, curd or poppy seeds, basically with everything that fits to a buttery sweet bun. I used canned fruits stuffed with a little lump of sugar to release their juices, there's no need to wait for their harvest in summer. It worked great! This is the right recipe to pull out all the preserved fruit cans and jars piled up in your pantry, apricots, peaches, plums are great too, just stuff them into your butter buchteln and enjoy their juicy sweetness.
Buchteln have been with me for quite a while, when I went to university I used to go to my favourite bakery at least twice a week to buy a couple of their fabulous plum cinnamon buchteln. I'll never forget the satisfaction I felt with each bite, and even today, after all those years, they still manage put me right back to this comforting feeling.
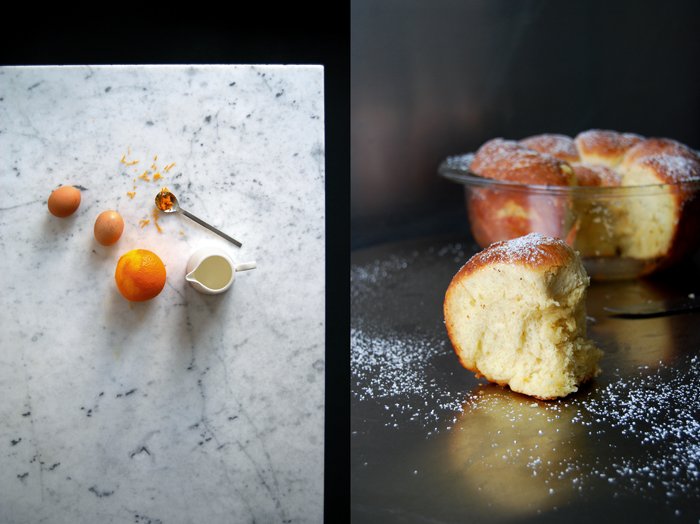
Buchteln (also known as Ofennudel or Rohrnudel in German) are very popular in Southern German, Austrian, Hungarian, Czech and Slovenian cuisine, several variations on this recipe spread into Polish, Croatian and Serbian baking over the years. However, they remind me a lot of Italian baking, the rich dough is almost yellow, made with lots of butter and eggs refined with orange zest and vanilla, it's as fragrant as a panettone. Simple and pure, yet so satisfying!

Butter Buchtel Buns with Cherries and Vanilla Custard
I used a round 19cm / 7.5" (6cm / 2.5" high) baking dish. The buchteln should sit close to each other.
For 8 buchteln you need
plain flour 400g / 14 ounces
granulated sugar 60g / 2 1/4 ounces
dry yeast 1 sachet (7g / 1/4 ounce)
salt 1/4 teaspoon
vanilla, scraped, 1/4 pod (or 1 package vanilla sugar)
orange zest 1 teaspoon
milk 125ml / 4 1/4 ounces
butter, melted, 80g / 3 ounces plus 80g / 3 ounces to coat the buchteln
organic eggs 2
jarred cherries, for the filling 16-24
sugar cubes, quartered, 4-6
icing sugar, for the topping
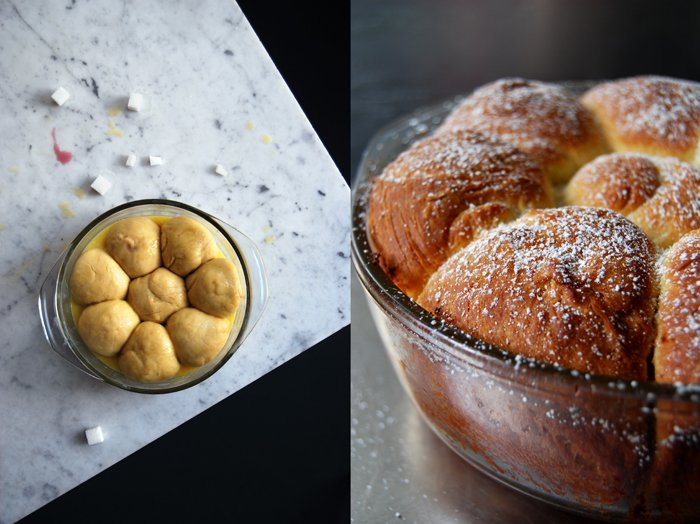
In a large bowl, combine the flour, sugar, yeast, salt, vanilla and zest. Whisk the cold milk with 80g (3 ounces) of the hot melted butter and the eggs (the mixture should be lukewarm) and add to the dry flour mixture. Mix with the dough hooks of your mixer for a few minutes until the dough is well combined and elastic. Continue kneading with your hands for about 4 minutes until you have a soft and silky dough ball. Put the dough back into the bowl, cover with a tea towel and let it rise in the warm oven (35°C / 95°F) for 70 minutes (top/ bottom heat and not fan-assisted!). The dough will need the last 10 minutes to reach the right volume.
Melt the remaining 80g (3 ounces) of butter in a sauce pan, take it off the heat as soon as it's liquid, it shouldn't be brown.
Take the bowl out of the oven, punch the dough down and knead for another 30 seconds. Divide the dough into 8 portions and roll each in your hands to a smooth ball. Fill each cherry with a quarter of a sugar cube. Use your thumb to make a hole in each dough ball and stuff it with 2-3 cherries. Close the ball well, use 2 fingers to close the fold of the hole tightly. Pour 3 tablespoons of the melted butter into the baking pan. Turn the little dough balls in the remaining melted butter and tuck them closely next to each other in the baking pan (the fold should be at the bottom). Pour the remaining butter over the buchteln. Cover with a tea towel and let them rise in a warm place for another 15-20 minutes.
Set the oven to 180°C / 355°F (fan-assisted oven).
Bake the buchteln for 30 minutes or until golden brown, check with a skewer, it should come out clean. When they are done, brush the warm top with a tablespoon of butter. Sprinkle with a little icing sugar and serve with warm vanilla custard.
For the vanilla custard
organic egg yolks 4
cornstarch 4 tablespoons
granulated sugar 100g / 3.5 ounces
milk 500ml / 17 ounces
a pinch of salt
vanilla pod, slit slightly, 1
Whisk the egg yolks with the cornstarch, sugar, salt and 50ml / 2 ounces of the milk until well combined.
In a saucepan, bring the remaining milk with the vanilla pod to the boil. Take the vanilla pod out and scrape the seeds out of the bean into the milk. Add the egg mixture to the hot milk, whisking well. Take the sauce pan off the heat after 1 minute and continue whisking for 2 minutes, serve immediately.

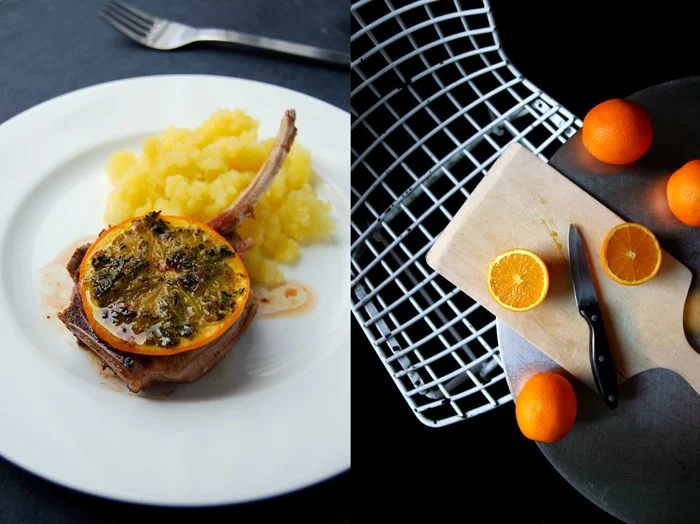
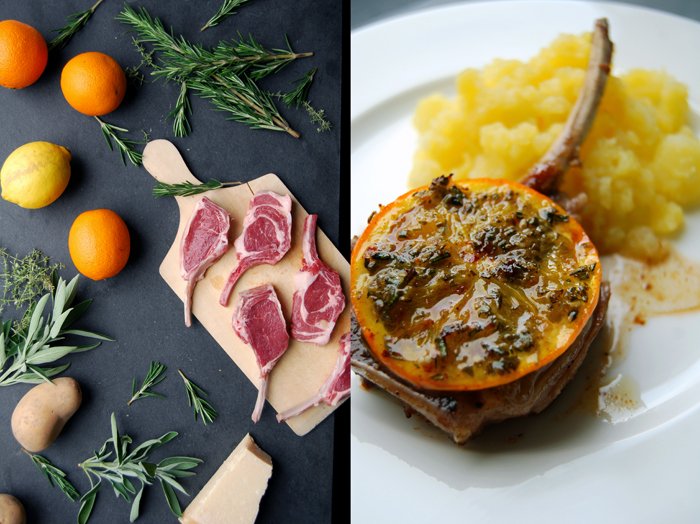
Lamb Chops with Orange-Herb Crust & Mediterranean Mashed Potatoes

When the popular German food magazine Lust auf Genuss asked to feature eat in my kitchen in their February print issue I was more than excited. This magazine is a culinary gem! Their fantastic team creates so many amazing recipes and shares detailed information about our every day ingredients. I really love their special columns about wine makers and other fascinating food producers and their delicious products, just reading through the pages and seeing the pictures makes me want to cook!
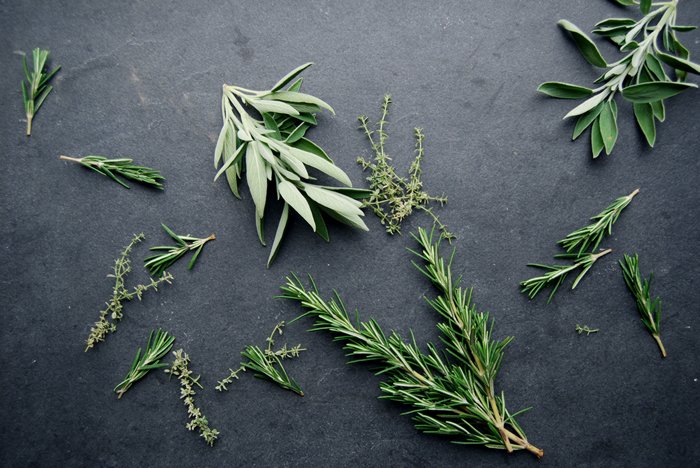
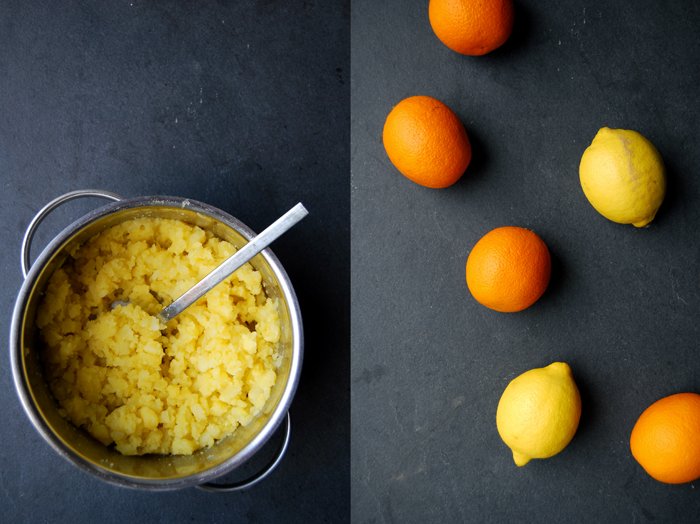
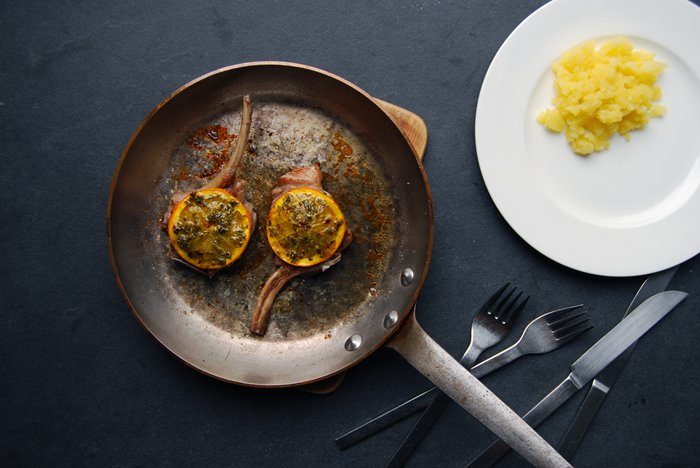
I was very lucky, this month's issue was about citrus fruits which made my pleasure even greater, there is barely a recipe without oranges, lemons or tangerines coming out of my kitchen at the moment. So a whole magazine dedicated to my beloved powerful fruits felt like the perfect surrounding for a feature about me and the blog, especially because I was asked to contribute a new recipe which wasn't on the blog yet. My first choice was guinea fowl with lemon ricotta stuffed under the skin but the magazine's own cooking team had a similar recipe in mind. Lamb chops were next on my list. Easter is close and there'll definitely be lamb on the table at one point, it also combines wonderfully with citrus flavours. It seemed just perfect. The decision for the final recipe was actually made in the forest, during an afternoon walk with my mother. We chatted about the feature and within seconds the idea was set: the chops quickly seared and topped with a thin slice of orange then finished under the grill. The orange coated in a layer of chopped, fresh herbs (rosemary, thyme and sage) mixed with parmesan and olive oil. The ripe cheese creates a fine crust in the oven and adds its wonderful aroma to the composition.
I served the lamb with lemony Mediterranean mashed potatoes to keep it pure and simple, just olive oil, sea salt and a bit of lemon zest chopped with a knife into the roots. This is the right meal to get into the mood for spring and all its culinary pleasures!

Lamb Chops with Orange Herb Crust & Mediterranean Mashed Potatoes
For 2 people you need
For the lamb chops
lamb chops (1 1/2-2cm / 3/4" thick) 6, about 450g / 16 ounces
organic orange, ends cut off, very thinly sliced, 1 (you'll need 6 slices)
olive oil 3 tablespoons plus more for frying
mixed fresh herbs (rosemary, sage, thyme), finely chopped, 1 tablespoon
freshly grated aged Parmesan 2 tablespoons
salt and pepper
Set the oven to grill (broiler), the oven has to be hot when you put the meat in.
Whisk the olive oil, herbs and Parmesan and coat 6 slices of orange generously with the herb oil on both sides. Heat a splash of olive oil in a pan and sear the lamb chops over a high heat for 1 minute on each side. I like them rare, keep them in the pan for another 30 seconds if you prefer them medium. Take the pan off the heat and season with salt and pepper. Lay 1 slice of herb coated orange on each piece of meat and put the lamb chops under the hot grill for about 1 minute (just let cheese melt and the rind turn golden brown). Serve with the mashed potatoes.
For the mashed potatoes
potatoes, peeled and cooked in salted water, about 400g / 14 ounces
olive oil 50ml / 2 ounces
lemon zest 1 1/2 teaspoons
sea salt
Chop the warm potatoes with a knife until they have a lumpy texture adding the oil constantly. Stir in the zest and season with salt.

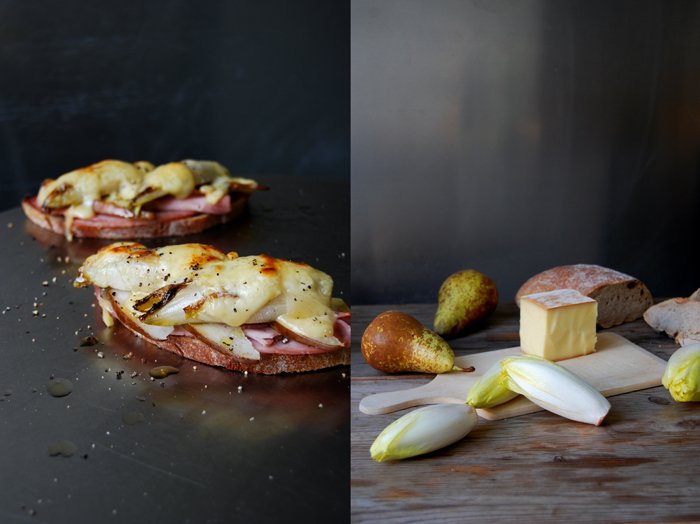
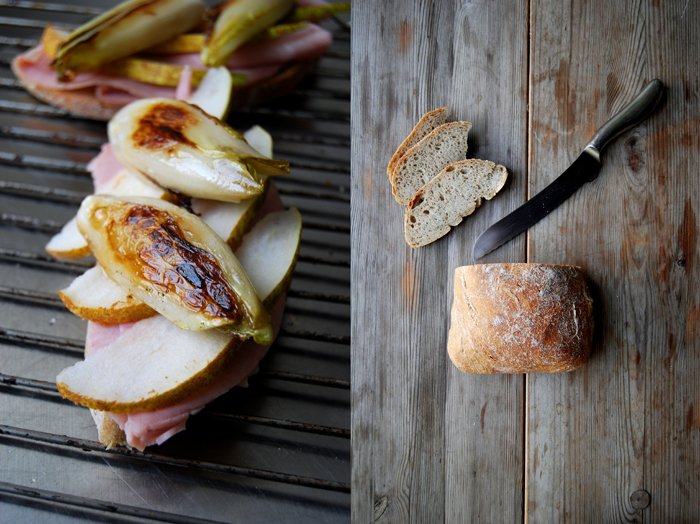
Grilled Endive, Ham, Raclette and Pear Sandwich
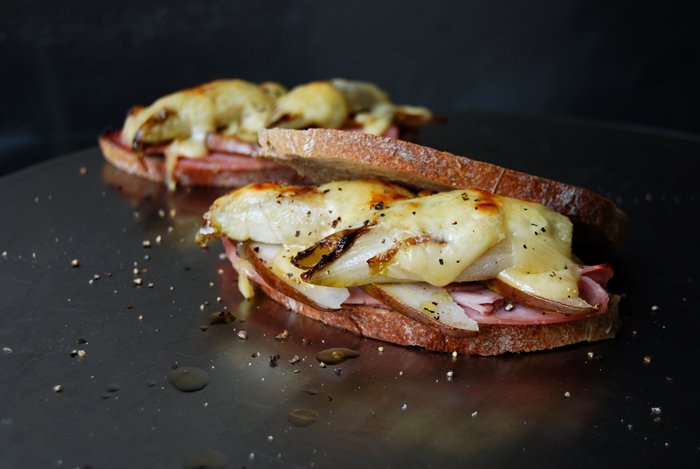
The thought behind this sandwich is simple: 1. I love the bittersweet combination of endive and pear, 2. the rustic duo of ham and endive gives me a cosy feeling which I desperately crave in February and 3. melted hearty raclette fits to (almost) everything. Just the idea of combining these four ingredients in a grilled sandwich sounded so promising that I could barely wait to take the first bite of my new creation. Usually, I'm quite disciplined while I take pictures for my posts but this time I truly suffered behind the camera. It didn't really help that the smell of this little beauty was even more tempting than its mouthwatering good looks, it was quite a cruel teaser!
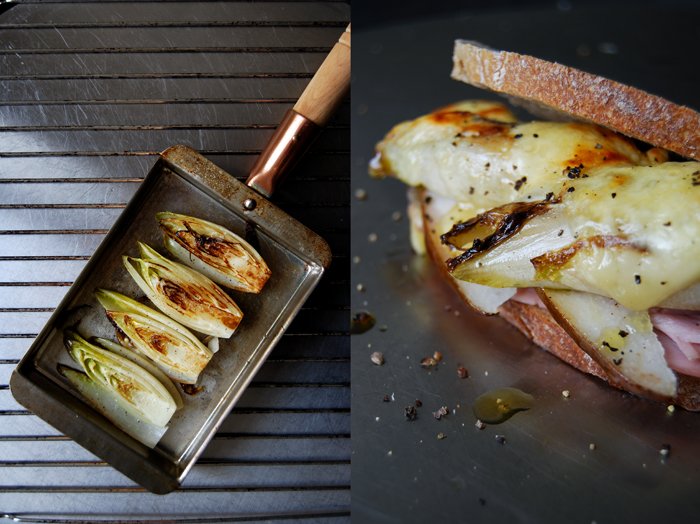
The result was so pleasing that I quickly prepared a second batch as the first one went down so well. You can use any hard cheese for this sandwich as long as it melts well and tastes strong enough to stand up next to the other ingredients. I can imagine a ripe blue cheese or camembert would be just as good. I'm a big fan of raclette, its powerful aroma is just made to merge with vegetables, meat or pasta. This Swiss cheese is far from being shy without being obtrusive, and it forms these little smoky bubbles under the grill which smell and taste fantastic. The preparation is quick and easy, I sautéed the endives on both sides before I stacked them on a rustic bun between ham, pear wedges and a generous slice of cheese. Just a few minutes under the grill and the raclette took over my kitchen!
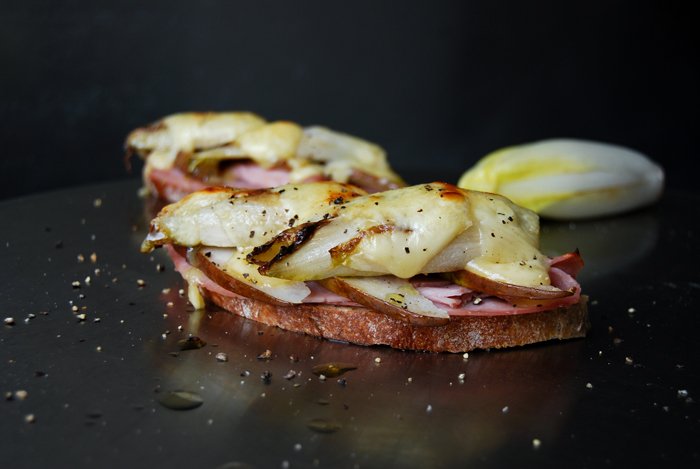
Grilled Endive, Ham, Raclette and Pear Sandwich
For 2 sandwiches you need
sourdough bread 4 slices
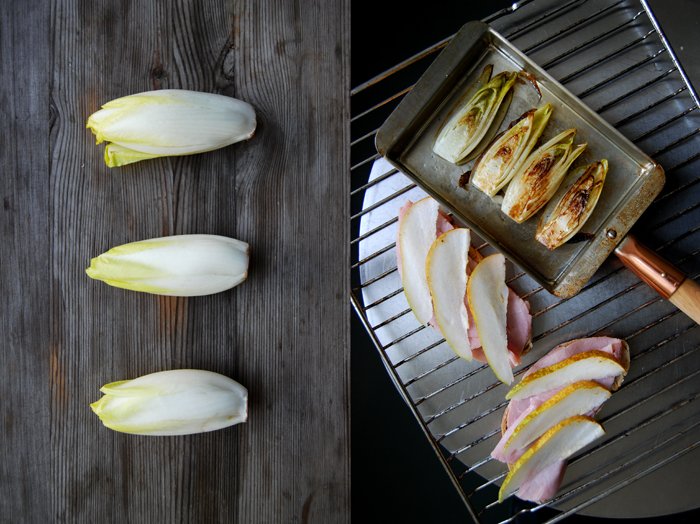
small Belgian endives, cut in half (lengthwise), 2
ham 4 slices
pear, cut into thin wedges, 1/2
raclette cheese, sliced, 80g / 3 ounces
black peppercorns, crushed in a mortar, for the topping
salt
olive oil
Heat a splash of olive oil in a pan and sauté the endives on medium heat for 1-2 minutes on each side, season with salt and pepper.
Lay 2 slices of ham on a slice of sourdough bread, spread the pear on top and finish with the sautéed endive. Spread some cheese over the vegetable and continue with the second sandwich. Put both sandwiches under the grill for a few minutes or until the cheese starts bubbling. Sprinkle with pepper and enjoy!


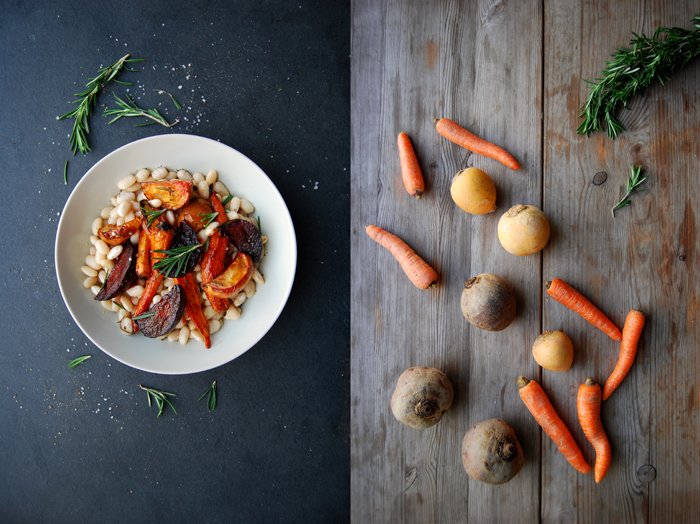
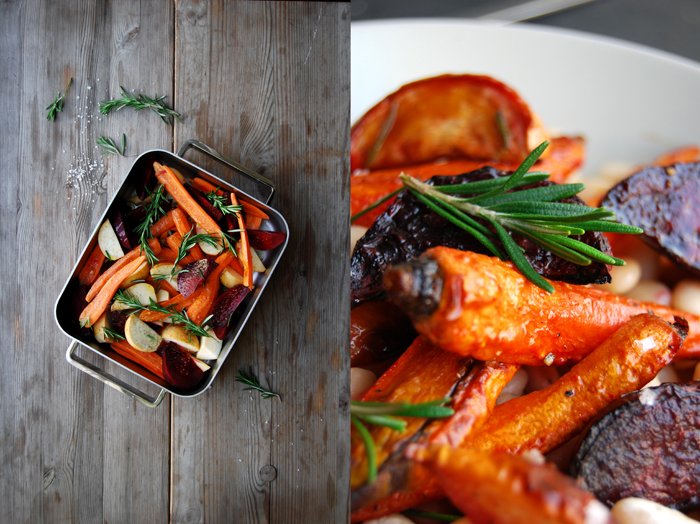
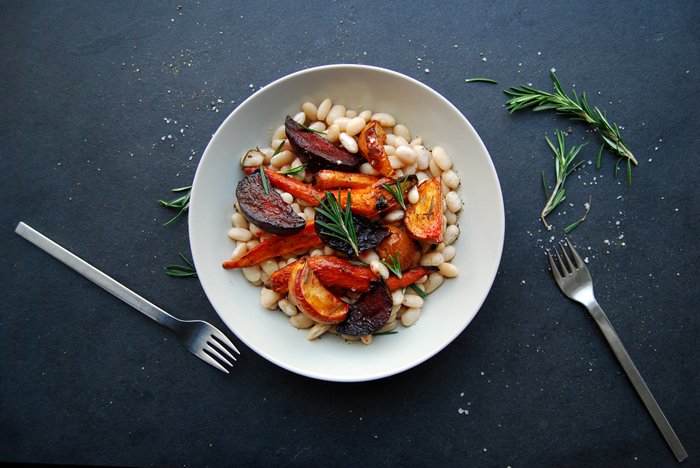
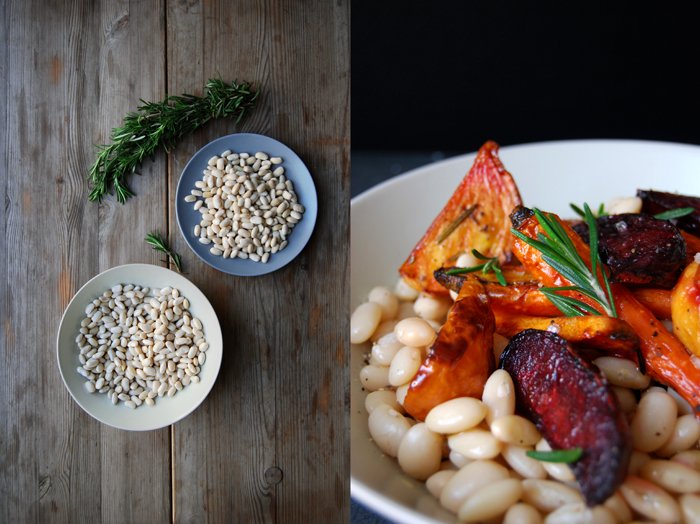
Rosemary Butter Beans with Maple Roast Roots

I don't know why but this winter I didn't really get into the mood for cabbage. Give me beans, lentils, all kinds of legumes and I'm happy. And whenever I pulled roasted roots out of my oven I was almost ecstatic, but cabbage, unfortunately, left me a bit uninspired. This is quite unusual for me, I would sometimes cook it every week in big batches in the cold season, cauliflower, kale, red cabbage heads and savoy, my freezer was always full with leftovers from my various cabbage creations.
I believe that you should follow your taste, your gut feeling in life. Whatever your appetite calls for stands for something that your body needs at that moment, not only when it comes to food. Lets leave out the excessive consuming of chocolate and cakes, this doesn't count in my train of thought, that's more for the soul rather than for the body, which is as important. My appetite definitely calls for legumes and roots! There weren't many cabbage recipes on eat in my kitchen this winter, just three, my Ginger Lemon Ricotta stuffed Cabbage Rolls, Savoy Cabbage with Coriander and Maltese Sausage and the Christmassy Roasted Red Cabbage with Orange Wedges. Roots, beans and lentils, that's what I put into my pots and pans most of the time.
Today's recipe combines both, velvety butter beans cooked with rosemary and caramelized mixed roots roasted in the oven in sticky maple syrup olive oil. The carrots, beetroot and Navet roots (yellow turnip) were still a bit crunchy and just as good when they were cold. This was our energising snack together with yesterday's olive oil bundt cake while we remodeled the kitchen. This dish works as a warming meal or a rich salad, just prepare a bigger batch and enjoy it for days!

White Rosemary Beans and Maple Roast Roots
For 3-4 people you need
dried butter beans, soaked in lots of water overnight, 250g / 9 ounces
broth to cook the beans (or 1 carrot, 1/4 celery root and 1/4 leek)
fresh rosemary, a small bunch
Navet roots (yellow turnip), cut into wedges, 3 (or 1 small rutabaga, peeled)
medium beets, peeled and cut into wedges, 2
carrots, peeled, cut in half (lengthwise), 10
cloves of garlic, in their skin, 6
olive oil 6 tablespoons
maple syrup 1 tablespoon
balsamic vinegar 1 teaspoon
coarse sea salt and pepper
In a large pot, cook the beans in enough broth - or in water with the carrot (cut in half), celery (peeled) and leek (cut in half) - for about an hour, don't add any salt. Add a sprig of rosemary in the last 15 minutes. When the beans are done take them out with a slotted ladle and mix them with 1 tablespoon of olive oil, balsamic vinegar, salt and pepper. Season to taste.
Set the oven to 200°C / 390°F (I used the Rotitherm setting).
Whisk 5 tablespoons of olive oil with the maple syrup and pepper. Spread the Navet roots, beets, carrots and garlic in a large baking dish or on a tray and coat them with the maple oil, add a few sprigs of rosemary. Sprinkle the roots generously with coarse sea salt and roast in the oven for about 45 minutes or until golden brown and al dente, turning them every 15 minutes. Serve on top of the beans.

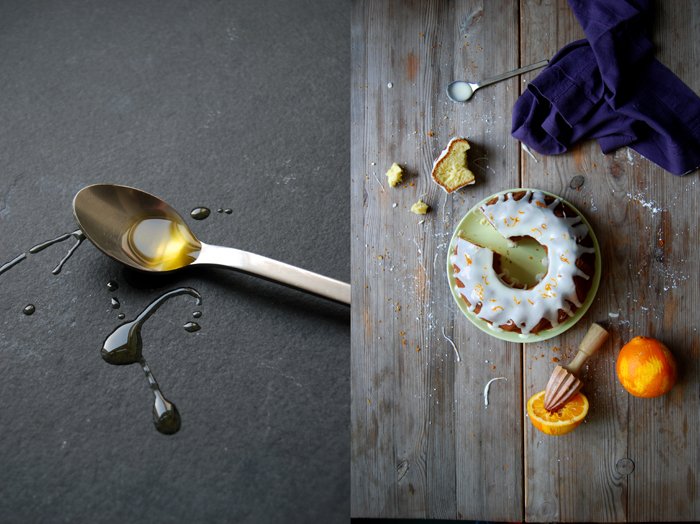
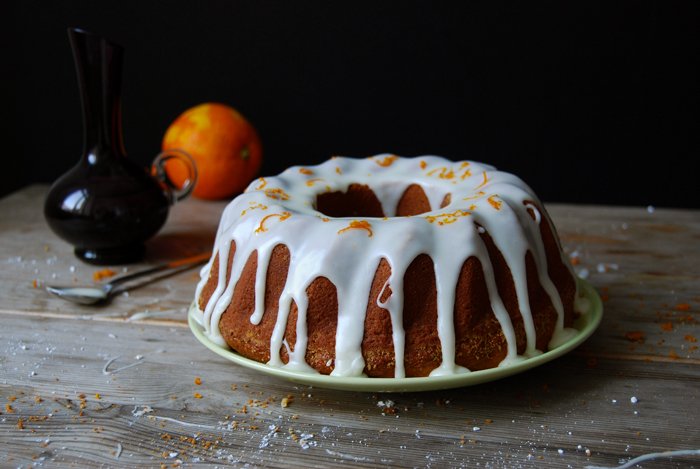
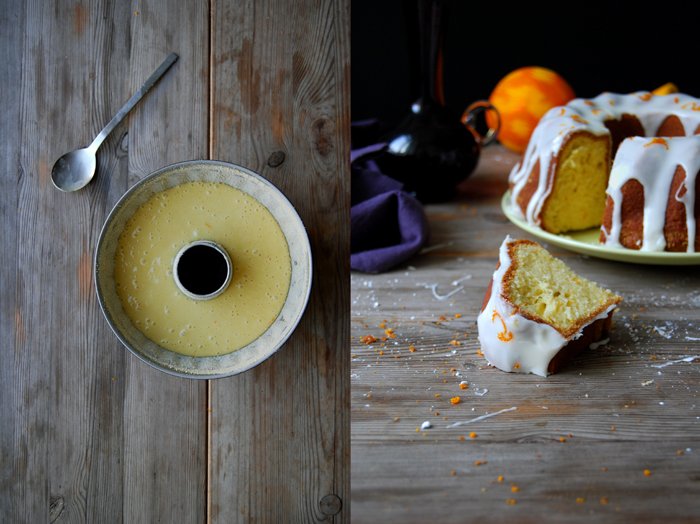
Olive Oil Bundt Cake with Orange Icing - 10 Years in Berlin

Kitchen remodeling! Finally, after having been in Berlin for exactly 10 years I used this special anniversary to change a part of my kitchen that has been bugging me since my first day. When I moved into my apartment I took over an oven and a rather simple and unpractical sink/ cupboard which were already set up. The oven made space for my new one after 5 years but, somehow, the sink which was supposed to leave after a week survived 10 years. Thanks to procrastination and my indecisiveness!
So, a few weeks ago I fell in love with a white ceramic sink and I took this love at first sight as an incentive to get my kitchen project started. Although I only had a one and a half meter space for the sink, cupboard and shelves, I don't think that the planning would have taken much longer for the whole kitchen. All the little details which make it or break it (literally) were much more time consuming than expected (which explains my hesitance to get started). I didn't want to break with the look that I already have, Carrara marble kitchen tops and aluminium wall panels. White is the dominant colour which is helpful as it makes the room brighter. The only thing I did change, are the closed cupboards under and next to the sink. In the past I only had an open shelving system with metal supports and wooden racks which looks great but is rather unpractical when there is water involved.
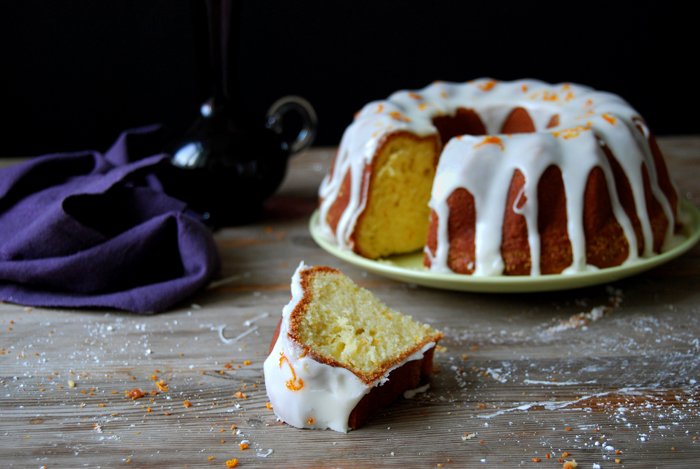
I made the final choices when I visited my mother last week, kitchen remodeling is a perfect mother-daughter project. We spoke about materials and the layout while we sat outside on her terrace in the sunshine with a glass of chilled white wine and lots of pictures, brochures and drawings scattered all over the table. As soon as I got back home, I made my orders and prepared myself for the building, I baked a cake! I love home works and renovations but to me good catering is essential to keep up the spirit in moments of frustration and we had a few of them. My cake of choice was the juiciest, spongiest gugelhupf (bundt cake) made with lots of olive oil. I covered this piece of simple bliss in a fruity orange icing to give it a more festive anniversary look. It doesn't really need it but it made it pretty! If you're looking for a cake that you can eat with your fingers as a little snack (while you're remodeling your kitchen) or for breakfast, or if you're after an honest tea time cake with a bit of finesse, go for it! The olive oil adds some moisture without making it soggy and it leaves a subtle hint of its rich aroma.
So, it's been 10 years of Berlin and the city has been very good to me. I fell in love with it when I visited it for the first time many, many years ago and it has inspired me every day since then, it made me grow and filled me with such happiness like no other place in the world (apart from Malta). Thank you Berlin!

Olive Oil Bundt Cake with Orange Icing
For a 1 3/4l / 3 1/2 pint bundt pan you need
plain flour 250g / 9 ounces
granulated sugar 200g / 7 ounces
baking powder 3 teaspoons
a pinch of salt
organic eggs 5
olive oil 150ml / 5 ounces
milk 100ml / 3.5 ounces
orange zest 2 heaping teaspoons plus more for the topping
butter and breadcrumbs for the bundt pan
For the orange icing
icing sugar 200g / 7 ounces
freshly squeezed orange juice 3-4 tablespoons
Set the oven to 180°C / 350°F (fan-assisted oven). Butter the bundt pan well and coat generously with breadcrumbs.
Combine the flour, sugar, baking powder and salt. Quickly mix in the eggs, olive oil and milk with an electric mixer. Pour the batter into the bundt pan and bake for 40 minutes or until golden and firm on top. Check with a skewer, it should come out clean. Let the cake cool for a few minutes, shake the pan a little and turn the cake onto a plate, let it cool completely.
Whisk the icing sugar and orange juice (spoon by spoon) until it's thick and slightly runny.
Glaze the cake with the orange icing and sprinkle with orange zest.


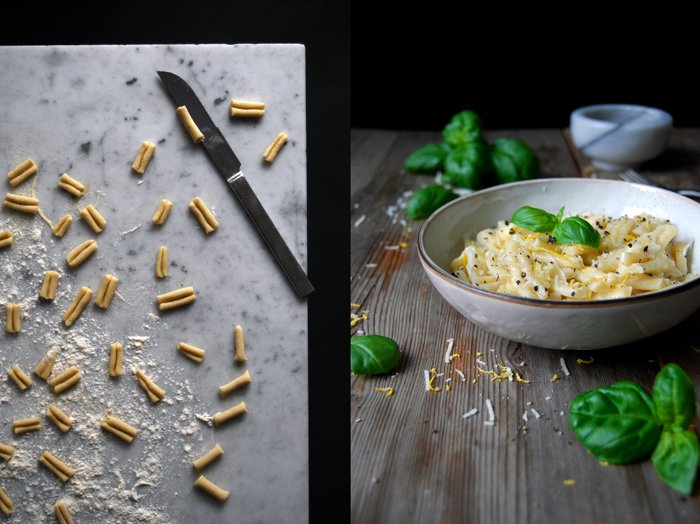
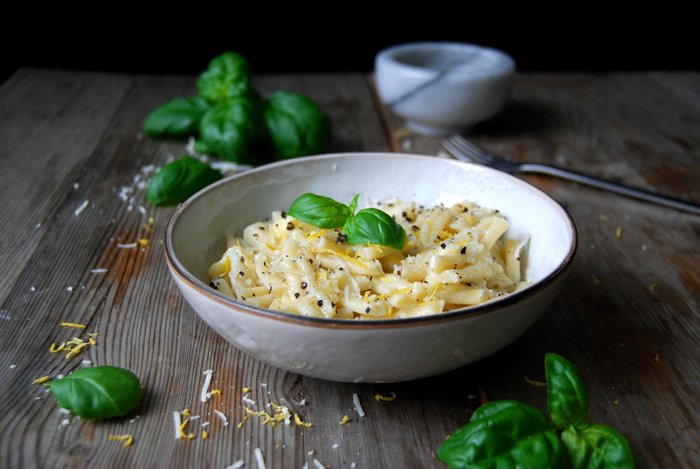
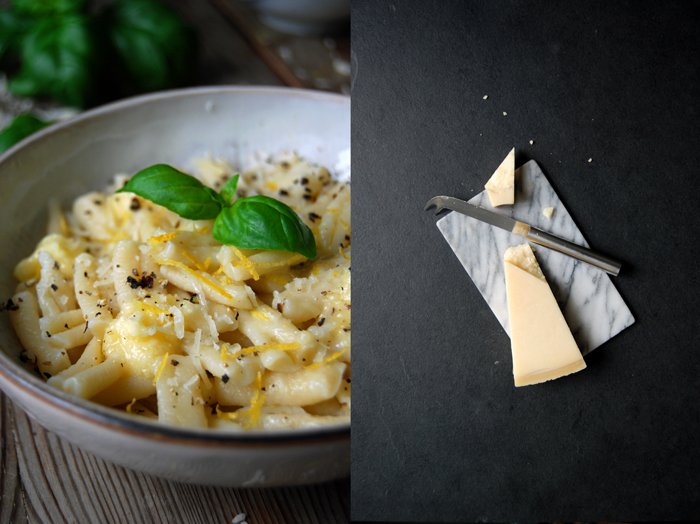
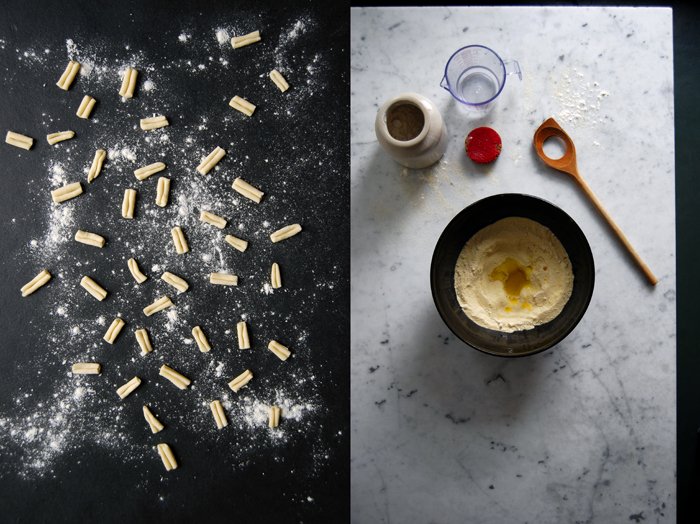
Homemade Malloreddus Pasta with Parmesan Butter
When I make my own malloreddus pasta at home, with a glass of Chianti in reach and crackling vinyl on the record player, I'm almost in Italy. Shaping pasta without a machine is pure meditation and it's just as relaxing. The dough is firm yet elastic and it feels so nice to roll it in your hands to a thin sausage shape. It takes a while, this isn't a 10 minute dinner, it's not something to have on the table as soon as possible, this is slow food, literally. Some people like to knit or sew, repair old radios or play an instrument to calm down, I like to roll my pasta.
Malloreddus is an old Sardinian pasta made of semolina flour often refined with saffron. Traditionally, it's rolled over a ridged surface that gives it a similar look to gnocchi and led to the second name, Gnocchetti Sardi. I learned another technique, here the pasta is pressed against the back of a knife which gives it a slightly bend shape, perfect to collect all kinds of sauces and meaty juices. Today I kept it simple, I wanted to enjoy the pure and honest taste of the semolina pasta so I just made a velvety parmesan butter. This is one of the many culinary tips from my mother, we visited her last week and I came home with lots of recipes and enough inspiration for the next few months. Her parmesan butter is mixed in a blender and unfolds a beautiful aroma when it's stirred into the pasta, it just needed some lemon zest, fresh basil and crushed pepper - Italian perfection!
Malloreddus with Parmesan Butter
For 2-3 people you need
durum semolina flour 300g / 10 1/2 ounces
plain flour 50g / 2 ounces
salt 1 teaspoon
water 170ml / 6 ounces
olive oil 1 tablespoon
black peppercorns, crushed in a mortar, to serve
flaky sea salt, to serve
lemon zest, to serve
fresh basil leaves, to serve
freshly grated Parmesan, to serve
For the Parmesan butter
butter, at room temperature, 40g / 1 1/2 ounces
freshly grated Parmesan 40g / 1 1/2 ounces
Combine the semolina, flour and salt, make a well in the centre and add the water and olive oil. Mix with the electric mixer or a spoon until combined. Continue kneading with your hands for a few minutes until elastic, the dough shouldn't be sticky but firm and stretchable. Form a ball and wrap it in cling film. Let the dough rest at room temperature for at least 30 minutes. You could also keep it in the fridge for a few hours.
Take a small piece of dough (keep the remaining dough wrapped) and roll it between your hands or on the kitchen top until it's about 7mm / 1/4" thick. Cut it into 2cm / 3/4" pieces and press them against the back of a knife (lengthwise). If you prefer the traditional ribbed surface you can roll the single pasta over a gnocchi ridger. Keep the malloreddus on a floured baking sheet and continue rolling the remaining dough.
In a large pot, bring salted water to the boil and cook the malloreddus for 4-5 minutes or until al dente.
Mix the butter and Parmesan in a blender (or with a tablespoon) until smooth.
Serve the pasta on warm plates mixed with a spoonful of the Parmesan butter, salt, pepper, lemon zest and basil.


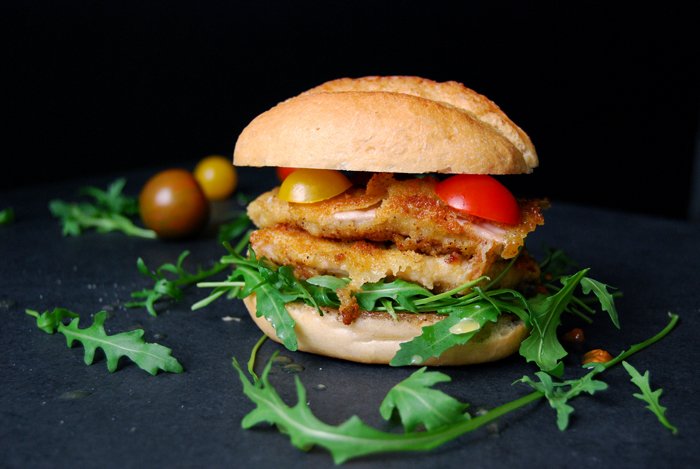
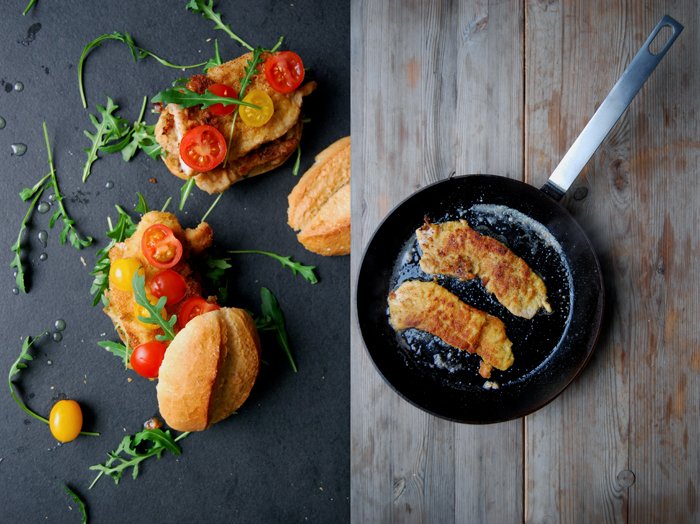
Schnitzel Sandwich with Lemon Butter, Rucola and Cherry Tomatoes

If you ever want to seduce a (non vegetarian) man, make schnitzel, and if you want to be 100% sure that he'll definitely fall for you, make a schnitzel sandwich! There must be something in this rustic snack that men absolutely love. When I fry schnitzel, I always prepare a bigger batch as I know that the leftovers are more than welcome the next day. To see the satisfaction in someone's face after the first bite of this breaded piece of meat stuffed in a bun is impressive. If the man of your heart is a true schnitzel connoisseur this will send him straight to culinary heaven!
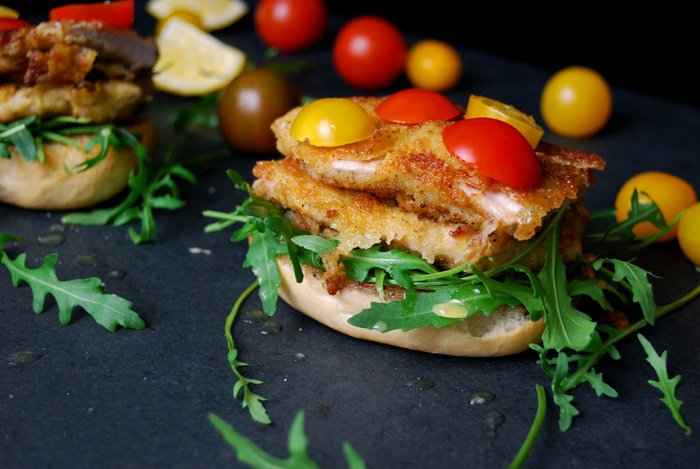
You could put the cold meat on a slice of white bread and keep it simple which is already delicious, or you could take it to the next level. Serve the schnitzel warm, fresh out of the sizzling pan and combine it with crunchy rucola and sweet cherry tomatoes. I drizzled lemon butter over it and that made it absolutely irresistible!
Here's another one of my schnitzel recipes with Swabian potato salad!

Schnitzel Sandwich with Lemon Butter, Rucola and Cherry Tomatoes
For 2 sandwiches
white buns, cut in half, 2
schnitzel, 5mm / 1/4″ thin, lightly pounded, 2 (each about 125g / 4.5 ounces)
organic egg, beaten, 1
dry breadcrumbs
plain flour
butter 1 tablespoon for the lemon butter plus 1-2 tablespoons to fry the schnitzel
freshly squeezed lemon juice 1 tablespoon
cherry tomatoes, sliced, 6-8
rucola, a small handful
olive oil
salt and pepper
In a large heavy pan, heat a generous splash of olive oil and 1-2 tablespoons of butter over a high temperature, the bottom of the pan should be covered. Prepare 3 large, deep plates, fill one with the egg, the other with flour and the last with breadcrumbs. Lightly dust and turn the meat in the flour first, then turn it in the egg and finally, quickly turn it in the breadcrumbs until covered. Fry the schnitzel for 1–2 minutes on each side until golden brown. Season with salt and pepper and take the meat out of the pan. Dip the inside of the buns into the pan and let them soak the juices.
In a saucepan, warm up 1 tablespoon of butter and the lemon juice. Take it off the heat when it's hot.
Spread some rucola leaves on the bottom of each bun and put the schnitzel (cut in half) on top. Drizzle the lemon butter over the meat and lay a few tomato slices on top. Close the bun, squeeze it and enjoy in good company!


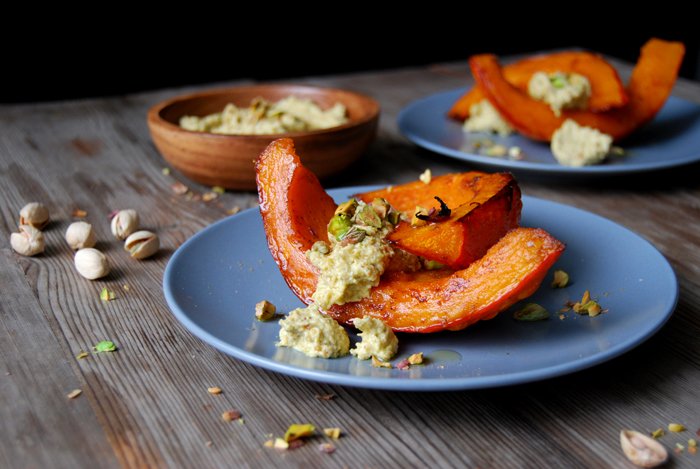
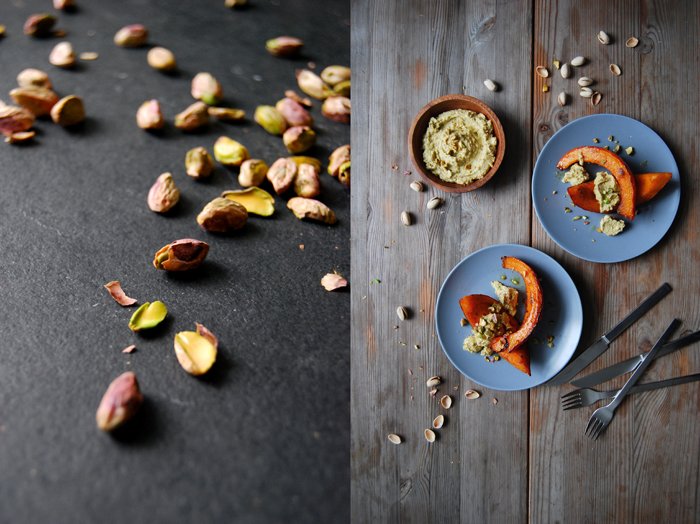
Oven Roast Pumpkin with Pistachio Cumin Feta
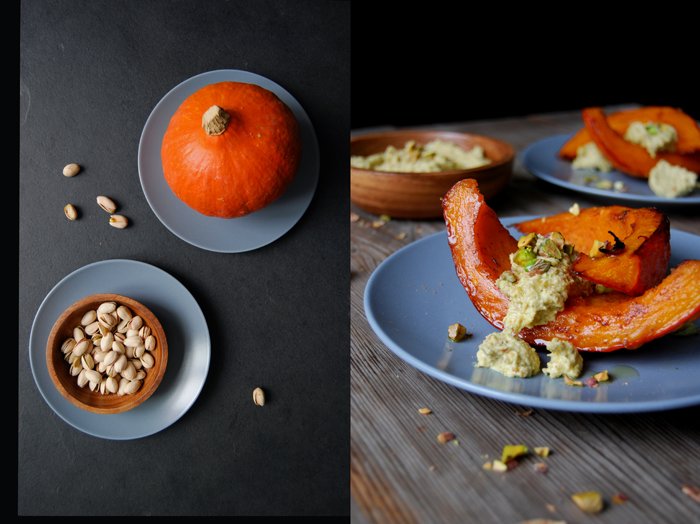
Oven roasted pumpkin has always been on the top of my list of winter favourites but I recently found out about a combination which makes this dish even more tempting: pumpkin, pistachios and feta cheese!
The woman who introduced my taste buds to these culinary highs wrote a wonderful cook book called Persiana which I happily found under our Christmas tree. Sabrina Ghayour managed to come up with an amazing collection of beautiful recipes from the Middle East and beyond that caught my attention from the first page. Her family's Iranian background combined with the fact that she grew up in England, let the self-taught chef create magical and manageable recipes praising her big culinary love, the Persian cuisine, by using ingredients that can easily be found at every supermarket. I find great relaxation and inspiration in this little gem, in the way she talks about food in general and about single aromas in particular.
Although I didn't have the time to cook many of her creations yet, I already read through the book three or four times. Her butternut squash with pistachio pesto, feta and pomegranate struck me every time I passed the page.
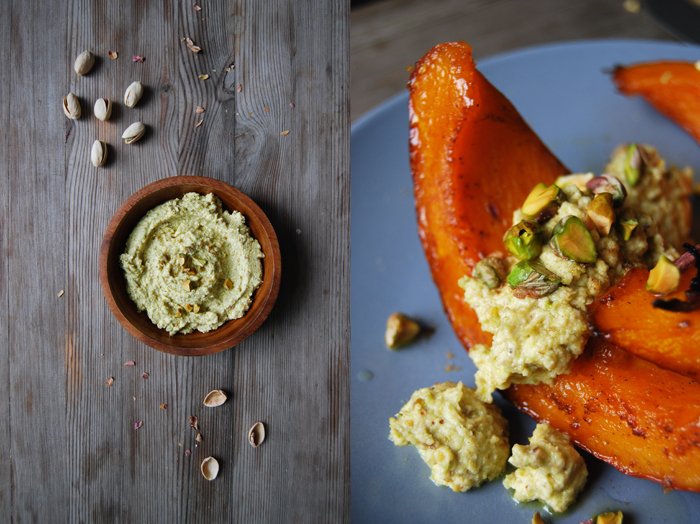
I rarely follow cook books to the letter, I love to work with them and develop my own ideas, that's what happened with Sabrina's butternut dish. I roasted Hokkaido wedges the way I always do and added a little cumin to the olive oil which is very nice with the squash's sweetness. Her pesto didn't make it into our dinner, but I whipped salty feta cheese with lots of pistachios, olive oil and cumin to a thick dip that I served on top of the warm squash. The combination of nutty, sweet and salty aromas is simply brilliant!
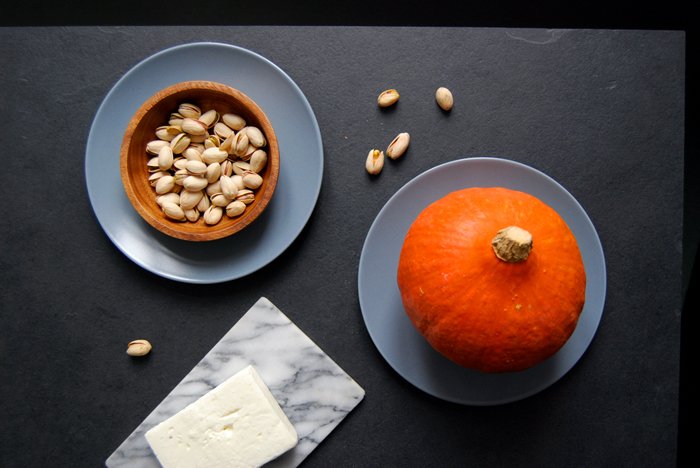
Oven Roast Pumpkin with Pistachio Feta Cheese
For 4 people you need
Hokkaido pumpkin or butternut squash, cut in half, the seeds and fibre scraped out, 1kg / 2 1/4 pounds
feta cheese 180g / 6 1/2 ounces
pistachios (in their shells) 200g / 7 ounces
olive oil 50ml / 1 3/4 ounces plus 3 tablespoons for the feta
ground cumin
coarse sea salt and pepper
Set the oven to 200°C / 390°F.
Cut the pumpkin into large wedges, don't peel it. Whisk 50ml (1 3/4 ounces) of olive oil with pepper and 1 teaspoon of cumin. Spread the pumpkin in a baking dish and coat with the spice oil. Sprinkle the wedges with salt and bake in the oven for 15 minutes. Turn the wedges and cook for another 7 minutes (Hokkaido) or 15 minutes (butternut) or until golden brown and soft.
Grind 60g / 2 ounces of the peeled pistachios in a food processor and purée with the feta cheese, 3 tablespoons of olive oil and 1/4 teaspoon of cumin until smooth and well combined. Season to taste.
Arrange the warm pumpkin and the pistachio feta on plates. Peel and chop the remaining pistachios and sprinkle them over the cheese. If you like, add a little more cumin (to taste).I
f you choose Hokkaido, you can eat the skin, but if you went for butternut squash, you have to scrape it out of the skin (you can do that on your plate).
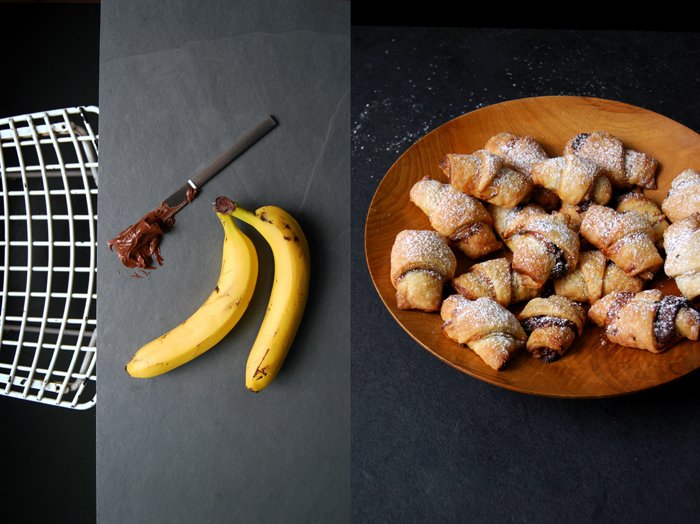
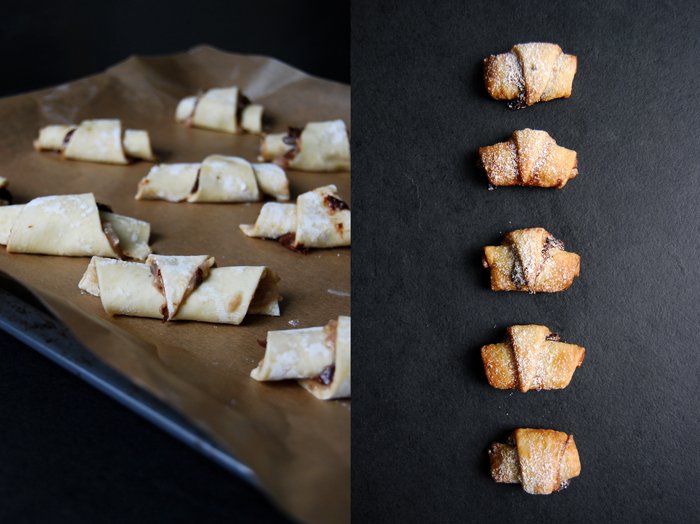
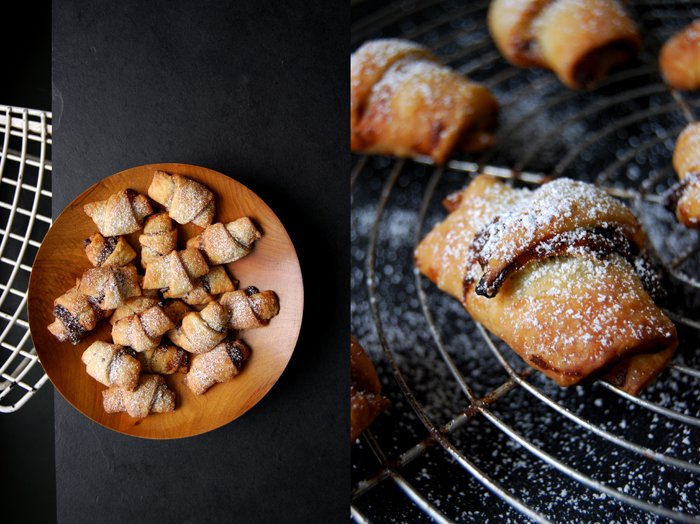
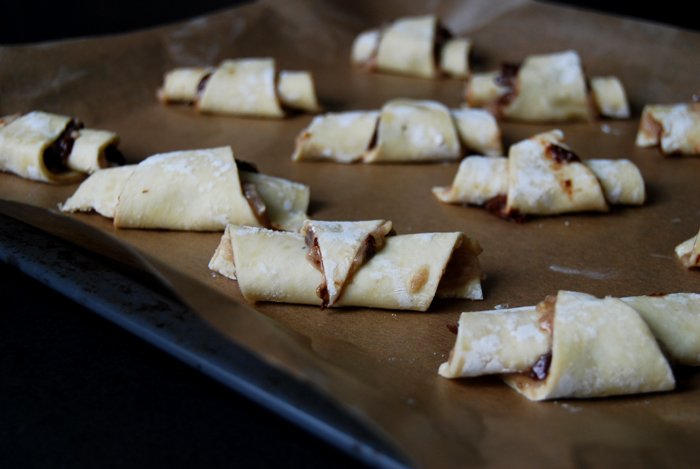
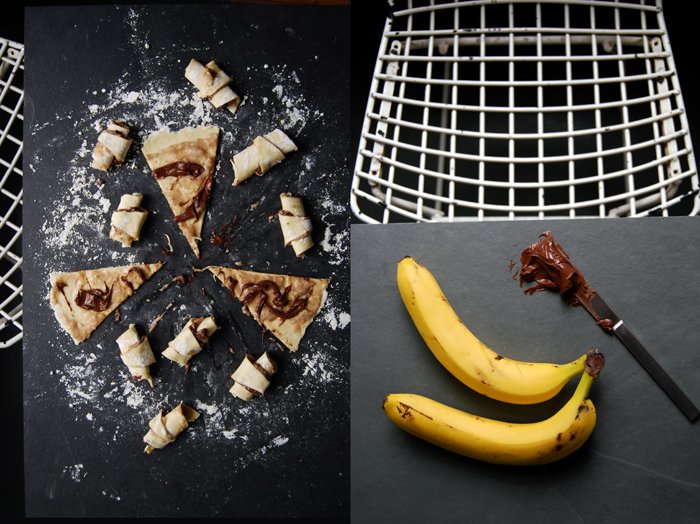
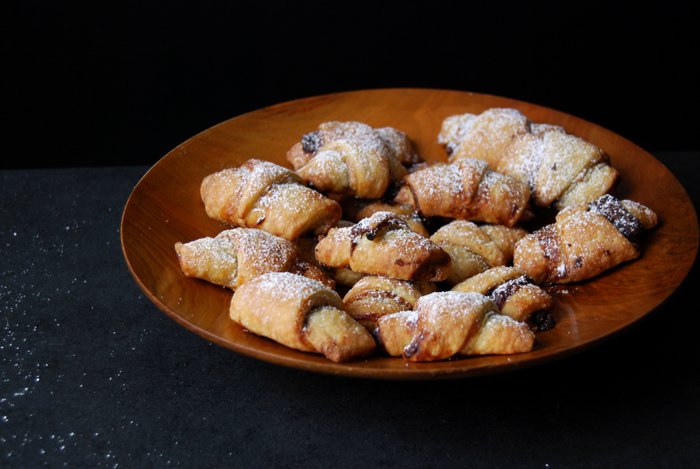
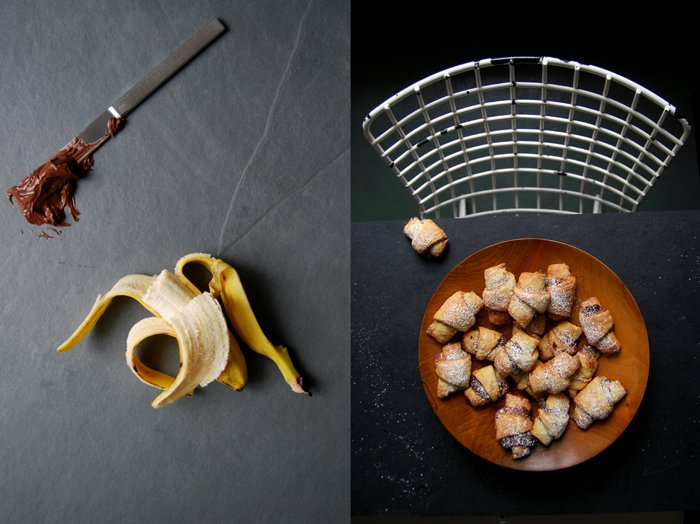
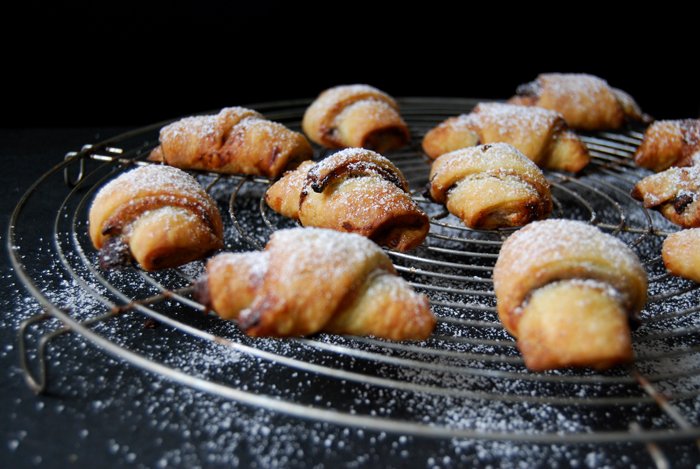
Banana and Chocolate Spread Rugelach
I've never baked croissants in my kitchen, I'm a bit scared of puff pastry at least when I'm the one who has to prepare it. Unfortunately, I love to eat them, sometimes I literally crave their buttery flakiness that leaves your fingers sticky and fills your mouth with the wonderful taste that only the excessive use of butter can create. Luckily, there is an easier and quicker alternative to the French treat coming from the Jewish cuisine. In case of urgent need of croissants, just bake rugelach!
The delicate pastry is in no way behind croissants, neither in richness nor in tender lightness. It's the addition of cream cheese that creates this easy miracle, easy as it's far from being as time consuming as the French breakfast classic. When the ingredients are mixed and the dough has cooled in the freezer for half an hour, the rolling and filling can begin!
My last rugelach recipe was one of the first posts I shared on eat in my kitchen, I baked them for a festive Hannukah party at a friend's house. I used bittersweet chocolate and cinnamon, a combination that can never go wrong. For my new recipe I had a bit of a childish combination in mind, chocolate breakfast spread and puréed bananas, the perfect kiddy treat! I'm quite sure that a few of our friend's young children would have loved to join in my messy kitchen activity. My first batch of rugelach turned out to be a bit difficult as I tried to cut the single pieces after I spread the banana and chocolate on top of the pastry, messy! I can't recommend this, it's almost impossible! Instead, start with the banana layer, cut the triangles and then put on the chocolate spread, that's much easier.
So, what can I say about the taste? My partner was quite skeptical when I told him about this combination but then, as soon as he smelled the sweetest aroma coming out of the kitchen, he couldn't stop himself anymore. Both of us actually, as we ate them like peanuts. It's one of those sweets that hits the right spot with the first bite and calls for more and more!

Banana and Chocolate Spread Rugelach
For 24 rugelach you need
plain flour 150g / 5 ounces
icing sugar, 2 heaping tablespoons plus more for the topping
a pinch of salt
butter, cold, 125g / 4.5 ounces
cream cheese 125g / 4.5 ounces
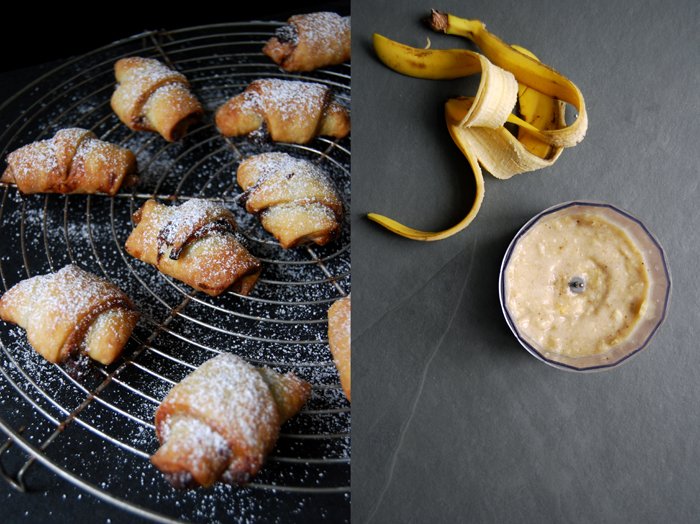
ripe bananas 2 (around 200g / 7 ounces)
chocolate spread (like nutella) 6 tablespoons
Combine the flour, icing sugar and salt. Cut the butter with a knife into the flour mixture until there are just little pieces left. Continue with your fingers and work the butter quickly into the flour. Add the cream cheese and continue mixing with a fork or the hooks of the mixer until the mixture is combined. Form 2 discs, wrap them in cling film and put them in the freezer for about 30 minutes, the dough should be hard but still rollable.
Set the oven to 185°C / 365°F and line a baking sheet with parchment paper.
Purée the bananas in a food processor until smooth.
When the dough is firm, keep one disc in the fridge and roll out the other disc between cling film dusted with flour. You should end up with a circle of about 30cm / 12″. Flip the dough onto a new piece of floured cling film, this will make it easier to roll the rugelach. Spread half of the banana purée on the dough and cut it like a cake into 12 triangles. Divide half of the chocolate spread roughly into 12 portions and sprinkle on each triangle. Gently roll up the rugelach from the wider side to the tip. Bake in the oven for about 19-20 minutes or until golden brown. Continue with the remaining disc.
Let the rugelach cool on a wire rack and dust with icing sugar.