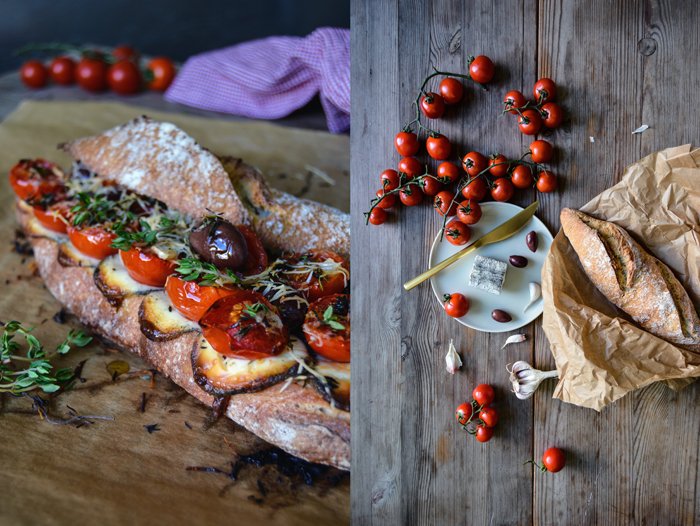
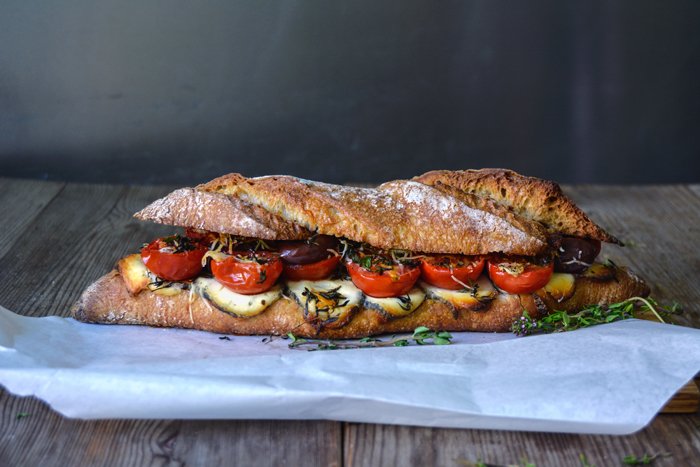
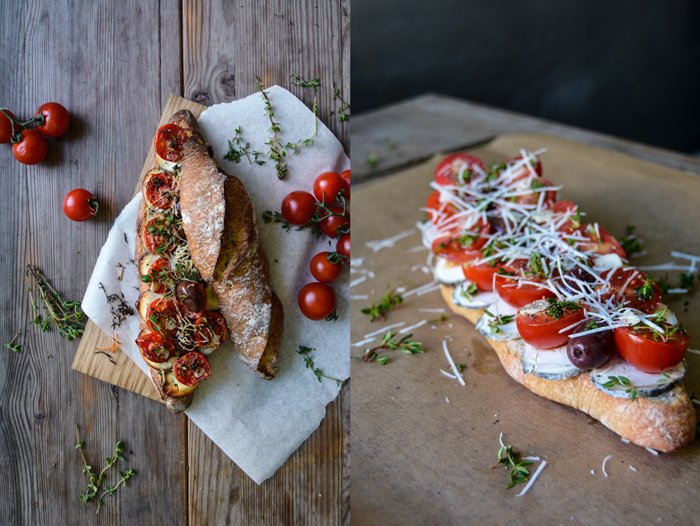
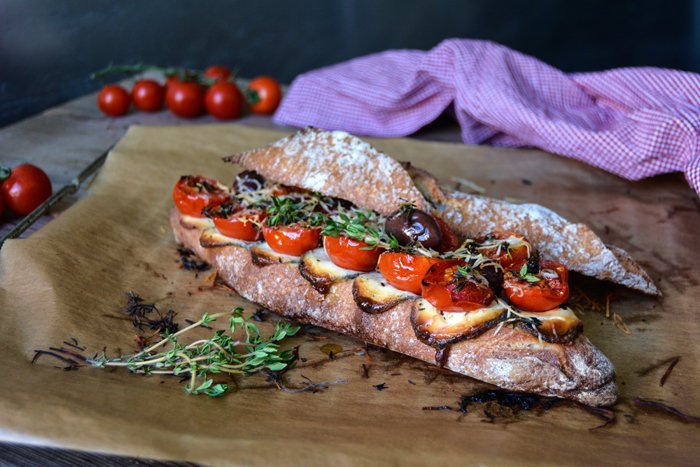
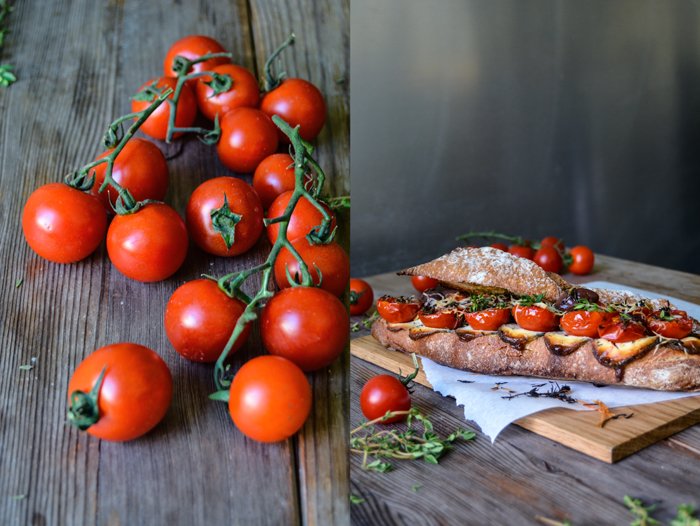
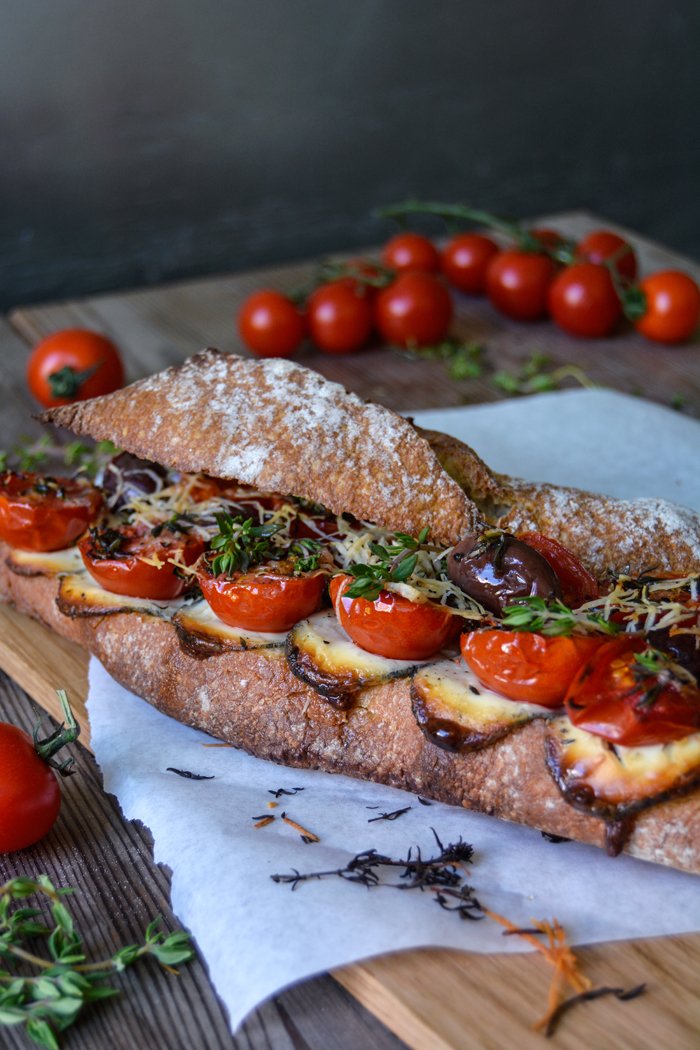
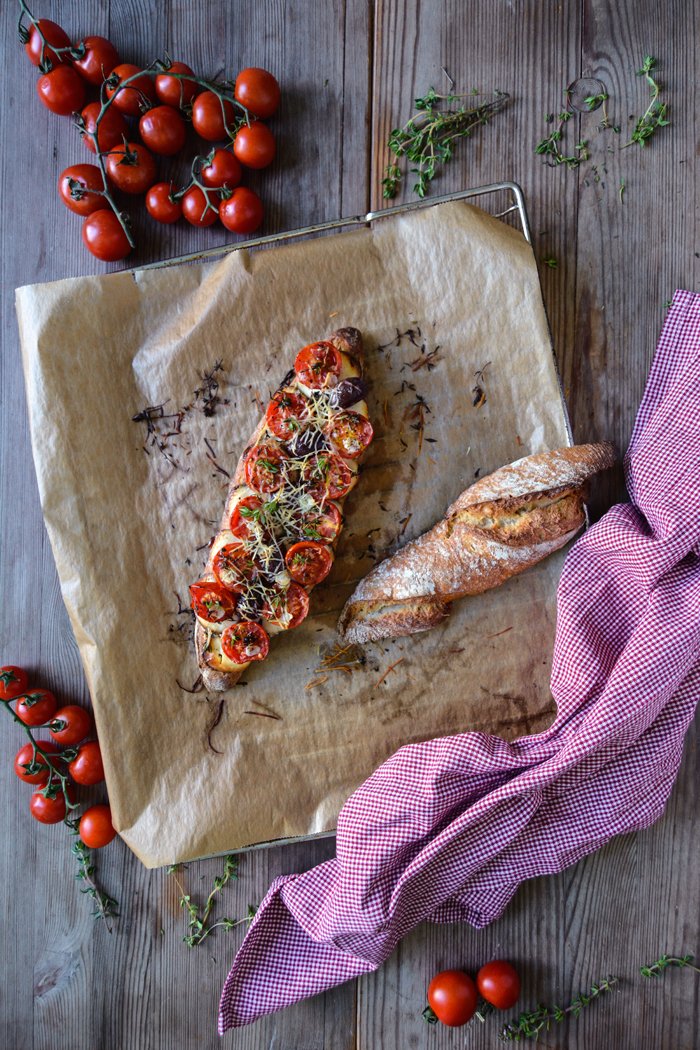
Grilled Tomato, Chèvre and Thyme Baguette Sandwich
Many summers ago, I spent a few wonderful weeks at the Côte d'Azur with my aunt, uncle and cousins. We stayed at a beautiful house in the middle of the green hills around Grasse, a picturesque town which is also called the world's capital of perfume. I think I wrote about this trip last year but after almost 500 posts I'm losing track! Never mind, I often sat with the girls of the family, my aunt and two cousins, at the pool in the garden. It was a little French paradise with all kinds of flowers, lavender, jasmine and roses turned this place into the most fragrant oasis. We had our girl chats, chilled, swam and ate, a perfect holiday!
Although I won't go to the French Riviera next month but to Malta (which I look forward to with growing excitement!), I had our peaceful Grasse garden scene in mind when I came up with today's sandwich. Imagine sitting on the fresh grass, feeling the warm morning air on your skin and the smell of a million flowers around you. You wear a summery dress and enjoy the quiet peace of the early hours of the day which is only interrupted when you take a big bite of this crunchy grilled baguette sandwich topped with chèvre, cherry tomatoes, olives, garlic, thyme and pecorino (I'm sorry, I had no French substitute at hand). Doesn't this sound just right?

Grilled Tomato, Chèvre and Thyme Baguette Sandwich
As a lunch for two you need
rustic French baguette (around 25cm / 10"), cut in half, 1
olive oil 2 tablespoons
chèvre (preferably Sainte-Maure de Touraine), very thinly sliced, 70g / 2 1/2oz
cherry tomatoes, cut in half, about 6
black olives 6
garlic, thinly sliced, 1 clove
fresh thyme leaves, from a small handful of sprigs
pecorino (or any other aromatic hard cheese), freshly grated, 2 generous tablespoons
black peppercorns, crushed in a mortar
Set the oven to 220°C / 430°F and line a baking sheet with parchment paper.
Place the bottom half of the baguette on the lined tray, brush the bread with 1 tablespoon of olive oil and spread the chèvre and then the tomatoes and olives on top. Sprinkle with the remaining olive oil, thyme, garlic, pepper and pecorino. Bake in the oven for about 20 minutes or until the cheese is melted and the tomatoes are soft. You can also bake the top half of the baguette for the last few minutes. When it's done, sprinkle with a little fresh thyme, season with salt (if necessary) and enjoy!


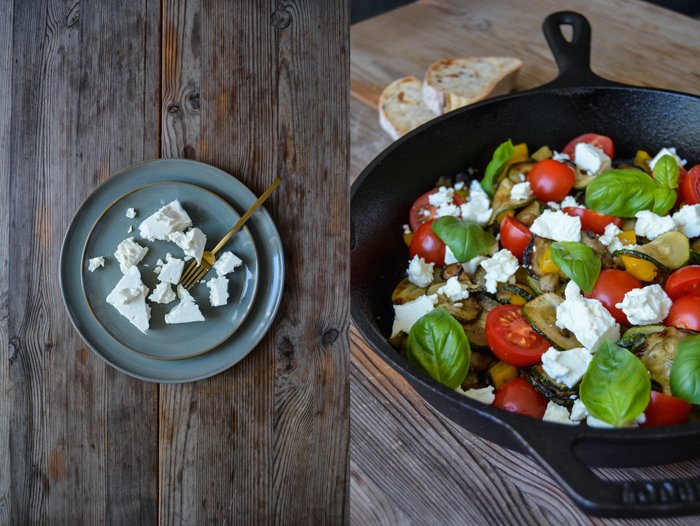
Mediterranean Roast Vegetables with Tomatoes, Feta and Basil
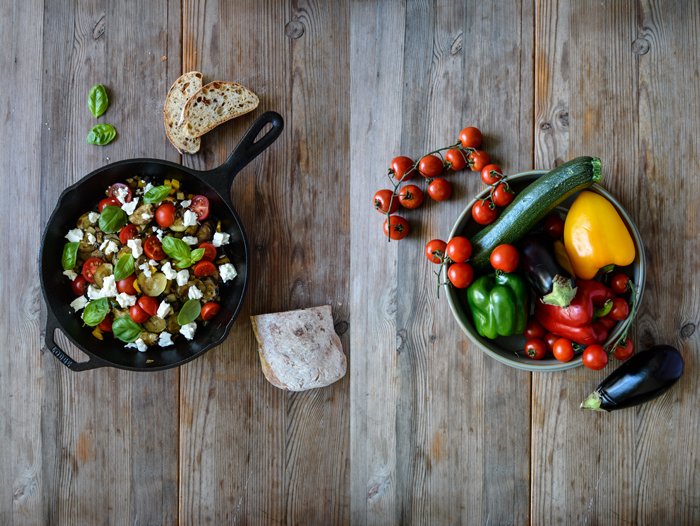
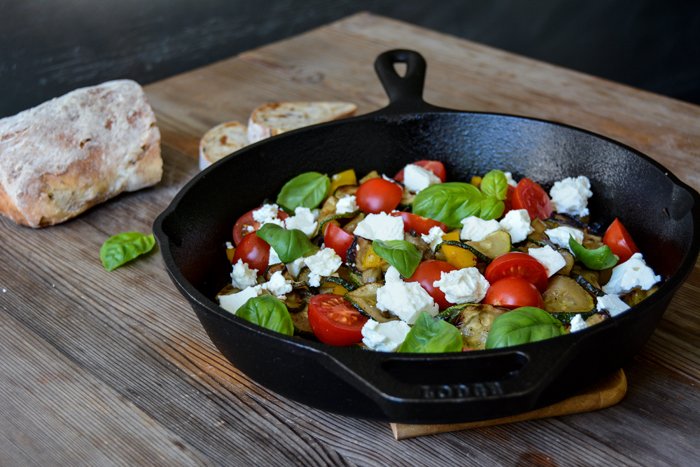
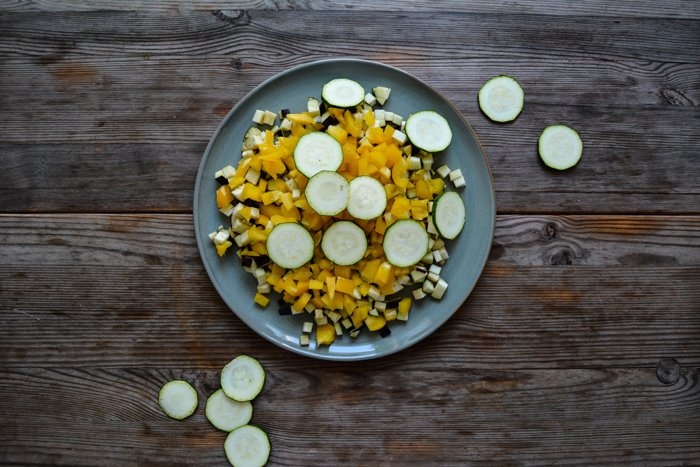
The secret behind this scrumptious Mediterranean pan lies in the separate cooking of the vegetables. First, I sautéed sliced zucchini until golden but with bite, and then I cooked a large handful of aubergine and bell pepper chopped into tiny cubes. The small size let them release a little more of their juices in the hot pan, within minutes they turn into a chunky stew. Mixed with the zucchini, it just needed a bit of salt and pepper and it was done.
You could easily leave it at that but I was after a colourful pan full of fresh flavours. In summer, I like the combination of cooked and raw vegetables, so my pan got a crunchy topping with cherry tomatoes, milky feta chunks and fresh basil leaves. All the wonderful aromas of a Mediterranean garden on a plate! There are a million variations of this dish, you could top it with lemon ricotta (instead of the feta cheese) and make a moussaka, mix in some spaghetti for a richer meal or cook all the ingredients in the oven, like my vegetable casserole. So many options, so many warm months and ripe and tasty vegetables ahead of us. Kitchen life is just great at this time of year!
Mediterranean Roast Vegetables with Tomatoes, Feta and Basil
For a lunch for 2 you need
zucchini, sliced thinly, about 200g / 7oz
olive oil
salt and pepper
garlic, crushed, 2 cloves
aubergine, cut into tiny cubes, about 200g / 7oz
medium bell pepper (colour of your choice), cut into tiny cubes, 1
cherry tomatoes, cut in half, 8
feta cheese, broken into chunks, about 100g / 3 1/2oz
fresh basil leaves 10
Heat a slash of olive oil in a large pan and sauté the zucchini on medium-high heat until golden brown with a little bite. Season with salt and pepper to taste, transfer to a plate and set a side.
Put the pan back on the heat, pour in a splash of olive oil, stir in the garlic and let it turn golden (not brown!) for about 1 minute. Add the aubergine and bell pepper, season with salt and pepper and sauté until golden and soft. Take the pan off the heat, mix in the zucchini and tomatoes and season to taste. Stir in the feta and basil and serve immediately, or as a warm salad, with fresh ciabatta bread.


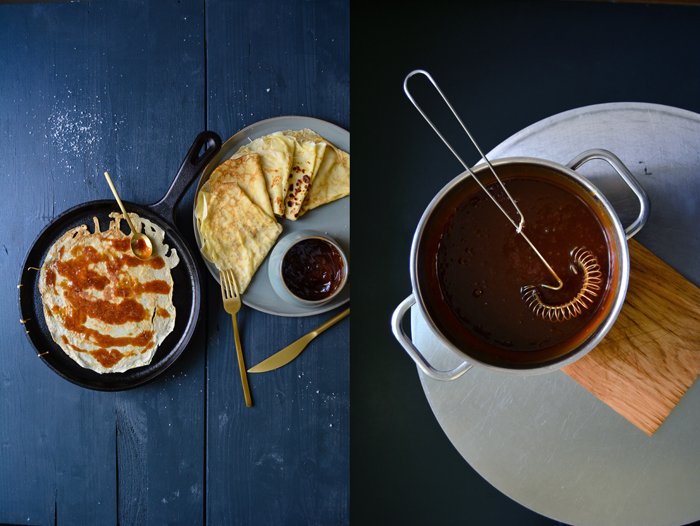
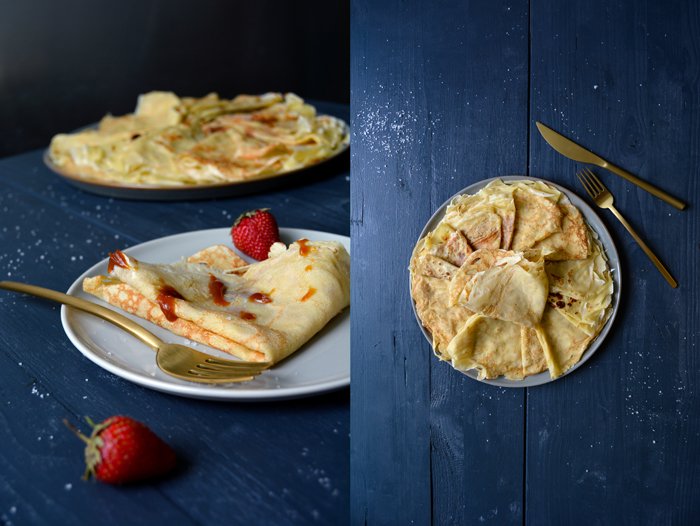
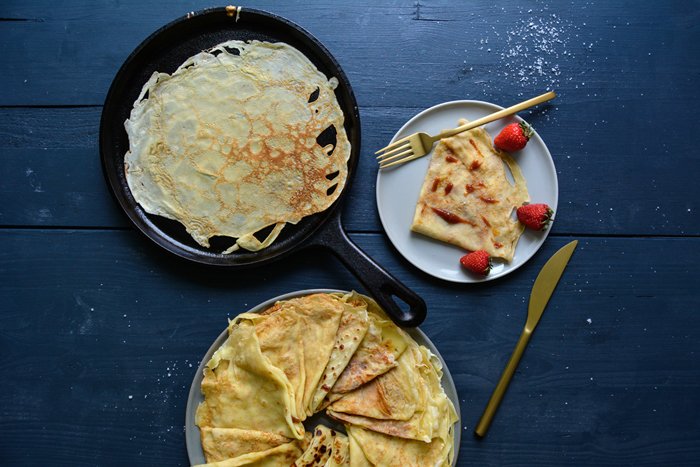
French Breakfast: Crêpes Caramel au Beurre Salé
An unexpected change of plans led to the most delicious French breakfast: thin crêpes with salted butter caramel! And the only reason why we could enjoy this treat was because I failed miserably at another recipe, a complete kitchen failure.
I tried to remake the popular galettes caramel au beurre salé from the Mont Staint Michel region in Normandy which I indulge in with the greatest pleasure whenever I can get hold of them. It's a simple shortcrust cookie with a buttery hint of salted caramel. I didn't expect it to be such a big deal, I had a clear idea of the texture, I did some research of course and then I got started. My kitchen activities began with the preparation of the crème caramel au beurre salé, a thick and luscious salted caramel cream which turned out really nice. At that point, I was still absolutely happy with the result and I continued mixing the dough for the cookies with great confidence but it went downhill from there! When I took the galettes out of the oven I had to face the disappointing truth, my adaptation of the delicate French caramel cookie was too thick and not crunchy and crisp at all. Although the butter caramel was only supposed to be mixed into the dough, I tried to save my creation by topping the baked cookies with a generous dollop of my tasty crème caramel butit was hopeless. I gave up, which doesn't happen very often.
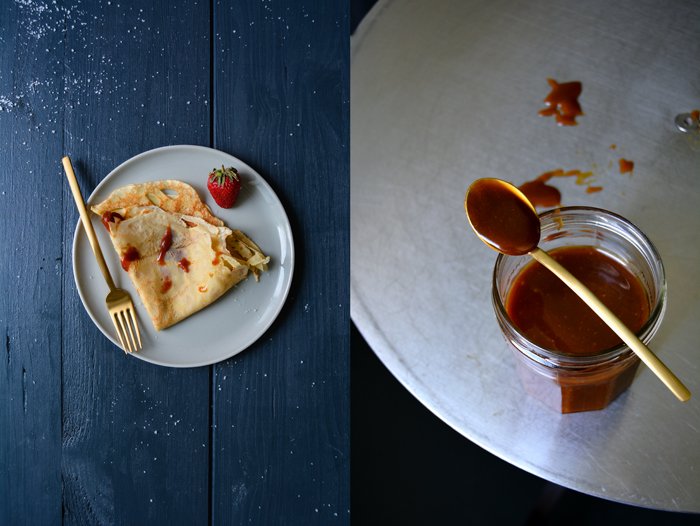
To overcome my culinary disappointment, I took the caramel filled jar out of the fridge and enjoyed a spoonful of it to make amends for the complete disaster. It helped right away, my inspiration came back and reminded me of another French classic, thin breakfast crêpes would be perfect with my delicious caramel. It was so good that I almost forgot about my unpleasant incident, we savoured and emptied the plates down to the last crêpe.
I haven't completely given up on my French caramel cookies but I think I could do with some help: if you are experienced in the cuisine de la Normandie and familiar with galettes caramel au beurre salé and if you know about a satisfying recipe, I'd be more than thankful if you got in touch to bring this kitchen story to a successful ending!
And some more news at the end: I was interviewed by Yahoo Food, they asked me to take over their Instagram this weekend to share a little forecast of the delicious food I'll be eating in Malta next month. For the interview, click here, and here you can follow me on Yahoo Food's Instagram.
Crêpes Caramel au Beurre Salé
You won't need all the caramel for the crêpes, you can keep the leftovers in a jar in the fridge and use it for ice cream and cakes.
For about 20 crêpes (for 4-6 people) you need
For the salted butter caramel - crème caramel au beurre salé
heavy cream 200ml / 3/4 cups and 3 tablespoons
icing sugar, sieved, 175g / 1 3/4cups
butter (unsalted) 90g / 3 1/4oz /1/3 cup and 1 tablespoon (if you use salted butter you can leave out the fleur de sel)
fleur de sel 1/3 teaspoon, to taste
In a saucepan, warm up the cream, take it off the heat before it starts boiling.
In a medium sized pot, melt the sugar on medium heat until golden brown and liquid, it will take a few minutes. Mind that it doesn't burn. Slowly pour the warm cream into the caramel, be careful as it will bubble up and rise. Keep the heat on medium, add the butter and salt and and whisk gently until the caramel and butter melt and the mixture is even, it will take a few minutes again. Take the pan off the heat, season with salt to taste and set aside.
For the crêpes
plain flour, sieved, 260g / 9 1/4oz / 2 cups
granulated sugar 50g / 1 3/4oz / 1/4 cup
a pinch of salt
organic eggs 4
milk 0.5 l / 2 cups and 1 tablespoon
butter, to cook the crêpes
Mix the ingredients for the crêpes to a smooth dough (with an electric mixer) and let the batter sit for 10 minutes.
In a heavy (or non-stick) pan, heat half a teaspoon of butter. Pour in a ladle of the dough, holding the pan in your hand and turning it so that the dough spreads evenly and very thinly. The temperature should be on medium-high, the crêpes won’t need more than 1 minute on each side once the heat is set right. When the crêpe is slightly golden on both sides, take the pan off the heat (or spread the crêpe on a large plate) and sprinkle with a little of the caramel. The taste is quite strong, so start with 1/2 teaspoon and add more to taste. Fold it twice and continue with the next batch. You should always melt 1/2 -1 teaspoon of butter in the pan before you fry the next crêpe. Enjoy warm and sprinkle with more caramel and a pinch of fleur de sel on the plates. Strawberries go very well with it!


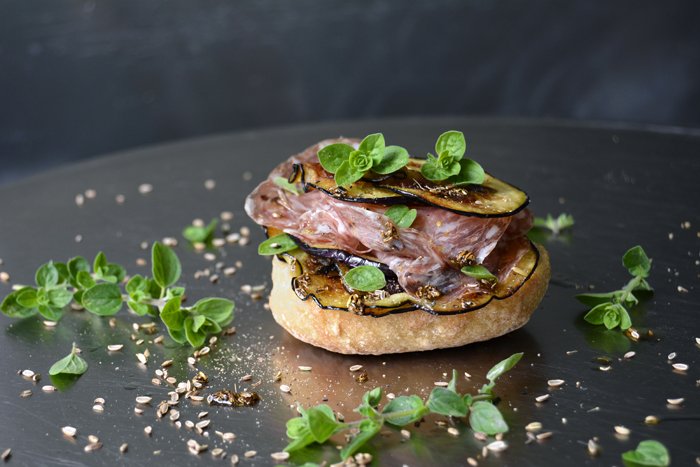
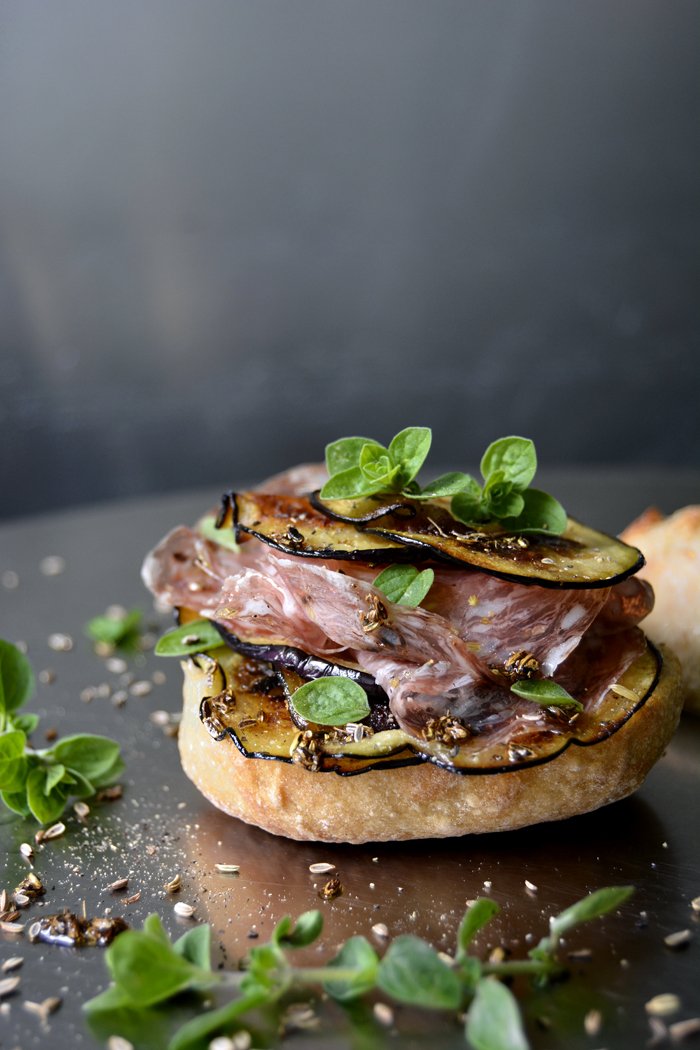
Sautéed Aubergine and Salami Sandwich with Fennel Oil and fresh Oregano
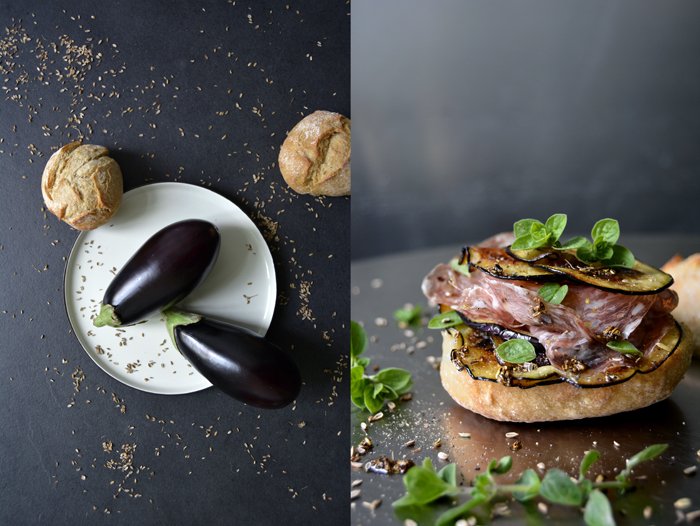
It happened at one of our traditional Sunday pizza nights, we had the glorious idea to drizzle fennel oil over our cheesy salami, aubergine composition and the result was even better than we had expected. I had bought a rather simple salami for this cosy sofa dinner, it was organic but without the addition of any outstanding herbs or spices, just the pure, distinct flavour of the dried sausage.
So we started playing around with the ingredients, as every Sunday when it comes to topping our pizza. I cut an eggplant into very thin slices and took out the sauce pan to warm up a splash of olive oil with a teaspoon of my Maltese fennel seeds, Buzbiez in Maltese. I bought them last summer from a lady at the market in Marsaxlokk. Soon, the jar will get refilled when we go back to our Mediterranean island in a month, just the thought of it puts a big smile on my face! Back to the oil, I let the spice spread its aroma on the heat until the seeds started sizzling, it's important to watch them as they shouldn't get dark, when they burn, they taste bitter. When I ate the first bite of the baked pizza I knew that this combination would have to be translated into a sandwich. And here it is: thin slices of aubergine sautéed in a pan, topped with Italian salami and sprinkled with fennel oil and fresh oregano. Wonderful!


Sautéed Aubergine and Salami Sandwich with Fennel Oil and fresh Oregano
For 2 sandwiches you need
white, rustic buns, cut in half, 2
medium aubergine, sliced very thinly, 1 (about 18 slices) (the thickness should be just before see-through, if they are too thin, they'll burn)
olive oil
salt and pepper
fennel seeds, lightly crushed in a mortar, 1 teaspoon
salami, preferably Italian (like salame al finochietto), 6-8 very thin slices (of a medium sized salami)
fresh oregano leaves, about 2 tablespoons
Heat a generous splash of olive oil in a heavy pan and sauté the sliced aubergine in batches on medium heat until golden brown on both sides. Spread them evenly, they shouldn't lay on top of each other. Mind that you'll have to add some more olive oil when you turn them around and watch them well as they can burn within seconds. Lay on kitchen paper to remove excess oil, season with salt and pepper and set them aside when they're done.
In a saucepan, heat 3 tablespoons of olive oil with the fennel seeds. Take the pan off the heat as soon as the seeds start sizzling and mind that they don't burn.
Brush the bottom side of a bun with the infused oil, lay about 6 slices of sautéed aubergine on top and continue with about 3-4 slices of salami. Sprinkle with the roasted fennel seeds and a little of the oil, finish it off with the fresh oregano leaves and close the bun. Enjoy!


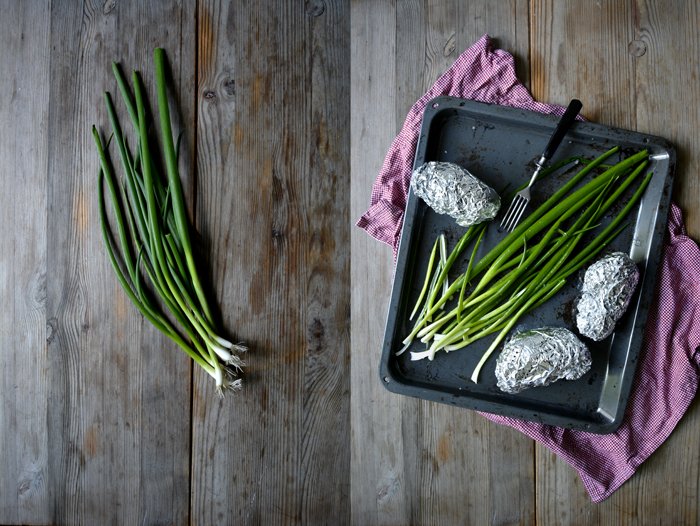
Roast Smashed Potatoes with Spring Onions, Garlicky Sour Cream & Sausages

There are two ways to enjoy this recipe: if the weather is nice and sunny, take out the barbecue and make it an outdoor treat, in case summer shows its grey and rainy face, just turn on the oven. Either way, I would always pre-cook the potatoes before you wrap and bake them in foil but I must confess that I'm an impatient soul, it's up to you. I've waited hours at BBQ's for the potatoes to be done, to avoid stretching my hunger unbearably I started to cook them beforehand until they are almost done. It's a bit sneaky, I know, but it tastes just as good.
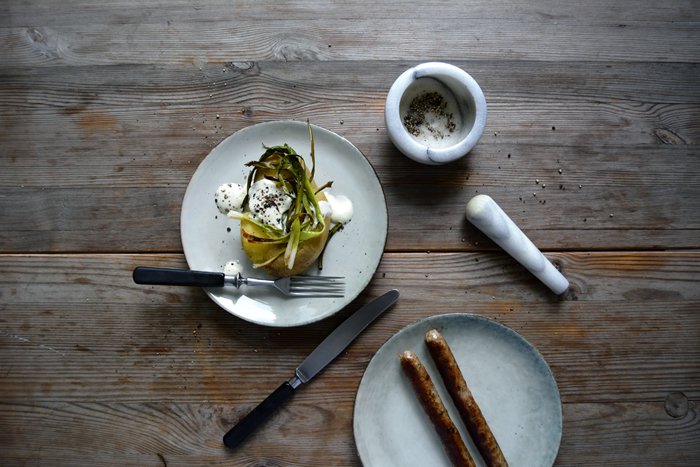
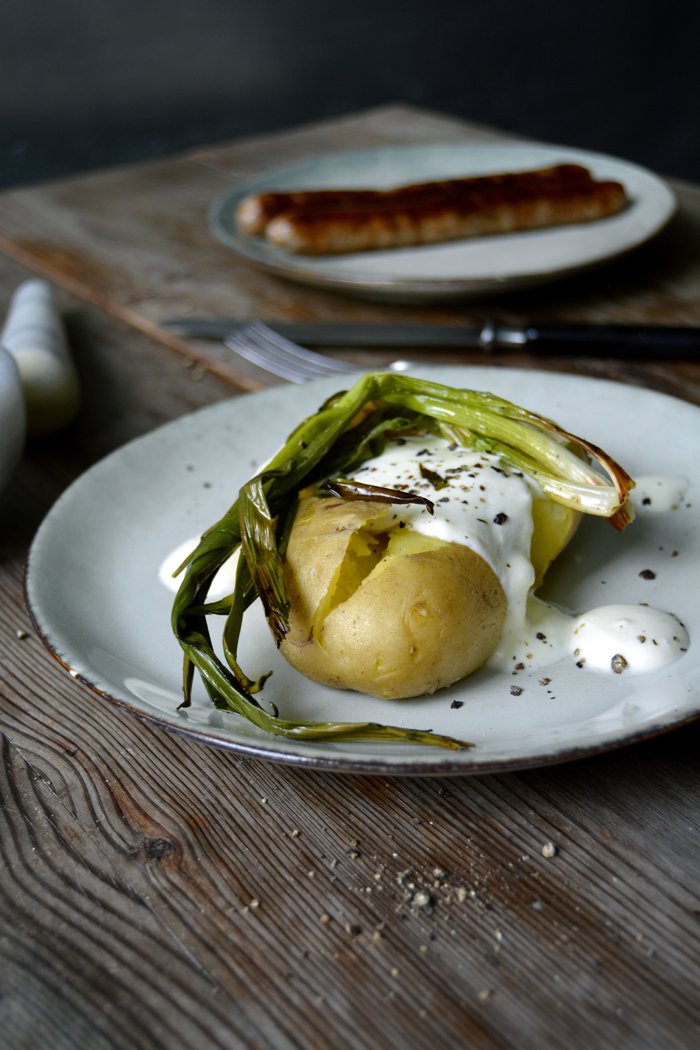
This combination is a classic from the grill: potatoes, onions, sausages and a creamy dip. I smashed the sweet and soft root with my hand and topped it with one of the most delicious (and simple) dips I've eaten this spring, it's just sour cream whipped with olive oil, crushed spring garlic, salt and pepper, it's divine! It feels like a hint of mayonnaise which goes so well with potatoes but without its eggy heaviness. The roasted spring onions add a complementary spiciness and the German sausages are a BBQ must for me. I love my glass of wine for dinner but beer is the right choice in this case!


Grilled Smashed Potatoes with Roast Spring Onions, Garlicky Sour Cream & Sausages
For 2 you need
For the sour cream dip
sour cream 110g / 1 1/2 cups / 3 3/4oz
olive oil 1 tablespoon
fresh spring garlic, crushed, 1 small clove, to taste
salt and pepper
Whisk the ingredients for the dip and season to taste.
For the potatoes and onions
large, waxy potatoes with thin skin, rinsed and scrubbed, 2-3
small spring onions, cut in half lengthwise, 6-9
olive oil 1 tablespoon
coarse sea salt
black peppercorns, crushed in a mortar
Cook the potatoes in salted water until almost done, rinse with cold water and let them dry for a few minutes. Wrap in aluminium foil with a little sea salt and prick with a fork.
Coat the spring onions with the olive oil.
Option 1 - Bad Weather
Set the oven to 220°C / 430°F (top / bottom).
Spread the spring onions and the wrapped potatoes on a baking sheet, sprinkle the onions with salt and pepper and roast for about 15 minutes or until golden brown and crisp at the ends and the potatoes are soft (check with a fork). Turn the onions once while roasting. Unwrap the potatoes, smash them on the plates with your hand, top with a dollop of the dip, the roasted onions and a little more pepper.
Option 2 - BBQ Weather
Lay the wrapped potatoes close to the coal for a few minutes until soft, mind that they don't burn. Lay a piece of aluminium foil on top of the BBQ, prick the foil so that it has a few holes and spread the onions on top. Season with salt and pepper and grill until golden brown. Serve as described in the bad weather option.
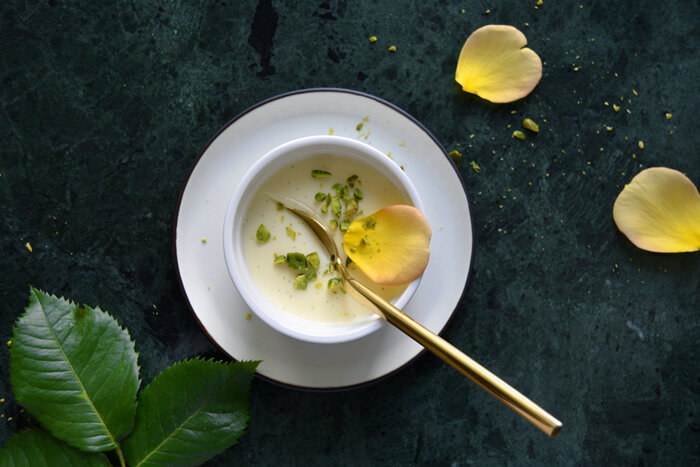
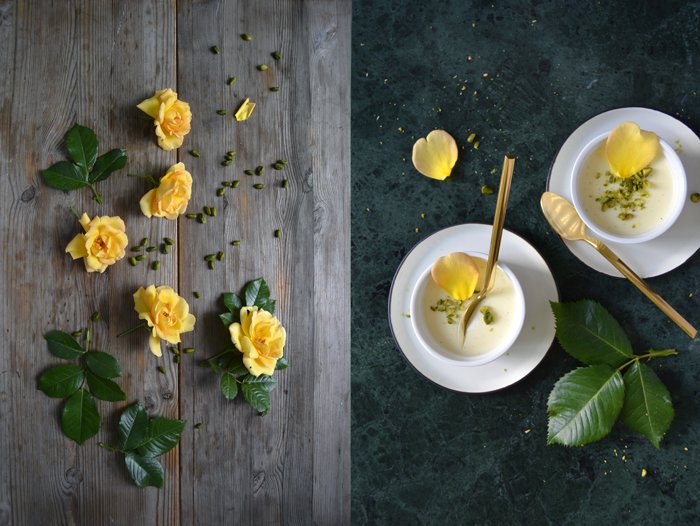
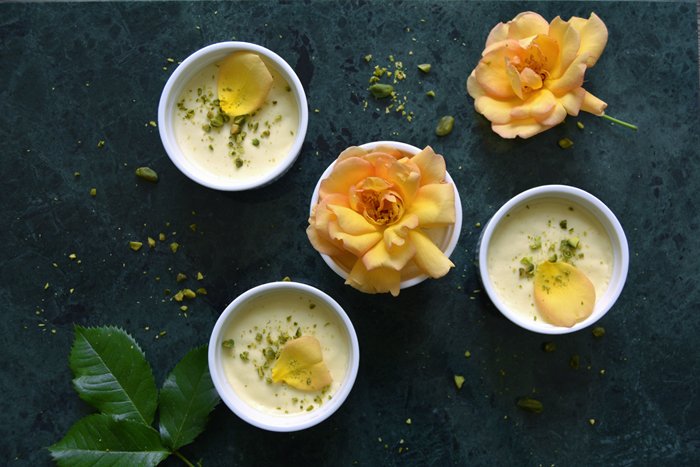
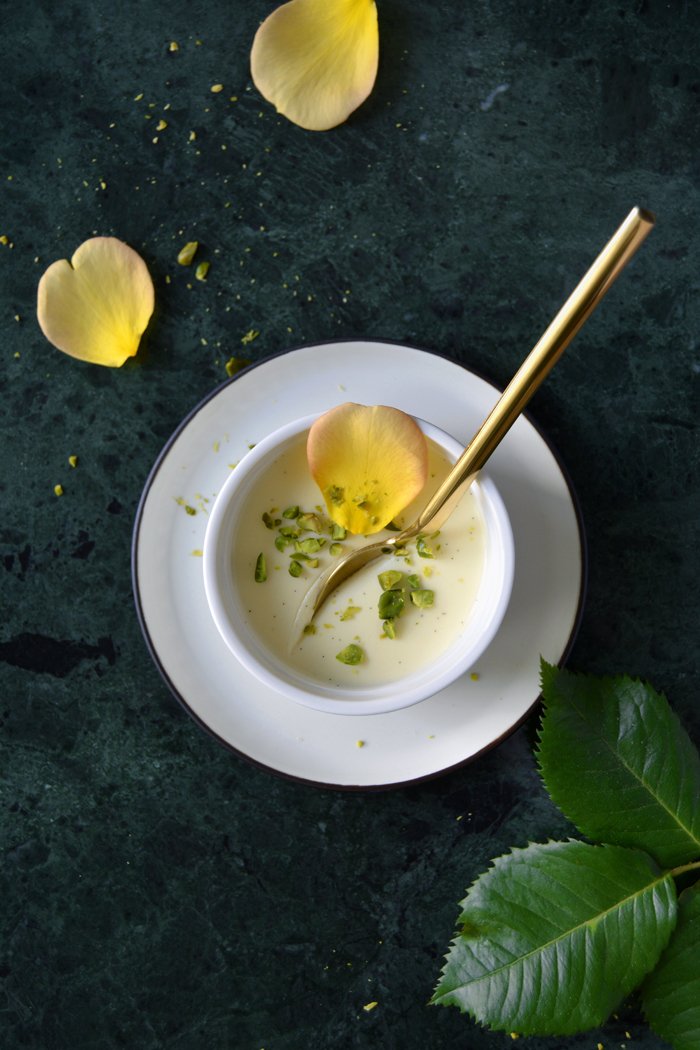
Rosewater Panna Cotta with Ricotta and Pistachios
Although I'm much more into cakes, pies and cookies than classic desserts, I can enjoy a good panna cotta once in a while with great satisfaction. It only needs a strong addition, chocolate doesn't work for me here but fruits or fragrant flavours. Rosewater, orange blossom water, lavender, rosemary or spices like aniseed, cinnamon or cardamom. Anything which gives the pure milky taste of this basic cream a bit of a punch, a more defined direction is not only welcoming but also necessary to get me hooked on this dish.
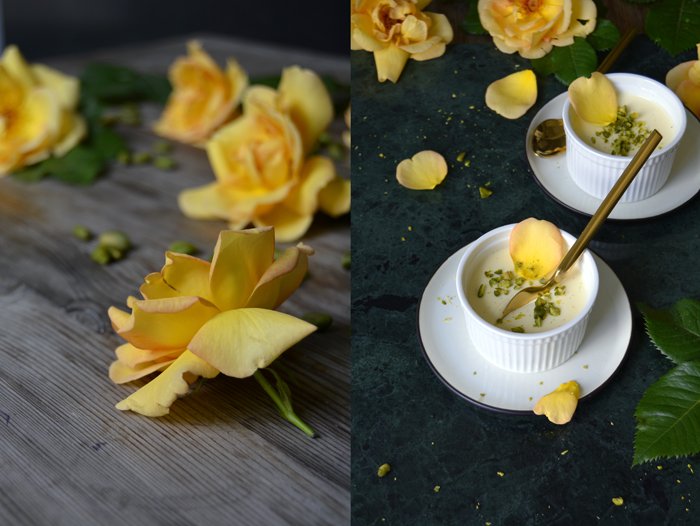
Today's recipe definitely manages to get my full attention, the flowery hint of delicate rosewater is more than tempting. It's important that you adjust the amount of the fragrant infusion to your taste though, every product tastes different and varies in intensity. My rosewater is organic, it has no artificial or overpowering nuances, so I could whisk 5 teaspoons into the cream without feeling knocked down by its aroma. Especially in combination with the soft nuttiness of the topping, unsalted pistachios, it reveals a warm, summery feeling. I also stirred in some fresh ricotta which makes it a bit lighter and fits the season.
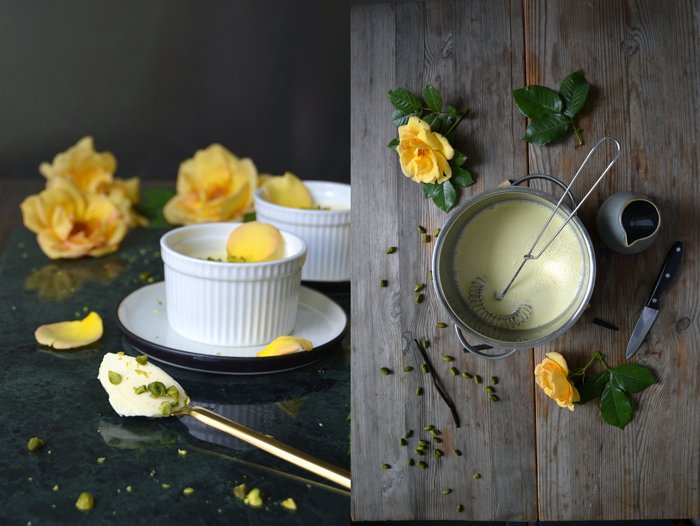
There's no reason for my preference of baked desserts, the list of recipes on eat in my kitchen can't hide that I totally fall for anything baked. Every few days, I feel the need to eat something sweet that includes pastries, cake doughs and batters. I adore the smell in my kitchen when there's a cake rising in the oven. The whole process of baking food, the warm air around the oven, it feels quite archaic, I like that. But then there are those days which call for different treats, especially in summer, and even more so when we go to Malta, living above 30°C / 86°F constantly day and night, that's the right time for creamy desserts: flans like the Spanish crème caramel, French creme brûlée, Bavarian cream or the wonderful Italian panna cotta. They tend to be lighter and less filling after an extensive dinner. And the preparation takes less time, which makes it a convenient crowd pleaser. You just have to time it well and keep in mind that it has to set in the fridge for a few hours which is another reason to give it a go at your summer dinner parties. You just open the door of your fridge, pull out the ramekins and sprinkle them pretty - done!

Rosewater Panna Cotta with Ricotta and Pistachios
For a small dessert for 4 or for a hungry couple (like us) you need
gelatine sheets (size 7 1/2 x 11 1/2cm / 3 x 4 1/2") 2 1/2 sheets
heavy cream 240ml / 1 cup
milk 110ml / 1/2 cup
a pinch of salt
granulated sugar 40g / 3 generous tablespoons
vanilla pod, scraped, 1
quality rosewater (preferably organic) 5 tablespoons, to taste
fresh ricotta 50g / scant 1/4 cup
unsalted pistachios, chopped, 1 1/2 tablespoons, for the topping
rose pedals, for the topping (optionally)
Break the gelatin sheets in half and soak in a bowl of cold water for 5 minutes.
In a sauce pan, bring the cream, milk, salt, sugar and vanilla to the boil. Take the pan off the heat once it's bubbling and squeeze in the gelatin, add the whole crumbled sheets and whisk until dissolved. Add 2 teaspoons of rosewater and the ricotta and whisk until combined. Add more rosewater to taste (I stopped at 5 teaspoons) and let the mixture cool in the pan (whisk it a few times while cooling). Once the cream is cool (it will still be liquid) pour it into 4 small ramekins, cover with cling film and refrigerate for about 4 hours (or overnight) or until the panna cotta is set. Sprinkle with chopped pistachios and rose pedals, you can also serve it with fruits, strawberries are great!


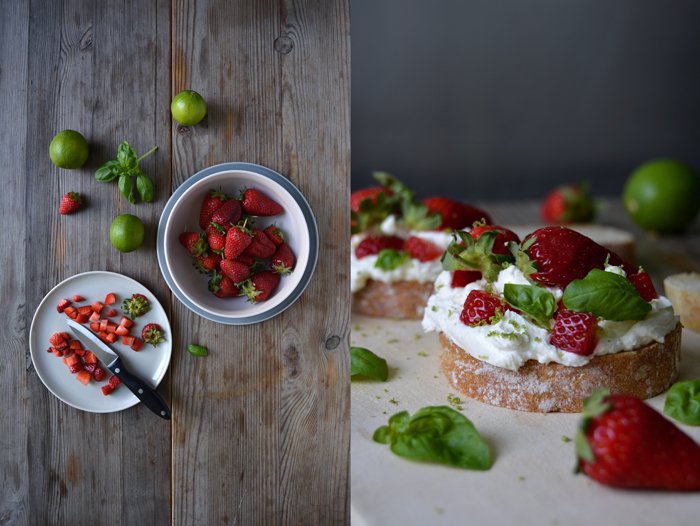
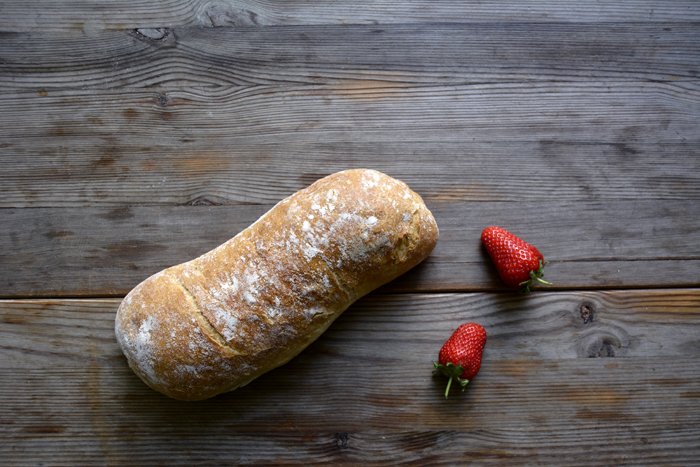
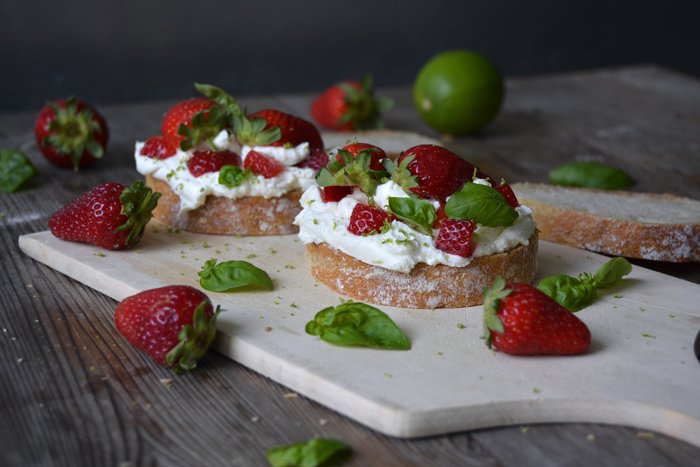
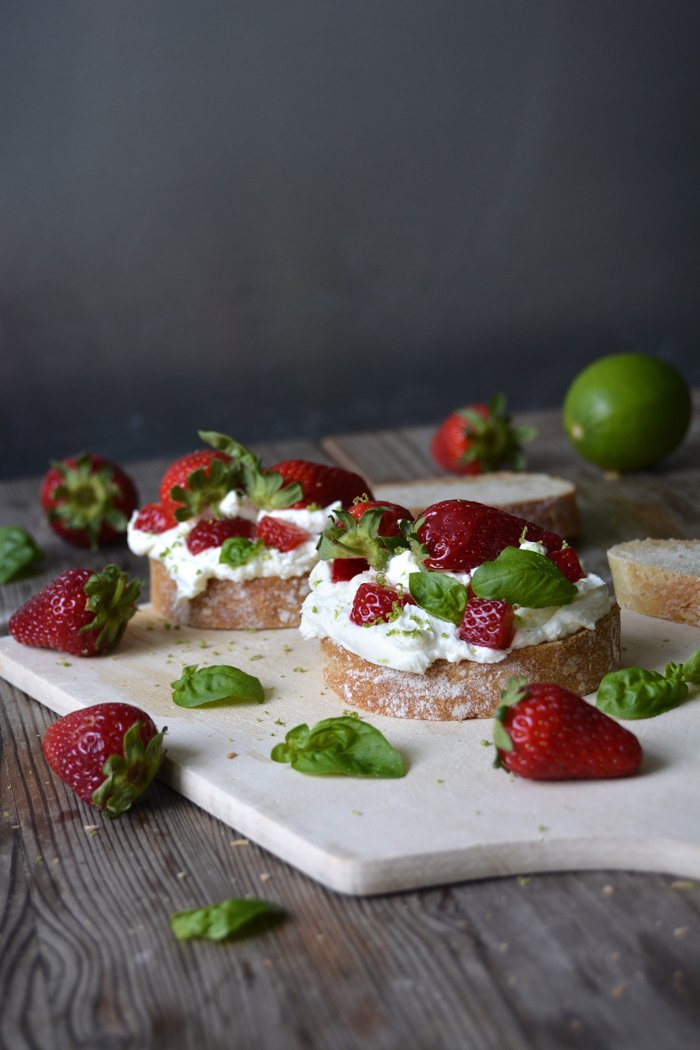
Strawberry and Lime Chèvre Ciabatta Sandwich with Basil
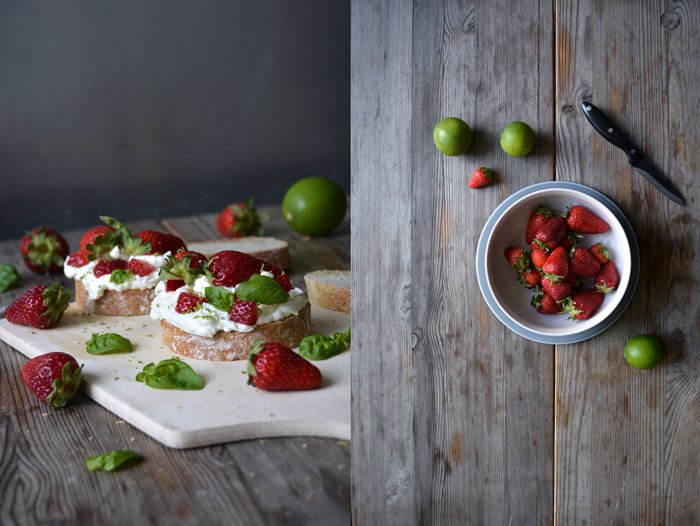
At the moment I can enjoy the best strawberries - sweet like honey and so good that you could just nibble them as they are, pure and without any distracting addition. I have done that excessively but now it's time to get a bit playful with this lovely fruit.
As summer is nearing, I like to simplify my recipes, less ingredients, less work yet still delicious and the ultimate bliss while I'm sitting at the open kitchen window with a glass of rosé wine in front of me and a friend to chat with. Now is the time for easy nibbles, good bread and cheese, fresh herbs, raw fruits and vegetables, and aromatic olive oil - pure, natural flavours.
When my mother was here a couple weeks ago, I did a lot of recipe testing together with her. All those different flavours, and indulging in so many dishes for days, finally called for a little break for my tastebuds. I felt like something simple, like a juicy ciabatta sandwich, so I whipped up some chèvre with a little lime zest, generously spread it on top of the oily bread and covered my perfect summer sandwich with strawberries and fresh basil. First I wasn't sure if the combination of chèvre and citrus would work, but there was no need to worry, they are a perfect match!
This sandwich has been featured by Food52!

Strawberry and Lime Chèvre Ciabatta Sandwich with Basil
For 6 open sandwiches you need
fresh ciabatta bread 6 small slices
fresh chèvre (or any other soft goat cheese) 200g / 7oz
heavy cream 4 tablespoons
lime zest 1/4 teaspoon, plus a little more for the topping
strawberries, quartered, 150g / 5 1/4oz, plus 6 fruits cut in half for the topping
fresh basil leaves a small handful, for the topping
Whisk the chèvre, heavy cream and lime and adjust to taste. Add more cream if necessary, the texture should be smooth and thick. Divide the cheese between the bread, top with strawberries (quartered plus 1 fruit cut in half for each slice) and sprinkle with lime zest and basil. Enjoy!


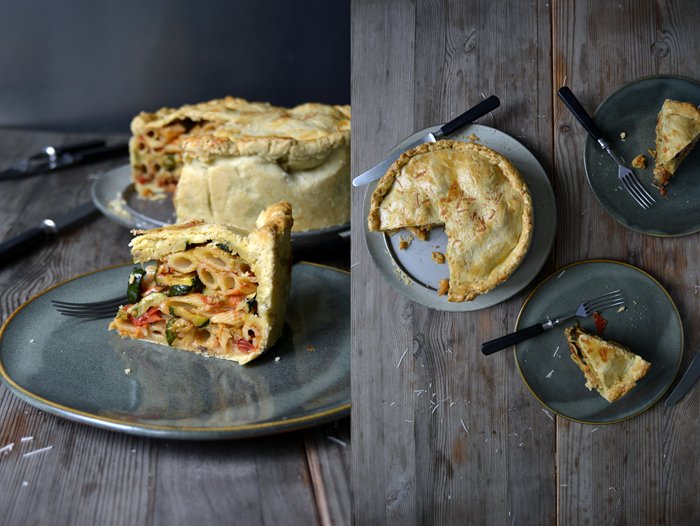
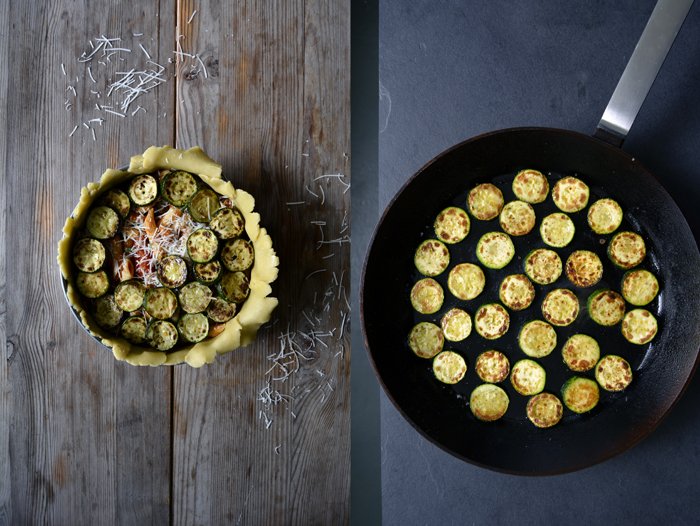
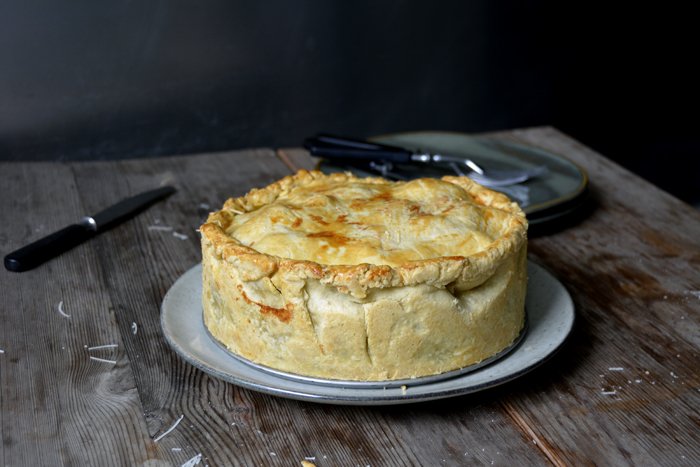
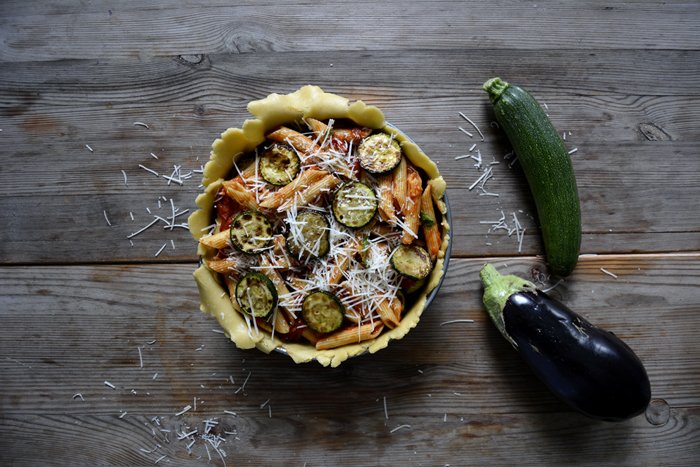
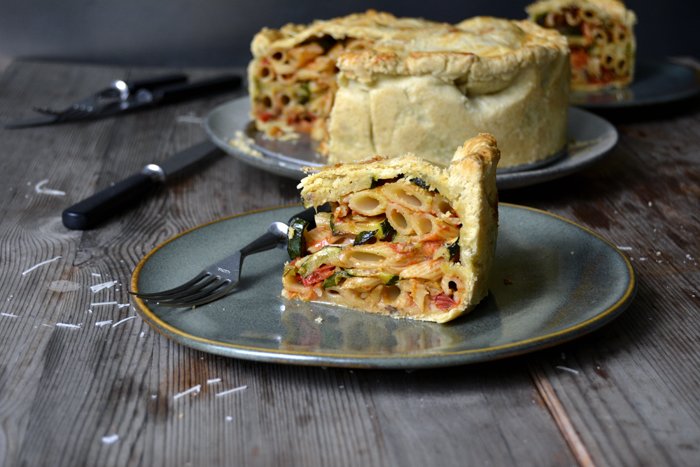
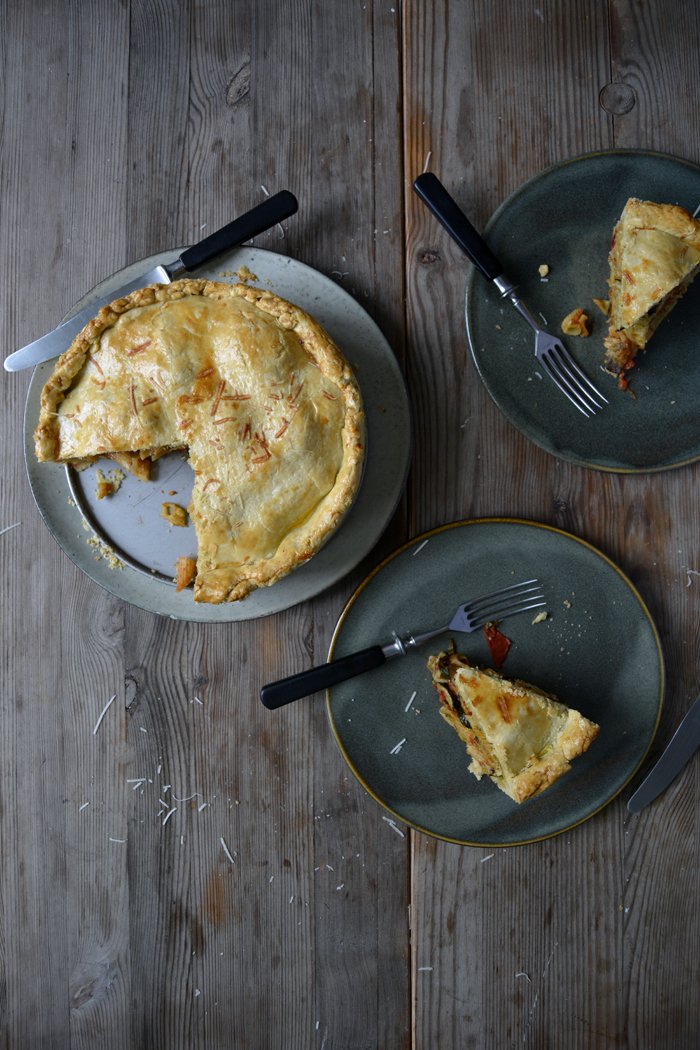
Timpana - Maltese Pasta Pie with Zucchini and Aubergine
After a long discussion in the kitchen with my (Maltese!) boyfriend, I have to accept that my recipe is not a traditional Maltese timpana - but it tastes just as good, even my man agreed with that!
Timpana is a Mediterranean dish which is very popular in Malta and also in Italy. It's penne or macaroni pasta mixed with Bolognese sauce baked in a pastry shell - basically a pasta pie. My version, however, left out the meat sauce. I cooked a concentrated red sauce with fresh tomatoes and lots of basil instead and sautéed zucchini and aubergine slices until golden and juicy. So, here's the blatant difference, I piled the tomato basil pasta with layers of the sliced vegetables and parmesan in a buttery pastry shell, which, to me, justifies calling this dish Timpana. But sometimes opinions about food differ, especially when it comes to tradition recipes.
Obviously I ate my first Timpana in Malta, bought from one of the tiny bakeries you find at almost ever street corner in the towns and villages. They sell this pasta dish cut into large squares along trays full of buttery Pastizzi and rich ricotta filled Qassata. It's a street food lunch classic on the island. When I ate a piece of this hearty dish for first time, I didn't quite understand the concept of wrapping pasta in crisp short crust. But after years of enjoying at least 1 or 2 pasta pies during my stay in the South I got used to this tradition bite by bite. It just makes you feel good, it's delicious comfort food that combines the best of a pie with lighter comfort of fruity penne. I must admit that I prefer the addition of vegetables, the Bolognese sauce makes it a bit too rich and heavy for my taste. But I won't argue about that ever again, especially not with a Maltese person!


Timpana - Maltese Pasta Pie with Zucchini and Aubergine
For a 20 1/2cm / 8" pie (a loose bottom spring form works best) you need
For the filling
penne pasta 250g / 9oz
medium tomatoes, chopped, 6 (about 650g / 1 1/2 pounds)
fresh garlic (preferably spring garlic) 1 clove
salt
olive oil
tomato pasta (Kunserva) 1 tablespoon
balsamic vinegar 1 tablespoon
pepper
fresh basil, thinly sliced, about 12 large leaves
medium zucchini, cut into 1/2cm / 1/4" slices, 2 (about 380g / 13 1/2oz)
medium aubergine, cut into 1/2cm / 1/4" slices, 1 (about 270g / 9 1/2oz)
Parmesan, freshly grated, 5 tablespoons plus 1 teaspoon for the topping
Cook the pasta in salted water until al dente, they should have bite. Let the penne cool.
On a chopping board, rub and press the chopped garlic under the blade of a large knife with 1/4 teaspoon of salt until you have a smooth paste. Heat a splash of olive oil in a large pan, add the garlic paste, chopped tomatoes, tomato paste, vinegar, salt and pepper and cook on medium-high heat for about 10 minutes until thick. Stir in the basil and season to taste, make sure that the basil comes through quite strong. Let the sauce cool completely before you mix it with the cooked pasta.
In a heavy pan, heat a splash of olive oil and sauté the sliced zucchini on medium-high heat for 1-2 minutes on each side until golden brown. Cook them in batches, they should be spread out in the pan and not on top of each other. Season with salt and pepper and set them aside to cool. Heat a generous splash of olive oil and sauté the sliced aubergine in the same pan. They will need a little more oil (you'll have to add some in between batches) and they will also need to cook a bit longer, they should be golden brown, soft and juicy. Season to taste and set them aside to cool.
For the pastry
plain flour 300g / 2 1/3 cups / 10 1/2oz
salt 1 teaspoon
butter, cold, 150g / 1 1/4 sticks / 5 1/4 ounces
egg yolks 2
cold water 2 tablespoons
For the glaze
organic egg yolk 1
milk 1 tablespoon
a pinch of salt
Combine the flour with the salt. Cut the butter into the flour with a knife until there are just little pieces left. Continue with your fingers and quickly rub the butter into the flour. Add the eggs and water and continue mixing with the hooks of your mixer until you have a crumbly mixture. Form 2 discs, dividing them roughly 2:1, wrap in cling film and put in the freezer for 10 minutes.
The pie
Set the oven to 200°C / 390°F (top/ bottom heat).
Whisk the egg yolk, milk and salt for the glaze.
Take the dough out of the freezer and roll out both discs between cling film, the bigger piece (about 32cm / 12 1/2") for the bottom and the smaller one as the lid for the pie.
Line the bottom and sides of the spring form pan. Spread 1/3 of the pasta mixed with the tomato sauce on top of the pastry, sprinkle with 1/3 of the Parmesan and cover with a layer of aubergine (let the slices overlap a little). Continue with a second layer of pasta (1/3), sprinkle with Parmesan (1/3) and cover with the zucchini. Finish with the remaining pasta, cheese and vegetables (if there are some left). Close with the smaller pastry lid and gently push the rim with your fingers to seal the pie. Brush the top with the egg glaze and sprinkle with 1 teaspoon of the cheese.
Bake the pie for 15 minutes before you turn the heat down to 175°C / 350°F and bake for another 50 minutes or until the pie is golden and baked through. Let the pie cool for at least 15 minutes before you cut it into pieces.
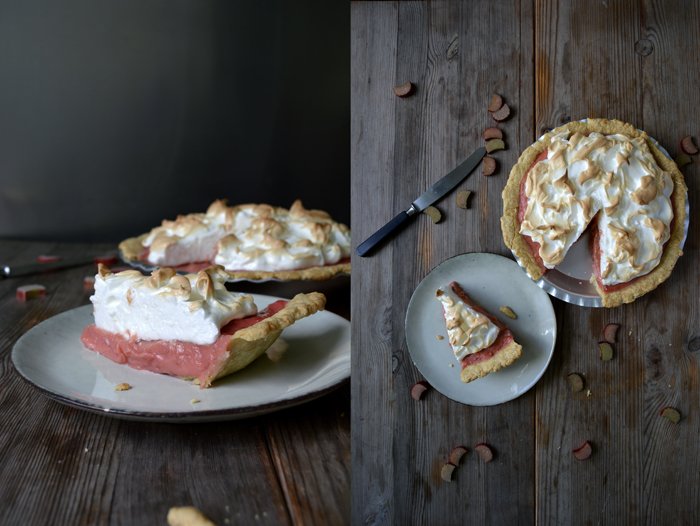
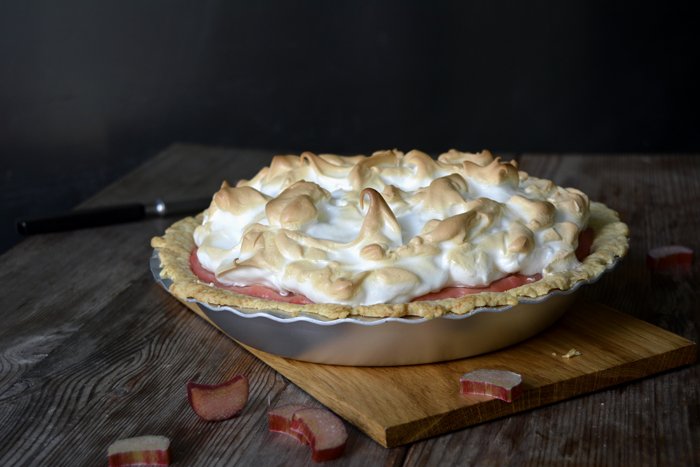
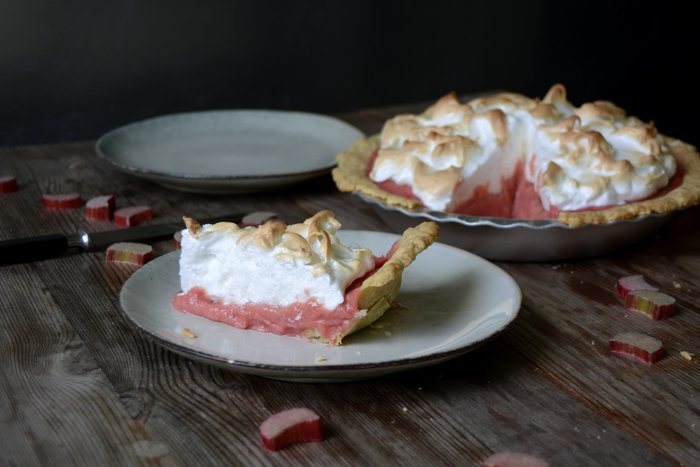
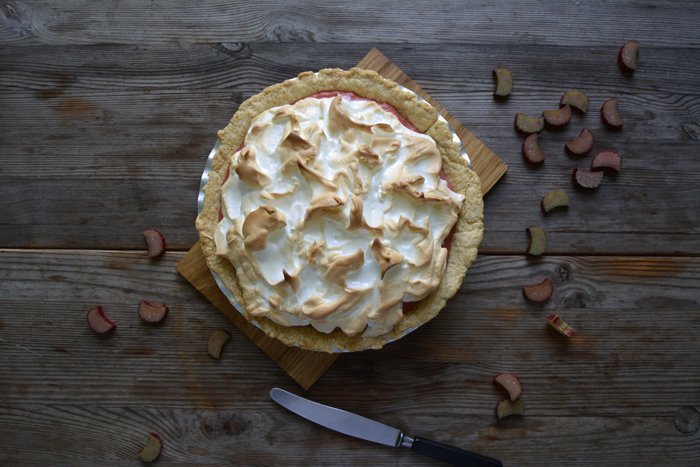
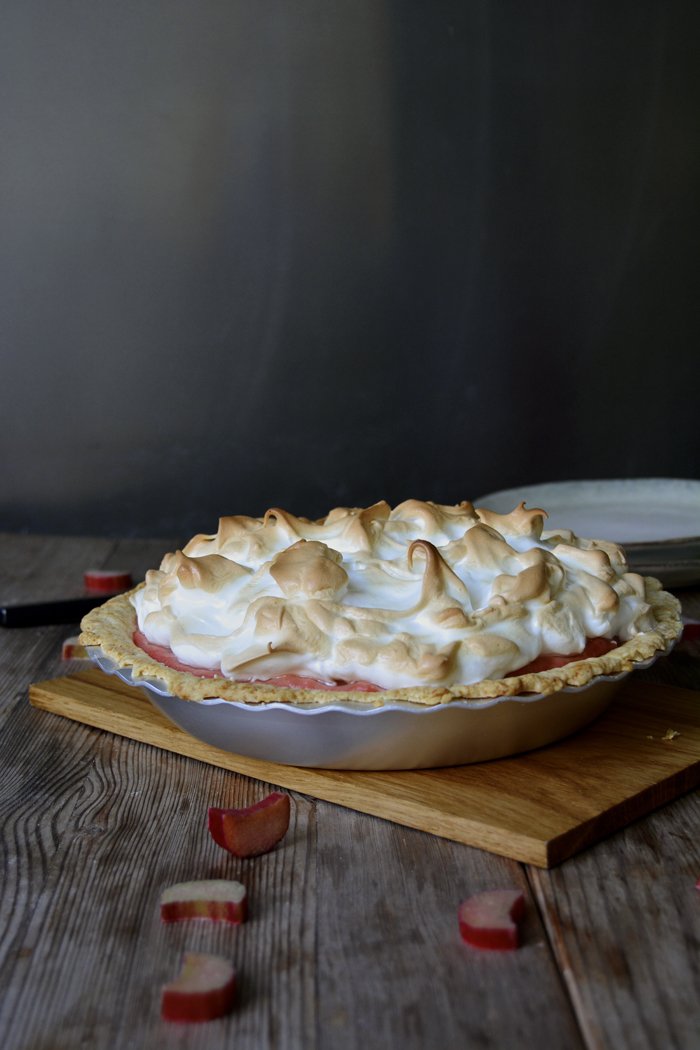
Cinnamony Rhubarb Meringue Pie

This has been my rhubarb week. I bought too many of the flavor-packed stalks for my rhubarb and leek gratin on Monday - their colorful beauty was just too tempting and I ended up grabbing (and buying) as much as I could fit in my hands. So the green and red pile of rhubarb on my marble counter top called for a compote, or even better, a pie!
I felt inspired by lemon meringue pie: an elegant pie made of a crumbly short crust, yet instead of lemon, topped with the fruitiest, cinnamony rhubarb curd you can imagine and finished off with a cloud of sweet meringue. I love lemon pie but learned that rhubarb lifts it onto another level, at least for my taste. It's such a fruity, sour, and slightly sweet and buttery composition.
A short note: The curd in the cool pie will be a bit more set than you see in the pictures, I cut it too early - tempted by my impatient appetite!
You can also find this recipe in my book 365: recipe no. 98!

Rhubarb Meringue Pie
For a 23cm / 9" pie (in a shallow pie dish) you need
For the pastry
plain flour 160g / 1 1/4 cups / 5 1/2oz
granulated sugar 1 tablespoon
salt 1/4 teaspoon
butter 90g / 3/4 stick / 3 1/4oz
water (cold) 3 tablespoons
Combine the flour, sugar and salt in a bowl. Cut the butter with a knife into the flour until there are just little pieces of butter left. Continue with your fingers and rub the butter quickly into the flour until combined. Add the water and continue mixing with the hooks of an electric mixer until you have a crumbly mixture. Form a thick disc, wrap in cling film and put in the freezer for 15 minutes.
Set the oven to 200°C / 400°F (top/ bottom heat).
Roll out the dough between cling film and line your pie dish with the flat pastry. Prick it with a fork and blind-bake in the hot oven for 15 minutes or until golden. Let it cool completely.
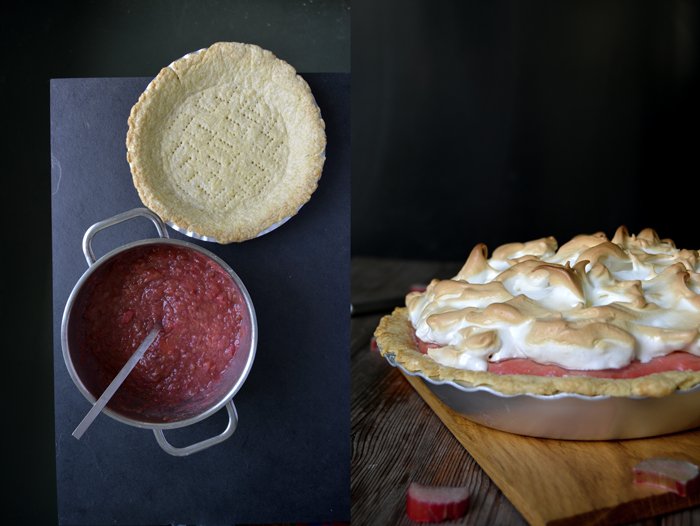
For the rhubarb curd
First you make a rhubarb compote which you then turn into a curd.
rhubarb, cut into 0.5 cm / 1/4" slices, 680g / 1 1/2 pounds
granulated sugar 150g / 3/4 cup / 5 1/4oz for the compote, plus 2 tablespoons for the curd
ground cinnamon 1/4 teaspoon
water 75ml / 1/3 cup for the curd, plus 1 tablespoon for the compote
butter 1 tablespoon
cornstarch 60g / 1/2 cup
pinch of salt
organic egg yolks, beaten, 3
For the compote, heat the rhubarb, 150g (3/4 cups) of sugar, cinnamon and 1 tablespoon of water in a large pot on medium heat until the sugar dissolves. Turn up the heat to medium-high and cook for 10 minutes (open, without a lid). Take off the heat and stir in the butter.
For the curd, whisk 75ml (1/3 cup) water, the cornstarch, 2 tablespoons of sugar and salt and add to the hot rhubarb. Bring to the boil and cook for 3 minutes on medium-high heat, stir once in a while. Take 1 tablespoon of this mixture and whisk into the beaten egg yolks, pour the egg-compote mixture back into the pot with the rhubarb. Bring to the boil, stir constantly and cook for half a minute. Take the pot off the heat, pour the curd into a bowl and let it cool completely. You could place the bowl on cooling pads to speed up the process.
For the meringue
egg whites 3
granulated sugar 80g / 1/3 cup and 1 tablespoon
a pinch of salt
Beat the egg whites with the salt, adding the sugar gradually while beating, until the white is stiff.
The pie
Set the oven to 200°C / 400°F (top/ bottom heat).
Pour the cool rhubarb curd on top of the pastry and finish it off with the stiff egg whites, you can form little peaks with a knife to create an uneven surface. Bake for 7 minutes or until the top is golden brown and crisp. Let it sit for about 30 minutes before cutting for the curd to set. The pie still tastes great the next day (after keeping it in the fridge) but it won't look as pretty.

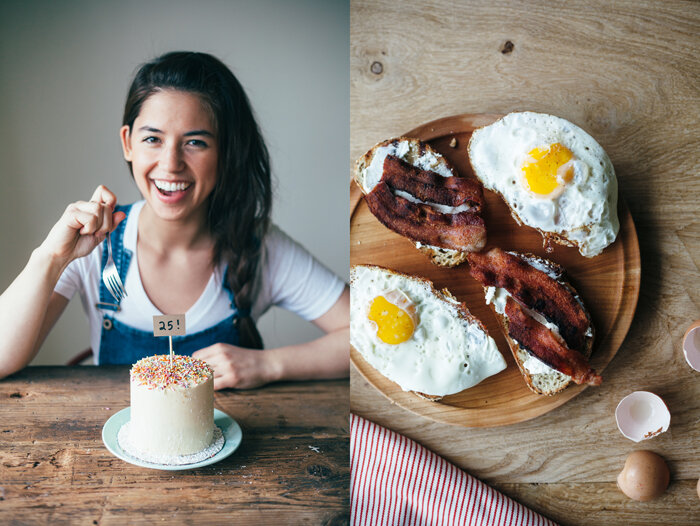
meet in your kitchen | Molly Yeh's Ricotta, Bacon & Egg Birthday Sandwich
Molly lives in North Dakota and I live in Berlin, there are more than 7000km (4000 miles) between us and this would be reason enough to accept that there's no way to meet her in her kitchen for a spontaneous kitchen chat, as this is the idea behind my meet in your kitchen features. But the way this girl cooks and bakes is irresistible! Her inspiring recipes, which she has shared on her gorgeous blog my name is yeh for 6 years and the way she talks about her life on a farm after years of living in New York made me rethink the importance of a physical meeting in real life.
Every time I read one of Molly's posts, when I see the pictures of such innocent creations as her Funfetti Cake, the cutest Pony Cake (a rosemary vanilla cake with blackberries and mascarpone) or her Pumpkin Cake and Semifreddo Push Pops, I feel like someone has put me right into another world. I turn into a little girl, pressing my face against the window of a candy store to get a glimpse of all the magic that happens on the other side - in Molly's kitchen. Just look at her Gingerbread Farm, a replica of the actual farm where she lives with her husband, there's no way one can't be touched by this masterpiece! Her husband called her a lunatic during the process, but I love her for her determination when it comes to her unique creations - sweet and savory. There's an unabashed ease in her recipes, infectious fun in her language and a pure honesty in her photography which makes her one of my favourite women in the blog world.
Molly studied percussion at The Juillard School in New York and is on tour with David T. Little and Royce Vavrek's opera Dog Days at the moment. She'll perform in LA in June, so if you happen to be in California, don't miss the chance to see her playing live (you can find the dates on her blog)!
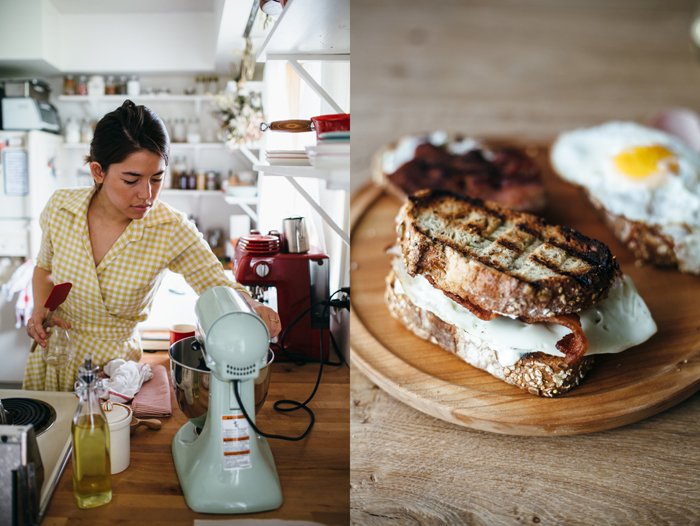
After chatting via email, reading her interview and seeing the images of her delicious ricotta, bacon and egg sandwich which she made for eat in my kitchen, I know that we'll definitely have to meet in the real world one day, either in Berlin, North Dakota or in Malta!
It's Molly's birthday this Friday and it became a tradition to eat a great (she says fatty) sandwich on her special day and I'm sure that there's also a special Molly Yeh cake to go with it, have a great one Molly!

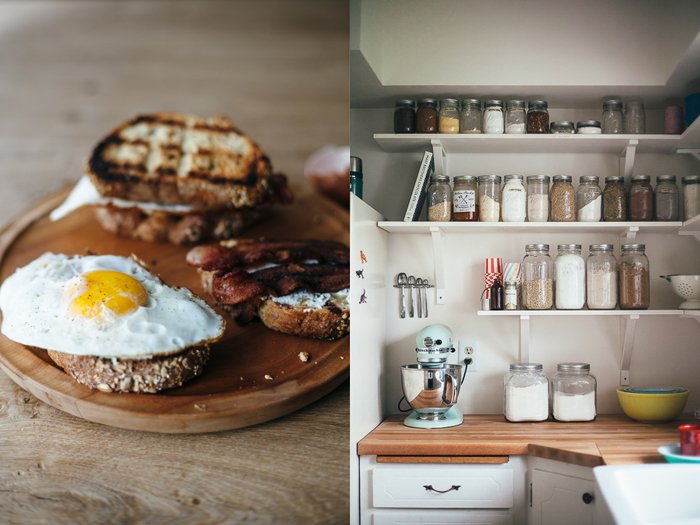
Ricotta, Bacon, and Egg Sandwich
It’s my birthday week! And every year on my birthday, I eat a fatty breakfast sandwich. This one gets a nice creaminess from ricotta, and while it’s a fairly simple recipe, it is absolutely next-level when it’s made with the freshest, best ingredients.
For each sandwich, you will need
thick cut bacon 2 slices
large egg 1
fresh whole grain bread 2 thick slices
coarse salt and black pepper
a smear of ricotta
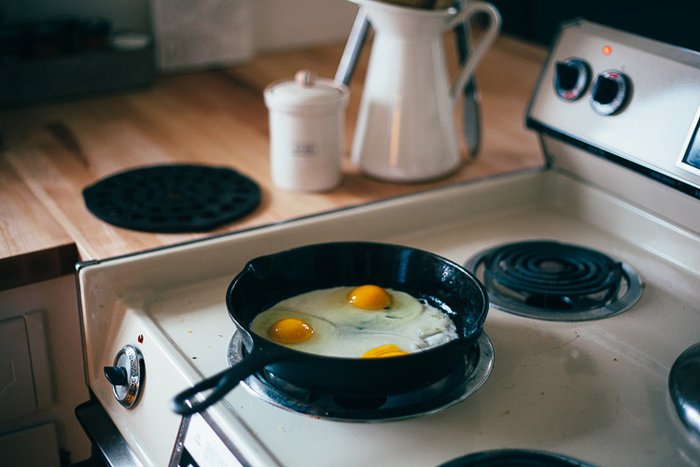
In a skillet, cook your bacon until crispy. Remove the bacon but keep the fat in the pan. Crack your egg in and cook it to desired doneness in the bacon fat. Set it aside. Grill the bread in the bacon fat (if the skillet dries up, add a little butter to the pan), salt and pepper both sides of the bread. Remove it from heat. Spread the ricotta on one slice of bread, sprinkle it with salt and pepper, top it with the bacon, place the egg on top, season the egg a bit with salt and pepper, and then place the other slice of bread on top. Enjoy!
You started sharing your life and recipes on your blog my name is yeh in 2009. Did the way you document parts of your life change over the past 6 years?
Oooh yeah, there are some really horrific and embarrassing posts. Don’t look in my archives, just don’t.
Your father is a musician at the Chicago Symphony Orchestra and you often travelled with him when he was on tour. Was he your biggest inspiration to study percussion at The Juillard School in New York?
He was definitely one of the biggest inspirations! Both of my parents really encouraged me to follow my love of hitting things (usually my mom’s pots and pans) and channel it into music. I think I really fell hard for classical music when I joined a youth orchestra near my hometown, and then going to Juilliard was my goal throughout high school. I loved training with the musicians there, being in New York, and having the same legendary ear training teacher that my dad had when he was a student there. She once called me by his name because we sat in the same spot, just 30 years apart.
At the moment you're on tour with David T. Little and Royce Vavrek's operaDog Days. What fascinates you about being on tour?
Being on tour is one of my favorite ways to travel because I’m not in full-time vacation mode, but I’m still on an adventure and I can explore when I’m not working. Being in full-time vacation mode makes me go a little bonkers after a few days (is that weird?), but on tour I can work a little, play a little, and just live my regular life but in a different city. I call it a work-cation. It’s so much fun.
You're from Chicago, you've lived in New York and now your life takes place on a farm in North Dakota. What do you miss the most about city life, what do you prefer about your life now?
I miss the food, my friends, and the music scenes, but the quality of life on the farm is what’s going to keep me from ever moving back. It’s so energizing that I feel like I can get every piece of work done that I want to, and the small town community here is really wonderful. If I had moved here in an age when we didn’t have the internet—to Facetime with my friends, live stream concerts, lookup copycat recipes for my favorite dishes from New York restaurants—it might have been a slightly different story. Just slightly.
You made Norwegian Lefse flatbread together with The New York Times food critic Sam Sifton in your kitchen, a traditional recipe from your husband's family. How did your partner's Norwegian roots influence your cooking?
It’s SO FASCINATING! There are so many Norwegian and Upper Midwest dishes that I’m learning about that are so great. Lefse is one of them. Hotdish is another. A lot of the new dishes that I’m learning are hearty, comforting meals that are perfect for the long winters here, and that type of food has always been my favorite. There is not a single unit of spiciness in sight, so my tolerance for spicy food has plummeted, but other than that, I’m so excited to be learning about all of these new dishes, and I love putting my spins on them, whether it’s adding flavors inspired by my roots or subbing in newer trendier ingredients like kale and ramps.
How did living on a farm change your kitchen activities?
I have a much bigger kitchen now, and more time. So I just do a lot more in the kitchen. And we also live outside of the range for delivery men, so there’s a lot more planning in advance to be done. We also have a garden and a rhubarb patch and an apple tree and we’ll be getting chickens soon, and all that jazz.
You combine Jewish and Chinese roots which your unique recipe creations often bring to light. What do you like about bringing these two culinary styles together?
They go really well together! Both cuisines pack a lot of carbs and comfort, and I grew up on both of them equally, so there’s a lot of nostalgia mixed in as well.
Who is your biggest inspiration in the kitchen?
My mom! Also all of my blogger friends.
How do you develop new recipes?
Sometimes I just figure out what I like and do it. Other times, if it’s a newer-to-me food or technique, I read everything that I can about that food and talk to people about it. I examine a lot of different recipes for that particular food, make notes of which aspects of certain recipes I like best, and then I start testing. I test a bunch and make sure every step and ingredient is as logical and as simplified as it can be, while still trying to maintain a delicious outcome.
What was the first dish you cooked on your own, what is your first cooking memory?
Probably microwaving hot dogs with cheese on them.
What are your favourite places to buy and enjoy food in New York and around your farm in North Dakota?
Whenever I go to New York, I must go to Hummus Place, Breads Bakery, Brooklyn Larder, and pretty much any pizza place. In North Dakota, there are a few great local places, like our town bakery, Dakota Harvest, and our town natural food market, Amazing Grains. I also love our pizza place, where you can order any pizza as nachos.
You share a sandwich recipe on eat in my kitchen. What was the best sandwich you ever ate and where?
Every time I eat a good bagel and lox, my eyes roll to the back of my head and it’s the greatest thing ever.
If you could choose one person to cook a meal for you, who and what would it be?
Josh Scherer, probably. It would be whatever his lunatic mind came up with at the moment.
You're going to have ten friends over for a spontaneous dinner, what will be on the table?
Mac and cheese.
What was your childhood's culinary favourite and what is it now?
Mac and cheese.
Do you prefer to cook on your own or together with others?
With others!
Which meals do you prefer, improvised or planned?
Planned. I LOVE planning meals.
Which meal would you never cook again?
I ruined a batch of mini frittatas last weekend, so that.
Thank you Molly!


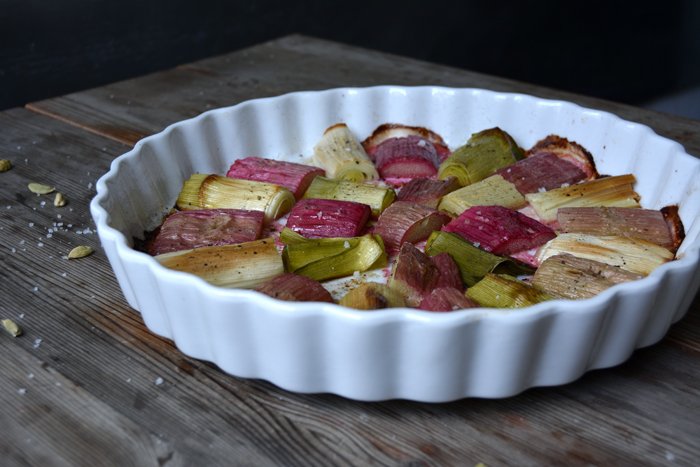
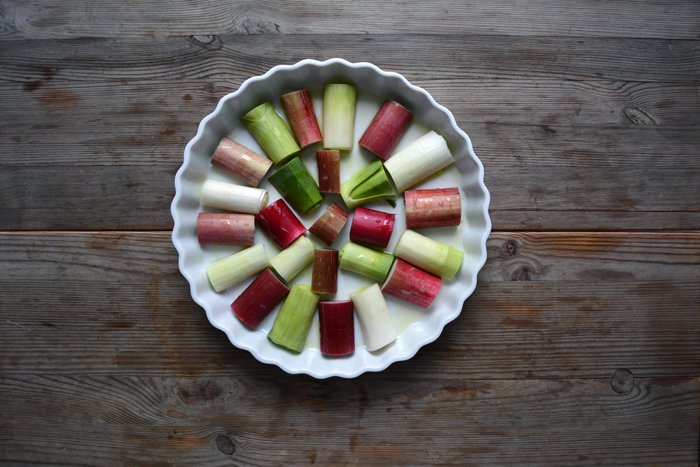
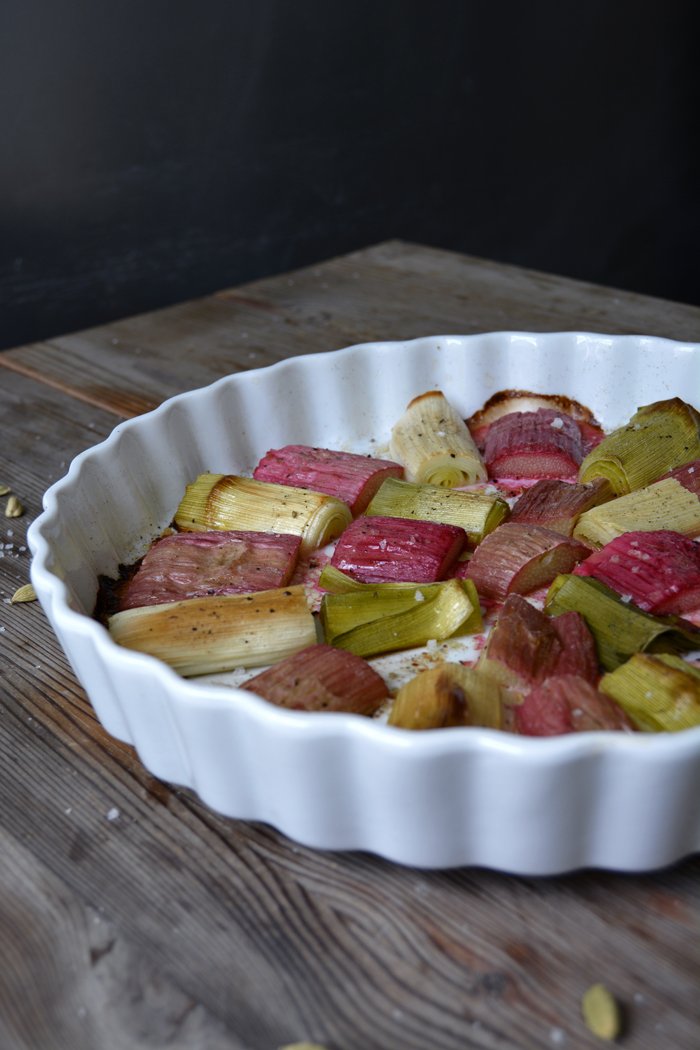
Rhubarb and Leek Gratin with Rosemary
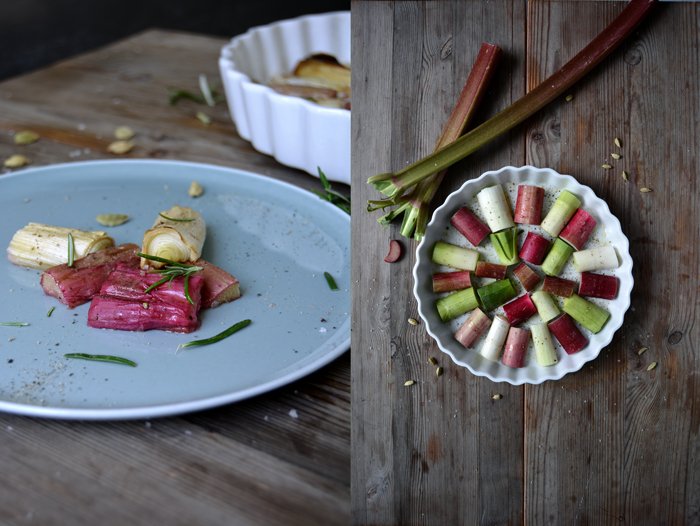
For weeks I have been thinking about combining leek and rhubarb in a gratin, the sourness of the fruity stalk and the onion's distinct spiciness seemed like a special match. Weeks and many other recipes have past, but I finally found the time to sit down and think about the right composition to make this duo work.
At first, I started off with a pinch of cardamom, this spice adds a nice warming touch, but something was still missing. I took a quick look at my herb garden in front of my bedroom window, that's the place where I keep all my little pots at the moment. The plants spread a mesmerizing smell in the afternoon sun and filled the air with the nicest aroma of rosemary, thyme, sage, oregano, marjoram, tarragon, chervil and lovage. I started to pick some thyme leaves but realised it would be too strong for my gratin, rosemary and its woody taste was the missing link in my composition, it made it complete!

Rhubarb and Leek Gratin with Rosemary
For 2 as a snack or 4 as a side dish you need
leek, cut in half lengthwise and cut into 6cm / 2 1/2" pieces, 250g / 1/2 pound
rhubarb, cut in half lengthwise and cut into 6cm / 2 1/2" pieces, 250g / 1/2 pound
olive oil
a pinch of ground cardamom
flaky sea salt
black peppercorns, crushed in a mortar
granulated sugar
fresh rosemary needles, chopped, for the topping
Set the oven to 200°C / 390°F (top / bottom heat) and oil the bottom of a baking dish.
Arrange the leek and rhubarb in circles in the baking dish and coat with 2 tablespoons of olive oil. Sprinkle with salt, pepper, cardamom and a little sugar. Bake in the oven for 20-25 minutes or until golden and soft. Sprinkle with fresh rosemary and season to taste.

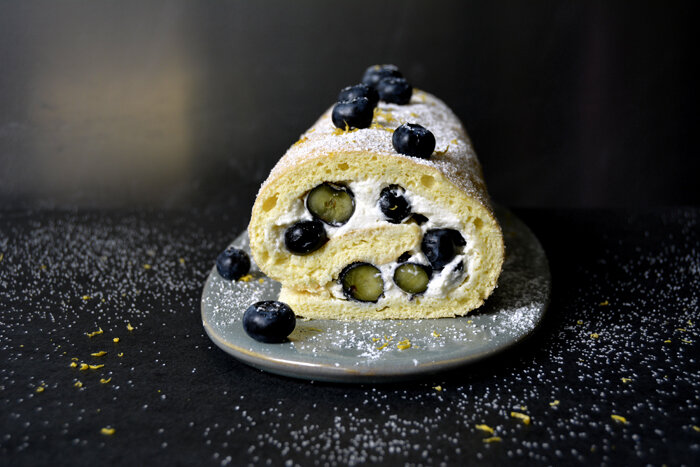
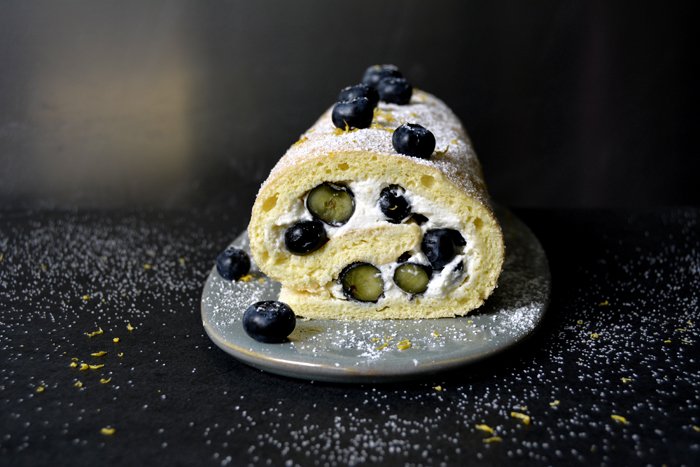
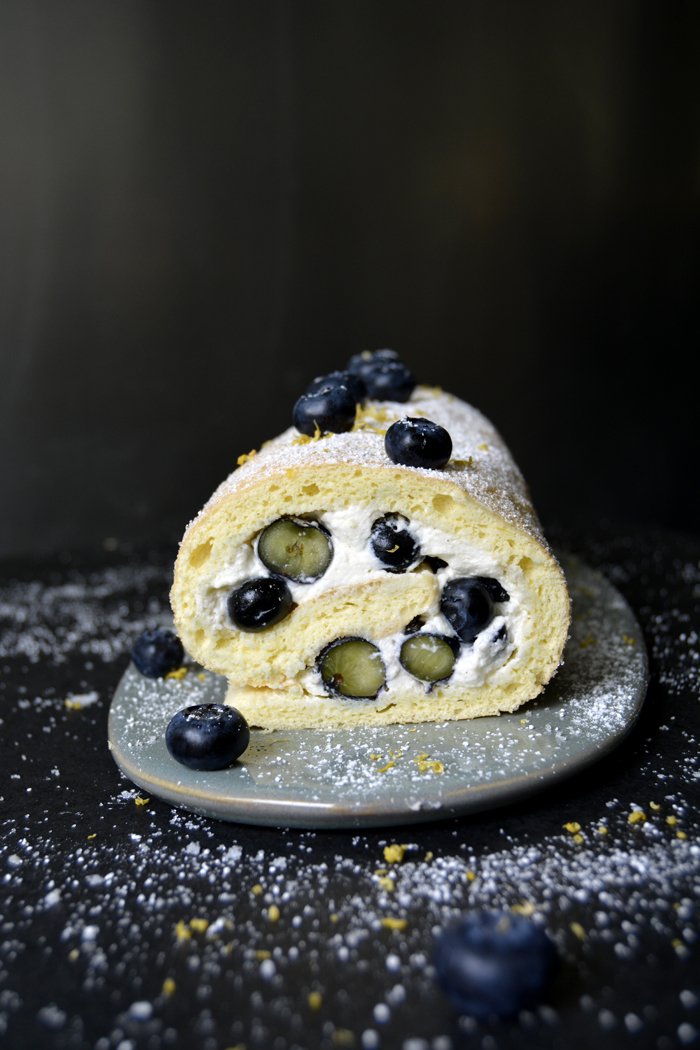
Blueberry Lemon Swiss Roll

My mother doesn't have a sweet tooth at all, we are complete opposites when it comes to cakes and dessert. I have no problem scarfing down a quarter of a cake on my own, and she's happy with a slice so thin that I wouldn't even bother cutting it. We look very much alike, we share the same birthday month and we both love to make a daily feast out of our lives, but our sweet preferences couldn't be further apart.
So when she visited us last week, there weren't many sweet treats on our culinary schedule but when I put my blueberry lemon swiss roll on the table, she impressed me. I was prepared to cut impossibly thin slices for her but, to my surprise, she got hooked on the roll. Usually, I'm the one who takes the last piece of a cake, my reputation is well known in my family when it comes to sweets, my appetite is insatiable. You can offer me the most extensive meal but even if I have to struggle towards the end, there's always space for a well sized dessert. But this time, the last piece wasn't for me, my mother asked for it and I don't think I'll ever forget this moment.
I must admit that my swiss roll was tempting on many levels, the spongy cake is absolutely heavenly, light, fluffy but structured, refined with lots of lemon zest. The blueberries added a juicy crunchiness but the cream filling was the actual star that made the whole composition complete. I whipped the cream with a little sugar and cardamom which creates an addictive deliciousness in combination with the lemony roll. The three of us loved it so much that this huge roll didn't even last 24 hours!
Here's the link to my strawberry swiss roll!

Blueberry Lemon Swiss Roll
For a 30cm / 12" roll you need
organic eggs 4
granulated sugar 70g / 1/3 cup plus 2 tablespoons for the whipped cream and 2-4 tablespoons for sprinkling
a pinch of salt
lemon zest 1 teaspoon
plain flour 70g / 1/2 cup
cornstarch 30g / 1/4 cup
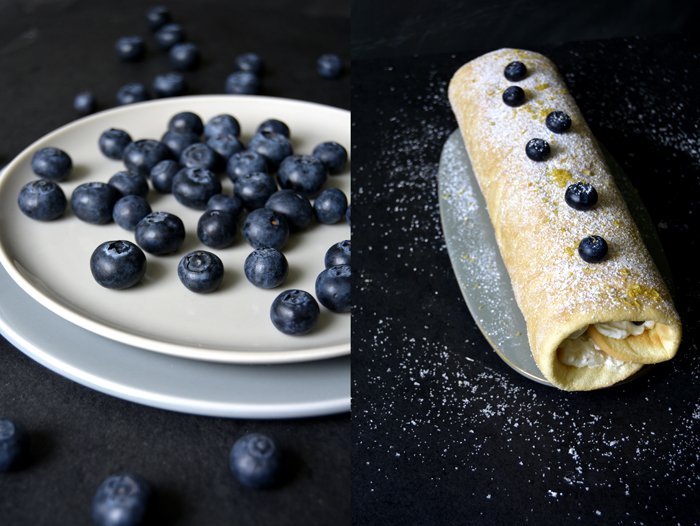
blueberries 250g / 1/2 pound (keep 6 berries as decoration)
whipping cream 220g / 1 cup
ground cardamom 1/2 teaspoon
icing sugar to dust the roll
Set the oven to 220°C / 425°F (top / bottom heat) and line a baking sheet (minimum 30 x 30cm / 12 x 12″) with parchment paper.
Whisk the egg whites with a pinch of salt for a few seconds before you add half the sugar, continue beating until stiff.
Mix the egg yolks, lemon zest and the remaining sugar with an electric mixer until thick and creamy. Fold the egg white into the egg yolks with a wooden spoon. Sieve and combine the flour and cornstarch and fold gently into the egg mixture. Spread the dough on the lined baking sheet (30 x 30cm / 12 x 12″) and bake in the middle of the oven for 6 minutes or until golden and spongy.
Sprinkle a kitchen towel with 2-4 tablespoons of sugar and flip the warm sponge onto the towel. Peel off the parchment paper and carefully roll the sponge with the towel. Leave it rolled up until cool. You can see the picture in my strawberry roll post (link above).
Whip the cream, cardamom and 2 tablespoons of sugar until thick and creamy and adjust sugar and spice to taste.
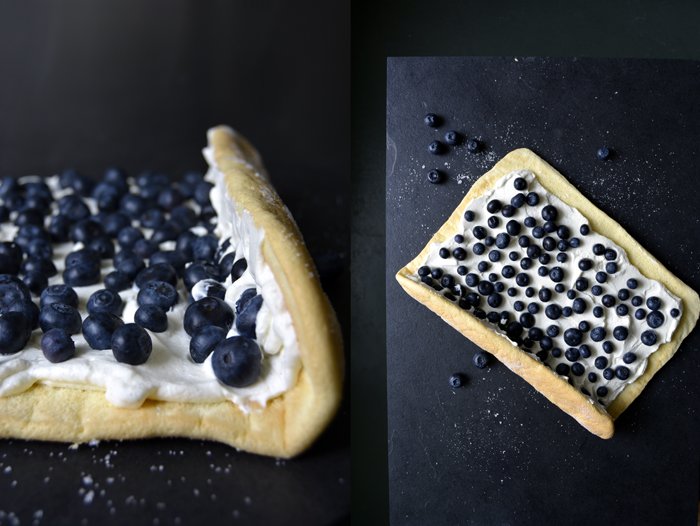
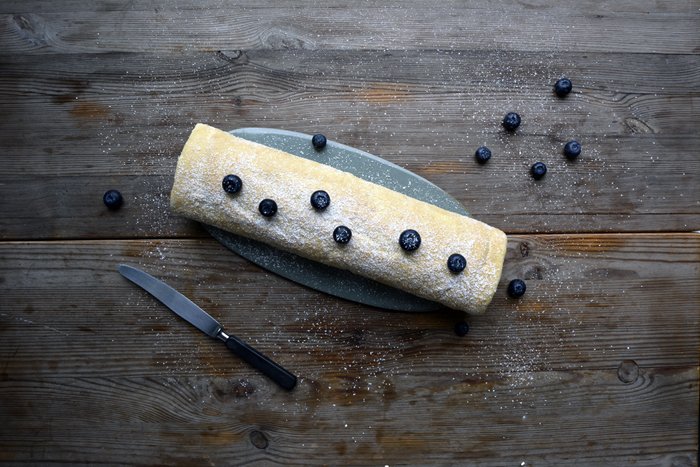
Unwind the sponge roll carefully and lay it onto a working surface. Spread the whipped cream on the cake, leave a rim of 2cm / 3/4". Cover with blueberries and roll it up again, slowly and gently, mind not to squeeze the cream out from the sides. Dust with icing sugar and decorate with the berries and a little lemon zest. Serve immediately or keep in the fridge before serving.
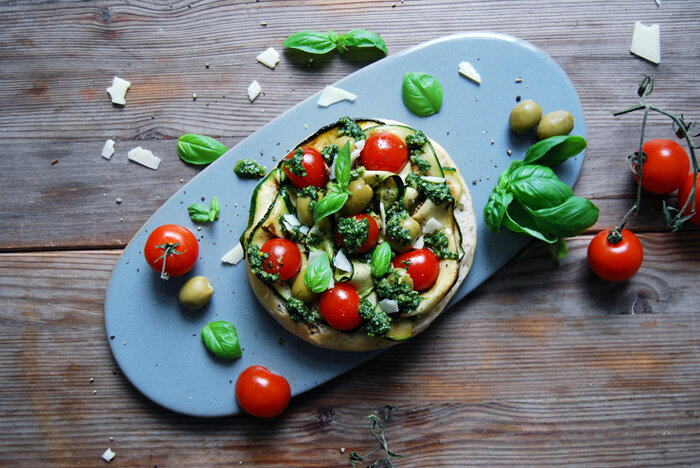
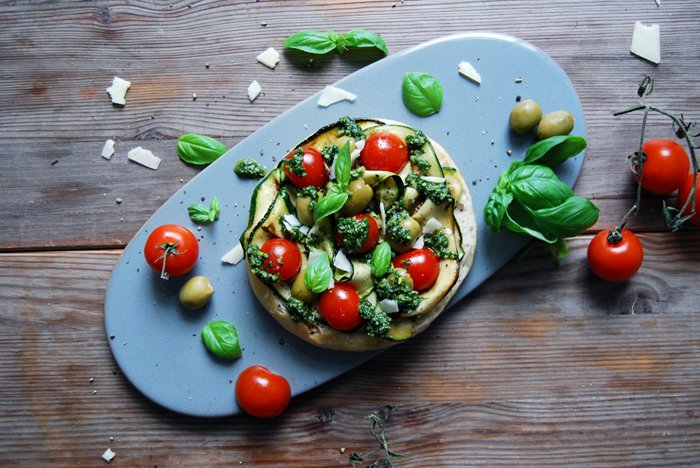
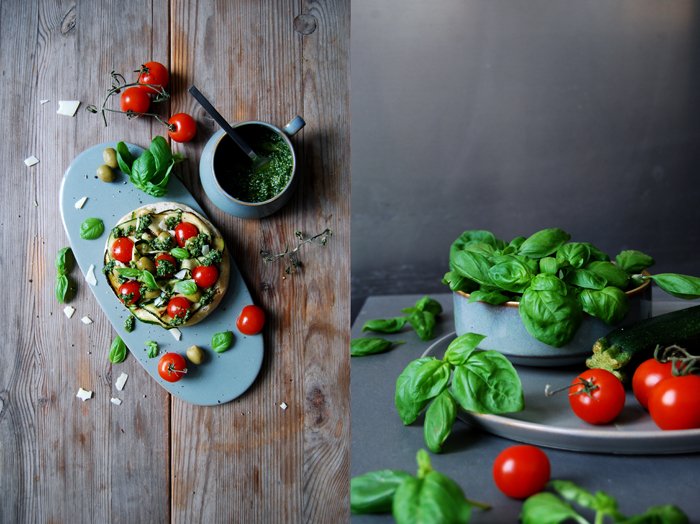
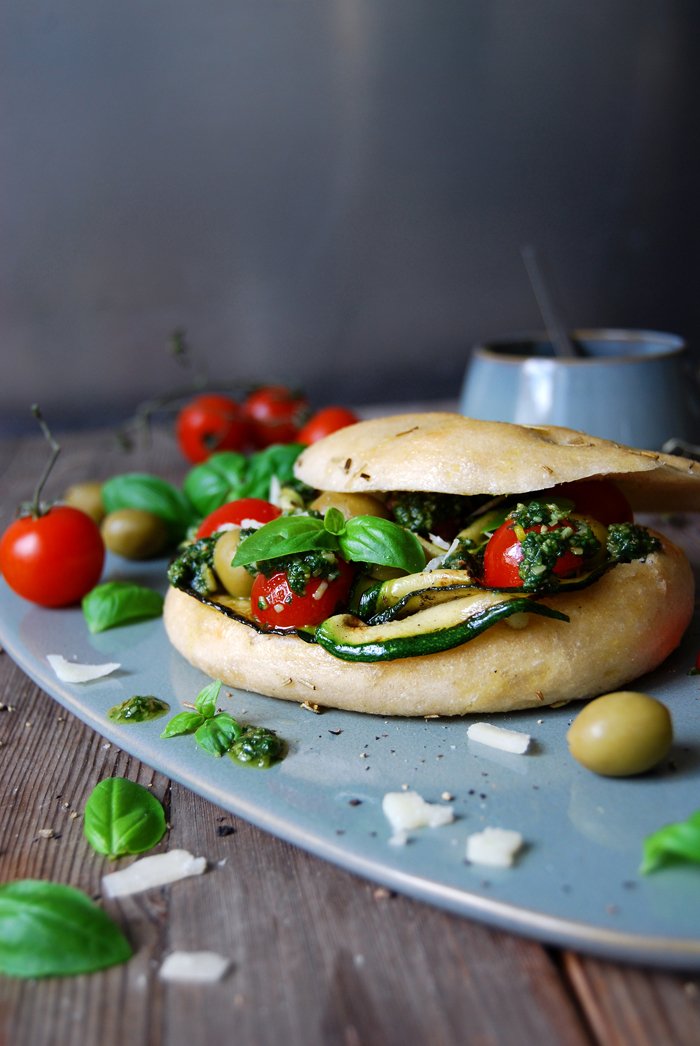
A Mediterranean Sandwich with Zucchini, Pesto and Olives

The past few days have been a pleasant break from my daily duties, my mother came to visit! I decided to take some time off for the long walks through the city which both of us love so much. We started with a beautiful place called Clärchen's Ballhaus which opened more than 100 years ago, in 1913. It's a restaurant/ dancehall where people still meet for Sunday tea dance. When we entered the room the sound of Samba, Waltzes and Tangos filled the air and the faces of the dancing couples seemed lost in nostalgic escape, it felt like a different world!
There's also a gorgeous mirrored ball room on the first floor which has quite a morbid charm, it doesn't sparkle with its original glory anymore. The room was heavily damaged in the war and it was used to store coal until 2005. The mirrors are dull and broken, the decorations and chandeliers on the ceiling can't hide the strains of the past years. It's a forgotten place, a remnant of Berlin's party days from a century ago. When we left the building and its faded light we stepped right into the bright afternoon, we felt like kids who found an abandoned house.
Our next stop was the Museum Island, a group of beautiful and renowned museums on a little island in the Spree river. One of my favourite Berlin buildings is the Bode-Museum, when I first visited it many years ago I instantly fell in love with it and with the little bridge that leads to its entrance. The round building is a classic beauty, majestic but not intimidating. It keeps a stunning collection of marble sculptures in a light-flooded room, the folds and faces cut into the white rock almost seem alive. Our walk ended in front of this museum, at a bar outside on the river bank. We sat down in deck chairs, enjoyed Prosecco with Aperol and witnessed another one of Berlin's tea dance scenes. On an open stage, couples danced Tango under the blue sky, forgetting everything and everybody around them. People stopped to watch them and I'll never forget the beauty of this moment!
So much outdoor activity meant little time for the kitchen, we focussed on salads, snacks and sandwiches. We took it easy this time, no extensive cooking sessions. Usually, when my mother visits, we spend lots of time together in my kitchen but I needed a little break. Yesterday, we had a big family dinner at a restaurant with crayfish and asparagus and today, there'll be oysters on our culinary schedule. In between, we fit in this little sandwich beauty, pure Mediterranean deliciousness stuffed in a juicy focaccia bun. I sautéed very thinly sliced zucchini and piled them up with ripe tomatoes, basil pesto and green olives. It tastes like summer!
A Mediterranean Sandwich with Zucchini, Pesto and Olives
For 2 sandwiches you need
focaccia buns, cut in half, 2
medium zucchini, cut into long, very thin slices, about 200g / 7oz( this is best done with a cheese or vegetable slicer)
olive oil
salt
ripe cherry tomatoes, cut in half, 6
green olives, cut in half, 6
black peppercorns, crushed in a mortar
For the pesto
fresh basil leaves 20g / 3/4oz plus a few small leaves for the topping
fresh mint leaves 2
pine nuts 1 tablespoon
Parmesan, freshly grated, 2 tablespoons plus 1 teaspoon for the topping
olive oil 50ml / 1/4 cup
salt
Mix the ingredients for the pesto in a blender and season to taste.
In a large heavy pan, heat a splash of olive oil and sauté the sliced zucchini in batches, spread the slices out next to each other. Cook them on medium-high for 1 minute, turn and season them with salt and pepper and cook for about 30 seconds on the other side until soft and golden but not dark. Take them out of the pan and keep them on a plate. Continue cooking the remaining zucchini slices, always adding a little splash of olive oil between batches.
Lay the zucchini on the bottom half of each bun and spread the tomatoes and olives on top. Sprinkle with pesto, coarsely crushed pepper and basil leaves. Close the bun and enjoy!


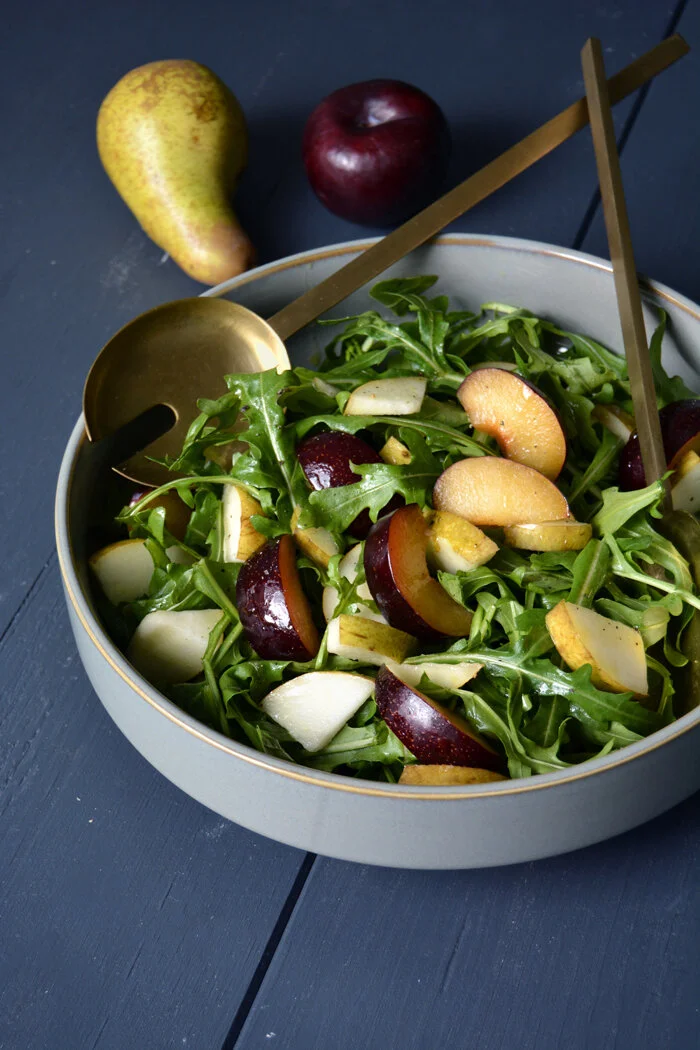
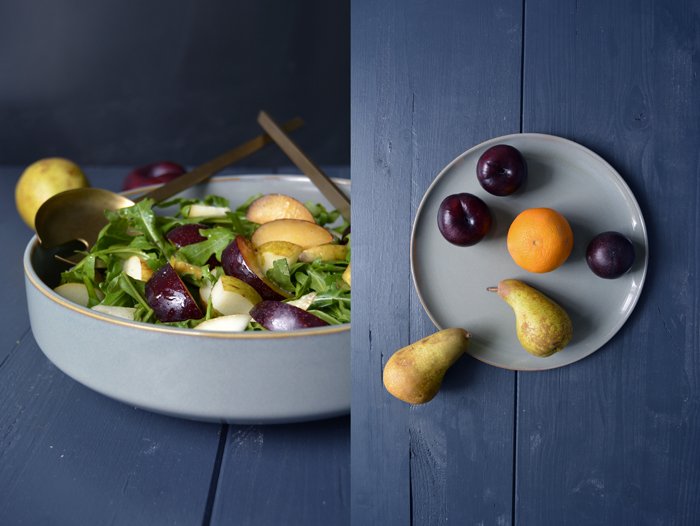
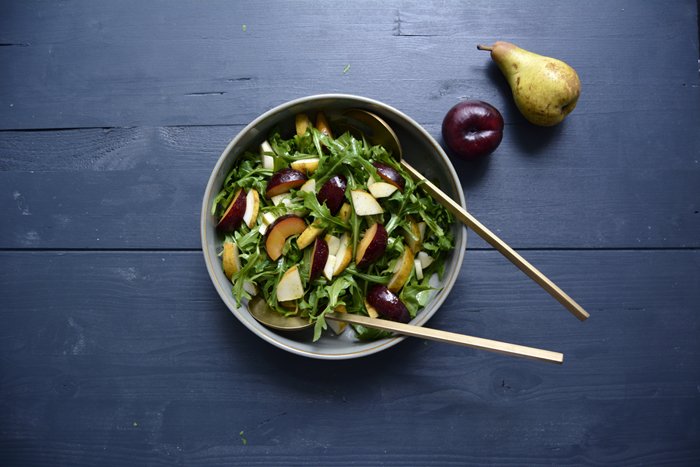
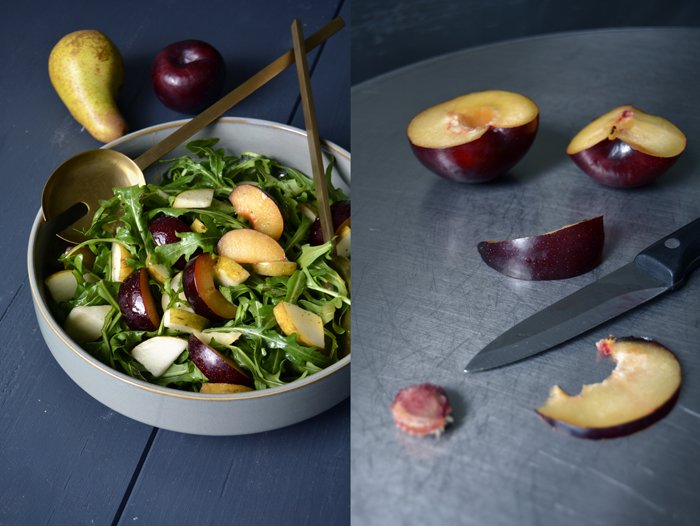
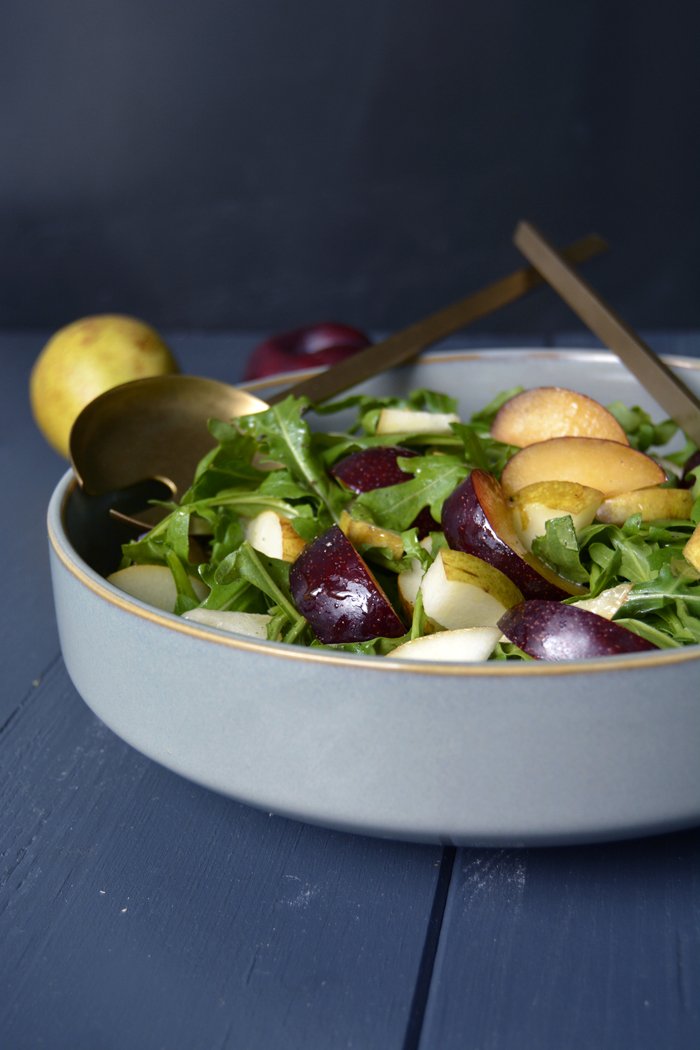
A Salad of Rucola, Plum and Pear with Orange Blossom Water
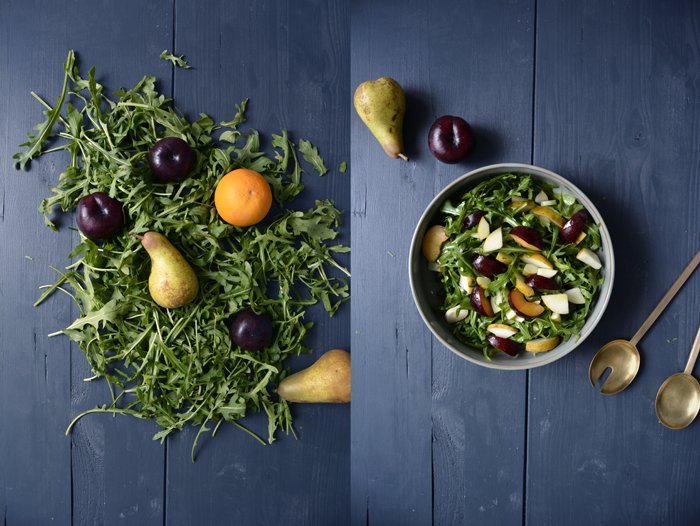
Here's another one of the kitchen leftover mash-ups I mentioned yesterday: There were 3 bunches of rucola (rocket) on the window sill, Italian plums which started to look a bit sad and ripe pears, ready to be eaten just before they get soft and mushy. I tossed everything together in a bowl and mixed it with my new favourite summer salad dressing: olive oil whisked with freshly squeezed orange juice and a little orange blossom water. It's fantastic, the citrus' fruitiness merges wonderfully with the orange blossom's flowery aroma and the warm olive oil.
Citrus and olive oil is a delicious combination. One of my favourite recipes on eat in my kitchen features this glorious treat, it's a very simple yet absolutely delicious Sicilian salad. The first time I ate it was at a farm in Noto where we stayed a few years ago. The lady of the house would make it for us for breakfast. She used the ripest oranges from the farm, cut them into fillets and sprinkled them with a little olive oil and dried oregano. It was a heavenly and eye-opening experience for me. I had never really thought of this combination before, mixing fruit with olive oil was quite new for me at that point and this morning treat influenced many of my recipes over the years. It taught me to be open minded and experimental, to combine various flavours, to mix what seems far away in taste but trust that it will lead to a satisfying result (which it often does).
However, the combination of fruit and olive oil needs a strong partner, either a herb or spicy rucola leaves as I chose. You could replace the plums and pears with any other sweet fruit you have at hand in your kitchen: strawberries, nectarines, figs or oranges. As long as they have honey sweet juices to add to the salad, they will be a good choice!
A Salad of Rucola, Plum and Pear with Orange Blossom Water
For a quick lunch for 2 you need
rucola (arugula) leaves, 2 handful
pear, quartered, cored and sliced, 1 (or an equal amount of another sweet fruit)
large plum, cut in half and sliced, 1 (or an equal amount of another sweet fruit)
For the dressing
olive oil 3 tablespoons
freshly squeezed orange juice 2 tablespoons
quality orange blossom water (preferably organic) 1-2 teaspoons, to taste
salt and pepper
Arrange the rucola and fruit in a bowl. Whisk the ingredients for the dressing, season to taste and sprinkle over the salad, serve immediately.

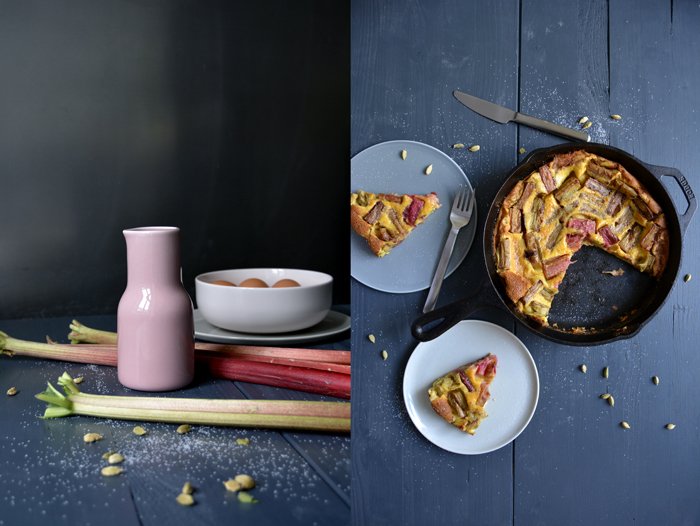
Rhubarb Cardamom Clafoutis
In the past few weeks, my kitchen (and sometimes even the living room and balcony) has looked like a farmer's market. I use every corner, kitchen counter, shelf and cupboard to store piles of fruit and vegetables. Tomatoes, squash and beans sit next to colourful cabbages, lettuce, the whole range of citrus fruits and more pots of herbs than I've ever had in my kitchen before. Plums, strawberries, pears and apples share space with all sorts of roots and greens. Since I started working on my first cookbook, my kitchen became a beautiful mess, completely stuffed and almost bursting. My fridge is always so full that I have problems fitting in the butter tin and milk after breakfast.
If there are no book recipes on my schedule, I only need to look around me and I can pick all the fruit and veg I could possibly ask for. There's everything at hand, whatever my taste desires. Be it spring, summer, autumn or winter, the four seasons are present in my kitchen through all the produce, which also means that there is always something that needs to be used as I don't want to waste anything. I ended up with too many eggs, too much milk and too much rhubarb, this called for a clafoutis! I refined the golden French pan dish with cardamom, you could also add cinnamon but cardamom is my favourite baking spice at the moment. The result was very fluffy, I was impressed how much it rose this time! You never really know what this dessert is going to do when you take it out of the oven. The pleasure didn't last very long, a clafoutis can gracefully rise like a soufflé and then deflate within seconds. But it tasted fantastic, warm and fragrant, slightly sweet and sour, just right for a late Sunday breakfast with your mama - Happy Mother's Day to all the great mamas in the world!
You can find the recipe for my apricot clafoutis here!

Rhubarb Cardamom Clafoutis
For a 23cm /9″ heavy, ovenproof pan or baking dish you need
rhubarb, cut into 3cm / 1 1/4" pieces, 300g / 10 1/2oz
ground cardamom
plain flour 80g / 3 ounces
granulated sugar 4 tablespoons plus 2 tablespoons for the rhubarb
a pinch of salt
butter, melted, 30g / 1 ounce plus 2 tablespoons for the rhubarb
large eggs 4
milk 200ml / 7 ounces
freshly squeezed orange juice 3 tablespoons
Melt 2 tablespoons of butter with 2 tablespoons of sugar and 1/2 teaspoon of cardamom in a heavy pan, add the rhubarb and cook for about 3 minutes or until it softens but still holds its shape, stir once in a while. Set the pan aside.
Set the oven to 180°C / 355°F (top / bottom heat) and generously butter a 23cm /9″ heavy, ovenproof pan or baking dish.
Combine the flour, 4 tablespoons of sugar and a pinch of salt. Whisk 1 teaspoon of cardamom into the warm melted butter and mix with the eggs, milk and orange juice then pour into the dry mixture and mix with an electric mixer until well combined.
Spread the rhubarb in the buttered pan and pour the batter on top. Bake for about 50 minutes or until the clafoutis is golden and set. Sprinkle the warm clafoutis with sugar and ground cardamom to taste and enjoy immediately.


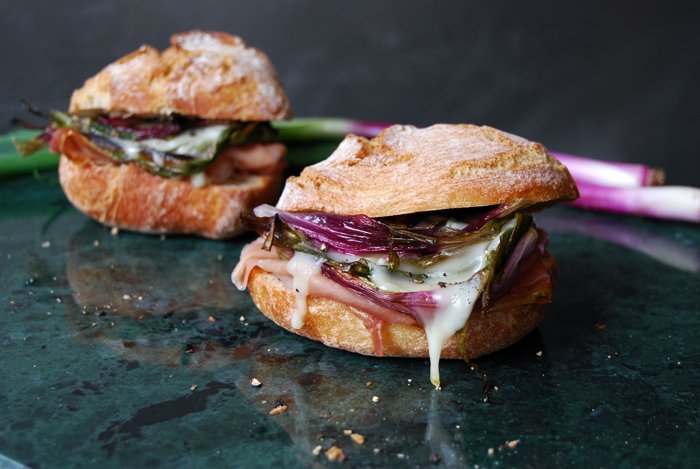
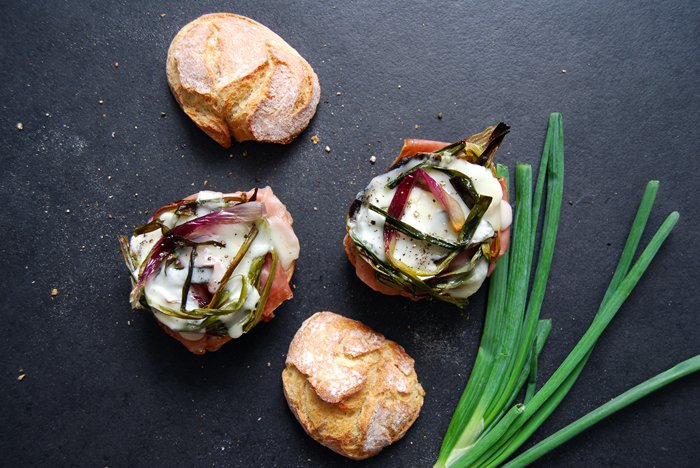
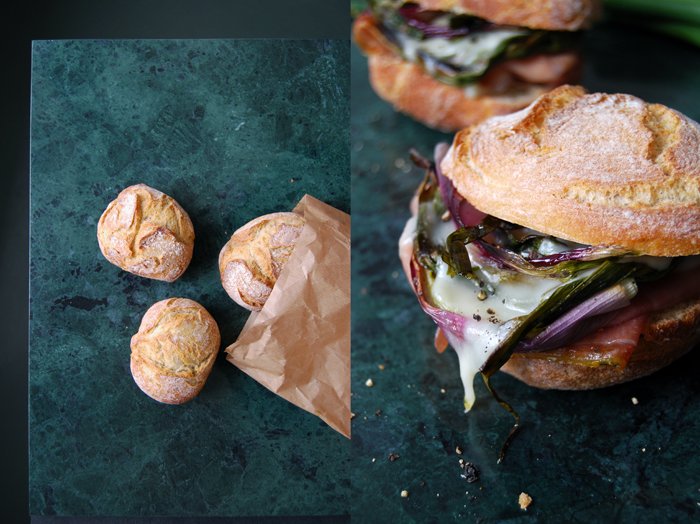
Roasted Spring Onion, Parma Prosciutto and Taleggio Sandwich
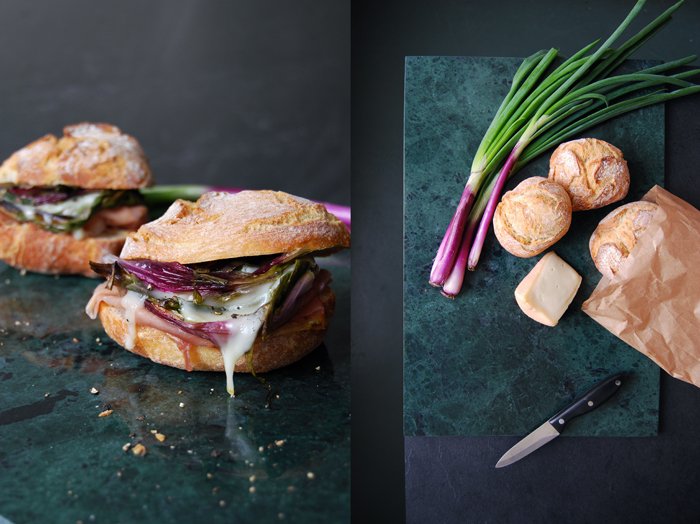
I rediscovered an old cheese love: Taleggio! Although I used to enjoy this Italian dairy product from the Val Taleggio in the Lombardy quite often in the past, it hasn't been in my kitchen for a few months, but now it's back - preferably melted! A culinary phone call with my mother (our regular recipe exchange) brought it back to my mind. I went to the supermarket right the next morning to stock up on this slightly creamy cheese and started thinking about all the recipes I would use it for.
A new sandwich creation was first on my list, the milky cheese melting its soft yet distinct aroma onto Parma prosciutto and sweet-roasted spring onions. The result was juicy and hearty without being overpowering. Taleggio isn't as harsh as one of my other sandwich-cheese-obsessions, the dominant raclette, its flavour is more subtle, almost fruity. It develops a little slower in the mouth but the impact is impressive nonetheless. I loved the look of this sandwich, I loved its taste and I had to have two of them!
Roasted Spring Onion, Parma Prosciutto and Taleggio Sandwich
For 3 sandwiches you need
rustic buns, cut in half, 3
small spring onions, cut in half lengthwise, 6
olive oil 1 tablespoon
sea salt
black peppercorns, crushed in a mortar
Parma prosciutto 6 slices
Tallegio cheese, sliced, 60g / 2oz
Set the oven to 220°C / 430°F (top / bottom heat).
In a baking dish, mix the spring onions with the olive oil, salt and pepper. Roast in the oven until golden brown, mind that they don't burn (about 20 minutes). Turn them after 10 minutes.
Lay the 2 slices of Parma prosciutto on the bottom side of each bun, cover with cheese and swirl the spring onions on top. Put under the grill for a few minutes until the Taleggio starts to melt. Sprinkle with pepper and close the bun. Enjoy!


Asparagus with Crisp Balsamic Bacon
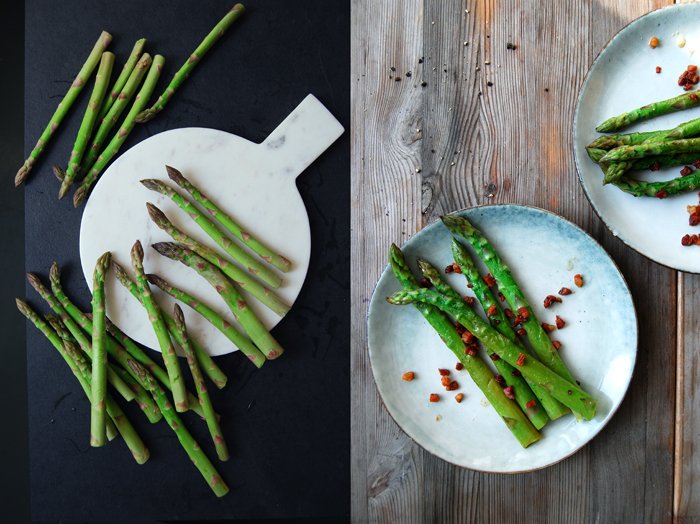
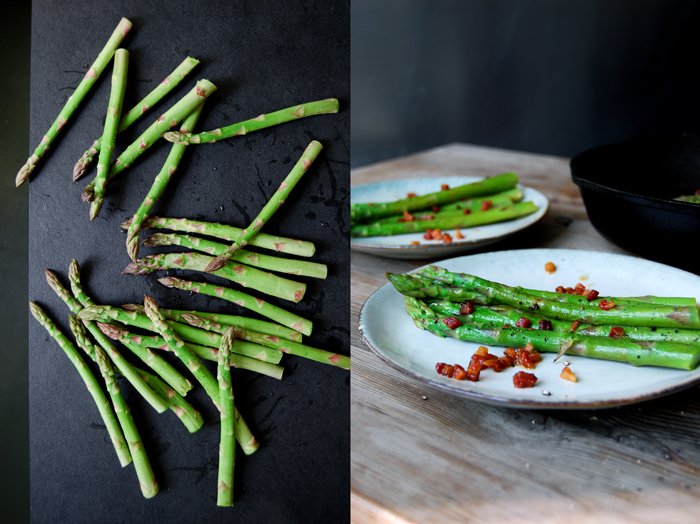
All you need are 6 ingredients: green asparagus, bacon, balsamic vinegar, olive oil, salt and pepper! This is one of the easiest asparagus recipes we've had on our table this spring and I'm sure I'll cook it a few more times during this season. Its comforting heartiness combined with the vegetable's crunchy freshness is all I need when I sit at the kitchen table after a long day of work.
The preparation takes around 10 minutes which is also quite convenient. Green asparagus only needs a few minutes until it's cooked al dente and the bacon bites fried to salty crispiness don't take much longer. I deglazed the meat with a little white Balsamico vinegar which brings out its sweet side and fits so well with the green stalks. It's such an easy spring comfort dish!
Asparagus with Crisp Balsamic Bacon
For 2 people you need
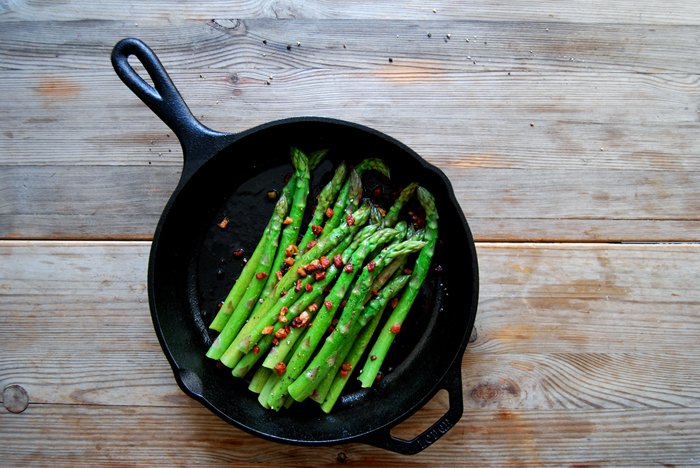
green asparagus, the bottom part cut off, 500g / 1 pound
bacon, cut into tiny cubes, 80g / 3oz
olive oil
white balsamic vinegar 25 ml / 2 tablespoons
salt and pepper
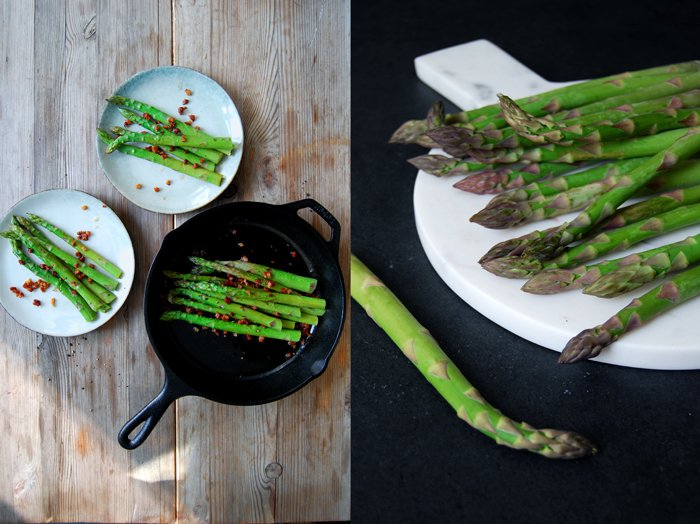
Blanch the asparagus in salted water for 3-4 minutes or until al dente, drain and rinse with cold water for a second to keep its fresh colour.
Heat a splash of olive oil in a pan and fry the bacon for a few minutes on medium heat until golden brown and crisp. Deglaze with the vinegar, add the asparagus, stir gently and season with salt and pepper to taste, serve warm.

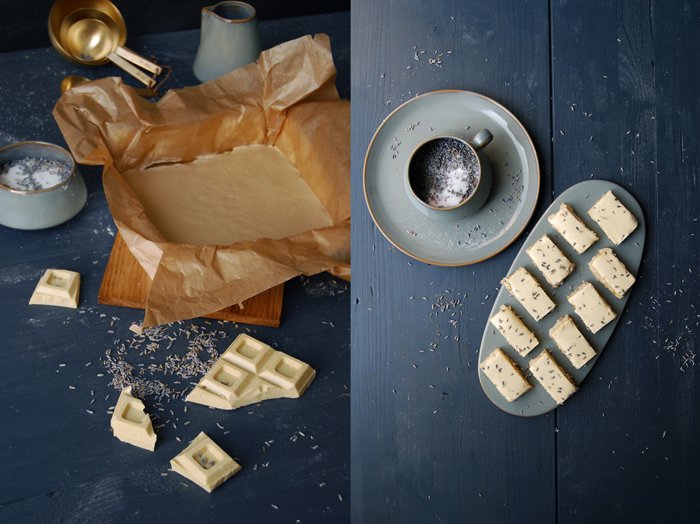
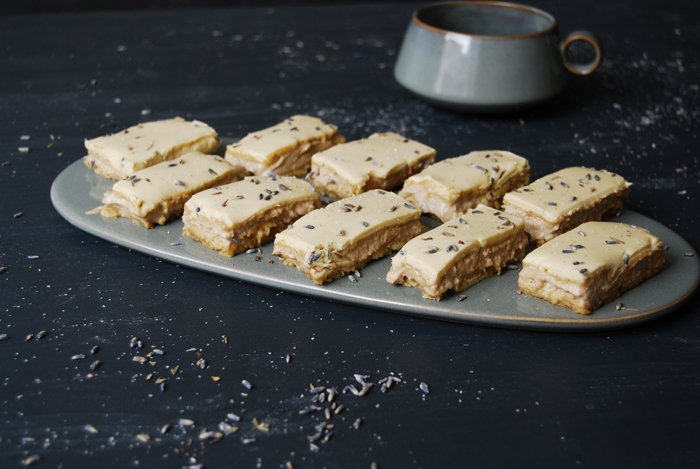
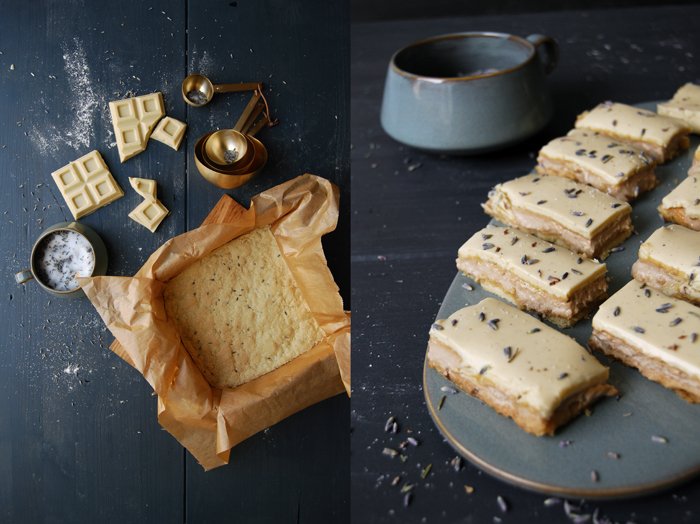
Frances Bissell's Lavender & White Chocolate Caramel Cake

This is advanced lavender baking! When I shared my Lavender Gâteau Breton recipe with you a couple weeks ago, I mentioned Frances Bissell's fantastic baking book, The Floral Baker. The renowned British cookbook author inspired me to give the aromatic blue flowers a try in my kitchen and to add them to my own baking. I started off with the preparation of a jar full of lavender sugar about a month ago, the floral sweetness needs some time to develop its exhilarating qualities. For my buttery French cake, the Gâteau Breton, I sieved the sugar and used the florets just for the topping. I wanted to take it easy at first, to get used to this new flavour and to avoid straining my taste buds without even getting started properly.
So now I felt ready to take the next step, the advanced level of floral baking. I got in touch with Stephen from Serif Books to see if I could share one of the floral master's recipes on eat in my kitchen. We got along very well and I found out that Frances lives in England and Gozo and also includes traditional Maltese recipes in her cooking. I really hope to meet her there one day for a meet in your kitchen feature on the blog!
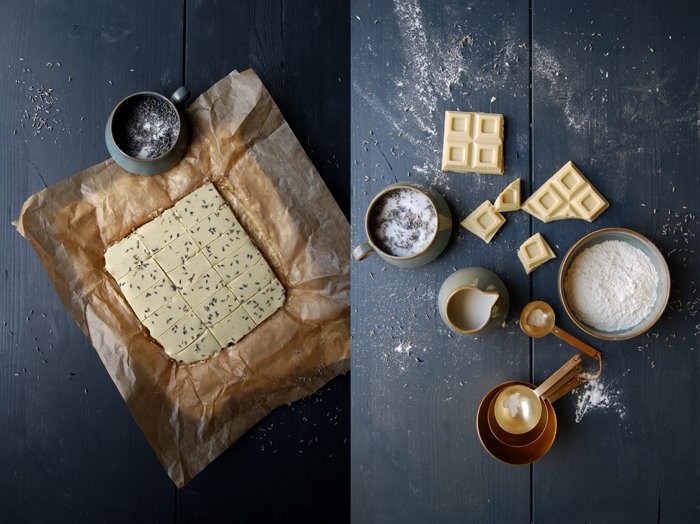
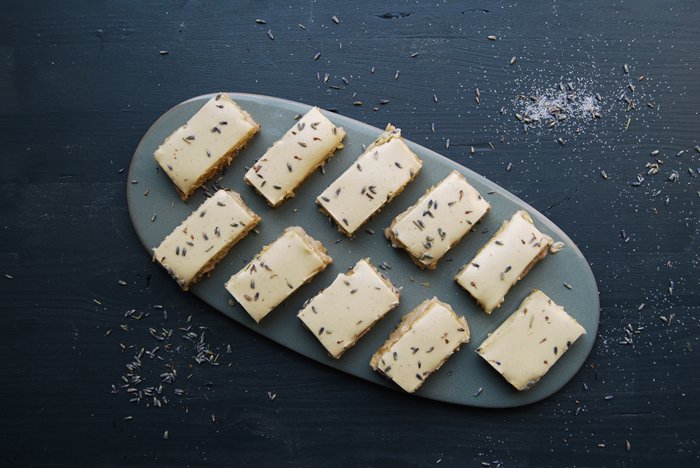
After reading her book I felt quite torn between a few recipes but in the end I went for Frances' Lavender and White Chocolate Caramel Cake. It sounded so decadent and rich that I had to give it a try. The creation is based on her mother's recipe for toffee cake and it has been in her family since the early 1960s. It's like Millionaire's shortbread, just with white chocolate. It starts off with a thin shortcrust base infused with the beautiful aroma of lavender, topped with toffee cream and a final layer of crunchy white chocolate. The creation looks a bit old fashioned which I love, it's the right treat for high tea with the ladies, when you bring out the nice porcelain and get dressed up. I didn't use my bone China at my table but another gem I found recently, the beautiful plates and bowls (and my beloved new measuring spoons!) by Ferm Living in Denmark. It's a clean, grey stoneware collection inspired by Bauhaus classics. My friend Anne, the photographer I mentioned last Sunday, told me about their stunning designs, she knows that I'm always on the lookout for nice tableware. Luckily, we have a similar taste, which is quite minimal, and we're both picky, so I found the perfect design scout for me!
Lavender & White Chocolate Caramel Cake
Recipe by Frances Bissell
Mind that you prepare the lavender sugar a few days (or even weeks) in advance, 10 parts sugar and 1 part organic lavender flowers (L. augustifolia, Hidcote).
For a 20cm / 8" cake tin, about 4cm / 1 1/2" deep, you need
For the shortbread
plain flour 115g / 4oz
lavender sugar 25g / 1oz (I used mainly the sugar and 1 teaspoon of the flowers)
butter, cold, 50g / 2oz
For the topping
Golden Syrup 2 tablespoons
condensed milk 395g / 14oz
quality white chocolate 200g / 7oz
a drop of culinary lavender essence (I left this out and sprinkled the cake with lavender flowers instead)
Set the oven to 190°C / 375°F (fan assisted oven) and lightly butter the cake tin (or line the tin with parchment paper).
For the shortbread, mix the flour, lavender sugar and butter with the hooks of your mixer. Press the dough into the tin and bake for 12-15 minutes. Remove the tin from the oven and leave the shortbread in it.
For the toffee, pour the Golden Syrup and the condensed milk into a saucepan, stir together over moderate heat until well-mixed, then boil precisely 7 minutes, stirring all the time.
Spread the mixture over the shortbread and allow it to cool. Melt the chocolate in a bowl over hot water, mix in the essence if you would like to use it and spread over the cooled toffee, marking into small triangles, squares or fingers, as appropriate, before the chocolate has set. Sprinkle with lavender flowers. Cut when cold.


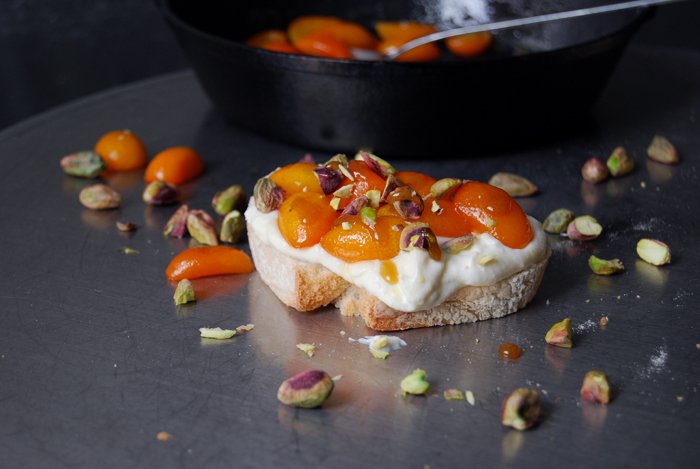
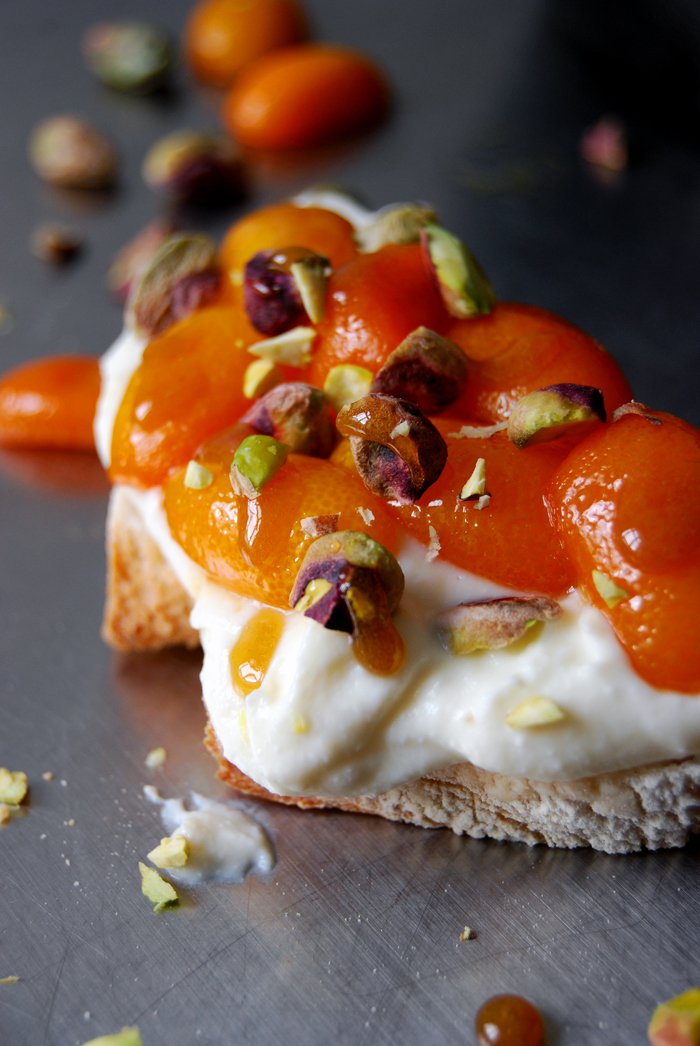
Orange Blossom Ricotta and Honey Kumquat Tartine with Pistachios
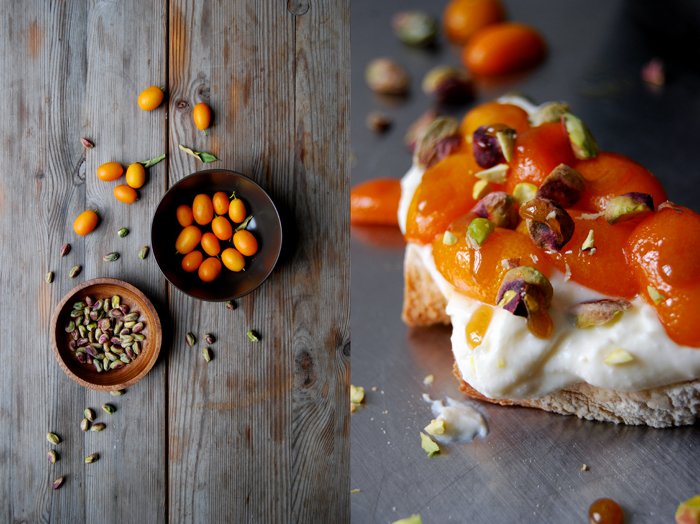
A handful of little kumquats have been lying on the window sill for days challenging my kitchen creativity. They were the meager leftovers from my bean and pea salad and I didn't really feel too inspired to use them. Although I really like these concentrated citrus fruits in combination with vegetables and dairy products, I'm not too fond of eating them on their own, so I had to come up with an idea which would fit their biting tanginess.
I thought of Malta, one of my biggest inspirations and answer to all sorts of open questions in my life. We just booked our flights for this summer, so it's been on mind since I clicked the confirmation button on the booking page. All that Mediterranean food, our family, friends, snorkeling, the sun and blue sky above my head every day, just the thought of it makes me so happy! And we'll have a very special guest over for a few days this summer which makes me even happier (and more excited if that's even possible): Holly, my editor, will visit us from New York to learn more about the country and culture that I praise and write about so much. I'm as excited as a child to show her around, to introduce her to my perfect spots for snorkeling and food, our favourite beach bar for a glass of Ricard in the sunset, my Maltese mama's and grannie's kitchens in Msida. I want to walk though the old streets of Valletta and Mdina with her and show her where to enjoy the best pastizzi, qassatat and Spaghetti Rizzi (sea urchin pasta), so much that was once new to me many years ago and opened the door to a mentality that's so different to mine yet filled my life with so much fun and love!
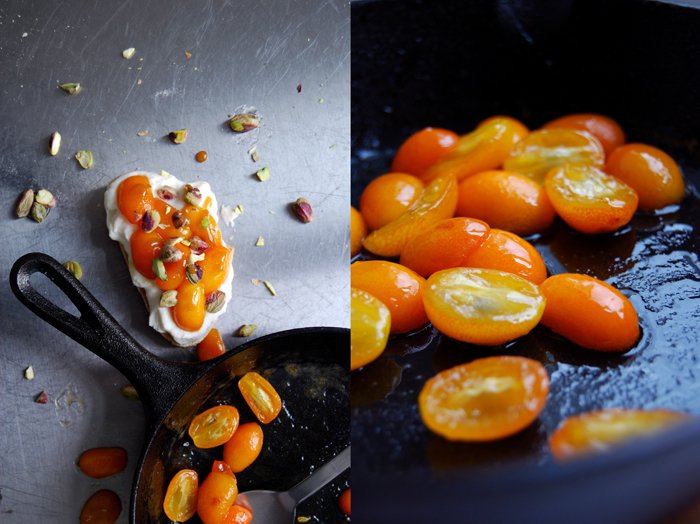
When I think of Malta, ricotta comes to mind, honey and orange blossom water, I just had to add my kumquats and a few pistachios (unsalted!) and all of the sudden I could see a new sandwich creation before my eyes. I whisked the dairy product with some honey, orange juice and blossom water and spread this sweet dip voluptuously on a slice of fluffy ciabatta bread. The citrus fruit came next, I caramelized the kumquats in honey to soften and sweeten their skin which made them a little sticky and juicy. The crunchy pistachios finished it off and gave this Mediterranean combination an oriental touch. It was as bright as the sunset in Malta and tasted wonderfully sweet and sour!
Orange Blossom Ricotta and Honey Kumquat Tartine with Pistachios
For 4 small tartines you need
ciabatta bread, 4 slices
fresh ricotta 250g / 9oz
quality orange blossom water (preferably organic) 1 teaspoon
liquid honey 1-2 teaspoons plus 3 heaping teaspoons for the kumquats
freshly squeezed orange juice 2 tablespoons plus 2 tablespoons for the kumquats
kumquats, cut in half (lengthwise), 12
pistachios peeled and unsalted, roughly chopped, a small handful
Whisk the ricotta with orange blossom water, 1-2 teaspoons of honey and 2 tablespoons of orange juice, season to taste.
Heat 3 heaping teaspoons of honey in a heavy pan, add the kumquats and 2 tablespoons of orange juice and cook for about 2 minutes on high temperature or until the citrus fruits start to soften.
Spread the ricotta dip on the bread, lay the kumquats on top and sprinkle with the juices from the pan and the pistachios. Enjoy!


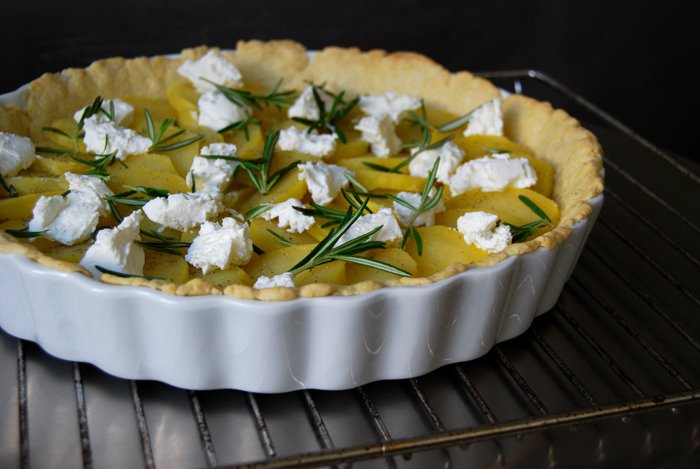
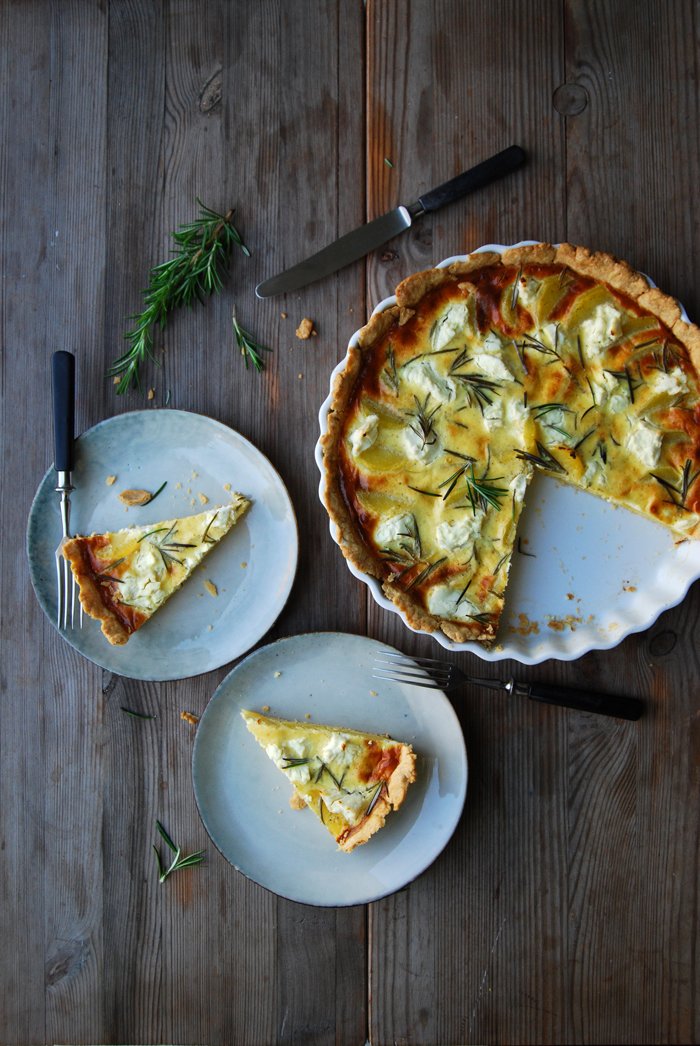
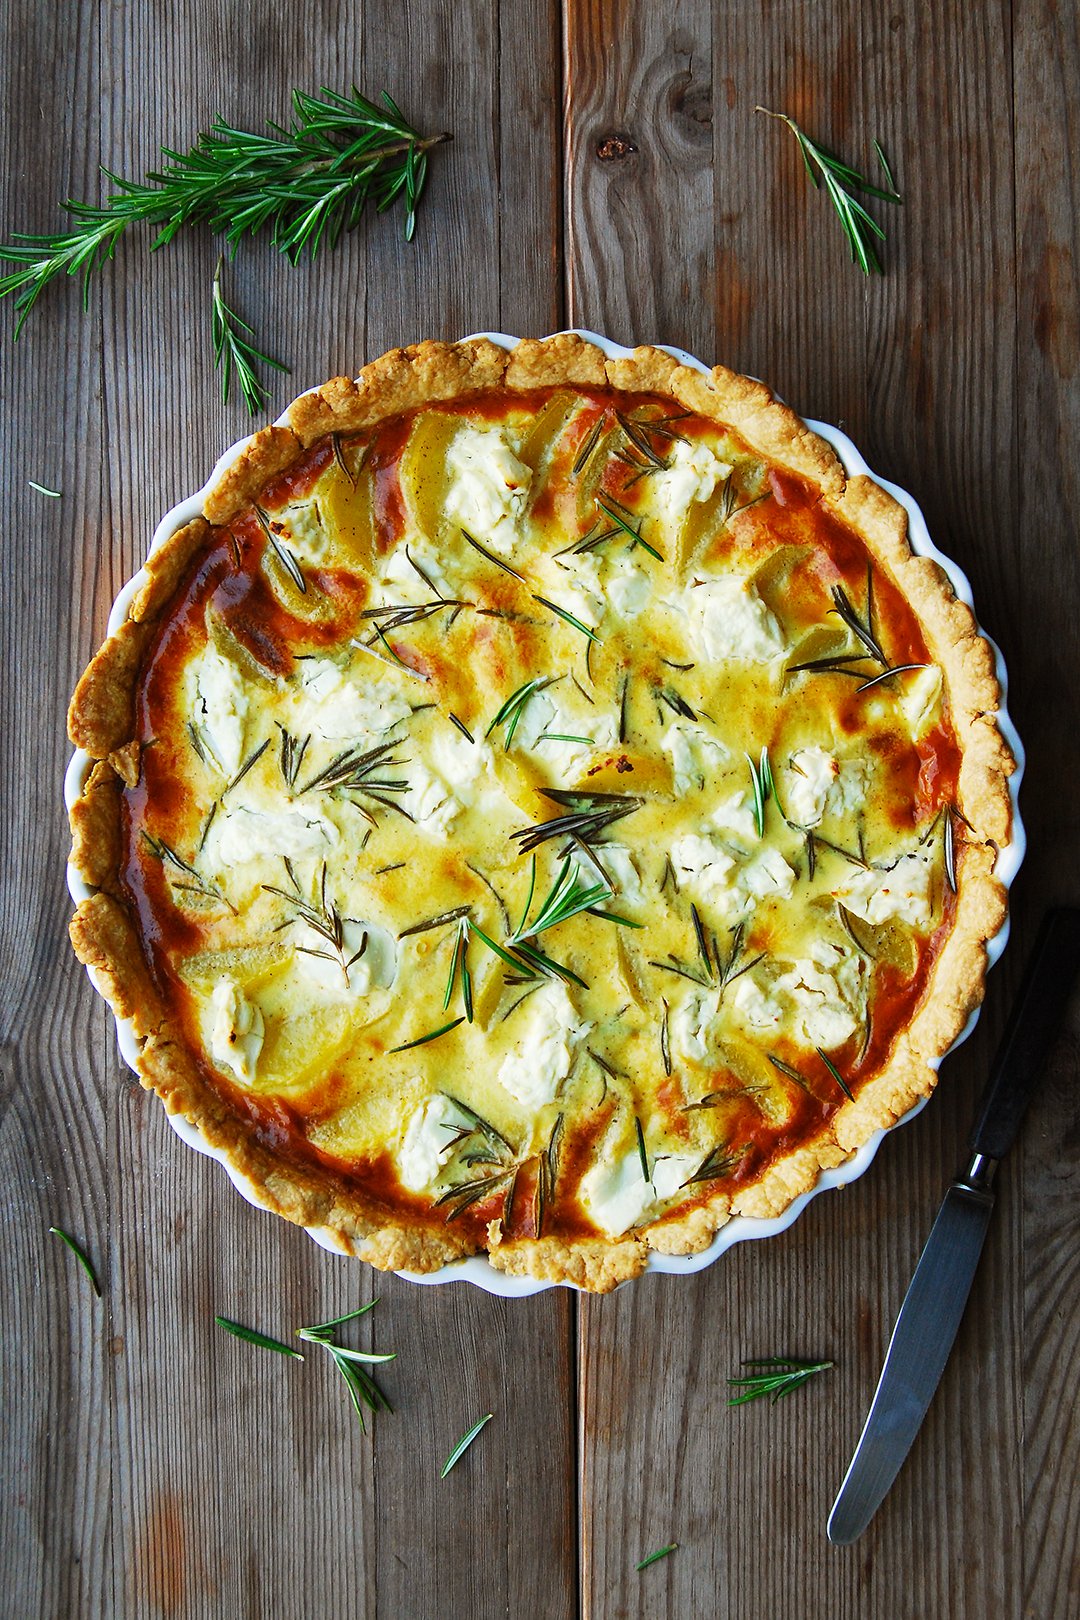
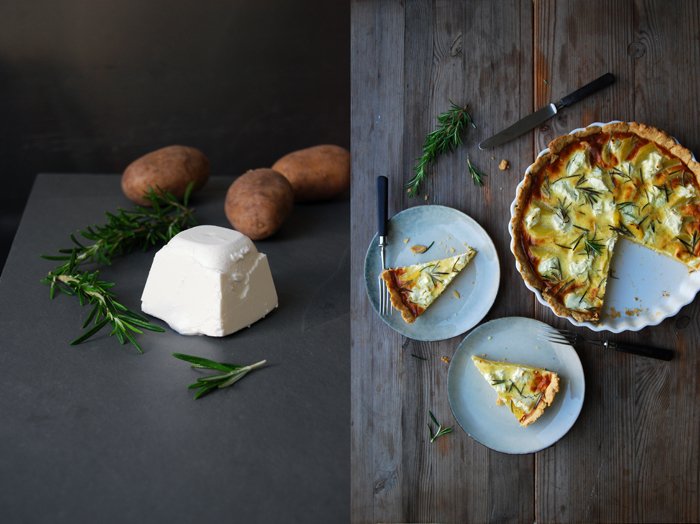
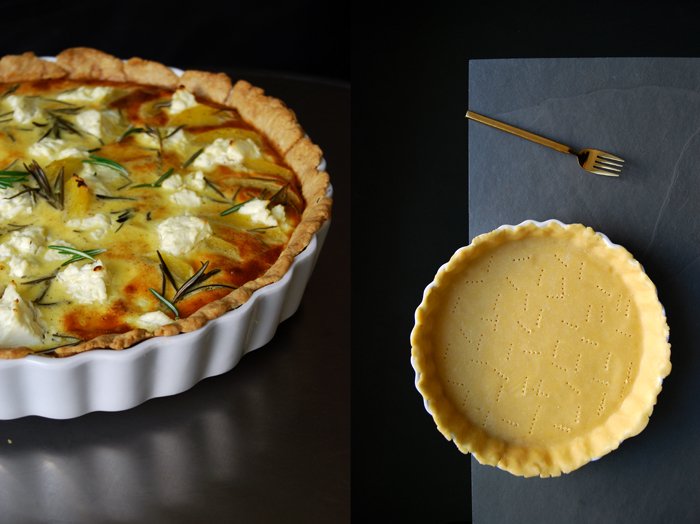
Potato, Chèvre and Rosemary Tart
Quite a few of the recipes that I have collected over time have become my culinary buddies, friends to celebrate good times just as much as giving me comfort when it gets tough. A savory tart, the wonderful French quiche, is definitely one of them. It's as easy and comforting as pizza and I can adapt the topping to my mood and the seasons, which I do with creative passion.
There's something about the buttery pastry base of a tart that gives me great satisfaction. An Italian pizza is a loud feast, preferably enjoyed in the company of friends. The base can be thin and crisp or oily and fluffy like a focaccia - the Italian oven classic is comfort food at its best, always. A quiche however, is more intimate, it's quite a sensual dish. The pastry needs to be thin (at least for my taste), crumbly and flaky. It's delicate, fragile, which makes it perfect for a romantic date or a picnic in the countryside. Add a glass of velvety red wine and you will have a lot of fun.
There are quite a few quiche recipes on the blog and I can't stop adding more: there's one with tomatoes and mozzarella, beans and ramp, with leek, one with fennel … Click here for the entire eat in my kitchen quiche collection. Today's recipe feels like a trip to the Provence, at the peak of summer. The potatoes give it a hearty touch - almost like a German quiche - yet the milky chèvre and woody rosemary make it light and take it right back to the Mediterranean.

Potato, Chèvre and Rosemary Tart
For a 30cm / 12″ tart pan or baking dish you need
For the short crust base
plain flour 260g / 2 cups
fine sea salt 1 teaspoon
butter, cold, 130g / 1/2 cup plus 1 tablespoon
large egg 1
Combine the flour and salt. Add the butter and cut it with a knife into the flour until there are just little pieces of butter left. Continue with your fingers and work the butter into the flour until combined (there shouldn’t be any lumps of butter left). Add the egg and continue mixing with the hooks of your mixer until you have a crumbly mixture. Form a disc, wrap in plastic wrap and put in the freezer for 10 minutes.
Set the oven to 200°C / 400°F (conventional setting).
Roll out the dough between plastic wrap then fit the dough into a 30cm / 12” quiche dish, pushing it into the dish. Prick the dough all over with a fork and bake for 15 minutes or until golden. If the dough bubbles up, push it down with a fork. Take the quiche dish out of the oven and reduce the temperature to 180°C / 350°F.
For the filling
large eggs 4
sour cream or crème fraîche 175g / 3/4 cup
heavy cream 120ml / 1/2 cup
fine sea salt 1 teaspoon
ground pepper
nutmeg, freshly grated, a generous amount
potatoes, boiled, peeled and sliced, 500g / 18 ounces
soft chèvre, broken into chunks, 110g / 4 ounces
fresh rosemary needles, a small handful
For the filling, whisk together the eggs, sour cream, heavy cream, salt, pepper and nutmeg.
Arrange the potatoes on top of the pre-baked pastry and season with a little salt, pepper and nutmeg. Sprinkle with the chèvre and rosemary then pour the egg mixture into the pastry base. Bake for 50 to 55 minutes or until golden, the top should be firm and the pastry crispy. Let it cool for a few minutes before serving.