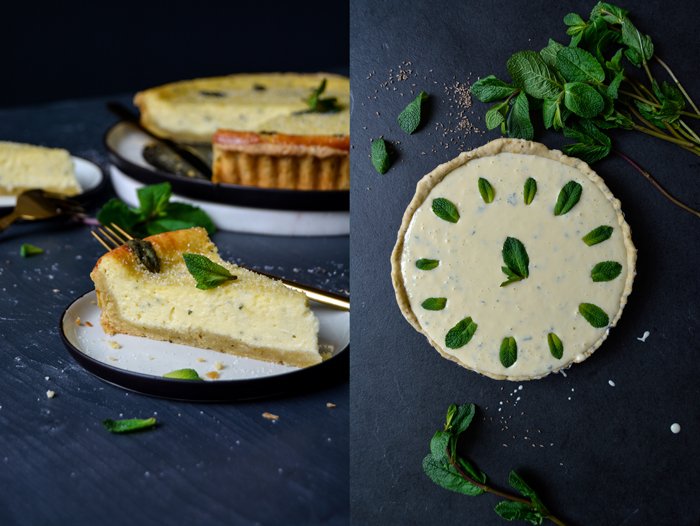
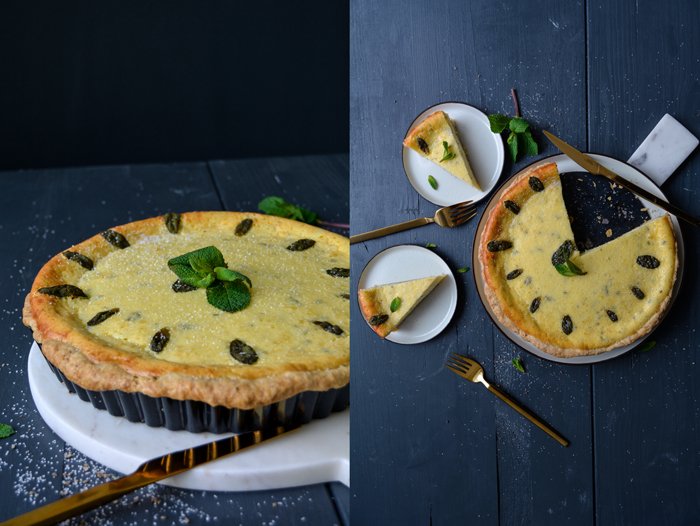
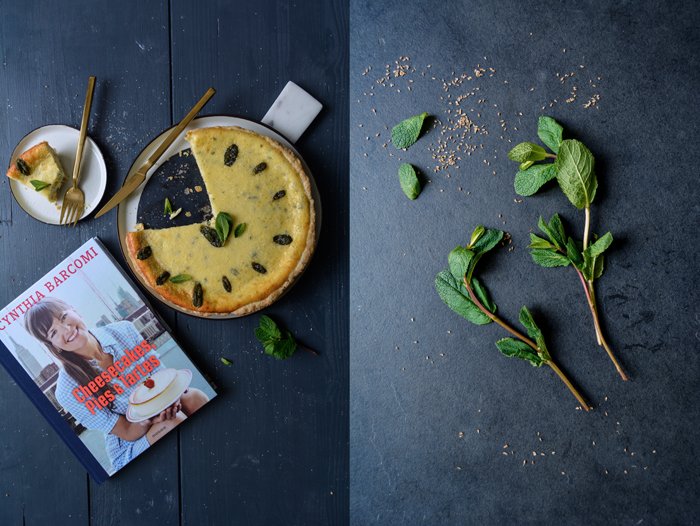
Cynthia Barcomi's Cheesecake with Mint and Aniseed Crust
This recipe comes from a woman who is a great inspiration in the kitchen and for life - and she's also one of the reasons why I live where I live. I used to visit Berlin quite often in my twenties and on one of those trips, I discovered Barcomi's Deli right in the heart of the city's old Eastern part. The moment I walked through the hidden Sophienhöfe for the first time, I fell in love with its peaceful backyards and the tall brick walls covered in vine. When I opened the glass door to Cynthia Barcomi's cozy café, I found my place (update: sadly, the café closed in 2021). Amazing coffee and the best American cakes, muffins, and sandwiches I had ever tasted, I was hooked. So I decided that if I ever moved to this city, it would have to be close to Cynthia's kitchen. And that's what I did.
Cynthia is from New York. In the late 80's, she came to Berlin to live and work here as a professional dancer. Today, she's one of Germany's most successful women in the food business. She started roasting her own coffee beans long before it became a trend, and she introduced the people in her new home city to all the scrumptious treats she grew up with: bagels, New York cheesecake, fruit pies, and luscious sandwiches made with the juiciest potato bread. It became a great success. When you meet Cynthia, you can see right away that she's not the kind of person who would rest if something works out. She's constantly on the move, her enthusiasm is impressive, and she jumps from one project to the next project. She started a flourishing catering business, became a popular TV host, sells her own bakeware collection (she has the most perfect pie dishes!), and she wrote six best selling cookbooks. And all this as a mother of four children - sometimes I wish I had her energy.
It's only a year ago since Cynthia published her last book Cookies, which includes the best brownie recipe I know: chocolate and peanut butter. They are divine. Her new masterpiece is just as packed with deliciousness and focuses on Cheesecakes, Pies & Tartes (in German). It's a very special book, as Cynthia, for the first time, shared her signature cake, the best New York cheesecake in town. Her fans have been bugging her for years to share it with them, but she declined. So finally, after 20 years, she had mercy on us and opens her new book with this exact recipe. When I decided to write about Cynthia's new creations, I felt so tempted to bake this cake and share the recipe here with you, but I wasn't even sure if I feel quite ready to bake this cake at home in my kitchen. I've ben enjoying it for so long at her café, do I want to know how this piece of magic is actually made? I think for now, I want to leave it this way, I just jump on my bike whenever my appetite calls for it and roll down the hill to her Deli.
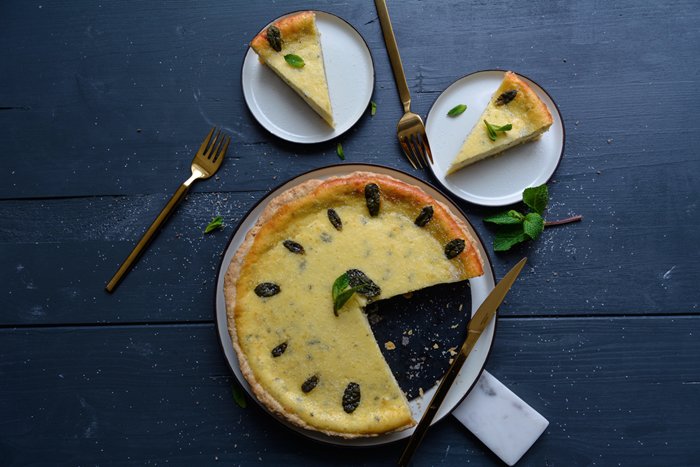
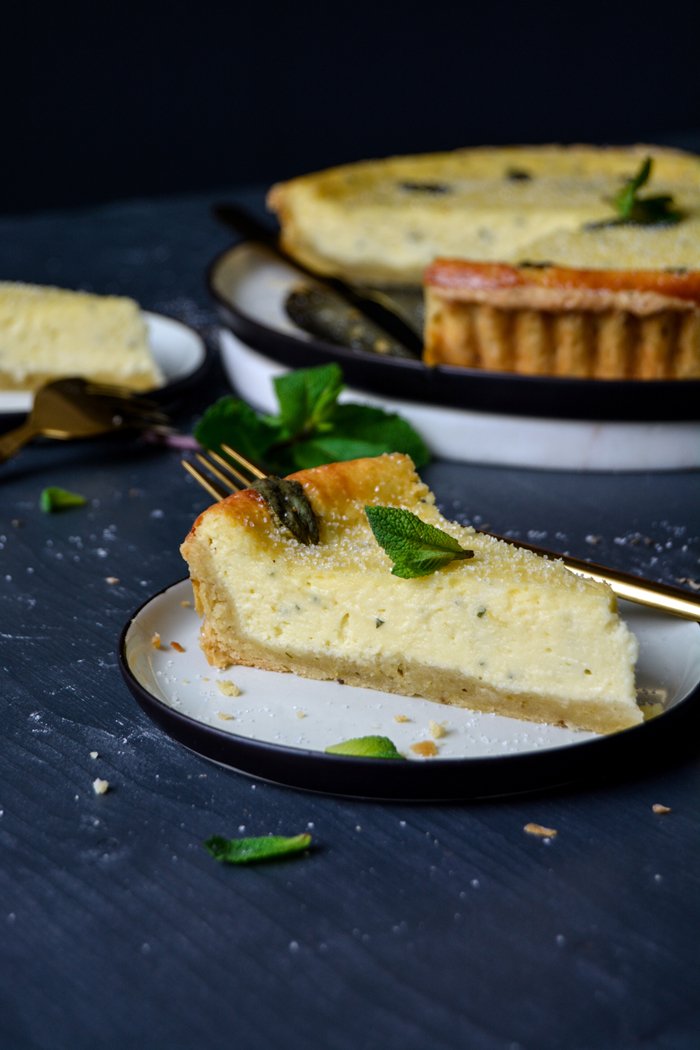
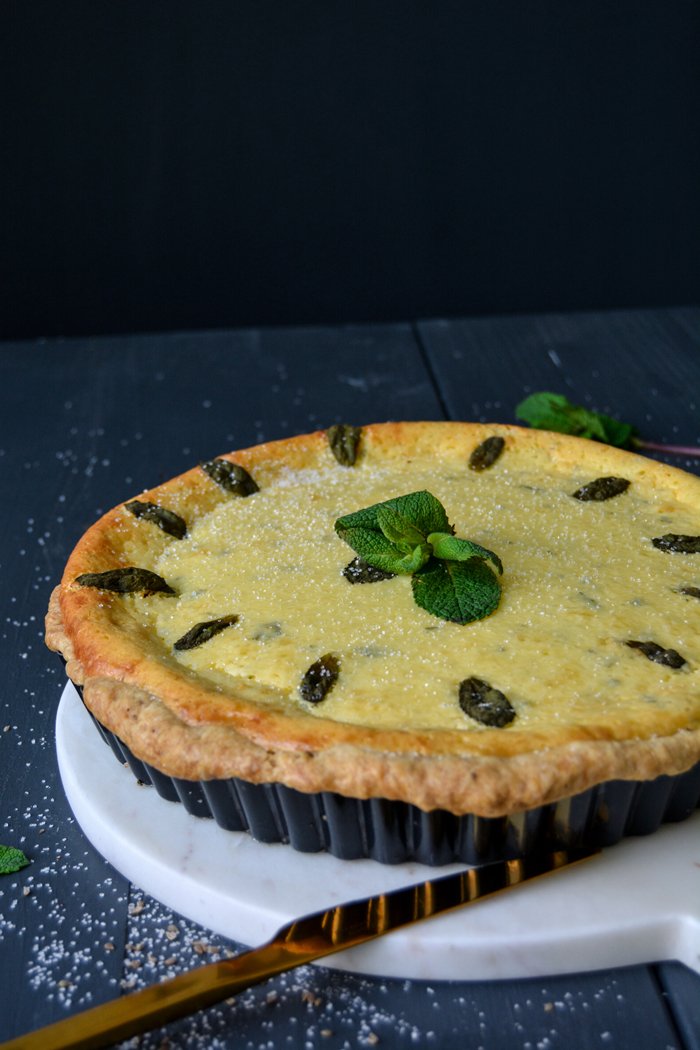
But as I thumbed through the pages of her new book, reading about such tempting treats as Blueberry Pocket Pies, Peanut Butter Townie, Sweet Potato Spice Bars with Potato Chip Crust, and Honey Almond Goat Cheese Cheesecake, I got excited. And then I spotted a recipe that made it impossible to read any further: A Spanish Cheesecake or Flaó from Ibiza. The pie is made with ricotta and mascarpone and refined with lemon and mint - this is genius! The filling lies on an aniseed short crust base and it's the most aromatic, fragrant, and light cheesecake I ever had on a plate. Two days ago, I shared the last pieces of it with some friends and there was happy silence at the table. I never even thought of adding mint to a cheesecake and it's actually the best thing that could happen to it. Cynthia learned about this combination from a friend's aunt, Maria, an eccentric art collector from Spain, living in New York. I have to start thinking about what else I could do with the mint plant outside my kitchen window.

When I sipped on my creamy cappuccino at Barcomi's many, many years ago, it would have never crossed my mind that one day, the woman who created all this would become more than an inspiration in my life. Cynthia gave me the best tips for my book when I started working on it. She shared her experiences with me and helped me so much during the whole process in the past year. And then, when I asked her if she'd like to write a quote for my book, she didn't hesitate. I emailed her the pages of the Eat In My Kitchen book, and I have to confess that I felt a bit nervous to share it with her. When I read her words, it brought me to tears:
"Great food like great art speaks the truth. Meike’s recipes and photos are pared down, honest and revealing – I love what she does! She goes right for the sensory jugular leaving you wanting and needing more. Void of superfluous detail, Meike’s all about delicious food – brava!"
Thank you Cynthia!

Cynthia Barcomi's Mint Cheesecake with Aniseed Crust
Serves 6
For the pastry base
plain flour 200g / 1 1/2 cups
granulated sugar 2 teaspoons
aniseed, finely crushed in a mortar, 1 1/2 teaspoons
salt 1/2 teaspoon
freshly grated zest from 1/2 lemon
unsalted butter, cold, cut into cubes, 90g / 1/3 cup plus 1 tablespoon
vegetable shortening, cold, cut into cubes, 30g / 2 tablespoons
egg yolk 1
olive oil 1 tablespoon
For the filling
fresh ricotta 250g / 9 ounces
mascarpone 250g / 9 ounces
granulated sugar 200g / 1 cup
eggs 4
freshly grated zest from 1/2 lemon
fresh mint leaves, finely chopped, 2 tablespoons
For the topping
fresh mint leaves 12
granulated sugar 1 tablespoon
In a large bowl, combine the flour, sugar, aniseed, salt, and lemon zest. Add the butter and vegetable shortening and rub them into the flour mixture with your fingers, or use the dough hooks of an electric mixer and quickly mix until you have a crumbly mixture. Whisk together the egg yolk and olive oil in a measuring cup and add water until the total is 100ml / 1/3 cup plus 1 tablespoon. Add to the dough and mix until just combined; don't knead the dough. Form a thick disc, wrap in cling film, and put in the fridge for 2 hours (or longer).
Preheat the oven to 175°C / 350°F and butter a 23cm / 9" pie or tart dish.
For the filling, in a large bowl, using an electric mixer, whisk together the ricotta, mascarpone, and sugar until creamy. Add the eggs, 1 at a time, and stir in the lemon zest and chopped mint leaves.
Take the pastry out of the fridge and roll our between cling film, large enough to line the bottom and sides of the pie dish. Line the pie dish with the pastry, press it into the dish, and leave about 5mm / 1/4" of dough hanging over the rim.
Pour the filling on top of the pastry and decorate with the 12 mint leaves (arrange them like a clock). Bake for 50 minutes or until golden. (Cynthia suggests that you check the cake after 30 minutes and cover it with aluminium foil if it gets too dark, I skipped this, the colour was fine.) Take the cake out of the oven, sprinkle with the sugar, and let it cool.


Spring Timpana - Maltese Pasta Pie with Asparagus, Peas, and Leeks

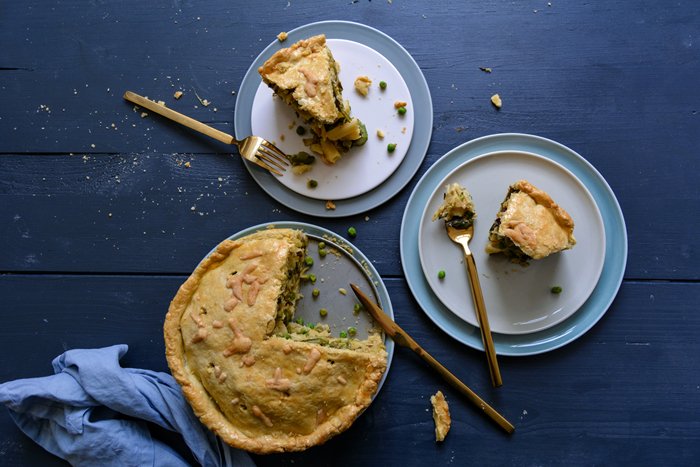
Yesterday's excitement called for lots of carbs - and a glass of wine! It was a day packed with too many emotions to handle. After sharing the cover of my book and the Amazon pre-order links here on the blog, I felt overwhelmed by all the sweet emails and messages I got from all over the world. I needed good, solid, rustic food for dinner to calm me down. I made a dish that is so packed with carbs that it actually feels a little weird, but it's also packed with flavour and comfort, so it makes sense. I baked a springy Maltese pasta pie, also known as Timpana. I introduced you to this Maltese street food classic a few months ago and the response to the recipe was crazy.
Timpana is basically short pasta stuffed into a buttery pastry shell. Usually, it's enriched with Bolognese, which is nice but it can get a little boring if you've eaten it for years, so last time I made it I went for a meat-free Mediterranean filling of zucchini, eggplant, tomato, and basil. It was so good that I thought I'd never need another filling ever again. But then spring came around the corner with all its pretty greens. Wouldn't it be nice to see green asparagus, sweet peas, and leek inside this pie beauty? I didn't have to think about it twice. I went to the grocery store, put all the vegetables in my bicycle's basket, and once home, I turned on the oven.
It's still a little weird for me to look at this combination of penne and shortcrust in a rational way but maybe this dish shouldn't be overanalyzed. It simply feels and tastes good, and after the first bite, my mind and emotions were at ease again: I felt so happy and thankful to have the eat in my kitchen blog and book in my life, both of them connect me with so many people all over the world and bring so many fantastic experiences into my life.


Spring Timpana - Maltese Pasta Pie with Asparagus, Peas, and Leeks
You'll need a 20 1/2cm / 8″ springform pan.
Serves 4-6
For the filling
penne pasta 250g / 9 ounces
green asparagus, trimmed, about 500g / 1 pound
peas, fresh or frozen, 200g / 7 ounces
olive oil
leek, thinly sliced, 200g / 7 ounces
Dijon mustard
3 teaspoons
fine sea salt 1 teaspoon
ground pepper
organic egg 1
Parmesan, freshly grated, 80g / 3 ounces for the filling plus 1 tablespoon for the topping (or 100g / 3 1/2 ounces for the filling if you prefer a richer pie)
For the pastry
plain flour 300g / 2 1/3 cups
fine sea salt 1 teaspoon
butter, cold, 150g / 2/3 cup
organic egg yolks 2
water, cold, 2 tablespoons
For the glaze
organic egg yolk 1
milk 1 tablespoon
a pinch of fine sea salt
For the filling, cook the penne in salted water until al dente, they should have bite. Let the pasta cool completely.
In a large pot, bring salted water to the boil and cook the asparagus for about 3 minutes or until al dente. Reserve 120ml / 1/2 cup of the cooking water. Drain the asparagus and rinse quickly with cold water. Let the asparagus cool completely, then cut into pieces as long as the penne.
In a small saucepan, cook the peas in boiling salted water for 1 minute. Drain and rinse with cold water; set aside.
In a large, heavy pan, heat a splash of olive oil over medium-high heat and cook the leek for about 10 minutes, stirring once in a while, or until golden and soft; let it cool completely.
Preheat the oven to 200°C / 400°F (conventional setting).
For the pastry, combine the flour and salt in a large bowl. Cut the butter with a knife into the flour until there are just little pieces of butter left. Continue with your fingers and rub the butter into the flour until combined. Add the egg yolks and water and continue mixing with the dough hooks of an electric mixer until you have a crumbly mixture. Form 2 discs, dividing the dough roughly 2:1, wrap in cling film, and put in the freezer for 10 minutes.
For the filling, in a large bowl, combine the pasta, the reserved asparagus cooking water, mustard, salt, and a generous amount of ground pepper. Season to taste with salt, pepper, and mustard, then stir in the egg and mix until well combined. To fill the pie, the filling should be completely cool.
For the glaze, in a small bowl, whisk together the egg yolk, milk and salt .
Take the dough out of the freezer and roll out both discs between cling film, the large disc, for the bottom and sides of the springform pan, should be about 32cm / 12 1/2″, and the smaller disc should be big enough to cover the pie.
Line the bottom and sides of the springform pan with the large pastry disc. Spread 1/3 of the pasta mixture on top of the pastry, sprinkle with 1/3 of the Parmesan, 1/3 of the vegetables (asparagus, peas, and leek) and season with salt and pepper to taste. Continue making 2 more layers. Pour any remaining liquid from the pasta mixture over the filling. Close with the pastry lid and gently push the rim with your fingers to seal the pie. Using a toothpick, prick a few holes into the top of the pie. Brush the top with the egg glaze and sprinkle with the remaining 1 tablespoon of cheese.
Bake the pie for 15 minutes, then turn the heat down to 175°C / 350°F and bake for another 50 minutes or until the pie is golden and the pastry is baked through. Let the pie cool for at least 15 minutes before you cut it into pieces.


What it means to write a cookbook - the EAT IN MY KITCHEN book is ready for pre-order!

It's coming to life: my book cover is out, the pre-order link is out, and I'm the happiest person in the world!
Writing a cookbook feels like being on a rollercoaster for months. It reveals emotions that I didn't even think I'd be capable of. Creating a book throws you up to the highest highs and drops you back to the ground, it makes you crawl into the deepest holes to bring out the best that you can possibly do - because it's a book. But it's all worth it, as it's one of the most exciting and satisfying experiences I've ever had in my life.
Usually, a book starts with an idea, a script, that the author thinks is worth sending into the world, or at least to an agent or a publisher. In my case, it was different, I was so busy with my blog eat in my kitchen, to keep the constant flow of a new recipe every day in the first year, that a cookbook didn't even come to mind. It felt strange seeing myself as a blogger, let alone calling myself an author. Some of my readers mentioned a book, or kept asking when I'd start working on a physical version of the blog, but I never saw myself as a cookbook author. I wrote about my recipes, that felt natural, as I've always been inspired by food, so coming up with new ideas in my kitchen is quite an easy task for me. My love for good food keeps the ideas flowing. So when Holly La Due from Prestel Publishing send me an email from her New York office a bit over 1 year ago to ask if I'd like to write a cookbook, I felt surprised, shocked, and overwhelmed. But then, after a few days, when the idea had sunk in, there was just happiness and gratitude for this great chance, and so I started working on what has become my first book:
EAT IN MY KITCHEN - To Cook, to Bake, to Eat, and to Treat is a collection of 100 mainly new recipes plus a few blog classics and six meet in your kitchen features (with Molly Yeh, Yossy Arefi, the Hemsley sisters and some more). I cooked and baked everything myself, alone in my kitchen at home, I took all the pictures, and wrote the book in two languages, in English and in German. To see it come to life more and more every day is rather overwhelming, and then, when I read the quotes about my book from two people whose work I admire so much, I was close to tears:
"Eat in my kitchen is a wonderful selection of recipes, bursting with colour, beauty and flavour. Each page offers a new temptation". - Sami Tamimi, head chef, Ottolenghi restaurants, co-author of Ottolenghi: The Cookbook and Jerusalem
"Great food like great art speaks the truth. Meike’s recipes and photos are pared down, honest and revealing – I love what she does! She goes right for the sensory jugular leaving you wanting and needing more. Void of superfluous detail, Meike’s all about delicious food – brava!"- Cynthia Barcomi, pastry chef, founder of Barcomi's, and author of six cookbooks
The EAT IN MY KITCHEN book will be published by Prestel on the 4th October (in English and in German) but if you're as impatient as me, you can already pre-oder it online:
Amazon.de (the German pre-order link will be available on 8th May)
In the past 12 months, my life has been more than crazy. I pity my boyfriend and I can't thank him enough for sticking with me, despite my countless nervous breakdowns and the fact that he put on weight due to my excessive cooking and baking. But we managed, all together, with my fantastic publisher team in New York, Munich, and London, and first and foremost, with my inspiring, patient, visionary Holly. I can't thank you enough.

What it means to write a cookbook:
I had lots of doubts at the start of this process, not so much about my recipes, but mainly about my photography. I'm not a professional photographer, I've always been far more passionate about the food, and I hate editing pictures (thank you so much Jennifer Endom for taking over this job for my book). So in the first days of shooting recipes for the book, I questioned every little detail and I was sure it wouldn't be good enough. Luckily, I got over it at one point, I had to, and then it became much easier. I developed all the recipes in a relatively short amount of time, it felt like they've always been inside me, just waiting to be turned into a book. After a few skype calls with my mother - the best food consultant I could ask for - and with Holly, my recipe collection was set.
Being well organized is essential when working on a book, and luckily, that's how my mind works. I can be a bundle of emotions, but if needs be, my head is clear and focussed. It helped that I studied architecture, those days at university taught me how to structure my working steps well and keep an overview (at least most of the time). Lots of lists, excel files, and notes lead to a cooking and shooting plan, including information when certain ingredients are available, which tableware I would use, and which recipes I would cook together in one day. The cooking/ shooting process took me 6 weeks and I was done - and exhausted. I had a strict weekly plan for grocery shopping, working on the blog, as I still posted 3 recipes a week at that time, test cooking, final cooking and shooting, and for writing. There were two moments during the whole process of working on my book when I felt like I crossed my limits, physically and mentally. Taking pictures of food means you're constantly rushing, to shoot the dish quick enough so that it still looks fresh, and to catch the right light (I only work with daylight). I felt constantly stressed, running out of time, and I was willing to keep the weirdest positions for the prefect shot for longer than my back would normally manage. After those 6 weeks I felt 10 years older.
Believing that the worst - or let's say, the hardest part was over - I went to Malta for 4 weeks, as I wanted to write the stories and final recipes in my Maltese mama's house in Msida. It was a great time, not very productive, but we had fun. I went snorkeling every day, we met our friends and family, and my mother came to visit for my birthday. I couldn't complain. And then I finally met Holly for the first time in person. She came to Malta to make the final selection of the pictures for the book together with me and while I had her on the island, I showed her around. It was beautiful and I wish that working on a book would always feel this way. But my rather relaxed Mediterranean schedule soon came to an end.
Writing didn't work out as easily under Malta's burning hot sun as I had expected, too many distractions, day trips, dinner parties, and the sea of course, left me with a manuscript that I wasn't that happy with. Back home in Berlin, I had to sit down at the desk - our dining table - and re-write almost everything. But then after a few weeks back in the North, I was happy with the results and my boyfriend was happy, who's the most critical when it comes to my book, which helps me a lot. So I sent everything to Holly and our copy editor Lauren Salkeld, who helped me put the recipes in a proper, professional cookbook approved, form. And this - to my surprise - took months. We emailed back and forth, changed grams to cups and rucola to arugula, rewrote instructions to avoid misunderstandings, added spaces and deleted spaces, and then after 3 months, we were done and I felt close to a breakdown. From the start, I've been quite paranoid that there could be mistakes in the book. Be it in the writing, measurements, conversion, or whatsoever. Like a maniac, I read these pages countless times to avoid mistakes, and then every time we changed something again, I was so worried that more mistakes might sneak in (which did happen). The fact that I did the German translation right away didn't make it any better. Now, I worried about two books and not just one. You don't write a book that often in your life, and if you get the chance to do it, you want to do it right. People have expectations, they will be willing to spend their money on this book, and I want to give them something that they enjoy working with in their kitchen, a book that is inspiring, and that's also nice to look at. Everybody has been telling me from the start, "Meike, there will be mistakes, like in any other book," and I'm aware of this, but I want to keep them as rare as possible. Thanks to my proof-reading friends in LA and Berlin, we made it: Kisses to you, Pattie and Ursula!
There is one part of working on a book that I actually enjoy a lot, and that's when the designer comes in. I'm so glad to have the amazing Jan Derevjanik at my side, I trust her eyes and taste, we seem to speak the same visual language. Whatever she does, feels right and I never had to explain any of my visions to her. Be it the fonts she chose, the layout of the pages, colours, or the cover - which I love so much, it feels so much like me - Jan took a lot of weight off my shoulders as I knew I wouldn't have to worry about anything she does. Thank you for that!
So finally we're almost done and I slowly understand that there will be a printed book soon, my book. It still feels a little strange, and the moment I truly understood that "it's a book", was the moment when Holly sent me the cover design. When I saw EAT IN MY KITCHEN and my name written on the cover, and the picture of this salad that I can still taste in my mouth, I knew that we had created something great all together.
In autumn, we'll have book launch events in New York, Washington, London, Malta, and Berlin and there might be a few more, we just started working it out. So the journey continues, and wherever it may take me, I'm grateful for every single experience.And now, the biggest thank you goes to you, you wonderful eat in my kitchen readers, for being a part of this adventure! You made all this possible and I wish that you'll enjoy my book as much as I already do.
Meike xx
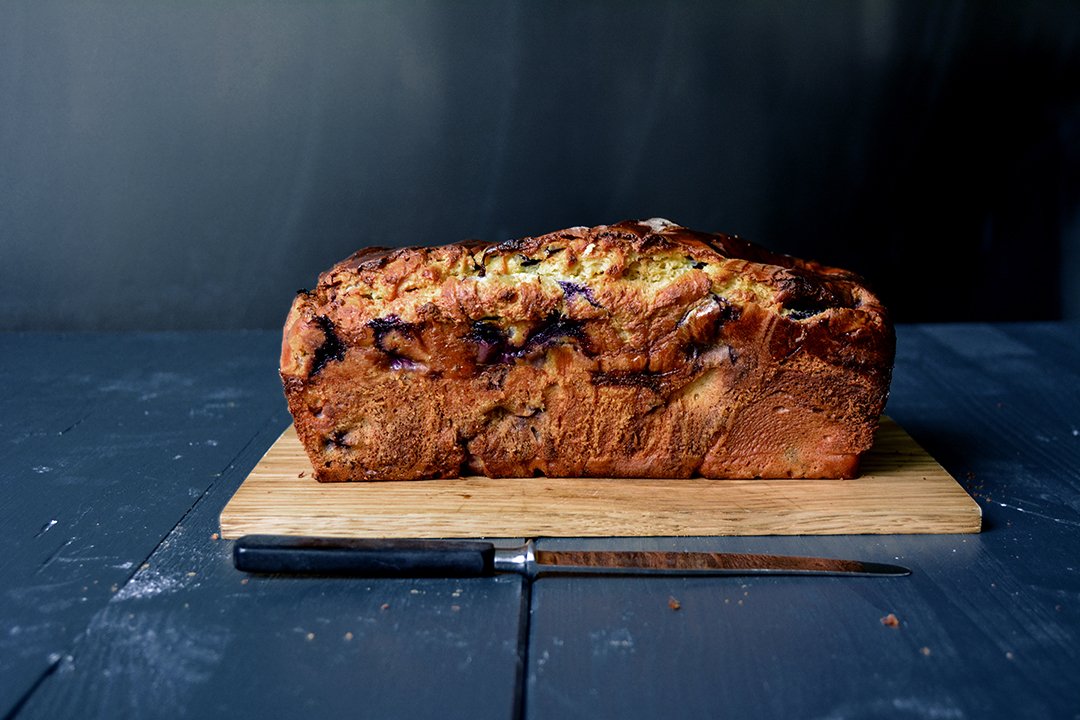
I've never shared a post on my blog without giving you a recipe, and although I intended not to write about food this time as the book is already so exciting, I can't help it:This is not really a recipe but it's my favourite food - although some people can't believe it. I love juicy white bread with olive oil, or dark German bread with butter. I need my daily dose of bread, I can't live without it. So to celebrate my appearance on Amazon as an author, we popped open a bottle of Champagne, broke chunks off a soft loaf of ciabatta, and drizzled them generously with fine Italian olive oil - I couldn't have asked for more!
Serves 2, when 2 want to celebrate
the best ciabatta bread you can get hold of, 1 loaf
the best olive oil you can get hold of, a few tablespoons
the best Champagne you can get hold of, 1 bottle
Enjoy with a special person!

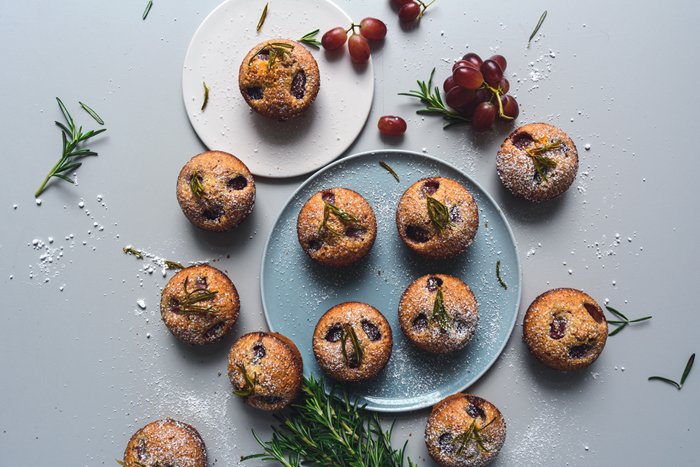
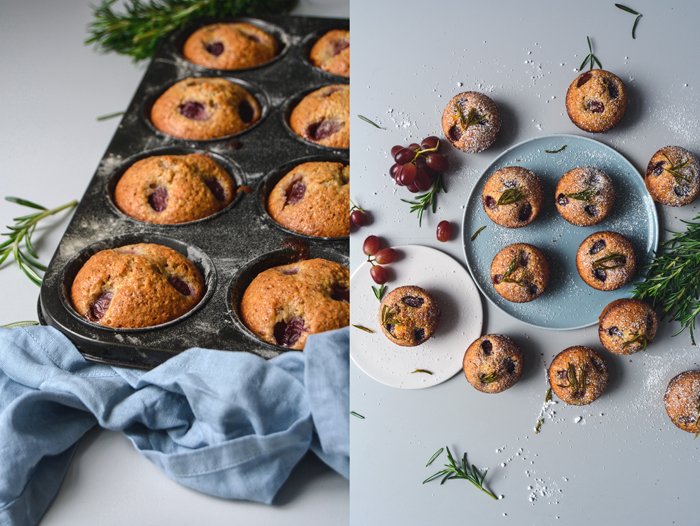
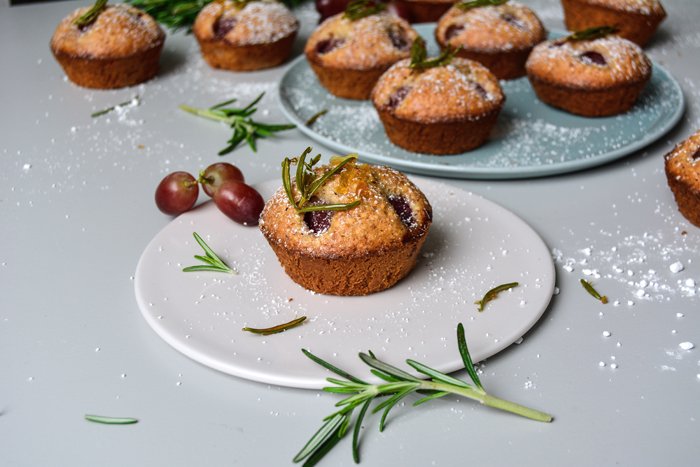
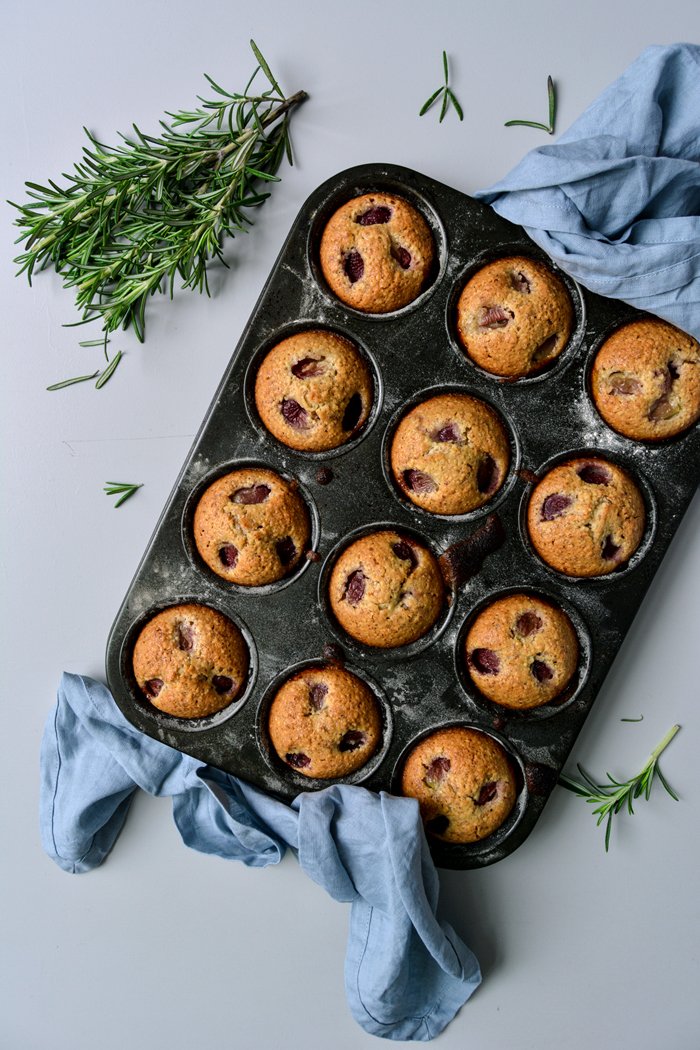
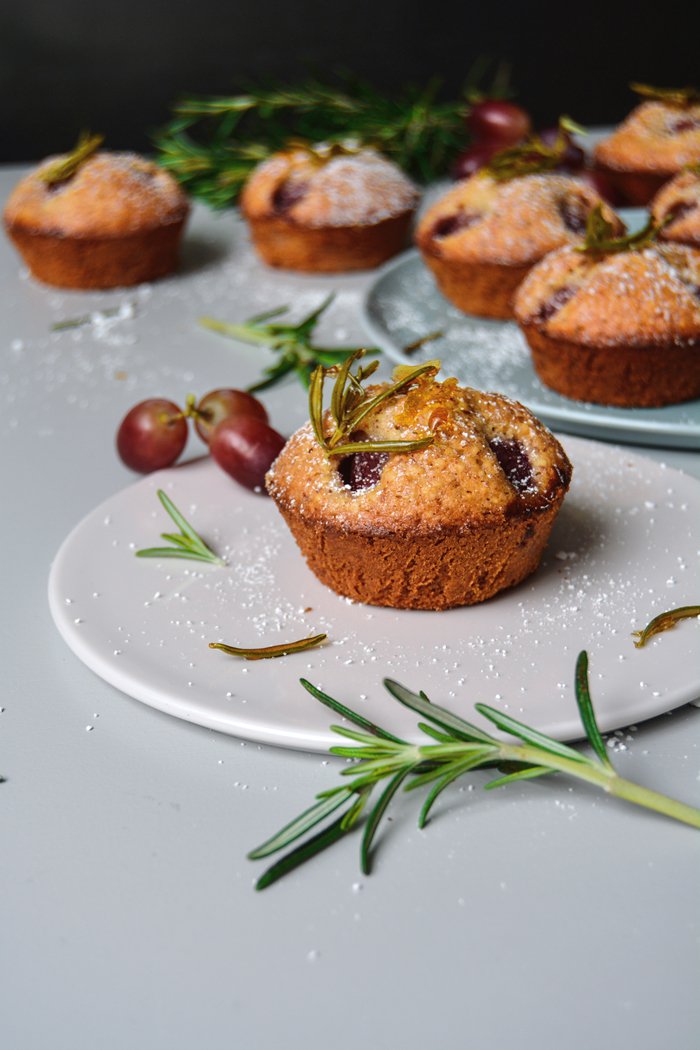
Grape and Olive Oil Friands with Caramelized Rosemary
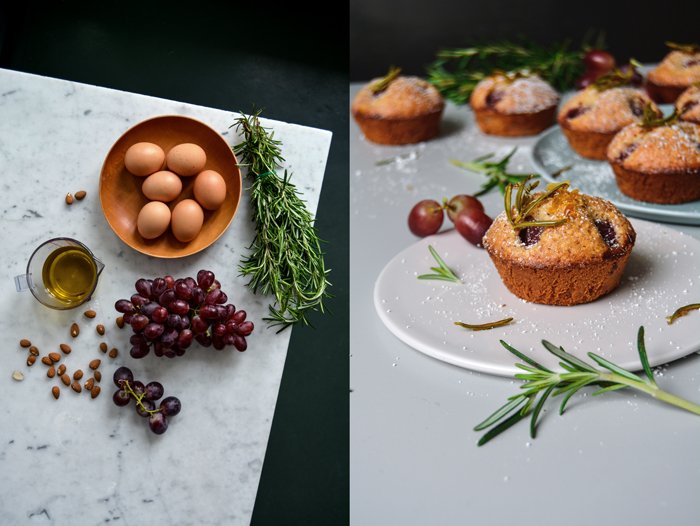
I don't know what drove me to come up with a grape-recipe in April, but it must have had something to do with the fact that I desperately felt like baking with fruits and there was nothing else in sight that sparked my interest. I went to the shop around the corner to find some inspiration, but there were just a few tiny baskets of unripe strawberries, I spotted plump blueberries, which seem to have become available all year round, and some very delicate - and artificial - looking raspberries. I didn't get excited by any of them.
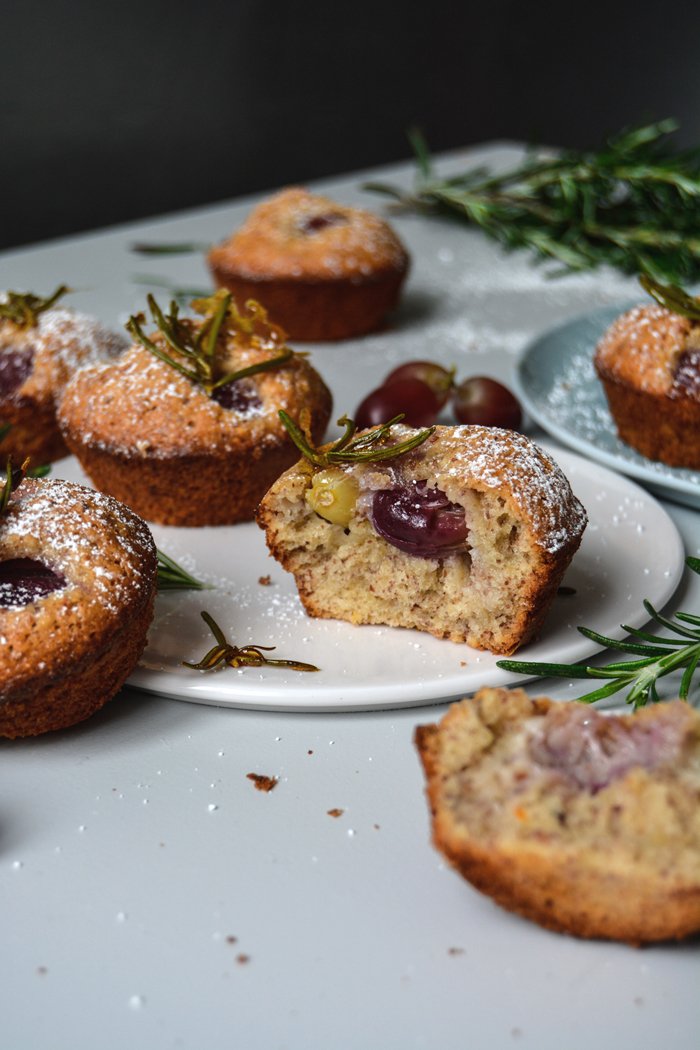
I usually try to follow the (local) seasons, but there was a bag full of South African grapes that seemed to fit perfectly to the bunch of rosemary that I had already picked. So they became the main flavours for my French olive oil friands. If we leave out the fact that it's not the fruit's season in the northern hemisphere where I live, it's a cozy sweet treat that is just right when the weather is too moody to go outside, or there's too much work on the desk, and you're forced to stay inside. A nibble of this aromatic beauty and the world looks much nicer again.
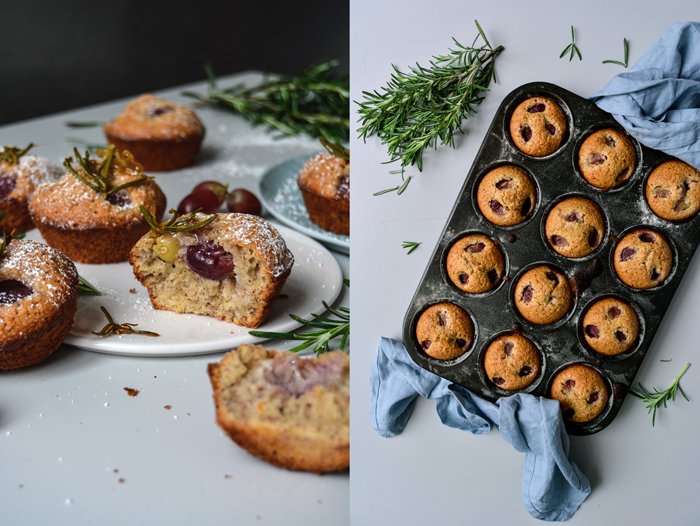
In case you've never heard of friands before - I must admit I was one of them - they are sumptuous small cakes, a patisserie classic. They look similar to muffins but the texture is actually more fine and delicate. They are made with ground almonds and just a little flour, and a generous amount of beaten egg white that helps the batter to rise instead of baking powder or baking soda. Traditionally made with melted butter, I just followed my mood and replaced the dairy product with mild olive oil. It was a good choice, especially in combination with the sweet fruit and fragrant herb.
Grape and Olive Oil Friands with Caramelized Rosemary
Makes 12 friands (in a muffin pan)
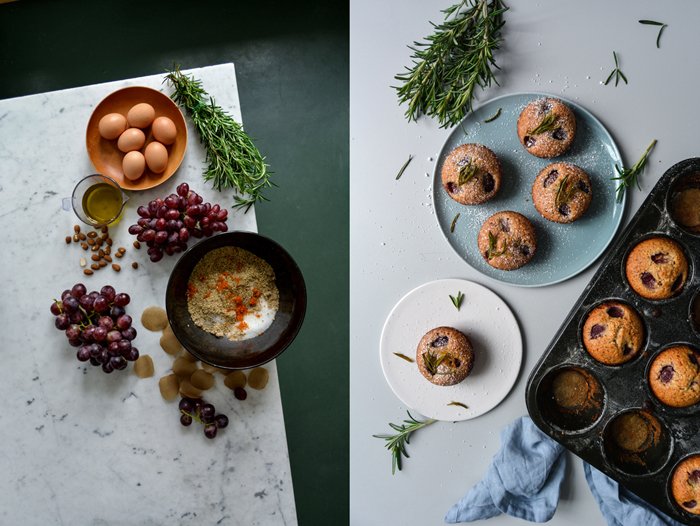
For the friands
organic egg whites 6
fine sea salt 1/8 teaspoon
granulated sugar 180g / 3/4 cup plus 2 tablespoons
ground almonds (or hazelnuts) 200g / 1 2/3 cups
plain flour 80g / 2/3 cup
freshly grated orange zest 2 teaspoons
mild olive oil 140ml / 2/3 cup
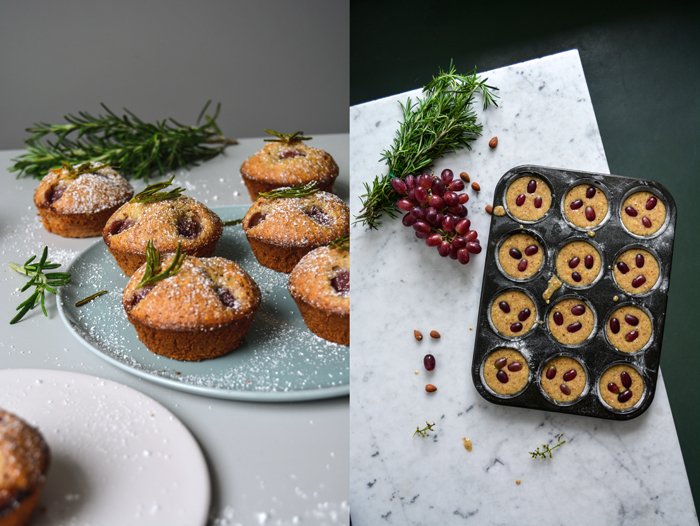
small dark grapes, preferably seedless (or seeds removed), 36 (3 grapes for each friand)
icing sugar, for the topping
For the caramelized rosemary
granulated sugar 3 tablespoons
water 2 tablespoons
the tips of 12 sprigs of rosemary (with about 4-5 needles each)
Preheat the oven to 200°C / 400°F (conventional setting). Grease a 12-cup muffin pan with olive oil, dust with a little flour, and place in the fridge. Cut 12 circles of parchment paper, large enough for the bottom of each muffin cup; set aside.
In a large bowl, using an electric mixer, whisk the egg whites, salt, and 1 tablespoon of the sugar for about 1 minute until it forms soft peaks.
In a second, large bowl, combine the remaining sugar, ground almonds, flour, and orange zest. In alternating batches, fold in the beaten egg whites and the olive oil, about 1/3 at a time. Stir gently until just combined.
Take the muffin pan out of the fridge, lay 1 parchment circle into each muffin cup, and divide the batter between the cups. Place 3 grapes on top of the batter in each muffin cup and bake for about 20 minutes or until golden. Check with a skewer, it should come out clean. Let the friands cool for a few minutes, then, using a small sharp knife, cut along the sides of the muffin cups and lift the friands out of the muffin pan. Remove the parchment paper.
For the caramelized rosemary, place a piece of parchment paper on the counter top. In a small, heavy pan, heat the sugar and water on high heat, without stirring. When the sugar is golden and caramelized, stir in the rosemary until coated in caramel and transfer to the parchment paper. Let it cool for a few minutes before you peel it off the parchment paper.
Dust the friands with icing sugar and garnish with the caramelized rosemary. They taste best on the first day.

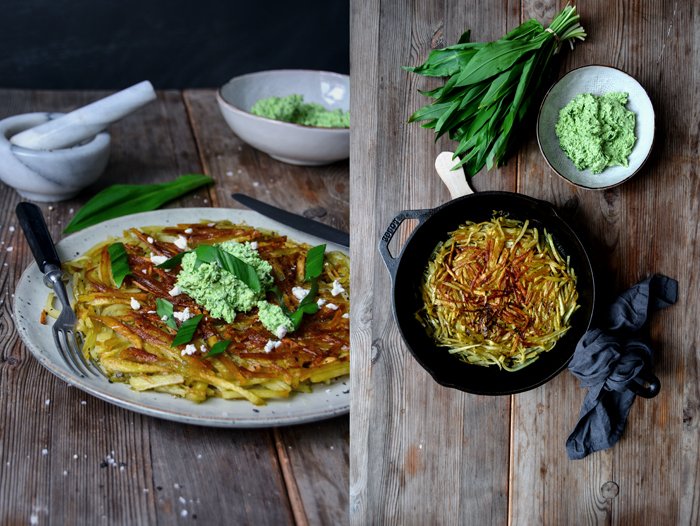
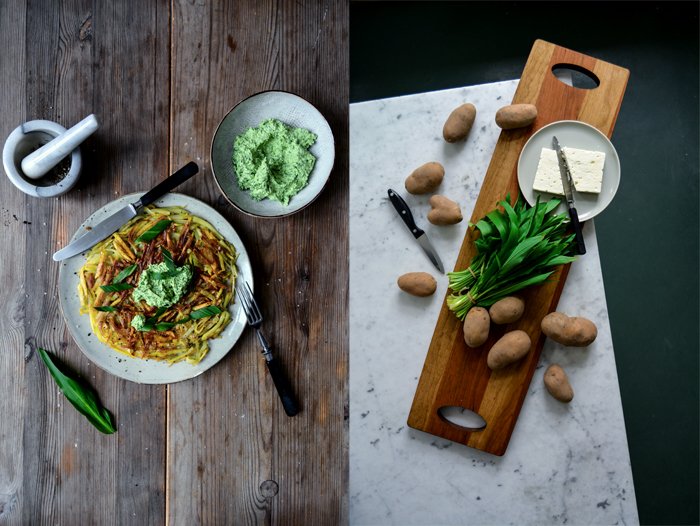
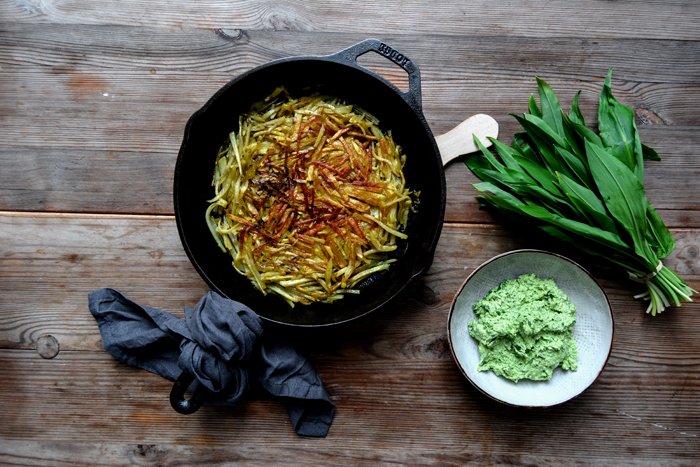
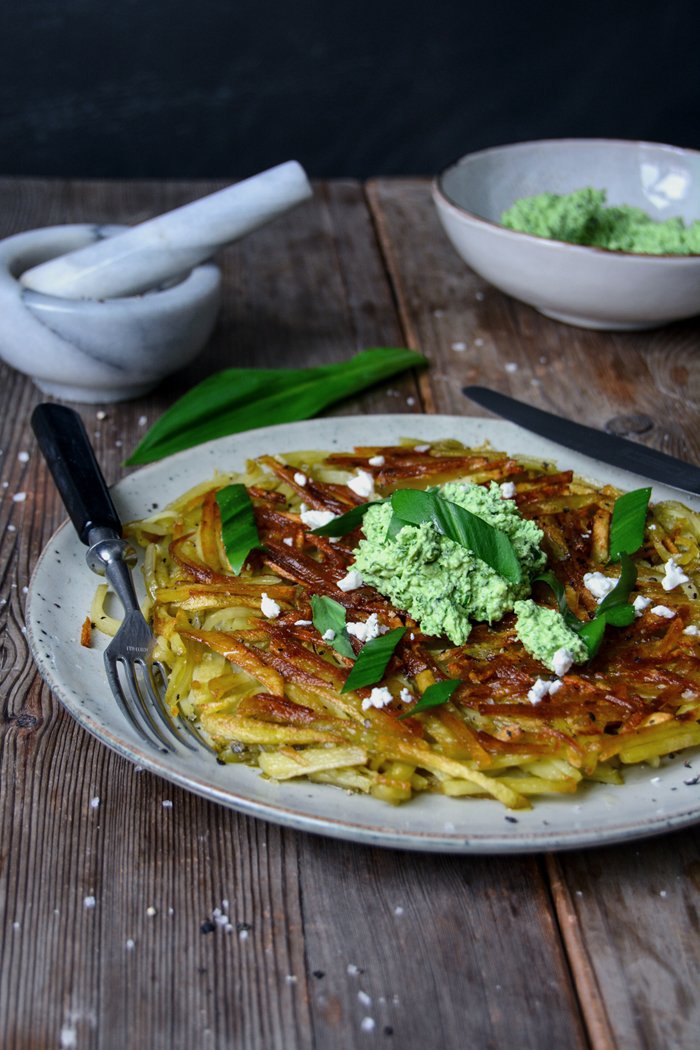
Swiss Potato Roesti with Ramp Feta Dip
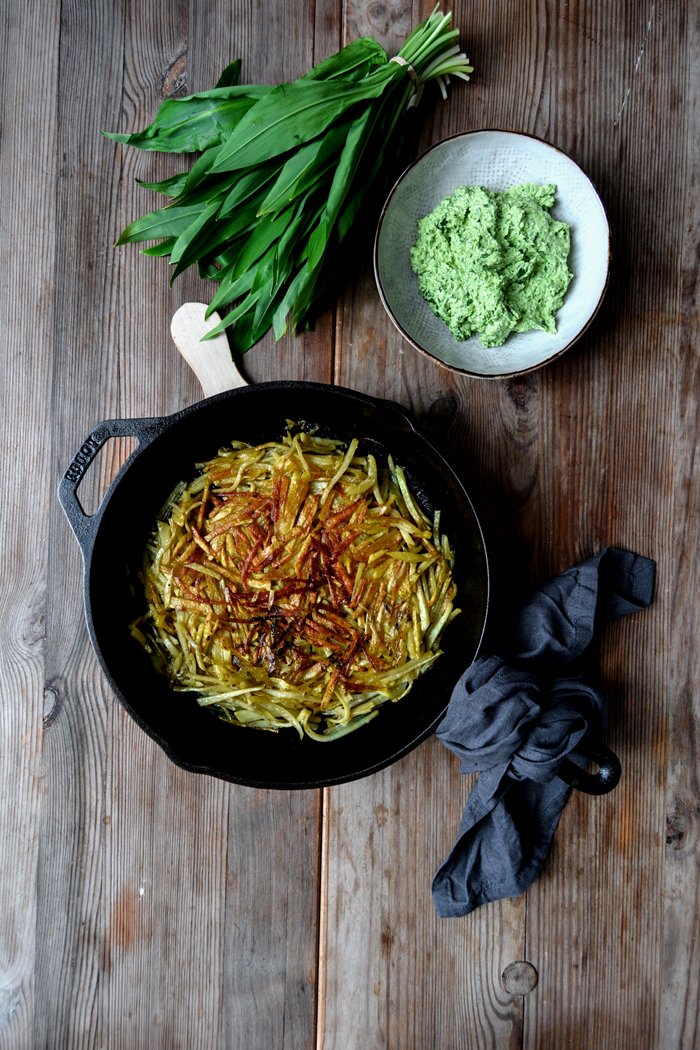
It's back! Before I even saw it, I could smell it: the oniony, fresh, green aroma of ramp.
I can't say what excited me more last weekend, Berlin's summery temperatures that brought city life back into the parks, cafés, and restaurants, or my beloved ramps. Large bunches of the springy leaves tucked into little buckets waited for me at the market and I couldn't stop myself - I already used more than a dozen of them. Mainly for pesto, as it tastes so unbelievably good and my boyfriend is convinced that it calms his pollen allergy. Soups are next, seafood, burgers, sandwiches, ramp's season is short but my inspiration to use it is unlimited.
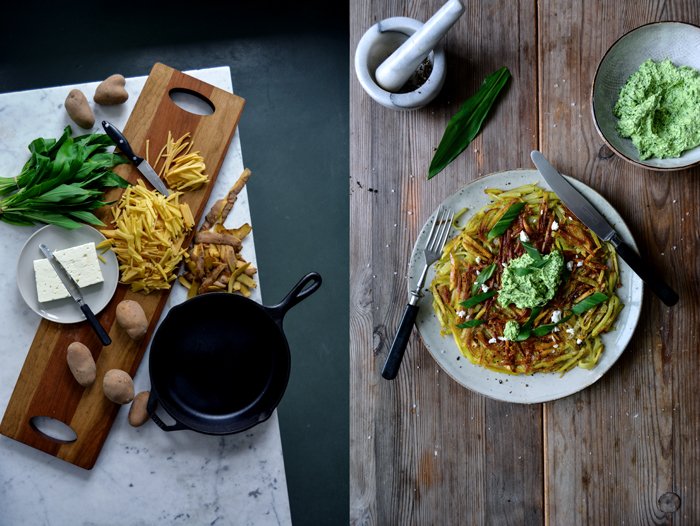
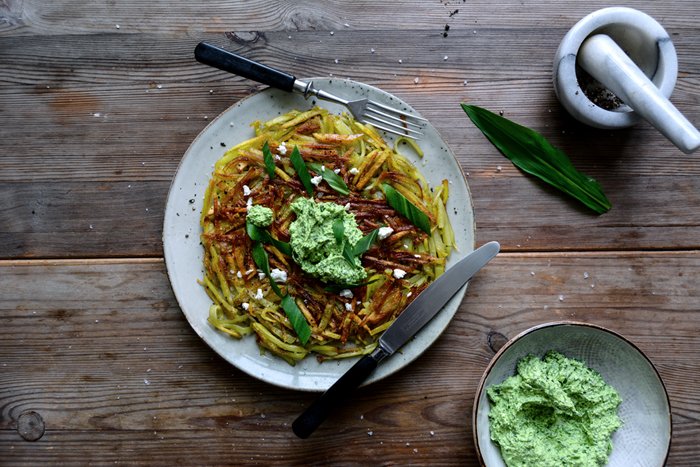
Another one of my spring classics is roesti (or Röschti). It's a rustic Swiss dish made of grated raw and preferably young potatoes fried in a heavy pan like crisp latkes, there's no flour or egg, only salt and pepper for seasoning. Last year, I shared a recipe with you that added lemon zest and rosemary, which made it feel quite summery. This time I go for a rich dip: feta whipped with lots of chopped ramp leaves and a squeeze of lemon juice. The spicy green melts into the cheese's saltiness, it's divine. I made a large batch of the dip as it's also fantastic in combination with juicy ciabatta or crusty dark bread.
Swiss Potato Roesti with Ramp Feta Dip
Serves 2 for lunch
peeled waxy potatoes, cut into small match sticks, 400g / 14 ounces
flaky sea salt
black peppercorns, crushed in a mortar
olive oil
For the feta dip
feta 150g / 5 ounces
fresh ramp leaves 30g / 1 ounce
olive oil 3 tablespoons
freshly squeezed lemon juice 1 tablespoon
ground pepper
For the dip, in a food processor or blender, pulse the feta, ramp leaves, olive oil, and lemon juice until smooth. Season with ground pepper to taste.
Heat 5 tablespoons of olive oil in a 22cm / 9″ cast iron pan on high heat, add the potatoes, quickly spread them evenly, and push them down with a spatula. Turn the heat down to medium / medium-high and cook for about 5 minutes, mind that the potatoes don’t burn. Using a spatula, loosen the roesti from the sides of the pan and lift it gently from the bottom, but don't flip it over yet, it should be golden and light brown at the bottom. To turn the roesti, cover the pan with a large lid and flip the pan over, carefully but quickly. You should end up with the roesti on the lid. Put the pan back on the heat, add 1 tablespoon of oil and let the roesti slide off the lid into the pan. Cook for 5 minutes or until golden brown and crisp on the bottom side. Loosen the roesti from the sides and the bottom of the pan and slide it onto a large plate (if you prefer, flip it over onto the lid first). Season with flaky sea salt and crushed pepper to taste and serve with a generous dollop of the feta dip. You can eat the roesti romantically from 1 plate or cut it in half and serve it on 2 plates.


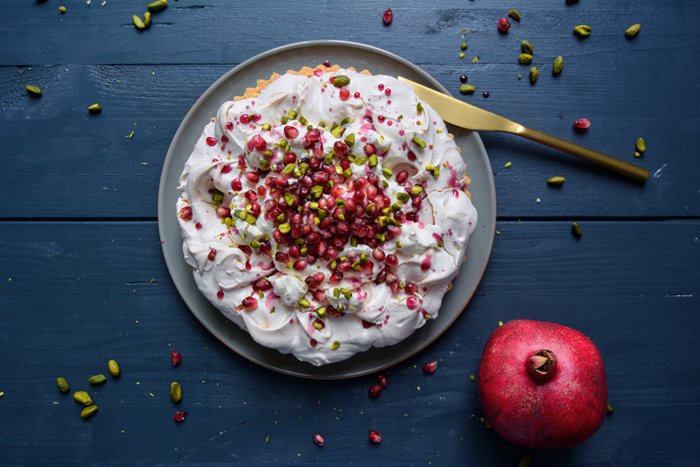
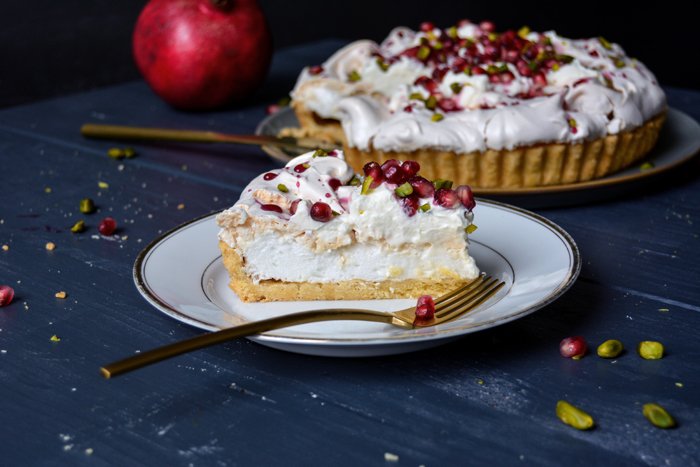
Pomegranate Pavlova Tart with Pistachios and Rosewater
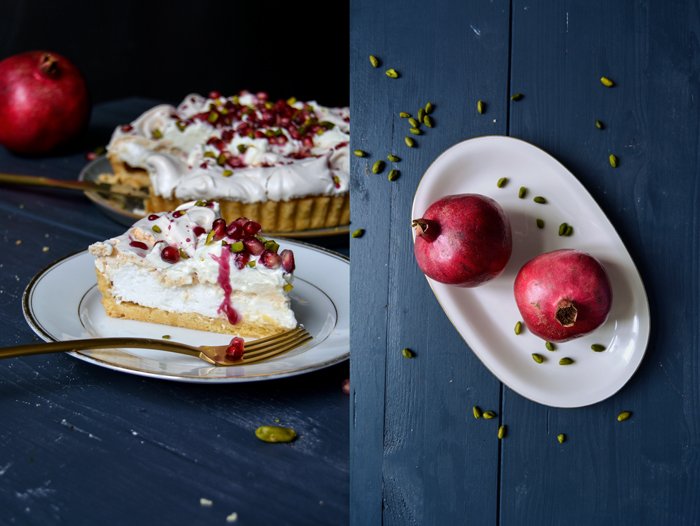
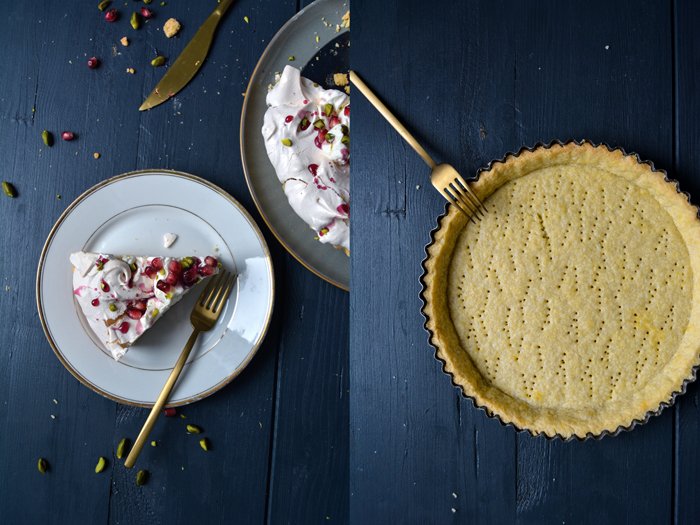
In the past week, I experienced the highs and lows of kitchen life, a fact that a curious baker has to live with when jumping into new recipes. Let's start with the uplifting experience: I baked 3 cakes and 2 were fantastic, which isn't that bad. One of them will stay a secret until I share it with you next week, but the other one was this bomb of a cake. It's a voluptuous beauty, full of flavour, sweetness, crunch, and fluffiness. I call it a pavlova tart - not just a pavlova, which never really managed to rouse my excitement. Baked meringue sandwiched with whipped cream can be nice but it's not enough for me. So I decided to transfer the whole thing onto buttery shortcrust pastry and now it has my attention. This combination is so good that I believe the pastry base should have been an obligatory part of this sweet classic named after the Russian ballerina Anna Pavlova from the start. But never mind, I'm happy with my new discovery. The light meringue is soft in the middle and crunchy on the outside, it's refined with a hint of rosewater just like the rich whipped cream that crowns the whole composition. Sweet-sour pomegranate seeds and their juices turned into a concentrated syrup lay graciously on top, side by side with nutty pistachios. Simply wonderful!
However, my disappointing kitchen experience was an epic fail - ready for the bin. I decided to give puff pastry a try again and I regretted it the moment I pulled the result out of my oven. I spent 2 days reading about the perfect croissant and up until they were in the oven I was quite optimistic that I'd manage to bake light, crisp apricot croissants, made for a Sunday brunch table. But my hope was destroyed as I opened the oven door and witnessed a rather sad result that looked like my flaky sweets got run over by a truck. It took me 2 years to recover from my last puff pastry disaster - I tried to make Maltese pastizzi, it's the flakiest treat, basically the queen of puff pastry - which ended in a buttery, floury soup on a baking sheet. I must say that, this time, it didn't actually look and taste as bad as my last attempt, but it's definitely far from making an appearance on the blog. It's a work in progress I guess.
Pomegranate Pavlova Tart with Pistachios and Rosewater
Makes 1 23cm / 9″ tart
For the short crust base
flour 200g / 1 1/2 cups
granulated sugar 65g / 1/3 cup
a pinch of salt
unsalted butter, cold, 110g / 1/3 cup plus 2 tablespoons
organic egg yolks 2
For the meringue
organic egg whites 4
fine sea salt 1/8 teaspoon
granulated sugar 200g / 1 cup
cornstarch, sifted, 1 1/2 teaspoons
cider vinegar 1/2 teaspoon
quality rosewater, preferably organic, 2 teaspoons, plus more to taste
For the topping
heavy cream, whipped, 200ml / 3/4 cup
2 tablespoons granulated sugar
quality rosewater, preferably organic, 1 teaspoon, plus more to taste
seeds from 1/2-1 pomegranate
pomegranate juice 60ml / 1/4 cup
unsalted pistachios, chopped, 1 small handful
For the pastry, in a large bowl, combine the flour, sugar, and salt. Cut the butter with a knife into the flour until there are just little pieces of butter left. Continue with your fingers and rub the butter into the flour until combined. Add the egg yolks and continue mixing with the hooks of your mixer until you have a crumbly mixture; this takes a few minutes. Form a thick disc, wrap in cling film, and put in the freezer for 12 minutes.
Preheat the oven to 200°C / 400°F (conventional setting).
Roll the dough out between cling film and line a 23cm / 9″ tart pan with the flat pastry. Prick with a fork and bake in the oven for 12 minutes or until golden and crisp. Take the pan out of the oven and let it cool completely.
For the meringue, in a large, clean bowl, using an electric mixer, whisk the egg whites and salt for 1 minute. Continue whisking for 10-12 minutes, adding 1 tablespoon of the sugar at a time. The meringue should be stiff and glossy. Whisk in the cornstarch, vinegar, and 1-2 teaspoons of the rosewater. Add more rosewater to taste.
Turn the oven down to 180°C / 350°F.
Scoop the stiff egg whites onto the pre-baked pastry, spread it lightly but don't push it down. Swirl it a bit for an uneven surface. Bake in the oven for 5 minutes, then turn down the heat to 135°C / 275°F and bake for about 60 minutes or until the meringue is light golden and crisp. Switch off the oven, open the door slightly, and leave the cake in the oven for 15 minutes. Take the cake out of the oven and let it cool completely.
In a medium bowl, using an electric mixer, whip the heavy cream, sugar and 1 teaspoon rosewater. Add more sugar and rosewater to taste; set aside.
In a small saucepan, bring the pomegranate juice and 1 1/2 tablespoons of sugar to the boil. Cook for 1 1/2 minutes or until it starts to thicken.
To assemble the tart, spread the whipped cream in the middle of the meringue, leaving a wide rim, drizzle with the syrup, and sprinkle with pomegranate and pistachios.


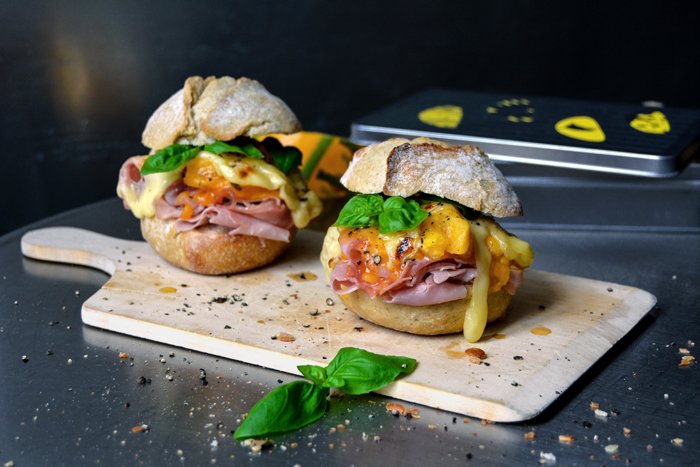
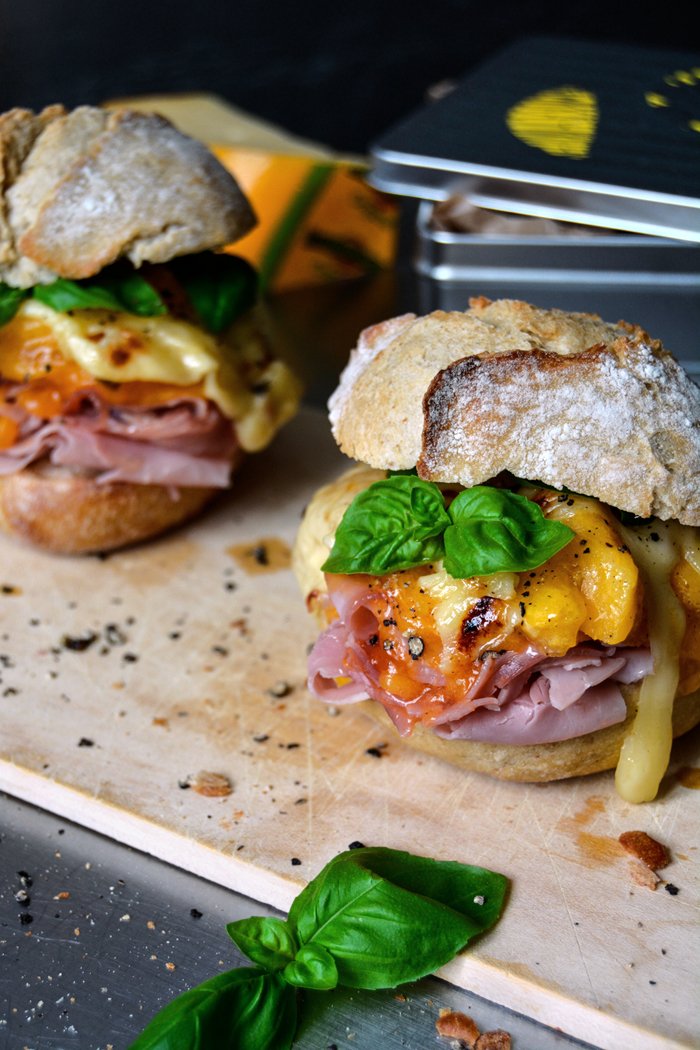
Grilled Persimmon, Ham and Cheese Sandwich with Basil

Cheese sandwiches have long been one of my favourite lunchtime snacks. The most basic version features dark German bread, thin slices of young hard cheese, cucumber, salt, and crushed pepper, you could call it my first sandwich creation, born in my early childhood days. But over the years I got a little more experimental: various fruits sneaked in to add their sweetness to ripe cheese, soft cheese, or blue cheese. Mozzarella di Bufala or ricotta are great to bring in some creaminess, and sometimes, I like to take whatever herb or vegetable my eyes catch in the kitchen and turn it into a runny pesto or smooth dip to dollop lusciously on a crusty bun.
When Leerdammer asked me to create a cheese sandwich for them, I decided to go back to my sandwich roots and think about what a great sandwich should be. I always say that I prefer to focus on a few strong flavours rather than distract my taste buds with too many ingredients. It's all about the right play of contrast and harmony, in taste and texture. I like Leerdammer for its mild and nutty taste, it's almost sweet, and it melts fantastically under the broiler. A grilled ham and cheese sandwich felt like the perfect choice but another German sandwich classic came to mind: Toast Hawaii. This child-pleasing creation was a hit in my early sandwich years, pineapple and ham covered in cheese on a slice of toast and grilled. People loved it, including myself. I like pineapple but the market has far more to offer at the moment, so I went for honey-sweet persimmon. The fruit has to be ripe and soft as jelly, in combination with the ham and melted cheese, it almost felt like jam, or a chutney without the sourness. A few basil leaves sprinkled on top give it the spring feeling that I crave so much and make this sandwich feel light and fresh.


Grilled Persimmon, Ham and Cheese Sandwich with Basil
Makes 2 sandwiches
rustic white buns, cut in half, 2
ham 4 thin slices
large ripe persimmon, peeled and torn into chunks, 1
Leerdammer cheese 4-6 thick slices
black peppercorns, crushed in a mortar
fresh basil leaves 6
Set the oven to broiler or preheat to the highest temperature.
Divide the ham between the bottoms of the buns. Lay the persimmon on top and cover with the cheese. Grill the sandwich in the oven until the cheese starts melting and sizzling, mind that the cheese doesn't burn or slip off the fruit. Sprinkle the grilled cheese with crushed pepper and basil, close the bun, and enjoy.


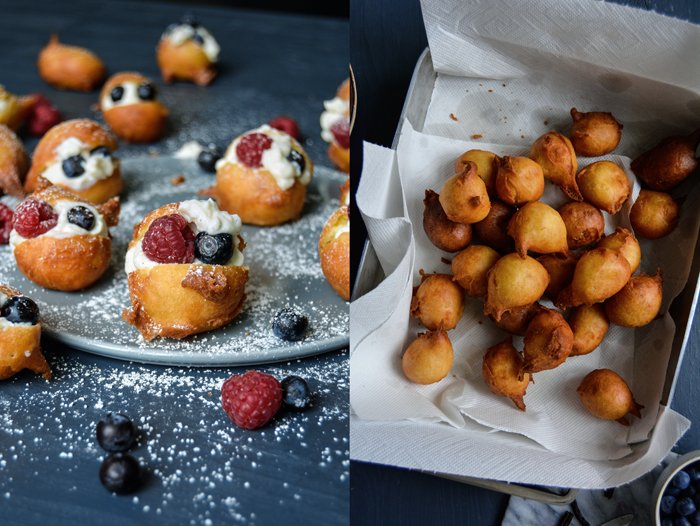
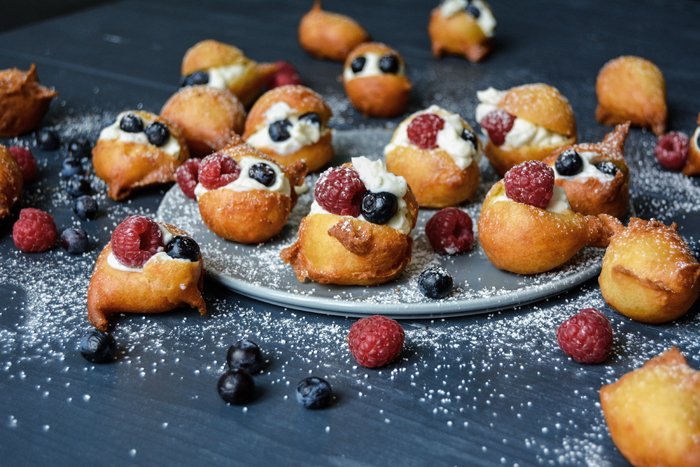
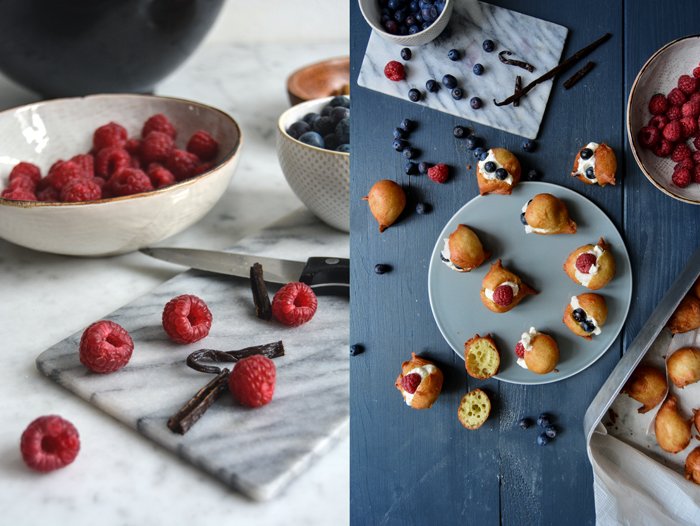
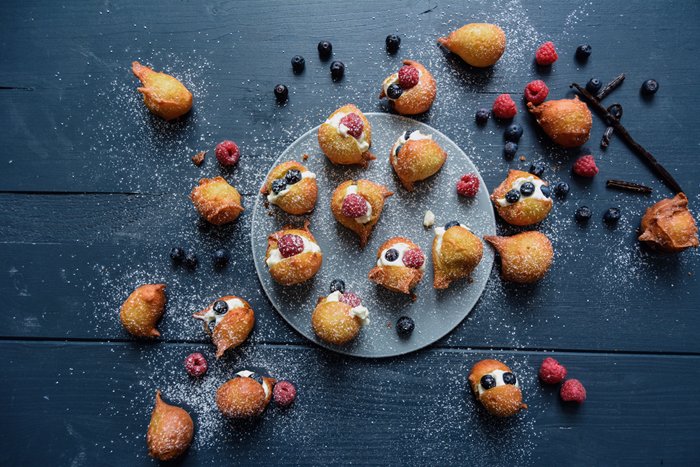
Maltese Zeppoli - Fried Cream Puffs with Vanilla Ricotta and Fresh Berries
My Maltese family has been telling me about zeppoli - or zeppole in Italian - for many, many years. Countless stories about these puffy, tiny balls of choux pastry, fried to golden perfection, and filled with ricotta, fed my curiosity and made my mouth water. In Malta, the little sweets, also known as sfineġ, are traditionally made on the 19th March to celebrate the feast of St. Joseph. The filling is rich, refined with chocolate and candied peel and fruit, and topped with chopped hazelnuts. In other parts of the Mediterranean, like southern Italy, Sicily, and Sardinia, you can also find them plain, rolled in sugar, dipped in melted chocolate, or topped with vanilla custard. There wasn't the slightest doubt which version I'd go for.
The problem is, when you have an idea of a classic dish without actually ever having tried it, it becomes a dish of its own. In my mind, I always imagined the little puff balls filled with pretty berries. I couldn't really see the chopped chocolate bits but lots of vanilla freshly scraped out of its pod, sweet orange juice, and fragrant Maltese honey stirred into the creamy ricotta. I have an excuse, I've never been to the Maltese archipelago on St. Joseph's special day, so I have never tried a single original zeppoli. Therefore, I just used my imagination and my critical Maltese man, and gave this project a go in my kitchen. I'm not the biggest fan of deep-frying - and some zeppoli recipes even allow you to bake the pastry in the oven - but I didn't want to move away from its origin too much. I made 26 of the crisp balls and to my surprise, they all turned out well, apart from the usual 2 to 3 first trials to find the right temperature setting. It should be relatively low, on medium, so that the inside can cook long enough without burning on the outside - golden and crisp should be the goal. The filling was delicious, fine and aromatic, and a couple raspberries and blueberries on top made it summery fresh. I was more than pleased with the result, and so was my Maltese man, the last zeppoli 'disappeared' after dinner.
There's also a savoury version of this dish, filled with anchovies, however, my imagination fails to give me an idea of how this would taste. I guess I have to go to Malta for this culinary experience. If you're into deep-fried sweets, you can also try my Greek Loukoumades, made with yeast dough.
Have a Happy Easter with your loved ones and enjoy lots of chocolate eggs! xx


Maltese Zeppoli - Fried Cream Puffs with Vanilla Ricotta and Berries
Makes about 26 cream puffs
For the filling
fresh ricotta 250g / 9 ounces
flowery honey, such as orange blossom, 1 tablespoon
freshly squeezed orange juice 1 tablespoon
vanilla pod, scraped, 1/2raspberries, 1 small handful (about 100g / 3 1/2 ounces)
blueberries, 1 small handful (about 100g / 3 1/2 ounces)
For the choux pastry
sunflower oil, about 1 1/2l / 6 cups, to fry the pastry
unsalted butter 120g / 1/2 cup
granulated sugar 50g / 4 tablespoons
fine sea salt 1/8 teaspoon
water 120ml / 1/2 cup
plain flour, sieved, 130g / 1 cup
organic eggs 3
For the topping
icing sugar
For the ricotta filling, in a medium bowl, whisk the ricotta, honey, orange juice, and vanilla seeds until creamy. Season with honey and vanilla to taste. Keep the ricotta in the fridge until you fill the choux pastry.
In a large, heavy pot, heat the sunflower oil on medium-high heat. Line a large baking dish with kitchen paper.
For the pastry, in a large pot, bring the butter, sugar, salt, and water to the boil. Turn the heat down to low, stir in the flour vigorously with a wooden spoon, and mix until smooth and the dough comes away from the side of the pan. Transfer the dough to a bowl and let it cool for about 10 minutes. Beat the eggs in with a spoon, 1 at a time, only mix in the next one when the one before is well combined.
When the oil is hot - dip in the bottom end of a wooden spoon, little bubbles, should form around it - scoop out 1 heaping teaspoon of the dough and carefully scrape it with a second teaspoon into the hot oil. Start with 2 balls of dough to adjust the temperature, you might have to turn the heat down to medium or a little bit lower. The pastry has to cook for 4-6 minutes for the inside to be cooked through. The outside should be golden and not dark brown. If they become dark after 2-3 minutes, turn the heat down. Transfer the cooked zeppoli to the lined baking dish and continue frying the remaining dough. Let them cool completely.
Using a sharp knife, cut a wide slit in the top part of each zeppoli and fill with a spoonful of the vanilla ricotta. Top with 2-3 berries, sprinkle with icing sugar, and serve. Once the zeppoli are filled, they should be enjoyed within the next hour as the ricotta soaks the pastry.


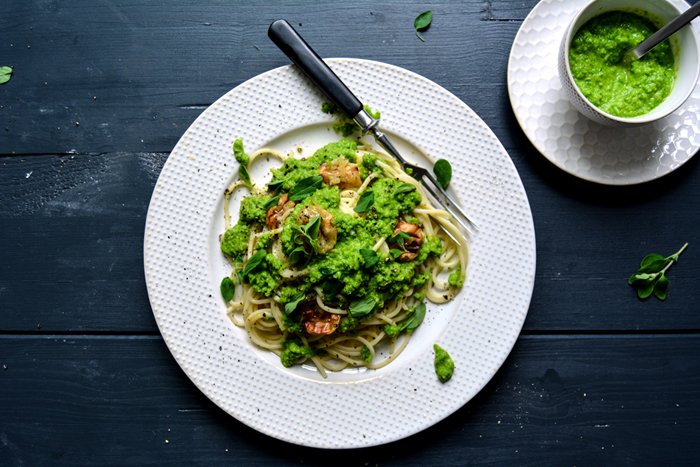
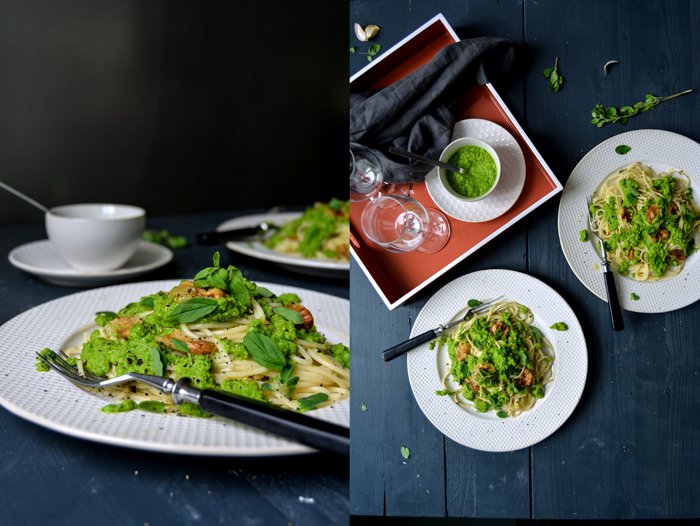
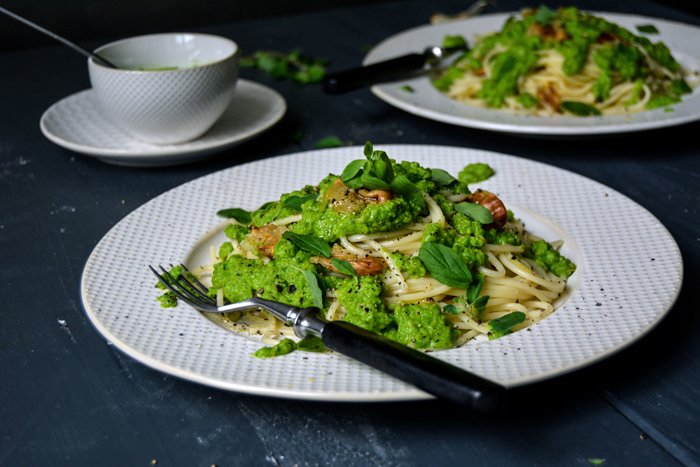
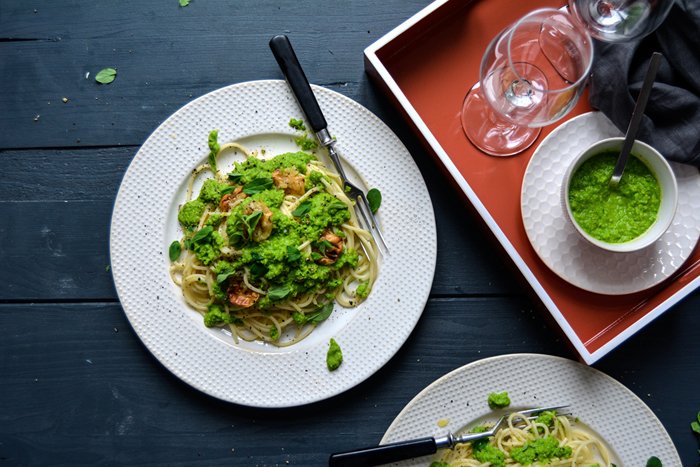
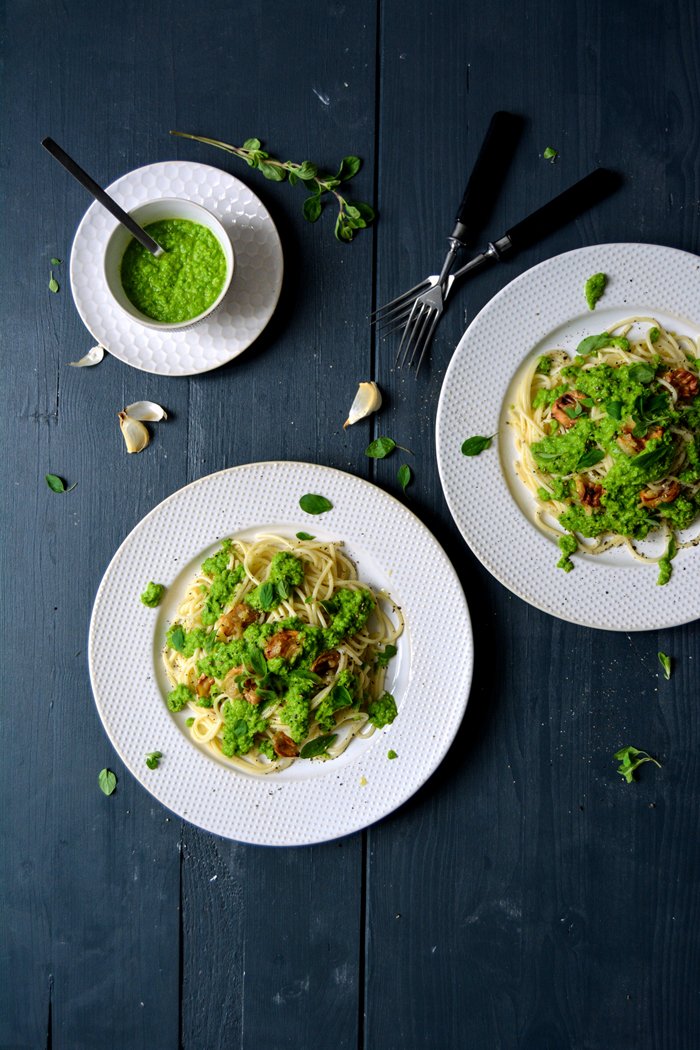
Spaghetti with Pea Pesto, Roast Garlic, and Fresh Marjoram
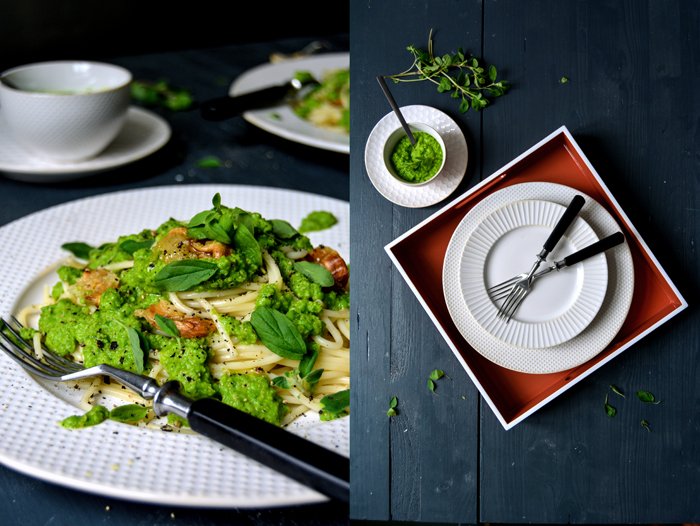
So now that spring has officially begun, the leaves on the tree in front of my living room window should start sprouting in fresh crisp greens, the birds should sing all day, and the rosé wine should fill the glasses to welcome the new season. But - apart from the pink wine - there isn't the slightest sign of bright sunshine and rising temperatures in the city. It makes no sense to despair, so I use the kitchen to create the atmosphere I'm after instead. The wine is chilled, the spaghetti's cooked, and a bright green pesto of sweet peas (frozen, I must admit), and fresh marjoram puts me in the right mood. I also roast whole cloves of garlic in their skins in the oven to turn them into a sweet paste. The golden cloves are mashed with a fork and mixed into the pasta - this dish looks like spring, tastes like spring, and makes me forget about grey skies, leafless trees, and my constant lack of sunshine.
This is the last of three recipes I created for Westelm. You can find all three recipes including my Mozzarella, Tapenade, and Preserved Lemon Sandwich and Pumpkin Quiche with Taleggio and Sage on their blog. This post was sponsored by Westelm to make my kitchen a little prettier!


Spaghetti with Pea Pesto, Roast Garlic, and Fresh Marjoram
Serves 2
For the pesto
peas (fresh or frozen) 200g / 7 ounces
fresh marjoram leaves 2 teaspoons, plus 2 tablespoons marjoram leaves for the topping
water used to cook the peas 3 tablespoons
freshly squeezed lemon juice 2 teaspoons
olive oil 3 tablespoons
fine sea saltg
round pepper
large garlic cloves, unpeeled, 12-16
spaghetti 200g / 7 ounces
black peppercorns, crushed in a mortar
Preheat the oven to 220°C / 425°F.
For the pea pesto, in a small saucepan, bring salted water to the boil and blanch the peas for 1 minute, reserve about 6 tablespoons of the water. Drain and quickly rinse the peas with cold water. Purée the peas, marjoram, 3 tablespoons of the water used to cook the peas, lemon juice, olive oil, salt, and pepper in a blender or food processor until smooth. If the pesto is too dry, add more of the pea-water. Season with salt and pepper to taste and set aside.
Spread the garlic cloves in a baking dish and roast, turning the garlic occasionally, for about 25 minutes or until the garlic is soft enough to mash with a fork - mind that it doesn't burn. Take the garlic out of the oven, let it cool for a minute, then peel the garlic cloves out of their skins and mash with a fork.
In a large pot, bring plenty of salted water to the boil and cook the spaghetti until al dente, drain, and stir in a splash of olive oil.
Divide the spaghetti between plates, sprinkle generously with the pea pesto, crushed pepper, and fresh marjoram leaves. Lay the mashed garlic on top and serve immediately.


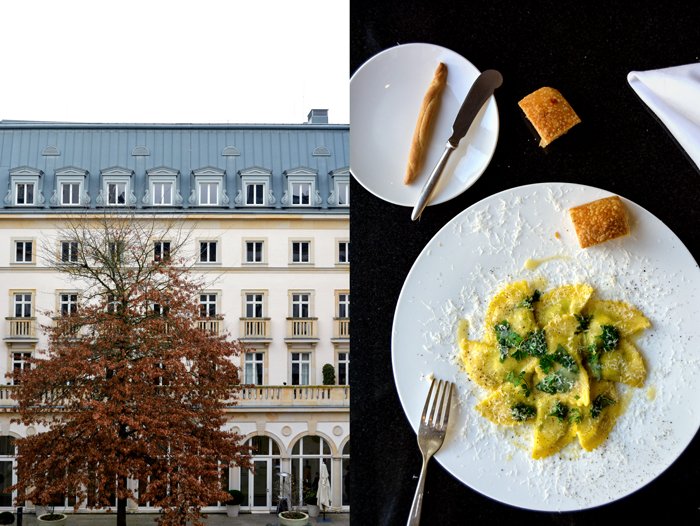
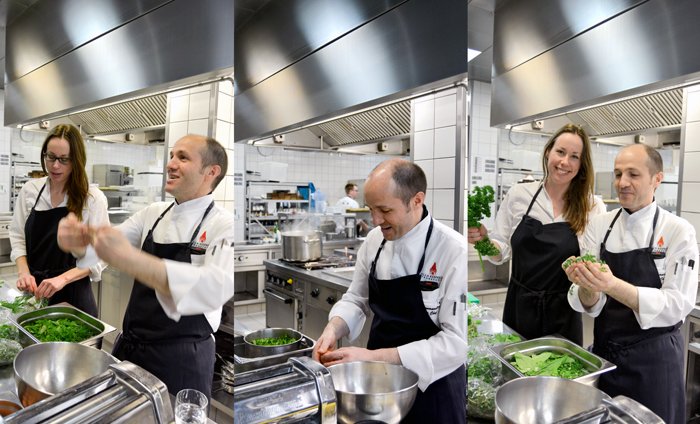
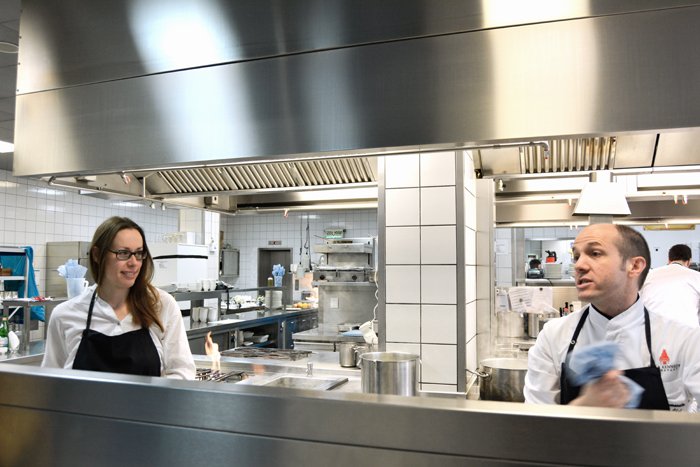
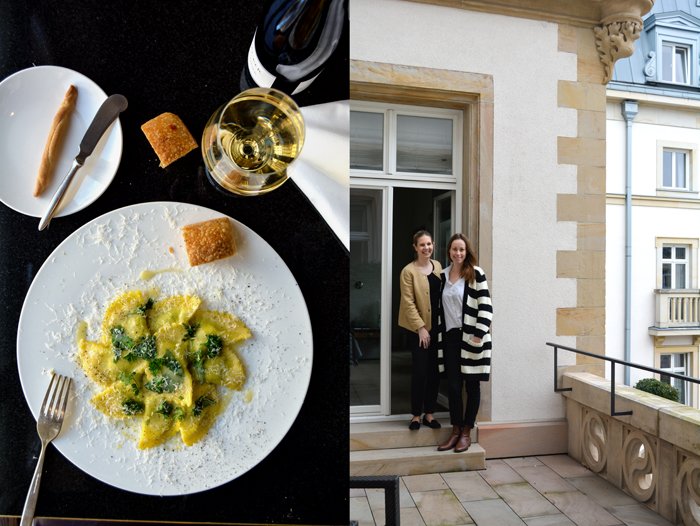
meet in your kitchen | Dario Cammarata's Herb Ravioli, Palermo & Villa Kennedy
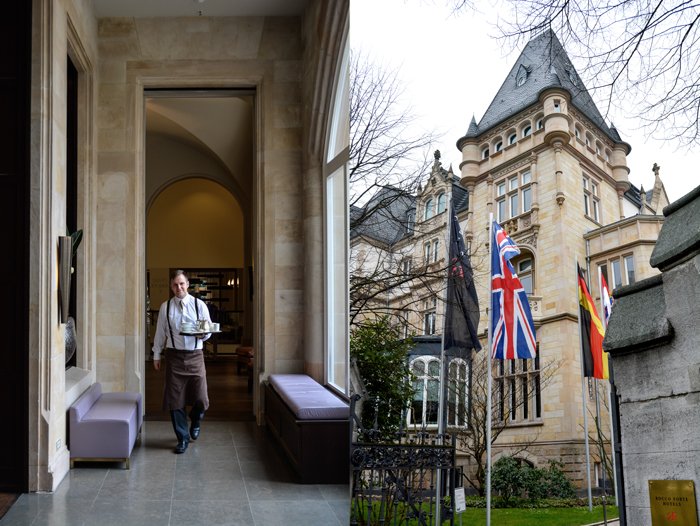
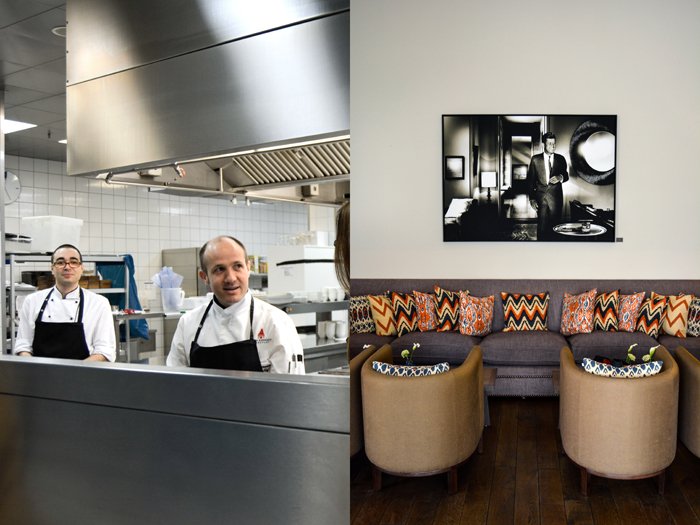
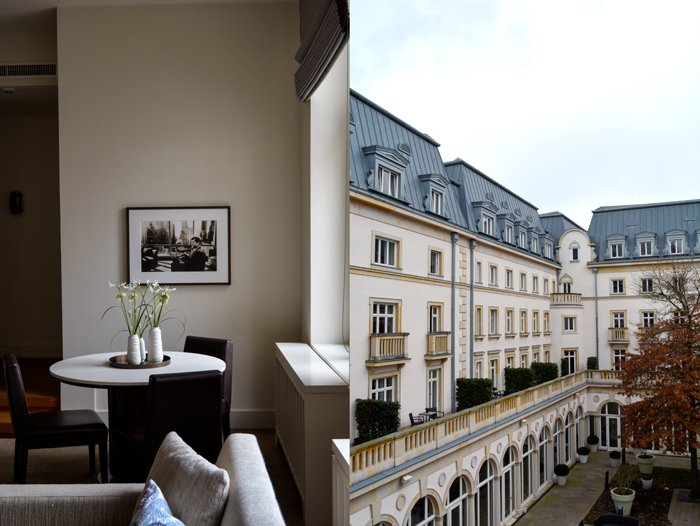
Once in a while one has to enjoy the pleasures of life a bit more excessively, plenty is the right word. I convinced my boyfriend that we deserved a little break from our daily duties, to learn how to make ravioli from a true Palermo man. Luckily, my Sicilian chef, the charming Dario Cammarata, works in the kitchen of Frankurt's most beautiful hotel, the splendid Villa Kennedy, so it wasn't much work to get a 'yes' from my man.
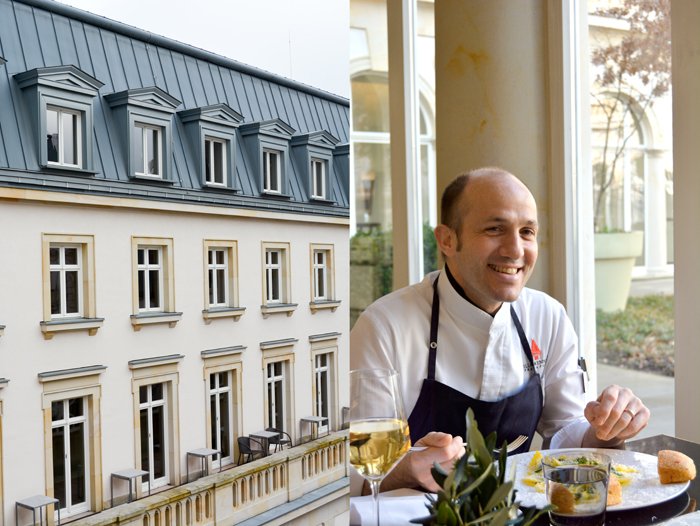
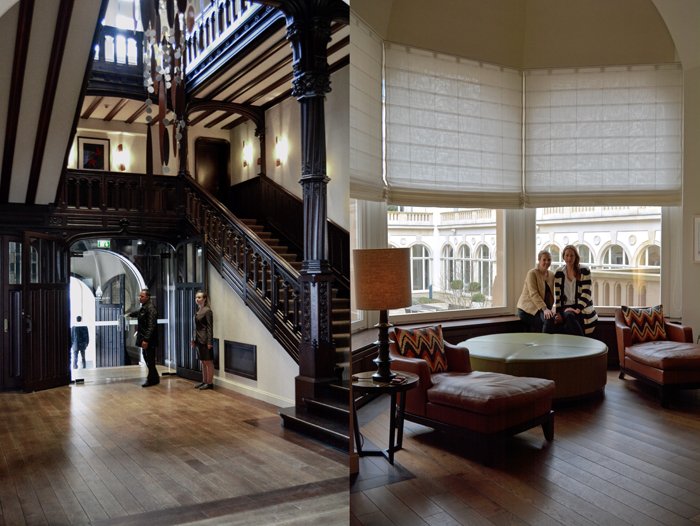
We jumped on a train, crossed the country, and found ourselves in front of the heavy iron gates of an elegant villa. Built in 1901 for a banker family, the house looks impressive but not intimidating. Beige sandstone, zinc gables, turrets, and ornate balustrades made me feel like a princess, at least for 24 hours. I was prepared for excellent service and outstanding food - which we definitely experienced at dinner, breakfast, and lunch - but I didn't expect to feel so welcomed and nicely spoilt, so I asked myself: "Why should I ever leave again?" Be it the three porters Luciano, Mahmood, and Girgis, or the second man from Palermo in the house and maître d'hôtel, Vito Vitale, the way they treated us goes beyond politeness, their friendliness comes straight from the heart. But there were two people who I could have taken straight home with me to Berlin, Yasmin Michel and my favourite Sicilian chef Dario, our two partners in crime for 24 hours to spoil us with amazing wine, the finest champagne, and delicious treats from the kitchen of the Gusto restaurant.
Before we sat down to our Sicilian feast on the evening of our arrival, I had a chat with Dario who left his home island at the age of 18. He wanted to become a chef since first setting foot in a restaurant kitchen in Palermo as a young man of 14. As soon as he finished his training he headed to northern Europe to follow his second passion: traveling. He worked in many great restaurants, amongst them Michelin-starred restaurants in Saint-Tropez, Italy, and Switzerland, and went through the suffering that every ambitious and successful young chef has to go through. Long hours of hard work and not much sleep are the price you have to pay if you work in the world's best culinary hotspots. Dario loved it and only the love to his wife made him settle down. It's already been 10 years since he joined the Villa Kennedy as the Executive Chef and - being a father of three children now - Dario wouldn't change anything. He enjoys cooking at home with his kids, introducing them to the vast knowledge and traditions he learned from his Sicilian Mamma Saveria. Dario praises her cooking and, although he admits that no Sicilian man would ever say his mother isn't talented in the kitchen, Saveria must be a true gem. She's critical - of course - she has very high standards when it comes to food, so much so that she sometimes cooked three different dishes for lunch to please the individual taste of her three sons when they were young. This woman loves her food - and her family. After one of Dario's visits to his Mamma's kitchen earlier this year, he decided to take a few of her recipes up north to introduce the guests of the hotel to the Mamma's Menu:
Anelletti alla Trapanese con Tartara di Gamberoni alla Menta (Anelletti Trapanese pasta with king prawn tatar and mint)
Involtini di Pesce Spada con Insalatina di Finocchi ed Agrumi, Calamaretti (swordfish involtini with fennel and citrus fruit salad and calamaretti)
Trio di Cannoli con Gelato al Pistacchio (cannoli trilogy with pistacchio ice cream)
We enjoyed it in silence, only accompanied by a few Ohh's and Ahh's and a bottle of amazing Sicilian white wine - divine. Grilled polpo with potatoes was next, beautifully hearty Ravioli con Sanguinaccio, Pera E Sedano Rapa (black pudding ravioli with pear and celeriac), and a heavenly buffalo ricotta cheesecake with blueberry sorbet. This dinner left me happy, stuffed, and ready for bed.
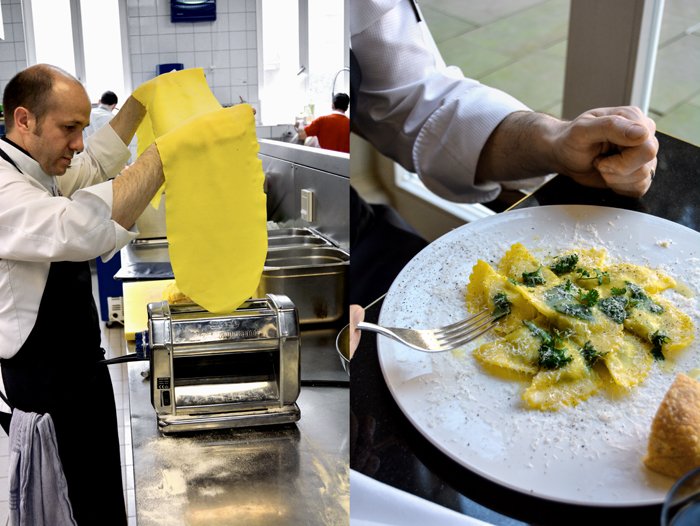
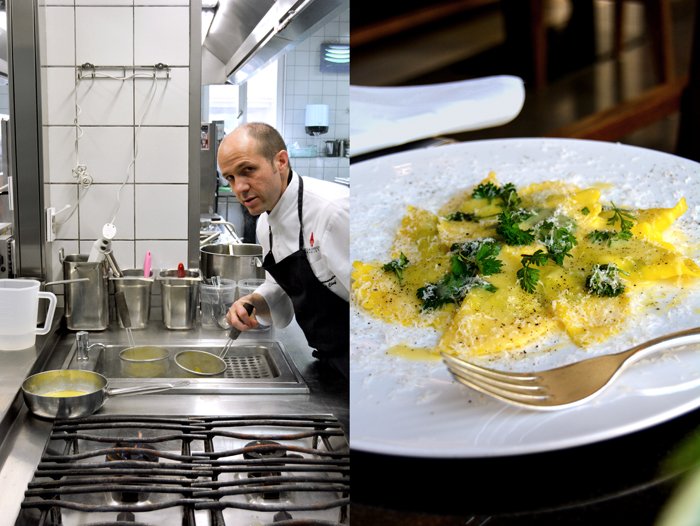
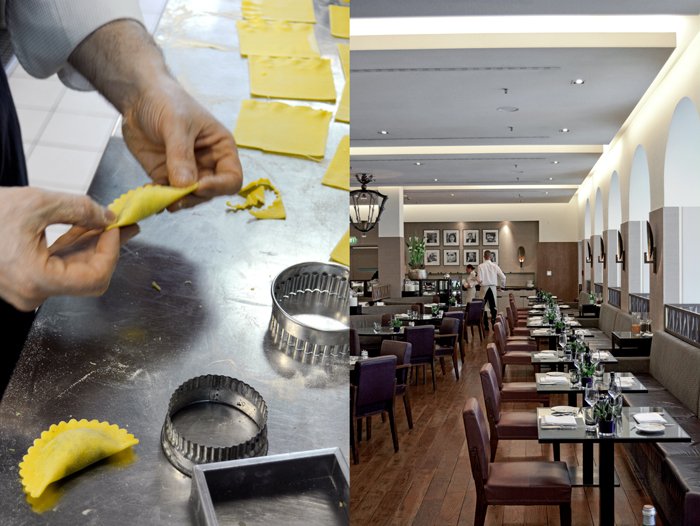
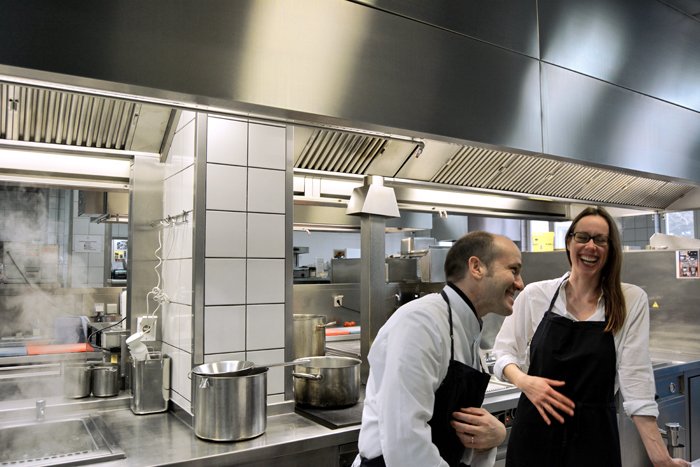
The next day started with an early morning swim in the peaceful spa, followed by lots of laughter and excitement in the kitchen - and even more fantastic food. I should have skipped breakfast as I had a cooking date with Dario ahead but it looked too tempting so I gave in. Sometimes in life you just have to go with the flow and enjoy what it offers - in this case, plenty of good food. We put on our aprons and I felt ready to learn how a Sicilian man who lives in the cold north makes ravioli. He uses what Mamma taught him to prepare the perfect pasta dough and combines it with one of the most popular classics of his new home: the Frankfurt green sauce, enriched with ricotta to fill the ravioli. The sauce is a traditional recipe from the Frankfurt region, made with seven fresh herbs: parsley, chives, chervil, borage, sorrel, garden cress, and salad burnet. In Germany, you can by them ready packed for this sauce but Dario recommends buying them singly, otherwise you'll end up with lots of (cheaper) parsley and little of the more expensive herbs. If you can't find all of them at your market, just skip one or replace it - I know that true Frankfurt green sauce defenders wouldn't agree with me but we're talking about cooking and not science. Dario says that a bit of fresh mint or lemon would also fit his ravioli filling to freshen it up. Just be experimental. And if you'd like to see a little video of Dario making ravioli, check out my Snapchat (@eatinmykitchen).
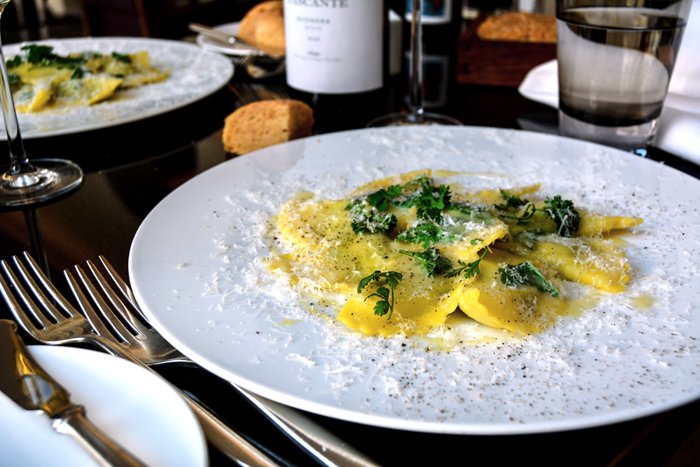
Although we laughed the whole time, we managed to successfully make ravioli and they were the best spring ravioli I ever had in my life - fresh and green, not too heavy and packed with flavour. From now on, Dario is my favourite Sicilian chef. His approach to food, the honesty and restraint in his recipes, the Sicilian way of playing with contrasting aromas, and his focus on only the best quality ingredients often imported from Sicily by himself, impressed me and made my taste buds jump.
Thank you for everything, you wonderful people at Villa Kennedy!
I can also recommend joining the Friday Chef's Table if you happen to be in Frankfurt - it's a gathering around the table in the Gusto kitchen to see and smell how you're food is prepared.
Dario Cammarata's Herb Ricotta Ravioli
Serves 6
For the pasta dough
plain flour 250g / 2 cups
durum wheat semolina 250g / 9 ounces
fine sea salt 1 teaspoon
egg yolks 15
olive oil 3 tablespoons
For the filling
fresh ricotta 250g / 9 ounces
a mix of 7 herbs: borage, chervil, garden cress, parsley, pimpinella (salad burnet), sorrel, chives, the leaves finely chopped, 1 large bunch
fresh basil leaves, finely chopped, 1 small handful
fresh mint leaves, finely chopped, 6, or a little lemon zest (optional)
Parmesan, freshly grated, 150g / 5 ounces
fine sea salt
ground pepper
For the topping
butter, melted, about 6 tablespoons
Parmesan, freshly grated, about 6 tablespoons
fresh herbs, leaves only, 1 handful
ground pepper
For the pasta dough, in a large bowl, combine the flour, semolina, and salt. Add the egg yolks and olive oil and mix for a few minutes until smooth and well combined, using your hands or the dough hooks of an electric mixer. Form a ball, wrap in cling film, and let it sit for 20 minutes.
For the filling, in a large bowl, add the ricotta and whisk in the chopped herbs and Parmesan until well combined. Season with salt and pepper to taste.
Using a pasta machine or rolling pin, roll the dough very thinly, you should be able to see your hand through the dough.
In a large pot, bring salted water to the boil.
To give the ravioli half moon-shapes, cut out circles using a 9cm / 3 1/2" cookie cutter. Put a spoonful of the filling in the middle of each circle and, using your finger, spread a little water all along the pasta rim. Fold half of the ravioli over to end up with a half moon-shape, push the rim well with your fingers to seal the filling inside.
Turn the water down to simmering and cook the ravioli for about 2-3 minutes or until al dente.Divide the ravioli between plates, drizzle with melted butter, and sprinkle with Parmesan, fresh herbs, and season with a little ground pepper.
Buon Appetito!
When you left Palermo at the age of 18, did you have a plan in mind, or a dream that you wanted to achieve? Or did you just jump into this big adventure?
I always wanted to become a chef, I already knew that at quite a young age. I didn't have a plan in mind but I had a goal. At the same time, I wanted to travel the world and I was after a job that would allow me to combine my two passions. It was a mix of planning and adventure, so when I finished school in Sicily at the age of 19, I packed my bags and left - off to Sirmione at Lake Garda. This was the beginning of my great dream and from then on it continued.
What did it mean to you to work in Michelin-starred restaurants in Italy, France, and Switzerland as a young man? What fascinated you about the work in these kitchens?
It meant a lot to me and it still does. I was particularly fascinated by these countries. I admire Italy and France's long kitchen traditions. So many amazing dishes and excellent chefs originated from these two cuisines. Switzerland, to me, stands for decades of tradition in the hotel business. They have outstanding houses with great restaurants.The amount of people working in Michelin-starred restaurants impressed me tremendously. At Badrutt's Palace, in Saint-Tropez, our kitchen team was made up of 61 people - it's unbelievable. I'm very proud of having worked there, and I wouldn't want to miss the experience, but it was never a must for me to work at these restaurants. It was far more important for me to learn about different countries and cultures and their traditions. Cooking connects us, to me it's easiest to understand various nations and habits through their cuisines.
What was the most important lesson you learned as a young chef?
Little things often have the greatest effects. Both positive and negative. This is what my boss in Saint-Tropez used to tell me and it became the cooking mantra of my life. It's the guideline I pass on to my team now.
You grew up with the Sicilian cuisine cooked by your Mamma Saveria, how did your home island's culinary traditions influence your style of cooking and your approach to food?
A lot! I wouldn't be the Dario I am today without the influences of my Sicilian home - and especially my Mamma. In particular when it comes to my cooking. At the age of 2 or 3, I already joined my Mamma in the kitchen. I didn't necessarily help her, but I tasted everything, and that's what I remember clearly. Already then, I was fascinated by the preparation of food and watching and learning at such a young age definitely affected my style of cooking, my outlook on produce, and the way I work with food.
If you had to point out the main differences between cooking and living in Italy and Germany, what would they be? What do you like about German cooking?
Italians live and eat differently to Germans. Italians "take their time for life", and food is a great part of it. To enjoy life is so important in the life of an Italian. Eating together is a feast, a celebration, no matter what we eat, what day of the week it is, or if we had a good or bad day. We savour the time together to the last second.Germans are more influenced by the experiences they had during the day - Italians aren't really like this. Eating together, being together, that's most important. What I like about German cooking, is that people start to go back to their roots. Regional produce, traditional recipes, and cultural gems are being re-discovered, that's great. This has always been important in Italian and French cuisine, so it's fantastic that more and more German chefs and cooks follow this trend.
Where do you find inspiration for new recipes?
Preferably directly at the farmers' market. Seasonal fresh produce inspires me, many of my ideas come up right there. I like the combination of tradition and new takes on recipes, this adds new qualities to a dish. And I love running, it allows my mind and creativity to be free, it relaxes me but at the same time it sparks lots of new ideas that I want to try in the kitchen immediately.
What do you miss the most about Sicily?
The sea! And the smell of the Zagara (orange blossom) flower. I really miss it. When I see the sea and I have this smell in my nose, I know that I'm home. And, of course, I miss my Mamma's cooking! That's why I imported her to Germany (see the Villa Kennedy Mamma's Menu in my introduction).
Who is your biggest inspiration in the kitchen?
My Mamma! Like I said, she inspired me at a very young age and from her, I learned about all the traditional Sicilian recipes, which I'm very grateful for. Another inspiration for my career was the chef Ludovic Laurenty, my boss at Château de Pray (in the Loire Valley). He taught me the importance of staying calm - he used to be the calmest person ever. I learned a lot from him and I still think a lot of him, like all the other chefs I've worked with - you take a piece of each of them with you.
What was the first dish you cooked on your own, what is your first cooking memory?
Involtini di melanzane (eggplant rolls), I was 15 and I cooked them for a good friend of mine. Typically Sicilian, it's an easy dish and still one of my favourites. You should try it!
What are your favourite places to buy and enjoy food in Palermo and in Frankfurt?
In Sicily, I like to go to Bisso Bistrot in Palermo. It's a cosy, friendly, and original Sicilian restaurant. In Frankfurt, I regularly go to the Kleinmarkthalle (a farmers' market hall), here you can buy and eat food at the same time. First, I choose the fresh produce I need and then I enjoy a glass of wine and some antipasti. In Wiesbaden, where I live, I like to go to Gusto E. A former colleague of mine runs this pretty little restaurant, I always get a warm welcome and scrumptious food.
If you could choose one person to cook a meal for you, who and what would it be?
The Sicilian director Giuseppe Tornatore. His movies open my heart - not just because he's Sicilian (laughing). He seems to be a great guy and I love his way of making movies, he carries a lot of Sicily out into the world, that always impressed me. I would make cannoli with him. It's typical for our home island and I'd love to go to the farmer together with Giuseppe to buy ricotta, or we'd make our own. Maybe he would even put this scene into one of his next movies.
You're going to have ten friends over for a spontaneous dinner, what will be on the table?
Parmigiana - I love this vegetable-Parmesan-casserole dish. It's the taste of Sicily. Pasta is next, I would see what fits to the season. If my friends came over in the spring, I'd make orecchiette with fava beans, fresh tomatoes, prawns, pine seeds, and basil. Fish as main, two oven-roasted sea bass with lots of herbs and lemon, and tiramisu or a tart with fresh raspberries as dessert.
What was your childhood's culinary favourite and what is it now?
My Mamma'sParmigiana. It's always been my favourite and it still is. Whenever I go to Siciliy, I can be sure to find it on my Mamma's table - she knows me too well.
Do you prefer to cook on your own or together with others?
I never cook alone. Cooking connects us and it's far more fun to do it together with others. Even if someone just watches. I love to cook together with my wife and my three kids. Cooking on my own is boring.
Which meals do you prefer, improvised or planned?
I prefer to improvise. It bores me to plan every single detail. When you improvise, you can change and adjust and create something new. That keeps it interesting.
Which meal would you never cook again?
That's not easy... 4 years ago, we had the final for a national cooking competition at the Villa Kennedy. Private cooks presented their own creations and I helped them with a little advice here and there, but I wasn't allowed to change much. I see myself as quite open-minded, but one of the finalists made salmon with celery cream and mascarpone, I never ever want to eat this again. The recipe lost the competition by the way.
Thank you Dario!

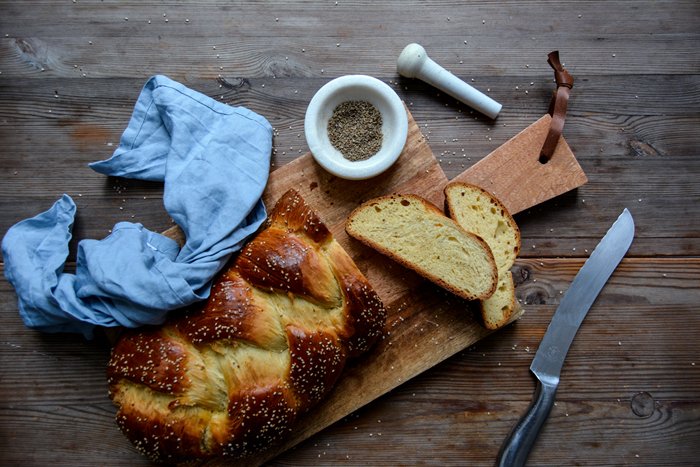
Tsoureki - Greek Braided Easter Bread with Aniseed and Orange Blossom Water

Patience is a tricky thing, I feel it growing with every year I gain, but it still manages to drive me crazy at times. After about one year of working on my cookbook, eat in my kitchen, developing the recipes, cooking, baking and shooting them all by myself, then going through a long process of filling the pages with my little stories connected to each and every dish, I feel a rising impatience to bring this project to an end. Month after month of working closely with my fantastic team in New York, Munich, Berlin, and London, having a daily exchange and constant flow of ideas between me and my editors, photo retoucher, and book designer; all this leaves me hungry. I want to hold the fruit of our work in my hands so badly. My friends constantly make little jokes about me as they only see me with my laptop, glued to my chair at our long wooden dining table, which I turned into my office, or busy in the kitchen. To them, it seems like I, the chair, and the table have become one in the past year.
In German, there is a beautiful word called Vorfreude, which you could translate to the happy excitement you feel connected to a positive event lying in the future. This Vorfreude keeps me going. Sometimes I just feel my heart jump, when I think of the dedication I wrote on one of the first pages of my book for someone who means a lot to me, when I virtually thumb through the pages of my book which is still a file on my computer, or when I first saw the cover design, which I'll share with you soon! And I'm willing to wait for these moments, I'm willing to wait to make this book better and better with every correction, addition, and change we make, and then one day, it will be printed and I'll look at it and remember all the excitement, happiness, and frustration that's woven into every single page of it.
Baking can be a good teacher for life and a master when it comes to patience, especially baking with yeast. It will be Easter Sunday in a week and a sweet braided yeast bread is one of the most delicious and fragrant treats that one can have on the breakfast or coffee table on this special day. But this bread takes its time, you can't really rush - although I still try and succeed by letting the dough rise in the warm oven. It's a little quicker but you still have to be patient.
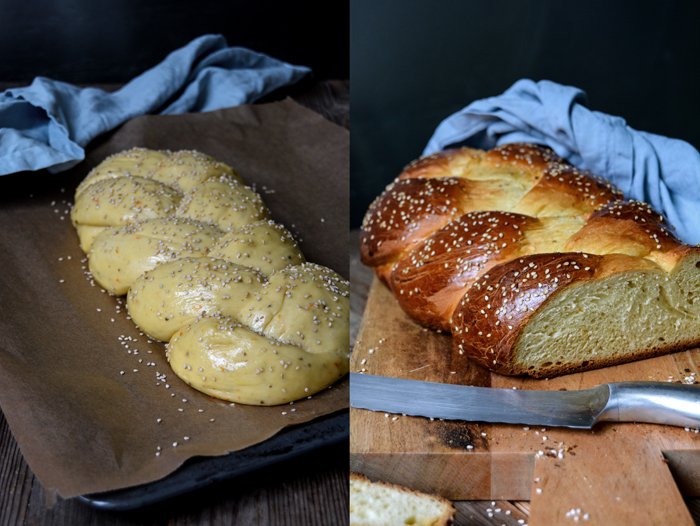
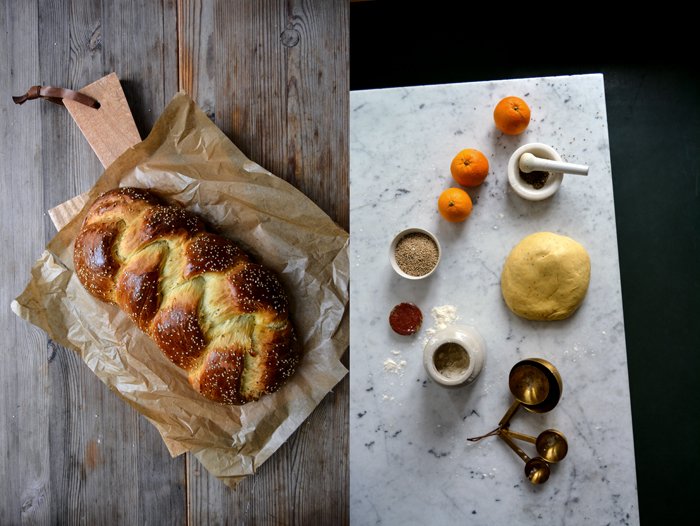
This year I go for a traditional Greek Easter bread called Tsoureki. It's soft and fluffy, enriched with butter and eggs, and flavoured, often refined with mahlep, a ground spice made of wild cherry seeds, and mastic, sun-dried resin. More modern variations feature vanilla and cardamom but I was after a different flavour combination: aniseed and orange blossom. Years ago, I spent a couple weeks on the Greek island of Naxos and I enjoyed one of the fluffiest yeast buns with aniseed and orange in the shade of an old chapel high up on a hill. This picture in mind, I knew what my Tsoureki would taste like. It smells so beautiful and aromatic like the air in the Mediterranean, anise and orange merged in a scrumptious breakfast bread sprinkled with nutty sesame. I only left it in the oven for a little too long, just a couple minutes, but I have an excuse. Two of my cousins stopped by for an unexpected quick visit, a family chat at the table and the bread was forgotten. At one point I thought "Wow, it smells so good!", so I ran to the oven and pulled out this nicely risen beauty (with a dark bottom).
Here's another sweet braided bread I made and shared 2 years ago.
Tsoureki - Greek Easter Bread with Aniseed and Orange Blossom Water
Makes 1 large loaf
plain flour 520g / 4 cups
granulated sugar 100g / 1/2 cup
fast-acting yeast 1 sachet (7g / 1/4 ounce)
fine sea salt 1/2 teaspoon
aniseed, lightly crushed in a mortar, 2 teaspoons
zest of 1 small orange
milk, lukewarm, 150ml / 2/3 cup
unsalted butter, melted, 100g / 1/3 cup plus 2 tablespoons
organic eggs 2
orange blossom water 2 tablespoons
sesame seeds, for the topping, 1-2 tablespoons
For the glaze
organic egg yolk 1
water 1 tablespoon
In a large bowl, combine the flour, sugar, yeast, salt, aniseed, and orange zest. Whisk together the milk, butter, eggs, and orange blossom water - the mixture should be lukewarm - and add to the flour mixture. Using the dough hooks of an electric mixer, knead for about 5 minutes until well combined and smooth. Continue kneading and punching with your hands for about 7 minutes until you have a soft and silky ball of dough. Place the dough back in the bowl, cover with a tea towel, and let rise in a warm place, or preferably in a 100°F (35°C) warm oven, for 100 minutes or until well risen (it won't double in size). Rising at room temperature prolongs the process.
Punch the dough down, take it out of the bowl, and knead for about 30 seconds, then divide into 3 parts and roll them into long sausage shapes. Lay the ends of the rolls on top and braid them tightly. Bend both ends of the bread under the loaf and transfer to a baking sheet lined with parchment paper. Cover with a tea towel and let it rise in a warm place for 50 minutes or until fluffy.
Preheat the oven to 180°C / 350°F (conventional setting).
Whisk the egg yolk and water for the glaze and brush the top of the loaf, sprinkle with sesame. Bake in the oven for 40-50 minutes, cover the loaf with aluminium foil after 15 minutes to prevent it from getting too dark. When the bread is done, it should be golden brown, knock on its bottom, it should sound hollow. Let it cool for a few minutes before cutting it into thick slices, and enjoy with butter.


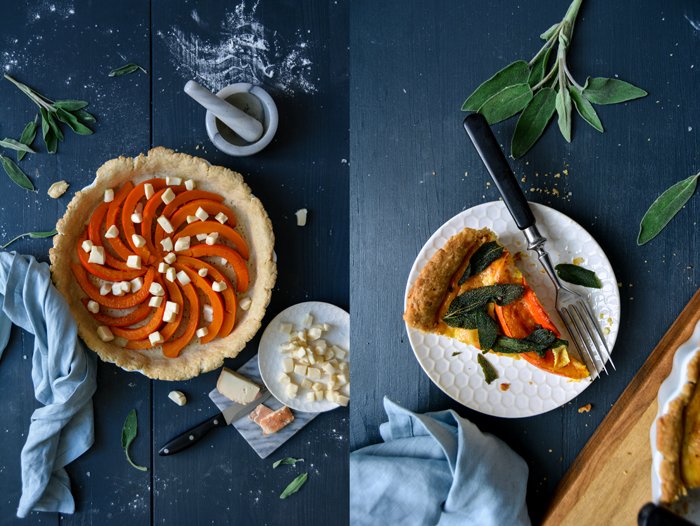
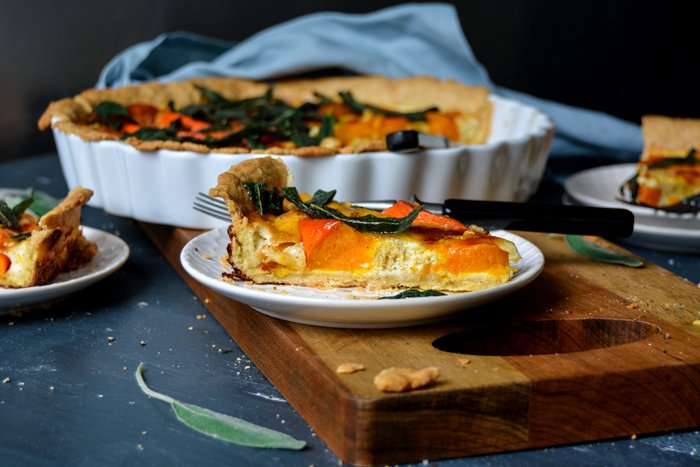
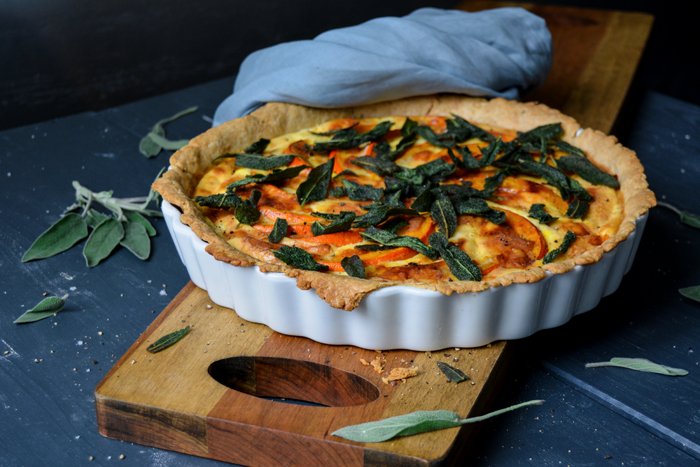
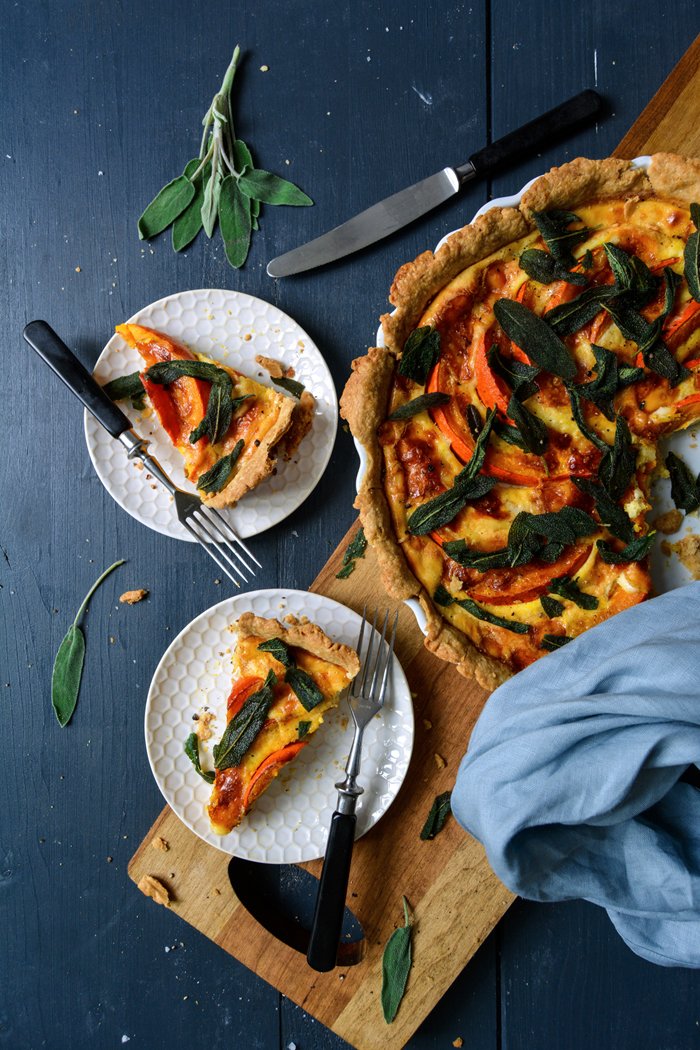
Pumpkin Quiche with Taleggio and Crisp Sage
A quiche was one of the first savoury recipes that I made on my own and actually enjoyed. Learning to cook takes time but once you succeed, you get hooked on it. Whenever friends and family asked me to chip in with a dish for a birthday party, I used to make my quiche and felt more than happy about the applause I got for it. In the beginning, I used a more basic filling of leeks, tomatoes, and thyme, but then I got experimental: be it my Italian fennel tart, the combination of artichokes, olives, and Gruyère, spinach and gorgonzola, or green beans and ramps - I love them all. There are boundless possibilities to follow the seasons and your mood. However, its greatest quality is the buttery, flaky, utterly tempting pastry base. It's light and crisp and tastes so good that it wouldn't even need any topping.
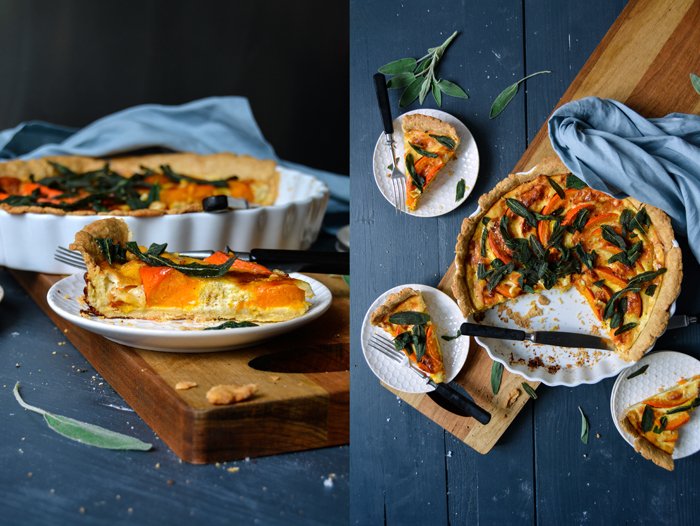
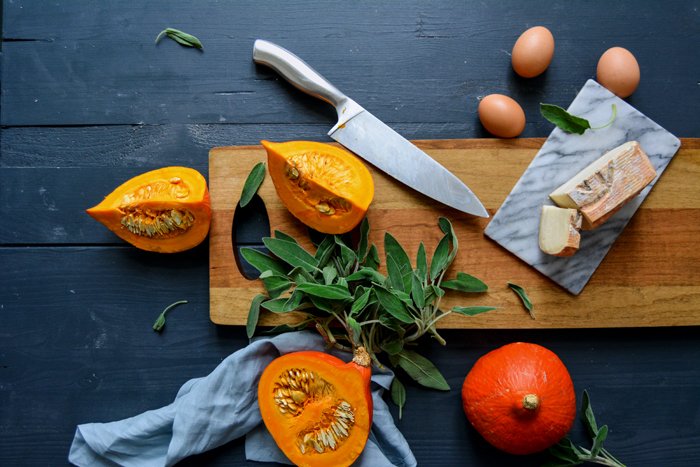
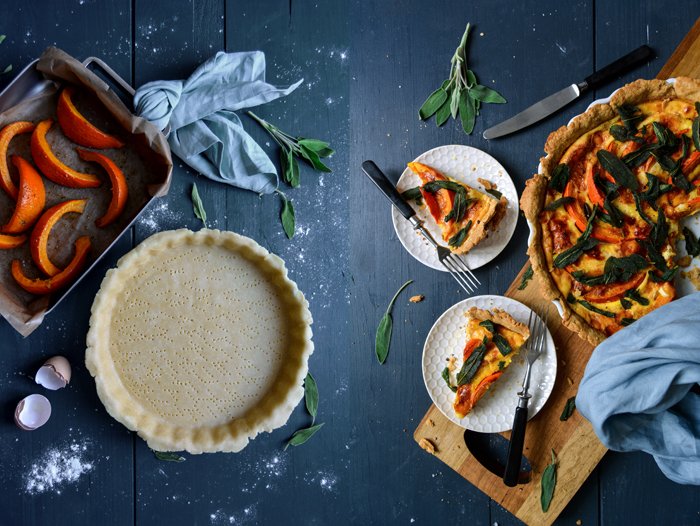
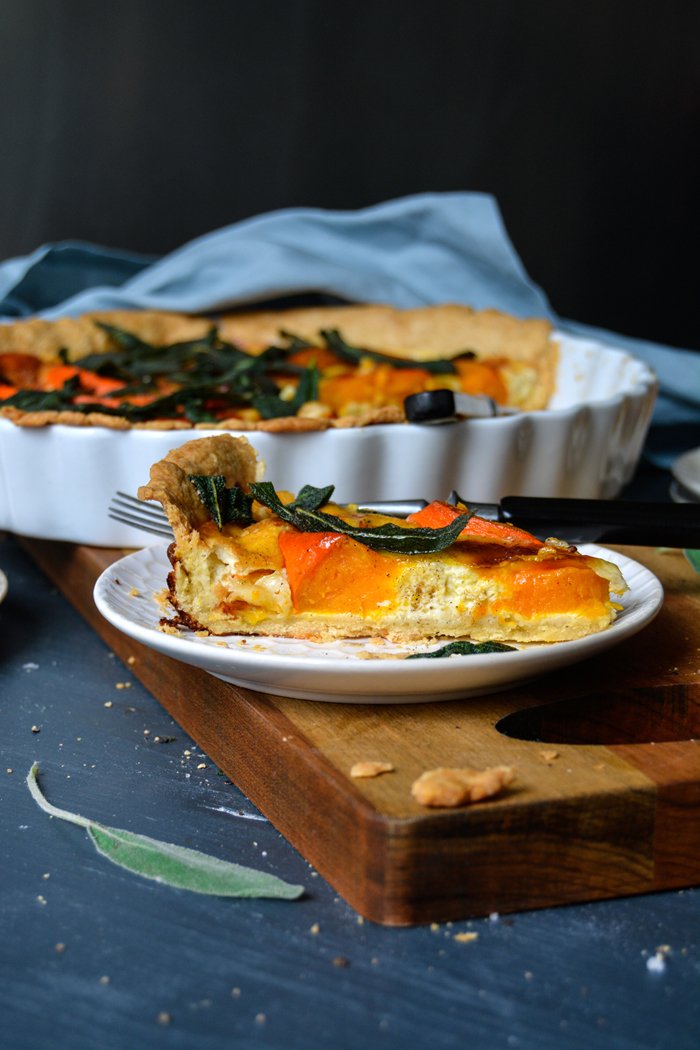
One of the best ways to enjoy a quiche, is at a picnic on a lazy summer's day, but the warmer season is still far away, so I choose a filling that fits the cold and moody weather of March and goes well for a Sunday brunch with friends. I go for pumpkin, Taleggio, and crispy sage leaves fried in butter. It's pure comfort food. Usually, I like my quiche recipes warm or cold, I have no preference, but this recipe here is best when it's still warm. The soft cheese spreads its aroma and sinks into the sweet squash and woody-earthy sage. It's happy-making food.
I developed this quiche recipe for the West Elm blog, where you can also find this recipe and the long (!) wooden chopping board, the linen napkin, and stoneware plates. This post was sponsored by West Elm to make my kitchen a little prettier!
Pumpkin Taleggio Quiche with Crisp Sage
Makes a 30cm / 12″ quiche
For the filling
seeded pumpkin, peeled butternut squash or Hokkaido with skin, 600g / 1 1/3 pounds
olive oil 1 tablespoon
flaky sea salt
ground pepper
organic eggs 3
heavy cream 125ml / 1/2 cup
sour cream 175g / 3/4 cup
fine sea salt 1 teaspoon
nutmeg, preferably freshly grated, a generous amount
Taleggio (or another aromatic semi-soft cheese), diced, 150g / 5 ounces
butter 3 tablespoons
large fresh sage leaves 50
black peppercorns, crushed in a mortar
For the pastry
plain flour 260g / 2 cups
salt 1 teaspoon
butter, cold 130g / 4 1/2 ounces
organic egg 1
Preheat the oven to 200°C / 400°F (conventional setting). Line a large baking dish with parchment paper.
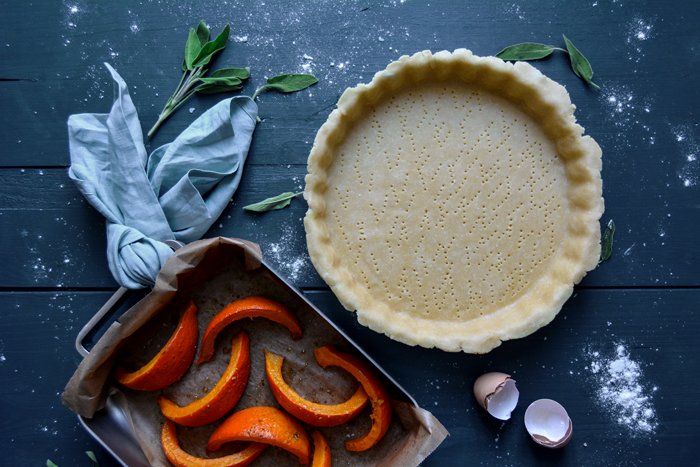
Cut the pumpkin into 5cm / 2" wedges and place them in the lined baking dish. Drizzle with the olive oil, use your hands to toss and coat the squash in the oil. Sprinkle with flaky sea salt and pepper and roast for 15 minutes. Turn the squash wedges over and continue roasting for about 15 minutes or until golden brown and soft when pricked with a fork. Cut the wedges in half lengthwise and set aside.
For the pastry, combine the flour and salt in a large bowl. Add the butter and use a knife to cut it into the flour until there are just small pieces left. Quickly rub the butter into the flour with your fingers until combined. Add the egg and mix with the dough hooks of an electric mixer until crumbly. Form the dough into a thick disc, wrap it in plastic wrap, and freeze for 12 minutes.
Place the dough between 2 sheets of plastic wrap and use a rolling pin to roll out into a disc, large enough to line the bottom and sides of a 30 cm / 12" quiche dish. Fit the dough into the quiche dish, pushing it into the dish, especially along the edges. Let the dough hang over the rim a little or cut it off with a knife. Use a fork to prick the dough all over. Bake for 15 minutes or until golden. If the dough bubbles up, push it down with a fork.
Take the baking dish out of the oven and set the temperature down to 180°C / 350°F.
For the filling, whisk the eggs, heavy cream, sour cream, salt, pepper and nutmeg.
Arrange the pumpkin in a circle on top of the pre-baked pastry and sprinkle with the taleggio. Pour the egg-cream mixture over the squash and bake for about 55 minutes or until golden brown, the top should be firm.
While the quiche is in the oven, cook the sage: Lay a kitchen paper on a large plate. Heat the butter in a large, heavy pan on medium-high heat. When the butter is sizzling, spread the sage in the pan and roast for about 20 seconds or until golden, turning the leaves gently once or twice. Mind that they don't become dark. Take the pan off the heat and immediately transfer the sage leaves to the plate lined with kitchen paper.
When the quiche is done, let it cool for 10-15 minutes, then cover with the sage leaves and sprinkle with crushed pepper, serve warm.


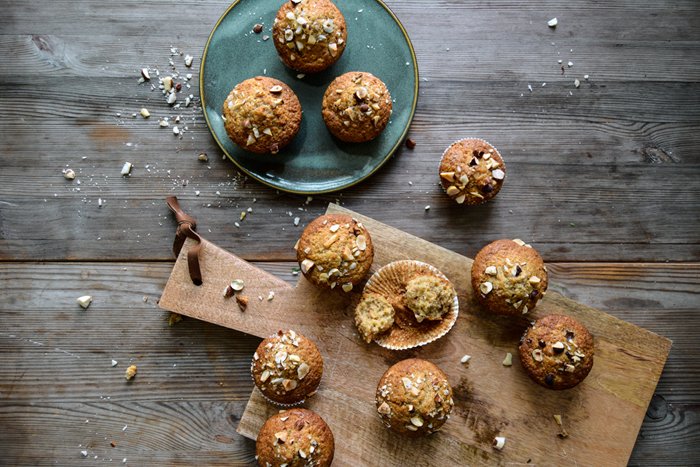
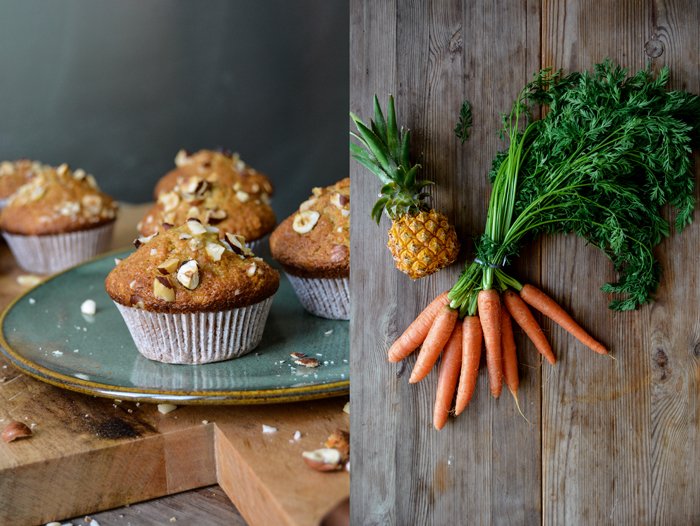
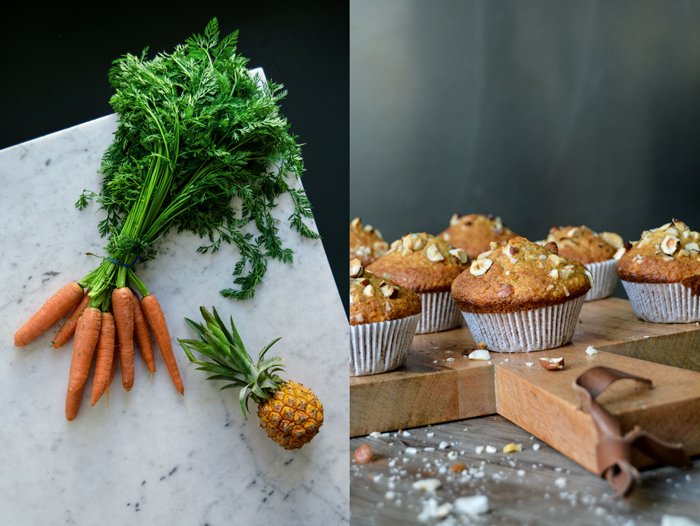
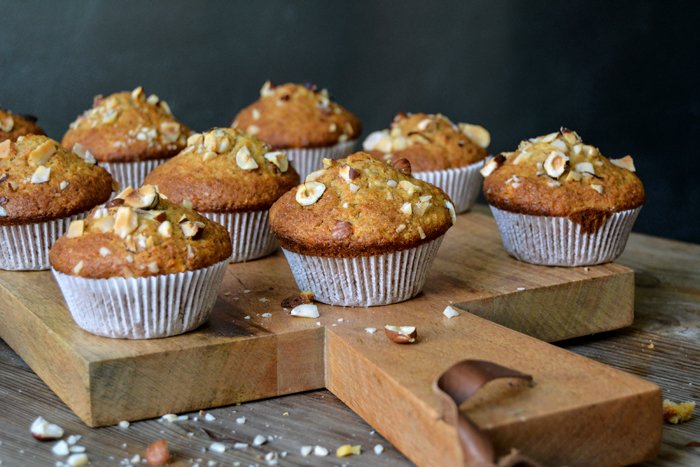
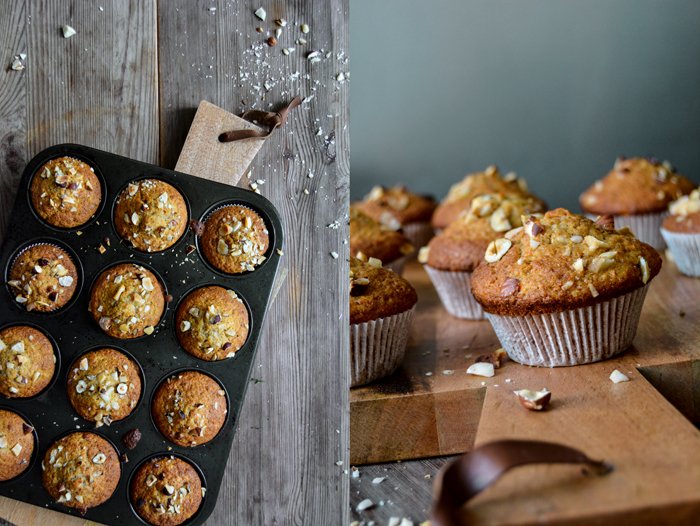
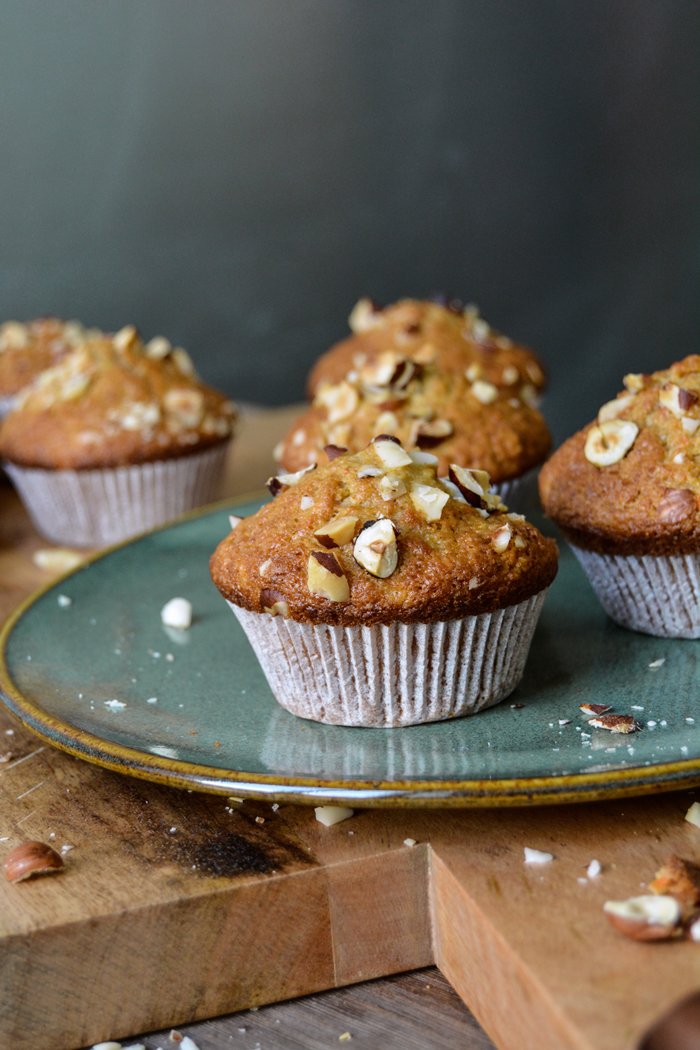
Carrot and Pineapple Muffins with Hazelnuts
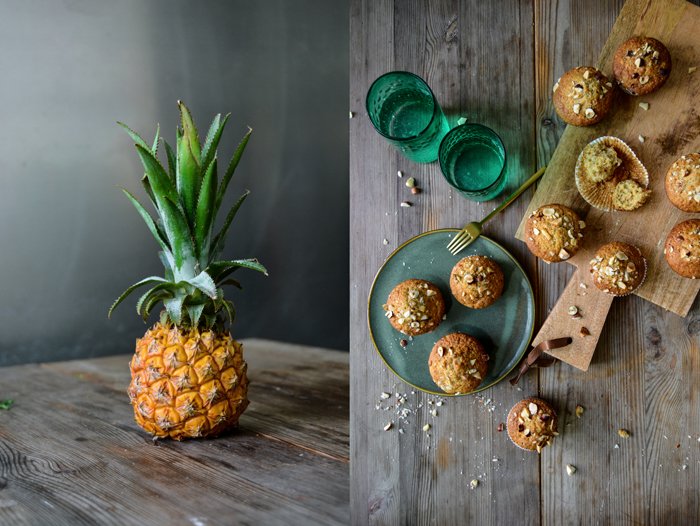
The secret ingredient to my favourite carrot cake is puréed pineapple, it makes the batter nice and light and adds subtle fruitiness. Our cake-loving granny Doris from Florida introduced me to her little masterpiece when I visited her in the sunshine state for the first time a few years ago. Although it wasn't the only treat she prepared for us - she's a grandma after all, so she made sure that our plates were never (!) empty - it was the one that struck me the most. I must have eaten the whole cake on my own, it's addictive and I loved it! It's made with sunflower oil instead of butter, which I'm usually not that fond of, but here it doesn't disturb the flavours and makes a very nice and fluffy texture. Refined with my beloved cinnamon, it's a fragrant cake that fits perfectly to a late Sunday breakfast in spring. The temperatures are far from springy here in Berlin so I need a bit of imagination, but never mind, my heart is already set on the next season.
So what works in a cake, also works in a muffin. It's just quicker and easier to prepare and you can even skip the icing of the cake, which turns the whole thing into a richer treat (but if you're up for it, you can find the recipe for my cream cheese icing in the link to the carrot cake). I often use canned pineapple in this recipe, drained and squeezed, I'm after sweetness so if you can't find the freshest, juiciest, and sweetest fruit, go for the can. The amounts of the cake ingredients needed a few adjustments to turn into muffins but the results are actually quite similar: they have the same light texture, beautiful aroma, and I can't stop eating the muffins either.
Carrot and Pineapple Muffins with Hazelnuts
Makes 12 muffins
plain flour 260g / 2 cups
granulated sugar 150g / 3/4 cup
baking powder 3 teaspoons
baking soda 1/2 teaspoon
fine sea salt 1/8 teaspoon
ground cinnamon 2 1/2 teaspoons
sunflower oil 120ml / 1/2 cup
pineapple (canned or fresh), drained and lightly squeezed (canned fruit), and puréed, 150g / 5 ounces
organic eggs 3
carrots, grated, 150g / 5 ounces
hazelnuts, chopped, 1 small handful, for the topping
paper baking cups 12
Set the oven to 180°C / 350°F (preferably convection setting) and line the 12 molds of a muffin tray with paper baking cups.
In a large bowl, whisk together the flour, sugar, baking powder, baking soda, salt, and cinnamon.
Whisk together the sunflower oil, puréed pineapple, and eggs.
Pour the pineapple-oil mixture along with the carrots into the bowl with the flour mixture and stir with a wooden spoon until you have a lumpy dough, with a bit of flour left here and there. Keep in mind, the more you mix it, the more it will lose its light texture. Divide the dough between the muffin cups and sprinkle with the chopped hazelnuts. Bake for about 20-22 minutes (slightly longer if using a conventional oven) or until the muffins are firm on top. Let them cool for 1-2 minutes before you take the muffins out of the tray.
You can keep the muffins in an airtight container for up to 2-3 days.

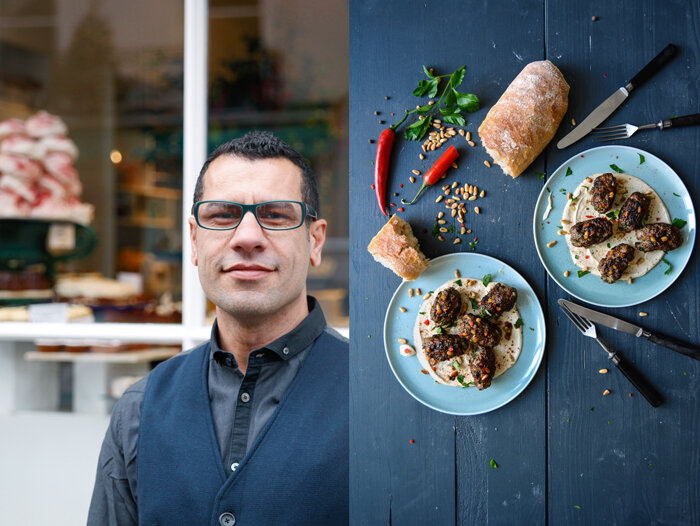
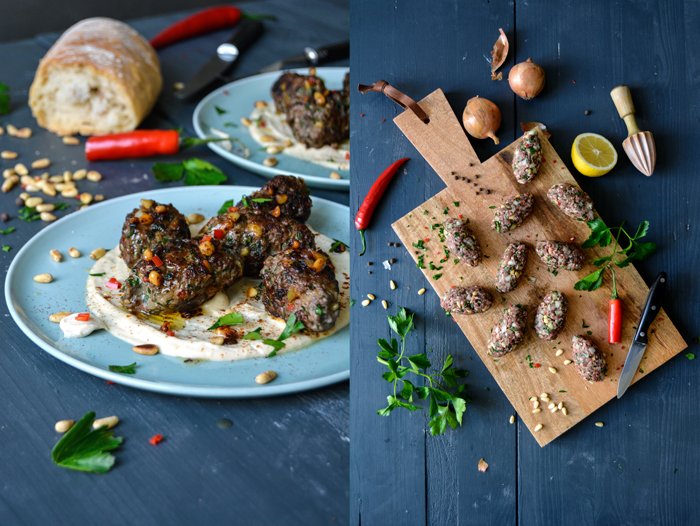
meet in your kitchen | Sami Tamimi's Kofta b'siniyah with Tahini Sauce

If you love cooking and cookbooks, you've probably come across Sami Tamimi's name, either on the cover of Ottolenghi: The Cookbook or Jerusalem - both award-winning bestsellers. But who is the man who co-wrote these beautiful recipe collections and started some of the most talked about restaurants on the London food scene together with his friend from Israel? While the whole world seeks fame and attention, what drives a man to stay in the background and concentrate on what he loves the most: to cook and create recipes? The more I got to know about Sami, the more I understood his decision to be the chef in the kitchen and not the star in the spotlight.
Growing up in the Old City of East Jerusalem and feeling the restrictions of life in a traditional Muslim family, he left home at the age of seventeen and headed to Tel Aviv. The ambitious young man worked hard and became a chef at one of the country's best restaurants. But Sami was hungry, he wanted to learn and evolve even more: London was next and with it the beginning of a beautiful story of friendship, great food, and success. A story of two men, whose ideas, dreams, and creativity are inseparably woven into each other.
Sami and Yotam first met at Baker & Spice in London, where Sami had developed a food concept quite similar to the one we know from the Ottolenghi restaurants in Islington, Belgravia, Notting Hill, and Spitalfields. Lusciously filled platters of Middle Eastern and Mediterranean dishes, so pleasing to the eyes that one can't help but stop at the first glance. You might not be hungry, but after a quick look through the large windows you'll fall for the tempting displays - they seem to call your name.
Yotam must have felt the same when he passed the restaurant back in 1999. He hopped off his scooter and started talking to Sami. They got along well straight away, so he joined him in the kitchen, and became responsible for the pastry. What happened next is one of the many reasons I love life: a simple idea became reality through hard work and dedication. They decided to open their own place and put their individual skills together to make it happen. The rest is history. In its honesty, Sami's view of the story touches me: “It was Yotam’s vision and his dream. The work was his. The stake was his. I didn’t have money to invest. He risked everything he had. A few years later, I became a partner, but regardless of the cookbooks we do, regardless of our friendship, I’m still working for Yotam. He’s my boss”. But as much as his friend was the visionary, in the end it was also Sami's creative concept for food, which became what we know as Ottolenghi today. These two men, aware of their individual strengths, put it all together and turned it into something greater.
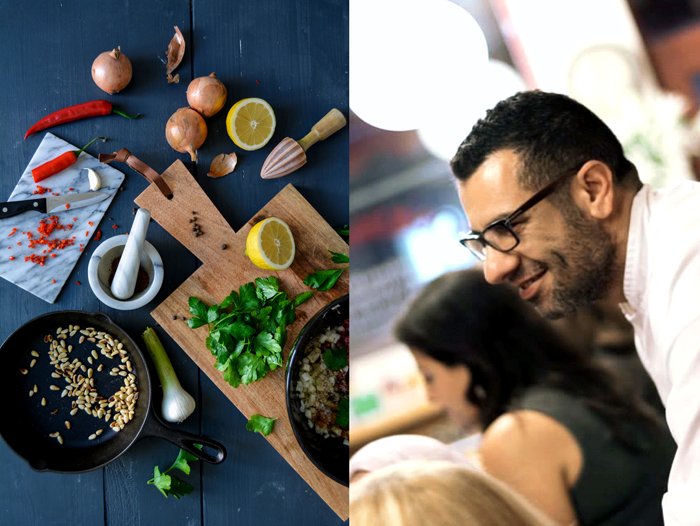
Having cooked and baked with Jerusalem, enjoying it every time I pull it off my shelf, it felt even more exciting to choose one of the recipes from the book together with Sami to share with you. We didn't manage to meet in London, but cooking his kofta here in Berlin, working on the interview with him, and learning so much about and from this inspiring man, made me feel once more that the kitchen is often the best place to get to know someone.
I made Sami's kofta and I loved it. It was nothing less than heavenly: the little oval meatballs are juicy, packed with nutty pine, parsley, spicy garlic and chilli. Sami lays them on a tahini-lemon sauce, a smooth and creamy contrast to the fragrant meat. It's one of those dishes that make you wish you had made twice as much.
Here's a great article by Jane Kramer about Yotam and Sami in The New Yorker, which I can recommend if you need a little inspiration for life.
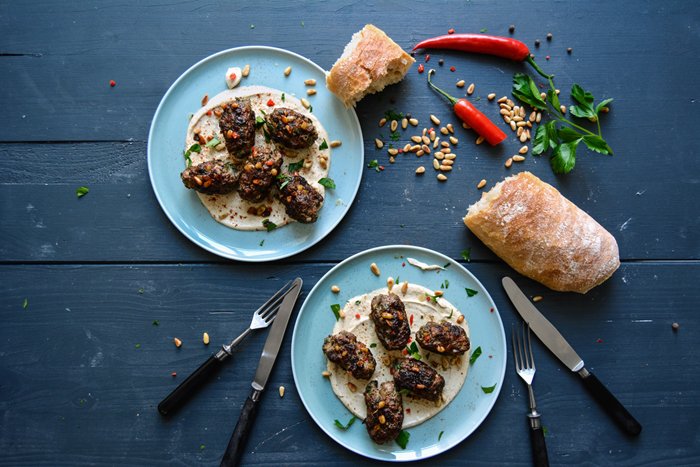
Sami Tamimi's Kofta b'siniyah
Recipe from Jerusalem by Yotam Ottolenghi and Sami Tamimi.
For these kofta, buy your meat freshly minced by your butcher, if you can. The lamb should be shoulder and the beef a good non-stewing cut. If you get the meat from a supermarket or another grocer, cook it through, just to be on the safe side. Finish the dish with butter only if you are serving it straight away and consuming it all at once. Otherwise, leave it out as it sets quickly, which isn't very nice. Serve with pita (I used ciabatta).
Serves 6 / makes 18 kofta
For serving
light tahini paste 150g / 5 ounces
freshly squeezed lemon juice 3 tablespoons
water 120ml / 1/2 cup
medium garlic clove, crushed, 1
sunflower oil 2 tablespoons
unsalted butter or ghee 30g / 2 tablespoons (optional)
sweet paprika, to garnish
fine sea salt
For the kofta
minced lamb 400g / 14 ounces
minced veal or beef 400g /14 ounces
onion, finely chopped, 1 (about 150g / 5 ounces)
large garlic cloves, crushed, 2
toasted pine nuts, roughly chopped, 50g / 2 ounces, plus extra whole ones to garnish
flat-leaf parsley leaves, finely chopped, 30g / 1 ounce, plus extra to garnish
large medium-hot red chilli, deseeded and finely chopped, 1
ground cinnamon 1 1/2 teaspoons
ground allspice 1 1/2 teaspoons
grated nutmeg 3/4 teaspoon
ground black pepper 1 1/2 teaspoons
fine sea salt 1 1/2 teaspoons
If the tahini-lemon sauce starts to curdle, slowly add more water and continue whisking or pulsing it in a blender until smooth.
Put all the kofta ingredients in a bowl and use your hands to mix everything together. Now shape into long, torpedo-like fingers, roughly 8cm / 3" long. Press the mix to compress it and ensure the kofta is tight and keeps its shape. Arrange on a plate and chill until you are ready to cook them, for up to 1 day.
Preheat the oven to 220°C / 425°F. In a medium bowl, whisk together the tahini paste, lemon juice, water, garlic, and 1/4 teaspoon of salt. You can also use a blender or food processor. The sauce should be a bit runnier than honey; add 1-2 tablespoons of water if needed.
Heat the sunflower oil in a large pan and sear the kofta, in batches, over high heat. Sear on all sides until golden brown, for about 6 minutes. At this point they should be medium-rare. Transfer the kofta to a baking dish and cook in the oven for 2-4 minutes (medium or well done). I cooked mine for 8 minutes in the pan and skipped the oven. I spread the tahini sauce on plates and laid the kofta on top, then I continued with the garnish.
Spoon the tahini sauce around the kofta, so it covers the base of the baking dish. Place in the oven for 1-2 minutes to warm up the sauce.
Meanwhile, if you're using the butter, melt it in a small saucepan and allow it to brown a little, taking care that it doesn't burn. Spoon the butter over the kofta as soon as they come out of the oven. I skipped the butter and used the frying juices from the pan instead. Scatter with pine nuts and parsley and finally sprinkle some paprika on top. Serve immediately.

What made you leave Israel and move to London?
I’d been cooking for many years in Israel. After a good time at Lilith, one of the top restaurants in the country, I was beginning to reach my full potential. I knew if I wanted to keep learning and growing I’d need to look further afield. I’d visited London a few times and fallen in love with it so it was the obvious place to go. The political situation was also getting worse by then and the levels of stress were getting higher. I wanted a change from that.
You say you're more into savoury than sweet baking, what do you like about the process of creating savoury recipes? Why do you prefer it to sweets?
I find I have more creative freedom with savoury cooking. Baking and sweet cooking in general is often quite a science: everything needs to be measured for the result to work out. What goes into savoury cooking can change much more, depending on the day and the mood and what you have to hand. I love that freedom. Also, I can’t stand all the flour that gets everywhere! I like my kitchen clean and tidy.
You lived in Tel Aviv for 12 years, a city known for its vibrant food scene, what makes it so special? What do you miss the most about the food in Israel?
I haven’t lived in Tel Aviv for 17 years so the food scene has changed a lot. I guess what makes it vibrant is people’s passion for the food and people often basing their social life around food. There are a lot of young people who travel the world from Tel Aviv and then return with all sorts of knowledge about different cuisines: that makes it a really creative place.
Do you find creative inspiration in the British cuisine? Do you have a favourite British dish?
We have some wonderful products and raw ingredients here, which are a constant inspiration. There are also a few local chefs who I get a lot of inspiration from: Simon Hopkinson and Nigel Slater, to name just two. I’ve lived in the UK for many years now so I have come to love some of the classic British dishes: Apple or pear and rhubarb crumble, beef wellington and so on.
Is it harder or easier to work with a close friend (Yotam Ottolenghi)? How did your friendship change through the experience of writing books and running restaurants together?
Yotam and I started to work together long before Ottolenghi was born. Combining friendship and business is not always a good thing but we’ve been doing it for many years now and have perfected the way of working together without it effecting our friendship. We see each other a lot and are constantly checking in with each other but our day-to-day jobs are very different. Yotam is based in the test kitchen and I am based in the restaurants so our roles are pretty separate from each other.
You've co-written Ottolenghi: The Cookbook andJerusalem, what is your favourite part of the process of writing a cookbook?
For Jerusalem, cooking at home, alone, in my kitchen and then sharing childhood memories and stories sparked from the food was my favourite part. The Ottolenghi: The Cookbook was harder for us: It’s the first child thing, you are making it up as you go along so it took longer to work out what we were doing! Jerusalem was easier technically but harder emotionally.
What advice can you give young chefs?
Being a chef is hard work: the stress levels are high, the hours are long and you don’t get to sit down or sleep much! Before you spend a lot of time and money going to cookery school, people should always do a stint in a commercial kitchen to see whether the job is for them. There is so much more to the job than just making food look pretty! You need to start with passion and love and then add some hard graft and dedication. And then you can start making the food look pretty!
You write poetry in Arabic and you paint, does this bring you relaxation or inspiration?Writing poetry, painting, photography, cooking, it’s all part of the same process, for me: a way of expressing myself, saying something about the world we are living in.
Do you like to cook at home?
Cooking at home is what keeps me in love with food. I cook at home every evening, even after a long day working with food.
Who is your biggest inspiration in the kitchen?
My mother. She was an amazing cook.
Was food, cooking, and eating a big topic in your family while growing up?
Yes, it was. The kitchen was the heart of the house and my family. When we were having breakfast we’d be discussing what to have for lunch. Chats at lunch were about what we were having for supper. Food was always on the go, being prepared or cooked.
What was the first dish you cooked on your own, what is your first cooking memory?
I cooked all the time, from a very young age: I’d be making it up if I said I could remember my first dish!
What are your favourite places to buy and enjoy food in London?
I tend to go to small Middle Eastern shops in west London for my food grocery because the fruit and vegetables come from sunny places and therefore they taste much better, plus I can find all the ingredients for Palestinian cooking.
If you could choose one person to cook a meal for you, who and what would it be?
My mother. Anything she will cook will be delicious.
You're going to have ten friends over for a spontaneous dinner, what will be on the table?
Many dishes to share and lots of food: if it was a Palestinian spread they’d be Maqluba, okra in tomato sauce, Bamieh Bil Zeit and Mujaddara, lentils and rice with lots of fried onions, to mention just three dishes.
What was your childhood's culinary favourite and what is it now?
I love Palestinian food and still do. I also love Japanese, Mexican, Thai and Nordic food.
Do you prefer to cook on your own or together with others?
When I'm at work then of course with others and it's much more fun. But when I’m cooking at home, I like to be alone, with music.
Which meals do you prefer, improvised or planned?
Some days I'll wake up with a dish in mind and then I'll make it but most times I just go to the shops and decide then, according to what I find and what's in season.
Which meal would you never cook again?
I have recently made Turkish Su Böreği or as some call it, water borek. I'll never attempt to do it again. It was so hard and complicated. The end result is delicious but honestly, I can live happily with myself knowing that I've cooked it once in my lifetime and I'll only be ever eating it in Turkey.
Thank you Sami!
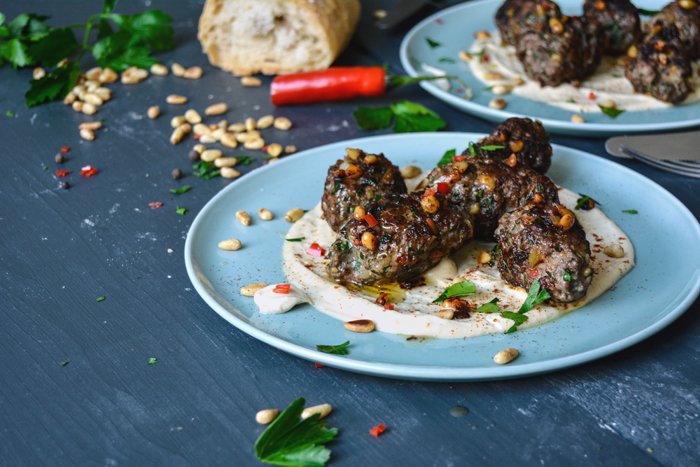

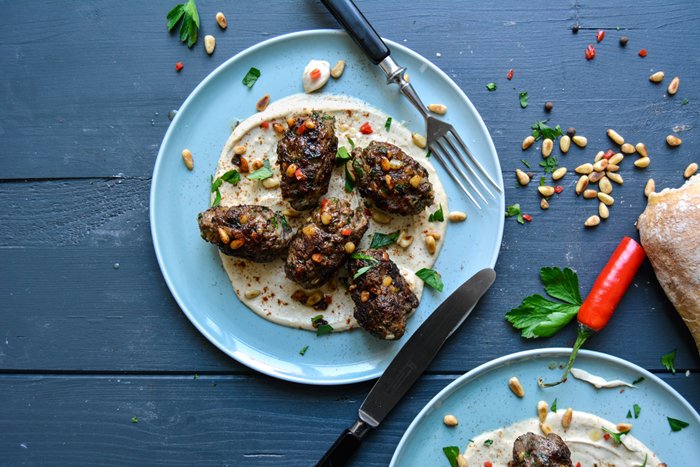

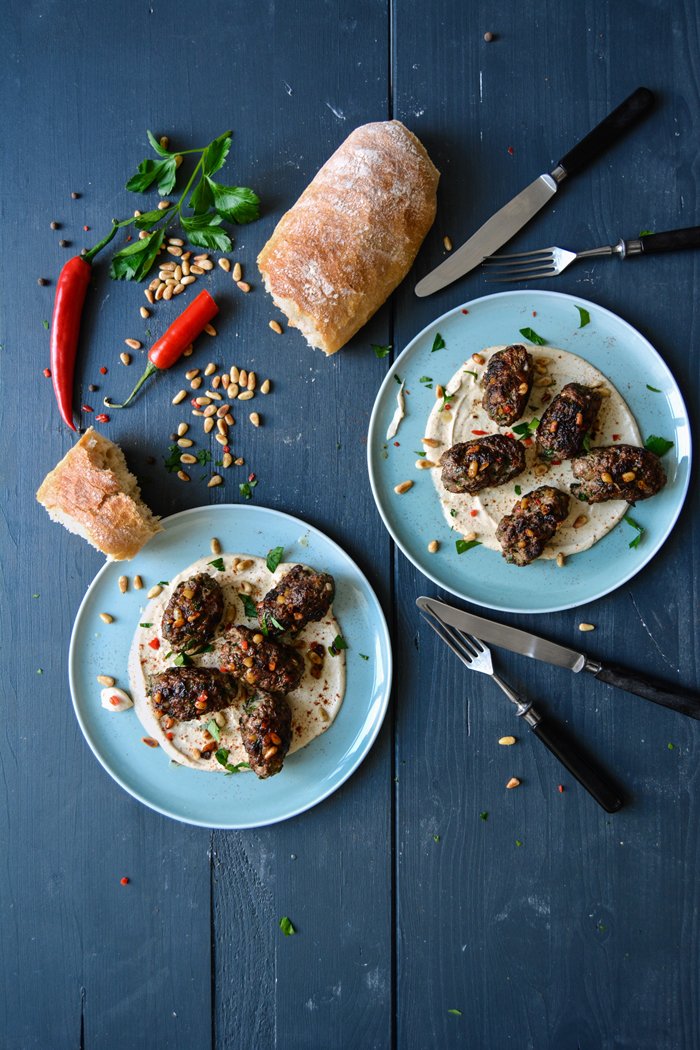

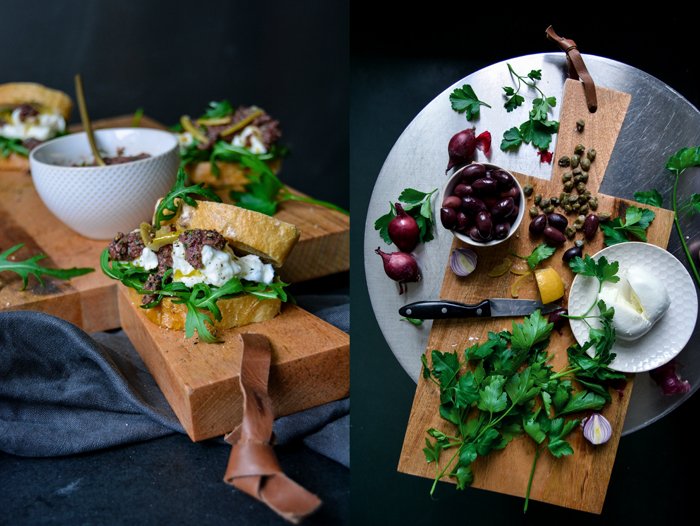
Mozzarella di Bufala and Olive Tapenade Sandwich with Preserved Lemon
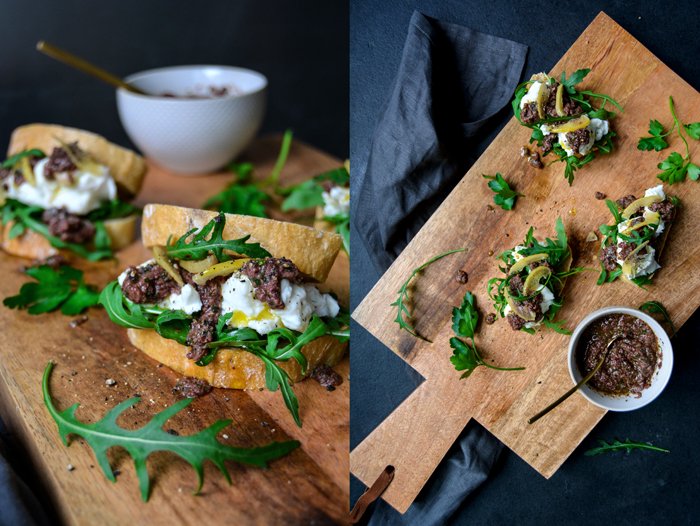
The best sandwiches are often the ones that are thrown together in just a few minutes. You grab whatever your fridge offers without overloading the whole composition and straining your taste buds. Just a few contrasting flavours and textures, the bread has to be fresh - soft and juicy to soak up the filling - and you're done.
Cheese is made for sandwiches and mozzarella is always a good choice, the creamier mozzarella di bufala or burrata are even better. A dark tapenade made of black olives, capers, and anchovy adds depth, refined with a handful of fresh parsley. This lies on a bed of arugula, the spicy leaves go so well with preserved lemons, which I use for the salty-sour topping. You can find them in big supermarkets but I recommend preserving your own. Tucked in a jar with lots of coarse sea salt for a month, the citrus fruit slowly becomes soft and ready to add some tangy bite to meat and vegetable dishes - or sandwiches.
I developed this sandwich recipe for the West Elm blog, where you can also find this recipe and the wooden chopping board you see in the pictures - it's just the right size for a loaf of bread and some cheese for late evening cravings on the sofa. The linen napkin and stoneware bowl and plate are also from their shop. This post was sponsored by West Elm to make my kitchen a little prettier!
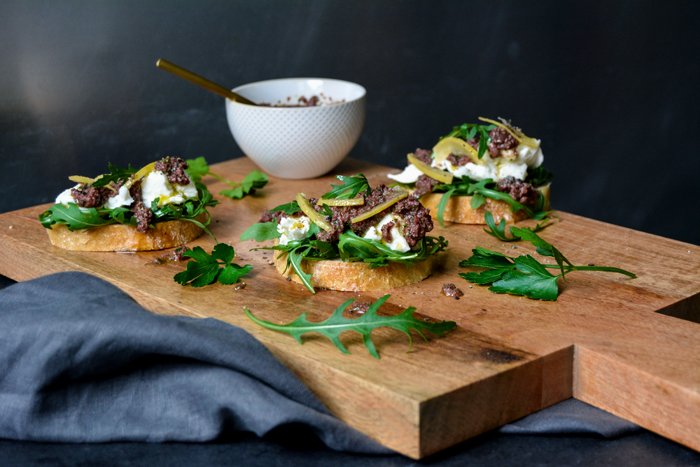

Mozzarella di Bufala and Olive Tapenade Sandwich with Preserved Lemon
You can use leftover tapenade for spaghetti.
Makes 4 small sandwiches
For the olive tapenade
pitted black olives, preferably Kalamata, 100g / 3 1/2 ounces
flat-leaf parsley leaves 10g / 1 small handful
small red onion, chopped, 1/2
capers, preferably preserved in salt, rinsed and dried, 1 tablespoon
anchovy filet, rinsed, 1 (optional)olive oil 6 tablespoons
freshly squeezed lemon juice 1 tablespoon
Dijon mustard 1 teaspoon
ground pepper
For the sandwiches
ciabatta, 8 small slices
fresh rucola, 1 handful
mozzarella di bufala, torn into small pieces, 125g / 4 1/2 ounces
preserved lemon, thinly sliced, 1/4
black peppercorns, crushed in a mortar
For the tapenade, purée the olives, parsley, onion, capers, anchovy (optional), olive oil, lemon juice, mustard, and pepper in a blender or food processor until smooth. Season with additional mustard, lemon juice, and pepper to taste.
Divide the rucola and mozzarella between 4 slices of bread and sprinkle with the tapenade, preserved lemon, and crushed pepper.
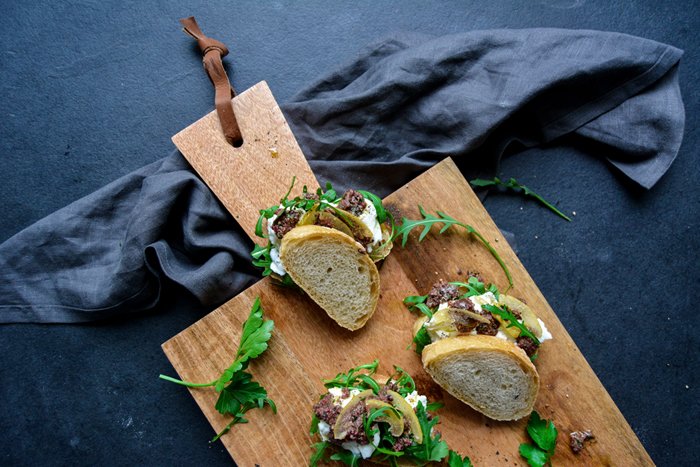
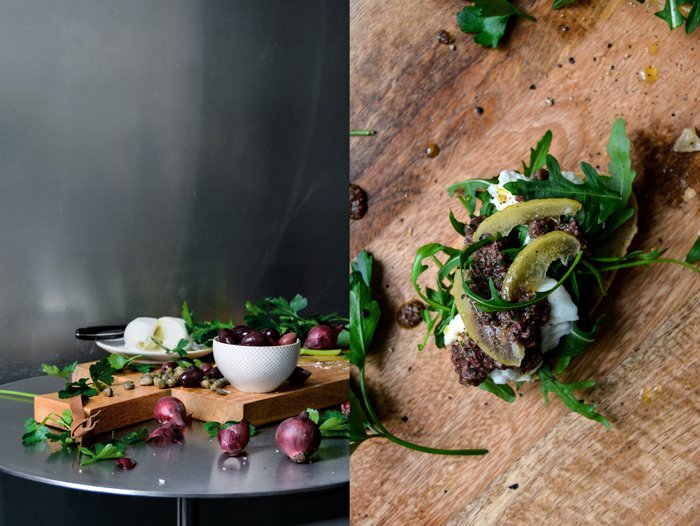
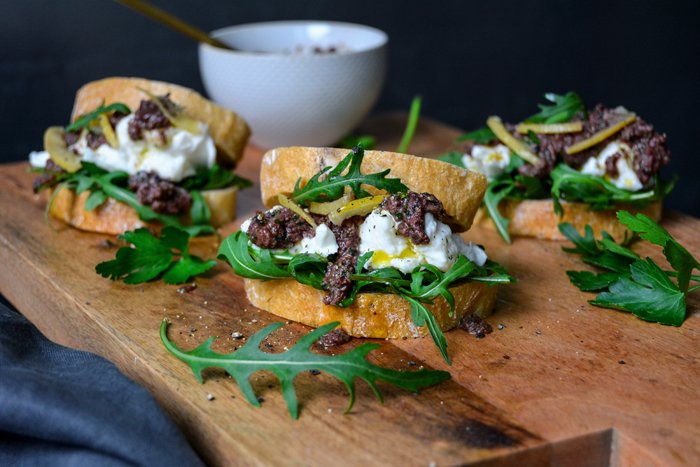
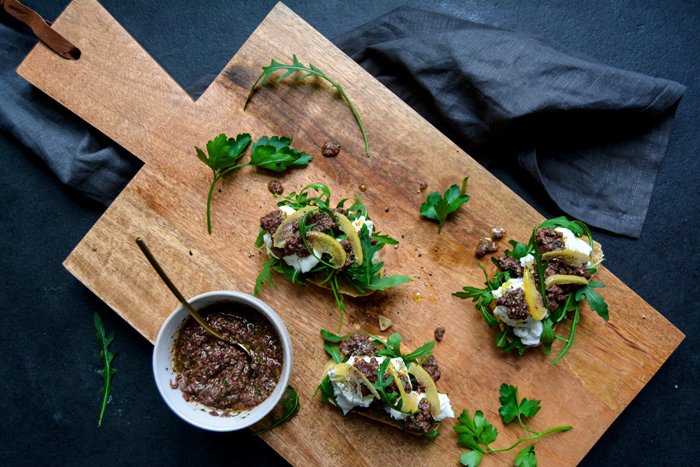


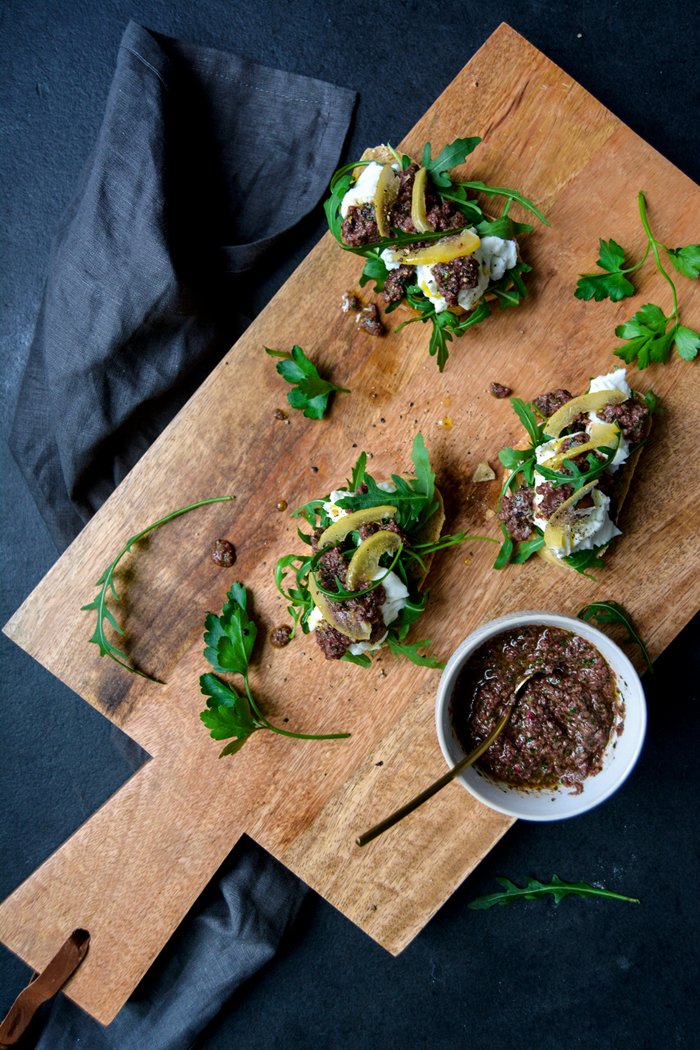

Provençal Pine Nut, Date, and Honey Tart

Berlin, March 2016:
I haven't left the country in a while and I'm starting to feel wanderlust. A few days in an old farmhouse somewhere in the soft hills of Tuscany, lonely walks along the endless beaches of breezy Brittany, or a lazy stroll through one of the ancient villages in the romantic Provençe. I wouldn't mind any of these tempting scenes, just far away, a different place, with different sights and smells, food, and languages to refresh my senses after too many months of being in the city.
Instead, I'm bound to my desk making the last decisions for my book, working on a few new projects, and thinking of recipes that can bring the sweet smell of traveling to my table. I'm quite obsessed with pine trees, I love their distinct, woody smell so much so that I even use a perfume that manages to capture this beautiful aroma of summer, sun, and sand in a little glass bottle. It's the smell of hot dry air mixed with the saltiness of the sea, where slim strips of pine forest become sandy beaches and end up in the gentle waves of the Mediterranean.
So, here's my cure: a Provençal pine nut tart filled with ground almonds, chopped dates, and honey, lying on top of a crisp short crust base. It's so fragrant, warm and sweet, a bit nutty, crunchy and soft, it's all you need when your heart is afar but you're still at home - in cold Berlin.

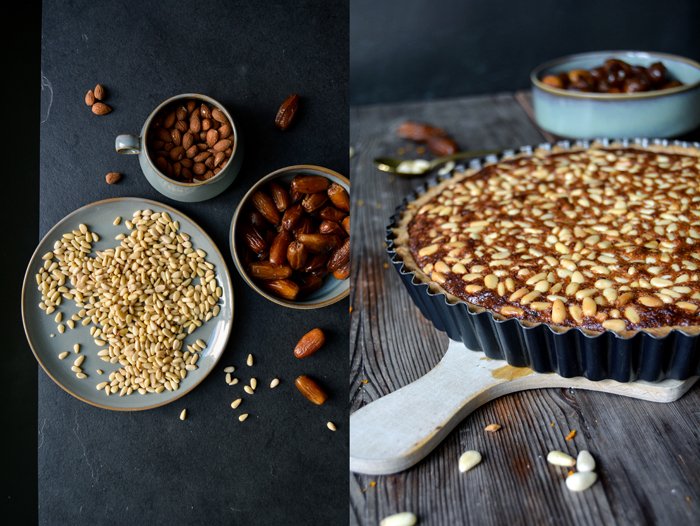
Provençal Pine Nut, Date, and Honey Tart
Makes a 23cm / 9″ tart
For the short crust base
plain flour 200g / 1 1/2 cups
granulated sugar 65g / 1/3 cup
a pinch of salt
butter, cold, 110g / 1/2 cup
organic egg yolks 2
For the filling
butter, at room temperature, 100g / 1/3 cup plus 1 tablespoon
brown sugar 50g / 1/4 cup
honey 50g / 2 1/2 tablespoons
freshly grated orange zest 1 teaspoon
freshly squeezed orange juice 1 tablespoon
organic eggs 2
ground almonds 100g / 3 1/2 ounces
dates, finely chopped, 100g / 3 1/2 ounces
pine nuts 100g / 3 1/2 ounces
For the pastry, combine the flour with the sugar and salt. Cut the butter with a knife into the flour until there are just little pieces of butter left. Continue with your fingers and rub the butter into the flour until combined. Add the egg yolks and continue mixing with the hooks of your mixer until you have a crumbly mixture. Form a thick disc, wrap in cling film, and put in the freezer for 12 minutes.
Set the oven to 200°C / 400°F (conventional setting).
Roll the dough out between cling film and line a 23cm / 9″ tart pan with the flat pastry. Prick with a fork and bake in the oven for 10 minutes until golden and crisp. Take the pan out of the oven and set aside.
For the filling, in a large bowl, using an electric mixer, beat the butter, sugar, honey, orange zest, and orange juice until creamy. Add the eggs, one at a time, mixing well in between until combined. Stir in the almonds and dates and mix until combined. Scrape the filling on top of the baked pastry, even it out, and spread the pine nuts on top. Push the nuts gently into the almond-butter mixture. Bake for 15 minutes, then turn the oven down to 180°C / 350°F, and bake for another 12 minutes or until the top is golden brown and firm. Let the cake cool for 10-15 minutes before you take it out of the pan.

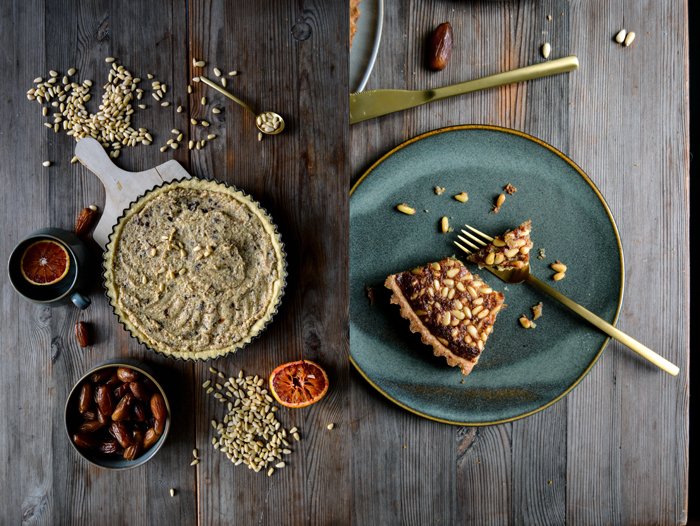
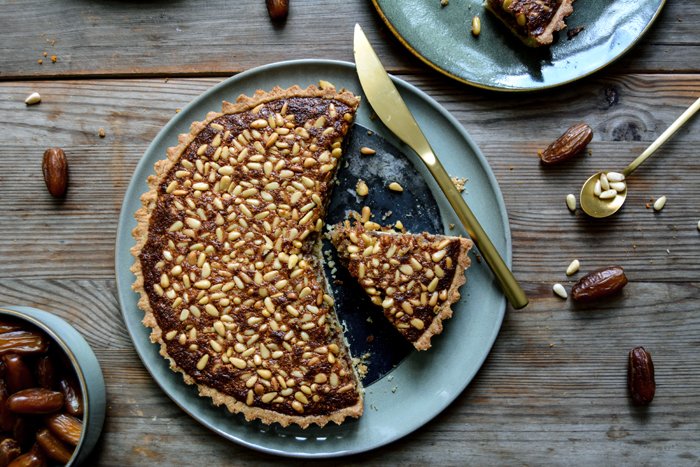

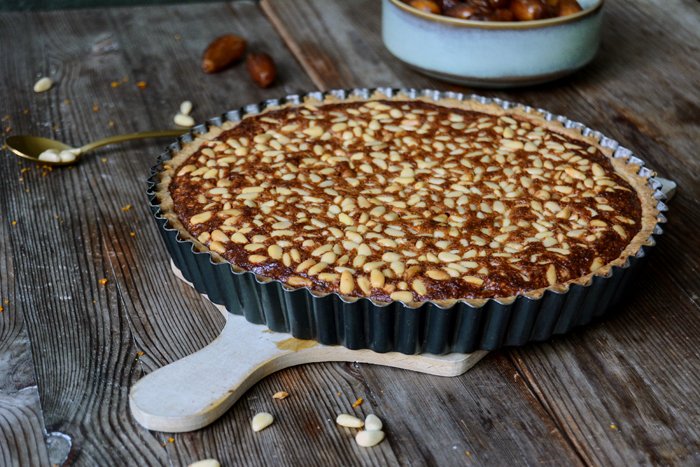
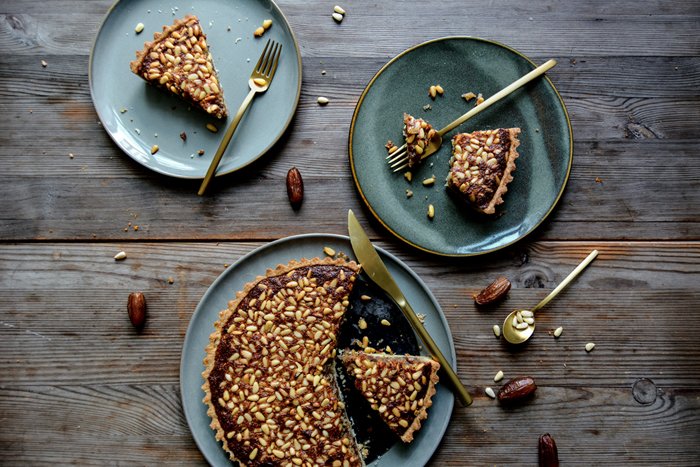
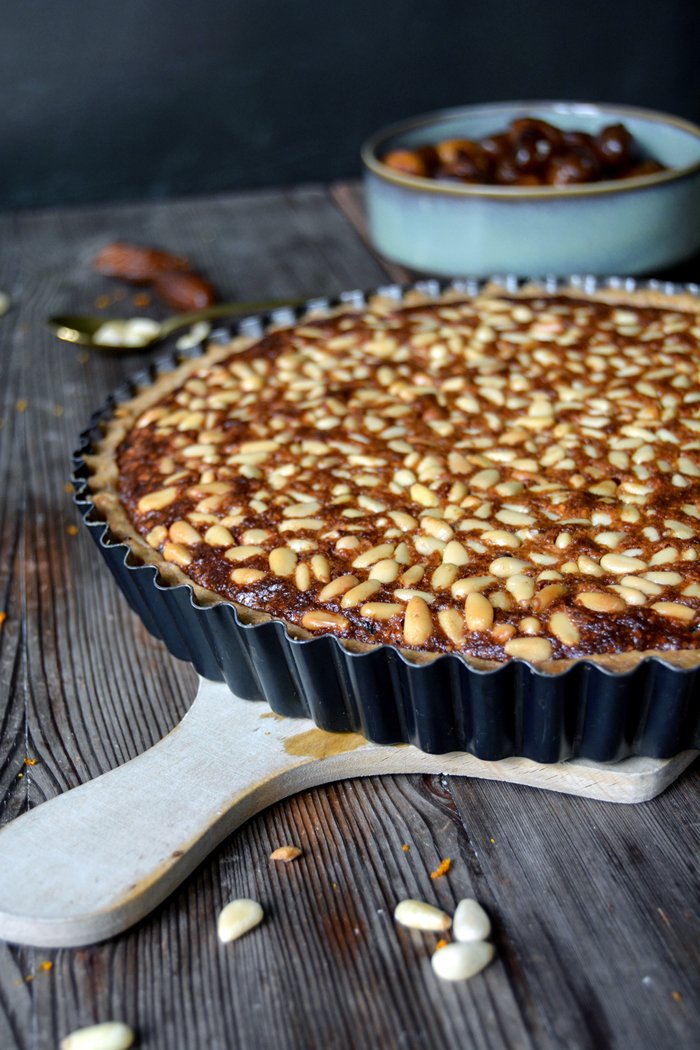
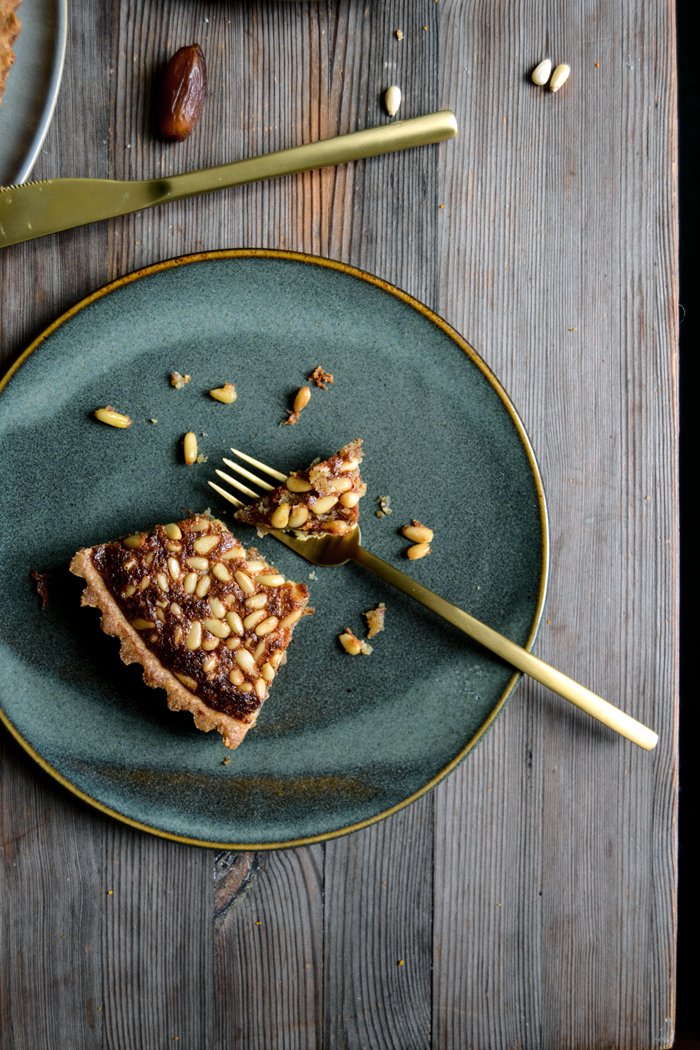


Beetroot and Skordalia - a velvety Greek Garlic Potato Dip
If you feel like garlicky mayonnaise but you're pushed away by its oily heaviness, cook some garlic and potatoes, then throw them in a blender, and you'll end up with skordalia. This popular Greek dip has a similar smooth texture if you pulse it - it becomes thick, sticky, and starchy. The added olive oil adds a Mediterranean touch and taste to it and makes it feel like velvet. If you use a potato masher, which is more common, it will be more chunky, like mashed potatoes, so it really depends on what kind of dip you're after. I was in a mayonnaise kind of mood so the blender was my tool of choice.
Skordalia is a new discovery for me and I don't know how I never heard of it or tasted it before. I love Greek food, I've been to Greece, and I ate my way through countless Greek restaurants, but for whatever reason, I never had it on my plate until now. So I'm keeping up and made an extra large batch of it. To balance the sweetness of the potatoes and garlic, I brought in some earthy flavours: Beetroots cooked in their skins along with a bay leaf. Peeled and still warm, I cut the purple roots into wedges, and served them with generous (!) amounts of my creamy dip. Delicious!
Beetroot and Skordalia - a Greek Garlic Potato Dip
Serves 2
For the beets
medium sized beetroots, unpeeled, 2
bay leaves 2
fine sea salt
For the skordalia
peeled potatoes, diced, about 240g / 8 1/2 ounces
large garlic cloves, unpeeled, 6
olive oil 4 tablespoons
fine sea salt
For the topping
fresh thyme leaves, about 2 tablespoons
flaky sea salt
black peppercorns, crushed in a mortar
Cook the beetroot along with the bay leaves in plenty of salted water on medium heat for about 40-50 minutes or until tender. Check the roots with a metal skewer, they should almost feel soft. Rinse under cold water and let them cool for a few minutes before you peel off their skins. Cut each beetroot into 4 wedges.
In a medium pot, bring the potatoes in plenty of salted water to the boil and cook for 10 minutes. Add the garlic and cook for another 5 minutes or until the potatoes are soft. Drain and quickly rinse with cold water. Peel the garlic and add, along with the potatoes, to a blender or food processor. Add the olive oil and a little salt and pulse until smooth. Season with salt to taste. Divide the beetroot wedges and skordalia between plates and sprinkle with thyme, flaky sea salt and crushed pepper. Enjoy cold or warm.
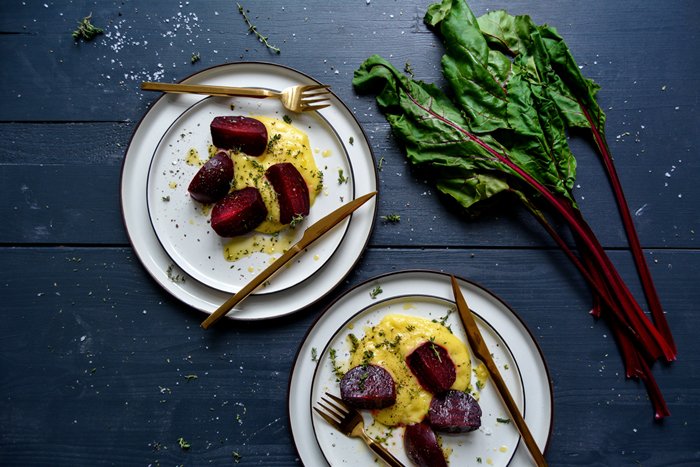
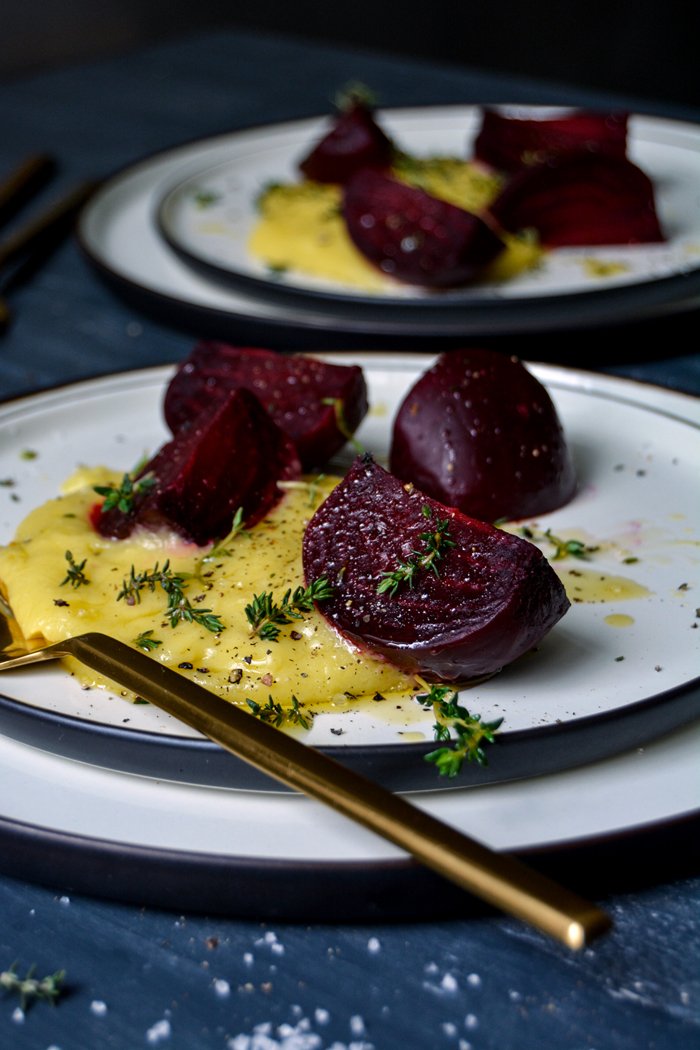
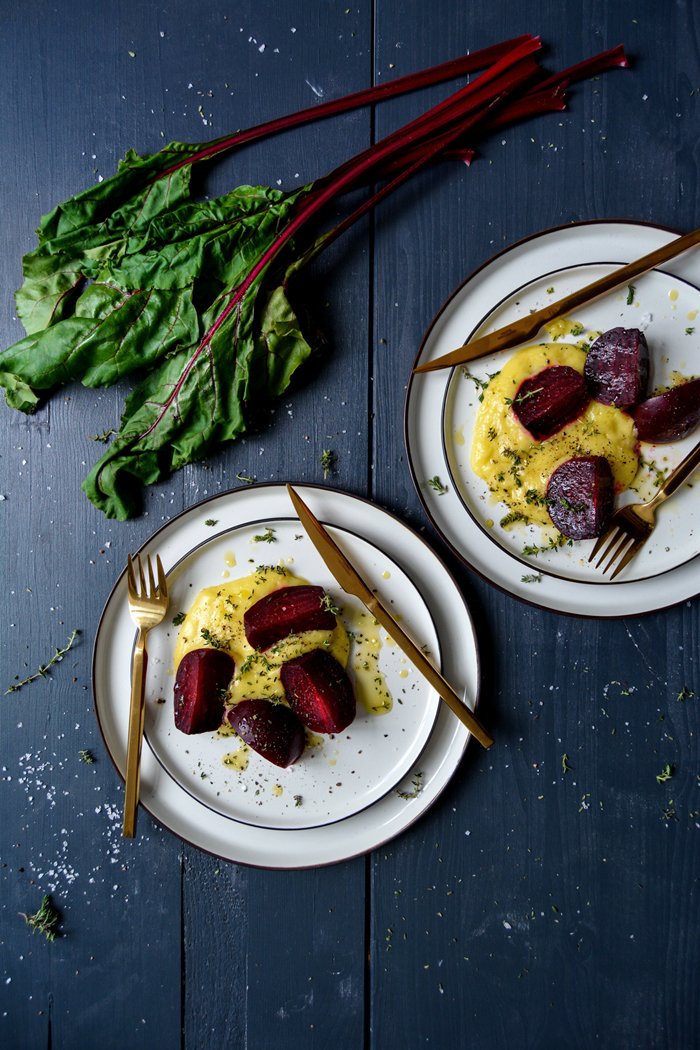

Sticky Banana Ginger Bread
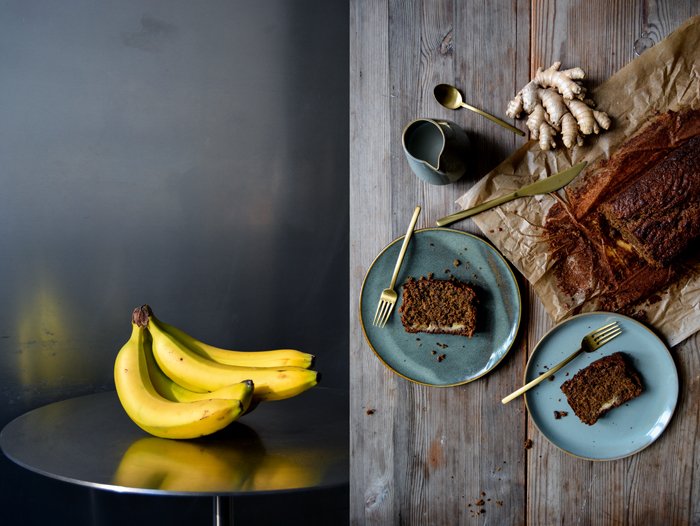
This cake tested my nerves - I needed two attempts to bring it to perfection. The first version tasted divine but was far too soggy and didn't bake through. I didn't mind and still ate half of it. But it didn't help, my pride as a baker made me go back to my kitchen and work on the texture.
Apart from its unsatisfyingly undone center, cake no. 1 had the advantage of the banana halves lying perfectly on top of the baked cake and the batter rising around it - quite dramatic. It was beautiful, but unfortunately, slightly burned as the temperature was too high from the start. Cake no. 2 decided to swallow the fruit and let it sink to the bottom. Not as pretty as the former but it had a scrumptious concentrated banana taste once you got to the sunken fruit.
The cake itself was inspired by Nigella Lawson's wonderful Fresh Gingerbread from her Domestic Goddess book, it's a recipe I truly adore. However there isn't much left of her original recipe, I only aimed for the stickiness, which she mastered to perfection. I added butter, more eggs and spices, and mashed bananas to my ginger bread. And some baking powder for more sponginess. After my disastrous first attempt, I decreased the amount of milk and turned down the heat. It looked completely different but tasted so, so good. The cakey bread (it's actually more of a cake than bread) is infused with the honey-sweet aroma of bananas, lots of freshly grated ginger, and warming cinnamon. It's so good that I forgave the bananas for their disappearing act.
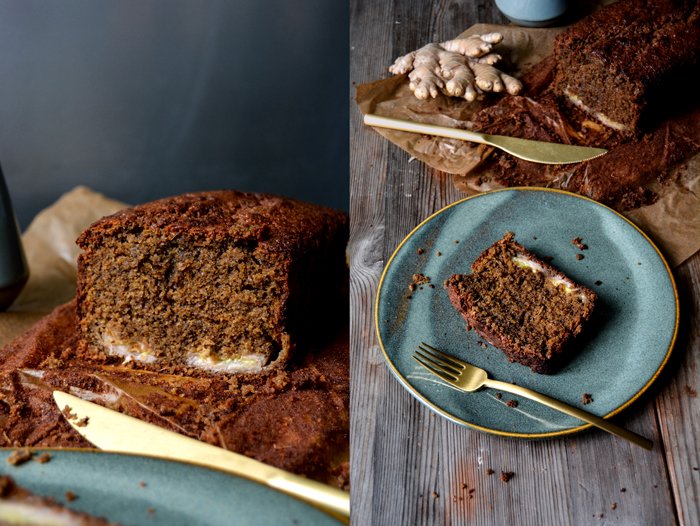
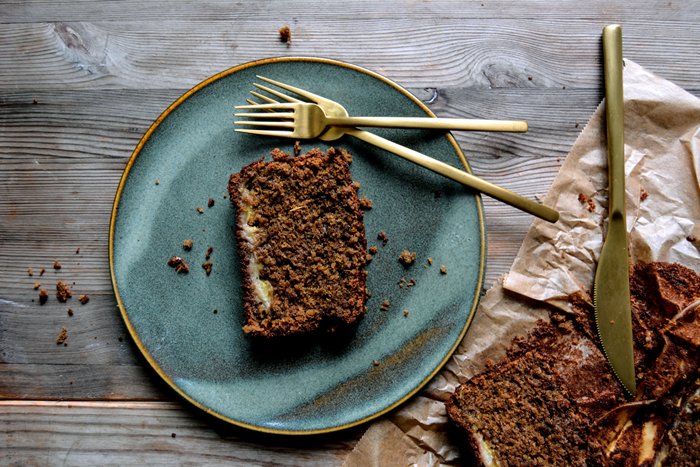
Sticky Banana Ginger Bread
This recipe is also in my 2nd book, 365: A Year of Everyday Cooking & Baking (recipe no. 34).
Update March 16th, 2024 (last picture of this post): Today, I decided to decrease sweetness and go for
180g / 1/2 cup plus 1 tablespoon sugar beet syrup (or dark molasses)
50g / 1/4 cup brown sugar (or granulated sugar)
The other ingredients / measurements didn’t change. I baked it for 60 minutes (so a bit shorter).
Makes 1 loaf
260g / 2 cups plain flour
1 teaspoon baking soda
1 1/2 teaspoons baking powder
1/8 teaspoon fine sea salt
120g / 1/2 cup butter, at room temperature
3 ripe bananas (2 mashed bananas, about 180g / 6 1/2 ounces, and 1 cut in half lengthwise)
200g / 1/2 cup plus 2 tablespoons sugar beet syrup (or dark molasses)
100g / 1/2 cup brown sugar (or granulated sugar)
1 generous tablespoon freshly grated ginger
2 teaspoons ground cinnamon
3 organic eggs
60ml / 1/4 cup whole milk
Preheat the oven to 160°C / 325°F (preferably convection setting). Line a 11 x 26 cm / 4 x 10" loaf pan with parchment paper.
Combine the flour, baking soda, baking powder, and salt.
In a large bowl, using an electric mixer, beat the butter until creamy. Add the mashed bananas, sugar beet syrup, sugar, ginger, and cinnamon and continue mixing until well combined. Add the eggs, one at a time, mixing well in between. In batches, add the milk and the flour mixture, alternating, about 1/3 at a time. Mix until just combined and no more flour is left. Scrape the batter into the prepared pan, lay the banana halves on top (cut side up), and bake for about 65-70 minutes (slightly longer if using a conventional oven) or until golden brown and firm on top. Insert a skewer, it should come out clean when the cake is done. Let the cake cool for at least 15 minutes before you take it out of the pan. Let it cool on a wire rack for another 15 minutes before taking it out of the parchment paper.

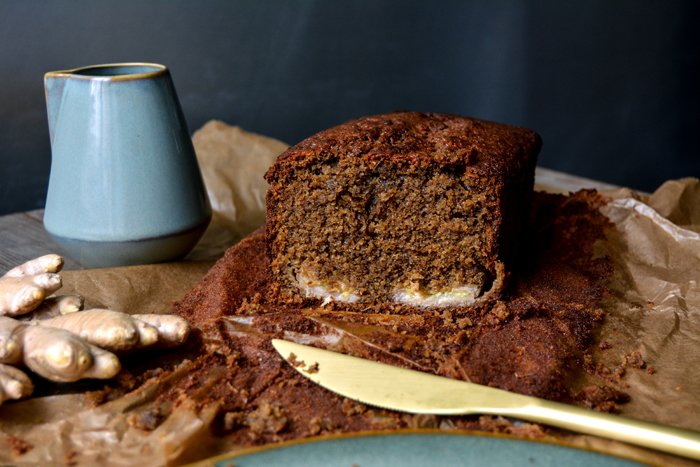
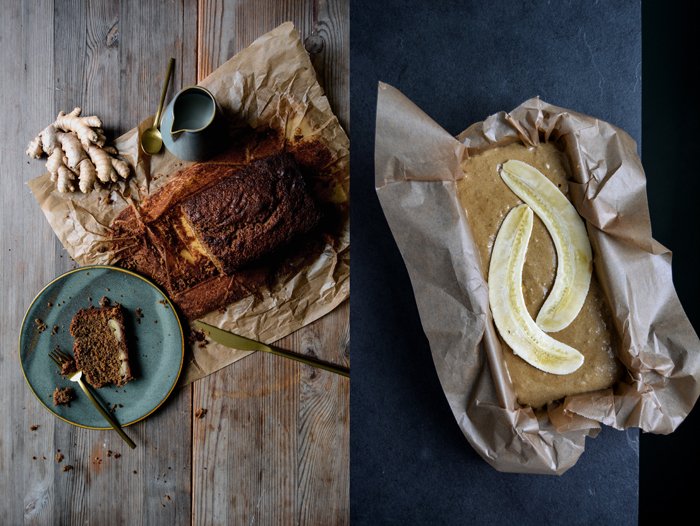
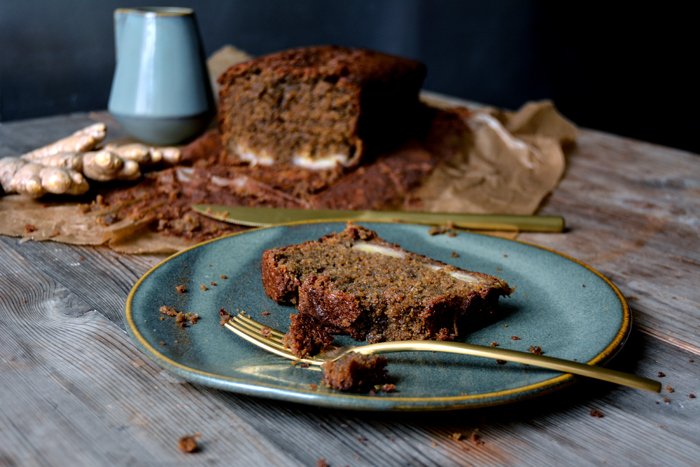
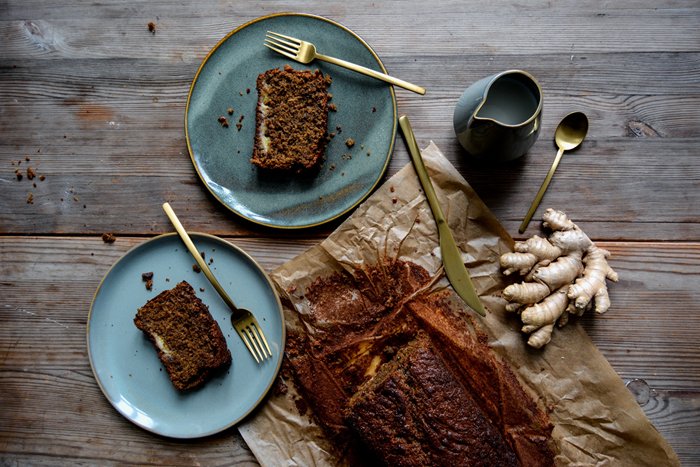


Sicilian Blood Orange, Olive, and Red Onion Salad
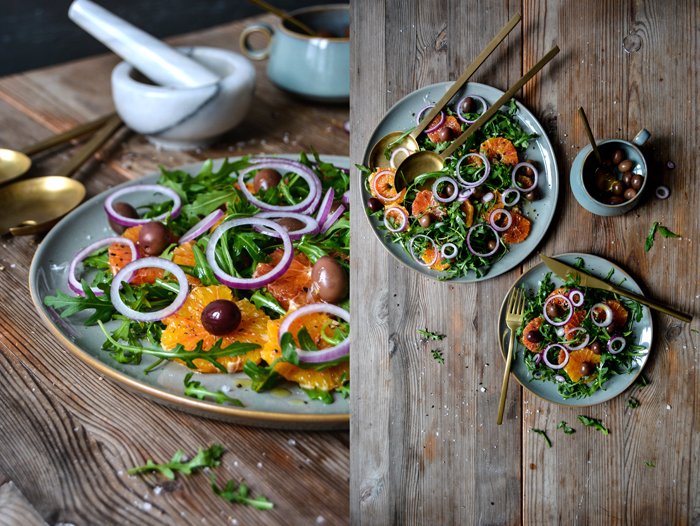
The past mornings have been rather cloudy and grey and to make it even worse, they pulled my beloved wild vine off the wall opposite my kitchen window, which I used to call my vertical garden - the poor thing damaged the bricks. My little garden is gone. So the mood hasn't been very uplifting. And as I sat at the table in my kitchen, chewing over a new exciting meet in your kitchen features that I've been working on over the past few days and that I'm eager to share with you, I had to decide to postpone it. The feature was supposed to be up on the blog this week, but unfortunately, my guest from afar - Australia - is opening his second restaurant and so busy that we couldn't finish the interview yet. I felt a bit sad, or rather frustrated, because I adore his work and I'm so curious to read his answers and to get to know him a bit better. In these moments, I can be like a little child, impatient and not willing to accept reality - in this case: having to wait.
Food is the best cure for disappointment, at least in my case, so I looked around my kitchen to see what I could use to throw together for a quick and uplifting lunch. As I spotted a bunch of ripe blood oranges, I remembered a Sicilian salad made with the sweet citrus fruits, olives, and red onions. I added some rucola, olive oil, flaky sea salt, and crushed peppercorns and enjoyed the colourful plate in front of me just as much as the fresh taste of this delicious composition. Needless to say, my mood was much better after the first bite. The sweetness of the oranges merges perfectly with the spicy rucola and onions and the dark and oily depth of the olives. And it's put together in just a few minutes - it's a keeper!
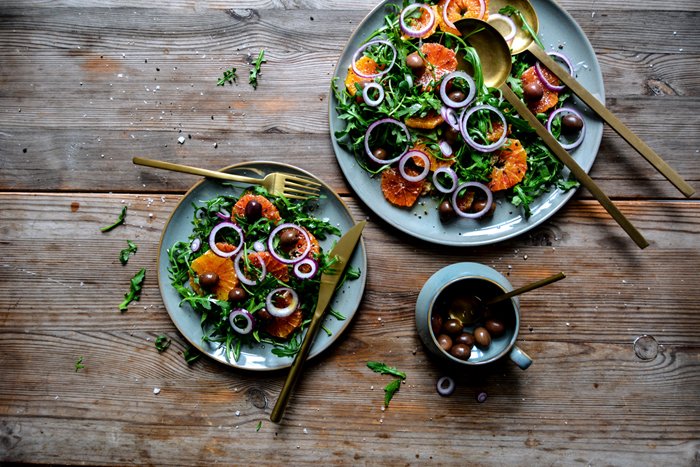
Blood Orange, Olive, and Red Onion Salad with Rucola
Serves 2-4
fresh rucola leaves, 2 handfuls
small blood oranges, peeled (outer skin and white pith), cut into rounds, 4
small red onion, cut into slim rings, 1-2
black olives with pit 12-16
olive oil
flaky sea salt
black peppercorns, crushed in a mortar
Divide the rucola between plates. Lay the blood oranges, onion, and olives on top. Drizzle with some olive oil and season with flaky sea salt and crushed pepper to taste. Serve immediately, preferably with soft ciabatta.
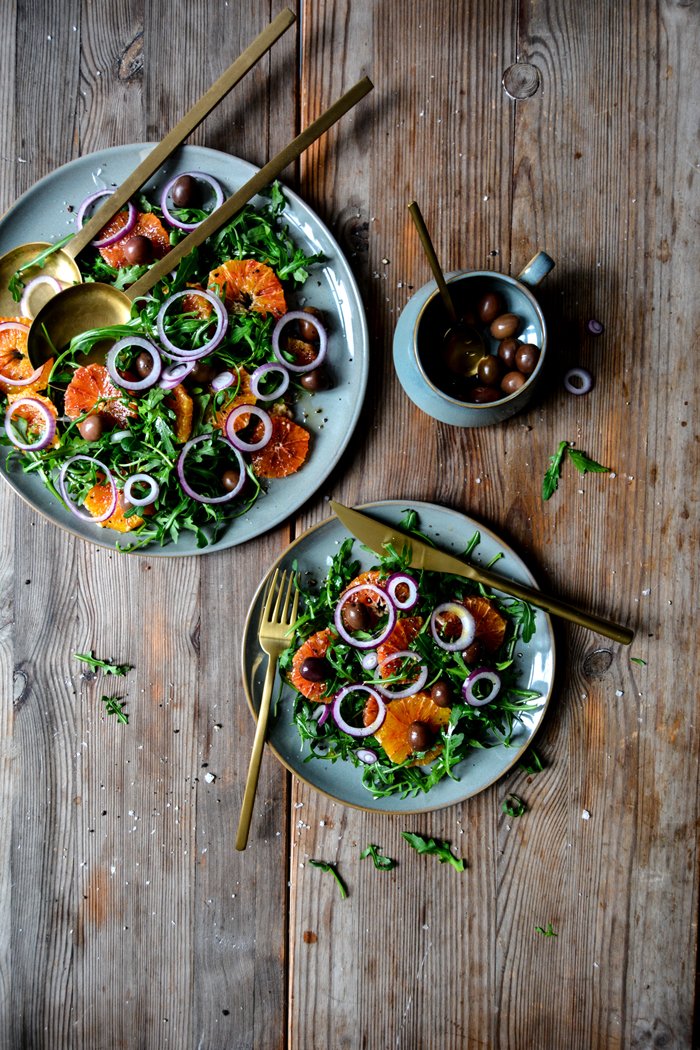
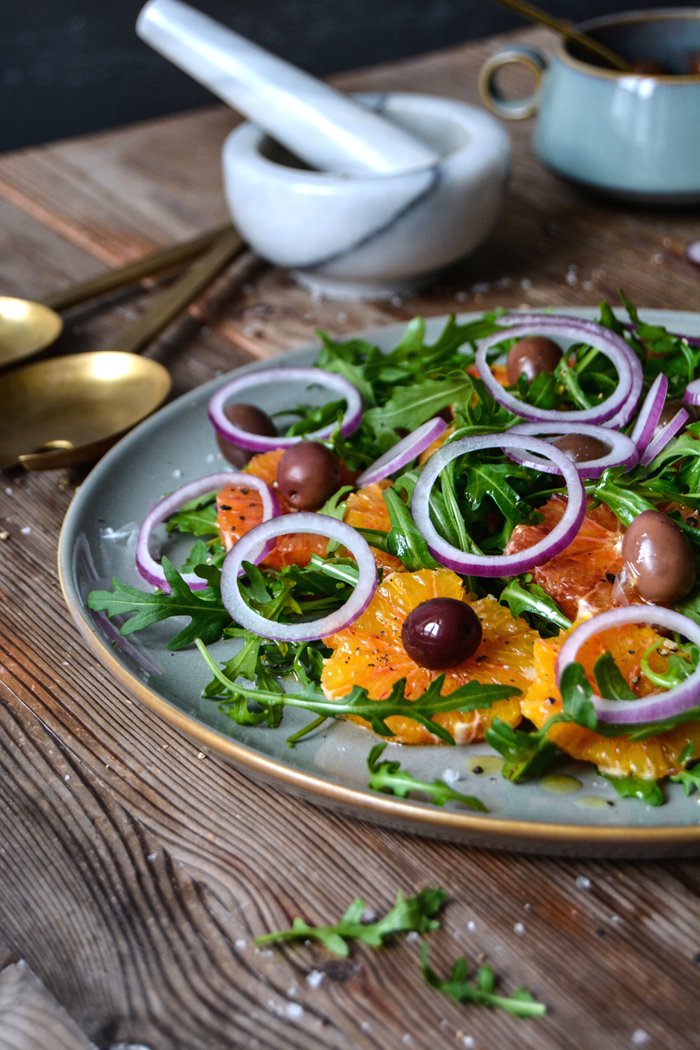
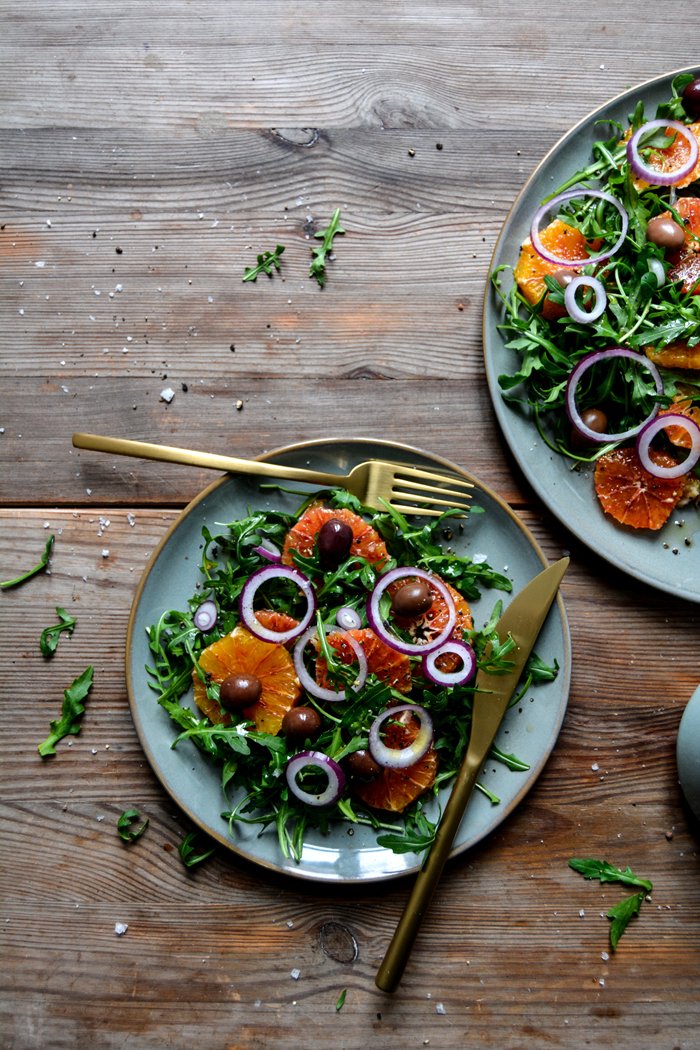

Blueberry Lemon Cheese Babka
One of the first recipes that caught my attention as I thumbed through the pages of Yotam Ottolenghi and Sami Tamimi's book Jerusalem, was their gorgeous looking chocolate krantz cake - also known as babka. It's a Jewish classic - a sweet, soft twisted yeast cake that can be filled with chocolate, ricotta, cream cheese, almond paste, nuts, poppy seeds, or fruit butter. I knew this cake from Cynthia Barcomi's German book Backen, she sprinkles the loaf with crumbles and adds marzipan to the filling. I never tried it but the pictures in both books looked so tempting that I decided to give babka a go. I didn't even mind the overnight-preparation that Ottolenghi recommends - if you time it well, it's not a big deal. Yotam and Sami use water for the dough, Cynthia goes for milk, which I also did. It makes it rich like a brioche.
However, I didn't feel like dark chocolate but cream cheese, blueberries, and lemon zest. A bit of spring feeling packed in a Sunday breakfast treat. The cheese makes the yeast dough nice and juicy, the berries make it fruity and fresh. I can only imagine how wonderful this would be at an early summer picnic in May but let's not think about that for now. I made the dough in the evening before I went to bed and gave it a good 10 minutes of kneading until the soft butter, eggs, and milk were well combined and I held a silky, smooth ball of dough in my hands. After a night in the fridge it had risen slightly by the next morning, but hadn't doubled in size. Rolled out thinly and spread with the filling, it was a bit fiddly to roll it up into a log without loosing the blueberries. I wanted to add even more berries but it would have made it too stressful to keep them inside - so I went for less fruit and a chilled out mood instead. Twisting was next: If you have Ottolenghi's Jerusalem book at home, you can see how he does it, his technique is too complicated to explain and impossible if you want to fill your babka with cream cheese enriched with stiff egg whites and fruit. I followed Cynthia's method instead: I closed the roll into a ring and twisted it about seven times. When it comes to this kind of fragile kitchen projects, it's best to transfer your piece of art quickly and with confidence to a buttered pan - insecurity and hesitance would just make it harder to succeed. When this is done, the cake has to rise for an hour once again, so if you want to enjoy it for breakfast, you should get up in time. Once it's nice and puffy, the babka bakes in the oven for about 1 hour, but then it smells and tastes so wonderful that you don't mind the hours of work.


Blueberry Lemon Cheese Babka
Mind that the babka has to rise twice, the first time overnight (for about 8 hours) in the fridge.
Makes 1 loaf cake
For the dough
plain flour 260g / 2 cups
granulated sugar 50g / 1/4 cup
fast-acting yeast 1 1/2 teaspoons
fine sea salt 1/4 teaspoon
milk, lukewarm, 60ml / 1/4 cup
organic egg 1
organic egg yolk 1
butter, at room temperature, cut into small pieces, 75g / 1/3 cup
oil, for the bowl
For the filling
organic egg whites 2 plus 1 egg yolk
a pinch of fine sea salt
cream cheese, drained, 250g / 9 ounces
granulated sugar 30g / 2 tablespoons
vanilla pod, scraped, 1/4
freshly grated lemon zest 1 heaping teaspoon
fresh blueberries 150g / 5 1/4 ounces
For the glaze
organic egg yolk 1
milk 1 tablespoons
For the yeast dough, in a large bowl, combine the flour, sugar, yeast, and salt. Whisk the milk, egg, and egg yolk and add along with the butter to the flour mixture. Knead for about 10 minutes, starting with the dough hooks of an electric mixer and continue kneading and punching with your hands for a few minutes until you have a soft and silky ball of dough. Transfer to a clean, oiled bowl, cover with cling film and put in the fridge overnight.
The next morning, for the filling, beat the egg whites and salt until stiff. In a large bowl, whisk the cream cheese, egg yolk, sugar, vanilla seeds, and lemon zest until creamy. Gently fold in the beaten egg whites until combined.
Butter a 11 x 24cm / 4 x 9" loaf pan and line the bottom with a piece of parchment paper.Punch the dough down, take it out of the bowl, and knead for about 30 seconds. On a floured counter top, roll out the dough with a rolling pin into a 28 x 40cm / 11 x 16" rectangle. Spread the filling over the dough, leaving a 2cm / 3/4" rim, and sprinkle with the blueberries. Brush 1 of the shorter sides with cold water. Starting from the other short side, roll up the dough tightly into a thick log. Press to seal the end onto the roll and place the seam at the bottom. Gently stretch the roll a little and close into a ring, pushing the dough of both ends together to seal the filling inside (see the 5th row of pictures). Leaving the ring lying on the counter top, push the ring gently together, and, starting from the middle, carefully twist the roll about 3-4 times on the left side and then on the other side. The more you twist it, the more layers it will have, don't worry if it tears a bit. It should look like a thick spiral (see the 2nd row of pictures). Lift the roll with a large knife and quickly transfer to the prepared pan. Cover with a tea towel and let it rise in a warm place (I put it on the heater) for about 60-90 minutes or until puffy.
Preheat the oven to 190°C / 375°F (conventional oven).
For the glaze, whisk the egg yolk and milk.Brush the loaf with the glaze and bake in the oven for 35 minutes, then cover loosely with aluminium foil and bake for another 30 minutes or until golden brown and almost firm on top. Check with a skewer, it should come out almost clean. Take the pan out of the oven and let the cake cool for at least 10-15 minutes before you remove it from the pan. Enjoy slightly warm or cool.